Are you ready to fill your home with the sweet, heady scent of freesias? Planting freesia bulbs in pots is a great way to enjoy these fragrant flowers indoors, and it’s easier than you think. But before you get started, make sure you’re choosing the right variety for potting – some freesias are better suited for containers than others.
In this article, we’ll take you through everything you need to know to successfully plant and care for freesia bulbs in pots. We’ll cover how to select a well-draining potting mix, when and how often to water, and the best fertilizers to use to encourage repeat blooms. You’ll also learn about pruning techniques that will keep your freesias healthy and thriving, as well as tips for overwintering them so you can enjoy next year’s blooms too. By following these expert tips, you’ll be on your way to enjoying beautiful, fragrant freesias all year round.
Choosing the Right Freesia Bulbs
When it comes to planting freesia bulbs in pots, choosing the right ones can make all the difference. Here’s what you need to know before selecting your bulbs.
Selecting the Right Variety
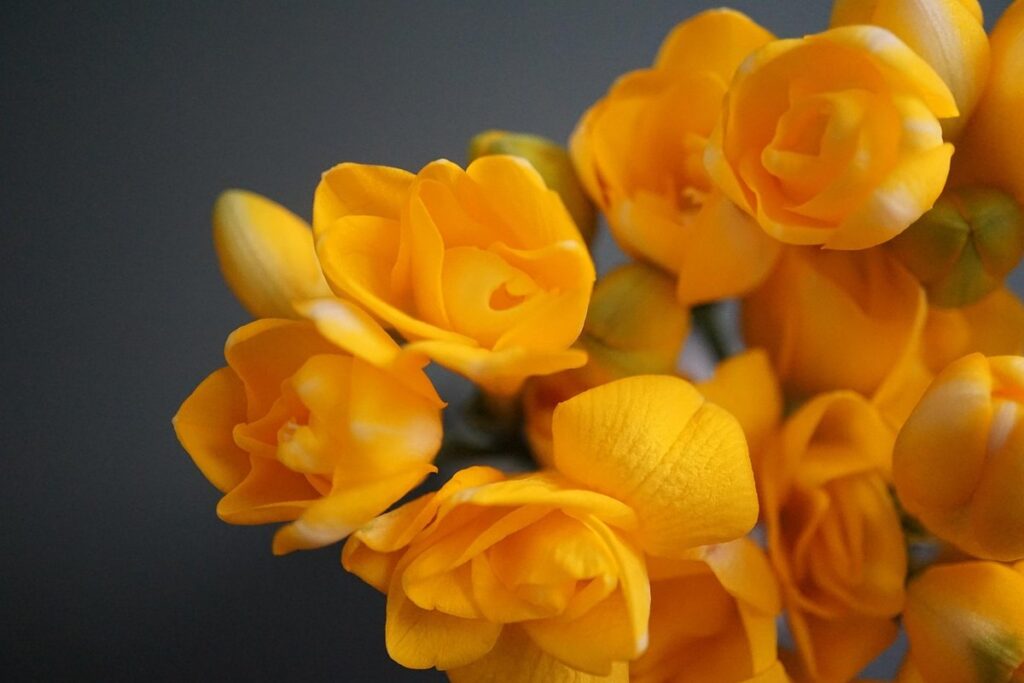
When it comes to selecting the right variety of freesia bulbs for container gardening, there are several factors to consider. First and foremost, think about the color palette you want to achieve in your pot. Freesias come in a wide range of colors, from pure whites and creams to vibrant yellows, oranges, pinks, and purples. Consider what will complement the other flowers or foliage in your container garden.
Another important consideration is fragrance. While all freesia bulbs have a sweet, floral scent, some varieties are more potent than others. If you’re planting for a cut flower arrangement or want to fill a room with fragrance, choose a variety known for its strong scent. On the other hand, if you’re planting in a small space or don’t want overpowering perfume, opt for a milder variety.
Some popular varieties of freesia bulbs include ‘Golden Falls’, which has golden-yellow flowers and a sweet fragrance; ‘Tangerine Dream’, with vibrant orange blooms and a strong citrus scent; and ‘Snowy Evening’, featuring pure white flowers and a light, airy fragrance. When selecting your bulbs, make sure to check the specific growing conditions for each variety to ensure they’ll thrive in your container garden.
Considering the Size of the Bulb
When it comes to choosing freesia bulbs for potting, it’s natural to think that bigger is better. However, when it comes to these delicate flowers, the size of the bulb can actually be a bit misleading. Larger bulbs often come with more foliage and flowers, but they also require more space to thrive.
In fact, smaller bulbs are often a better choice for potting because they are easier to care for and more forgiving if you forget to water them from time to time. Smaller bulbs also have a higher yield of blooms per plant, making them a great option for small spaces or containers with limited depth.
To select the right size bulb for your potted freesia, look for bulbs that are around 1-2 inches in diameter. These will give you a good balance between foliage and flowers without taking up too much space. When purchasing bulbs, make sure to choose ones with firm, plump skin and no signs of mold or rot.
Preparing the Potting Mix
To get your freesia bulbs off to a healthy start, it’s essential that you prepare a well-draining potting mix specifically designed for tropical plants like freesias. This section will walk you through how to create the perfect blend.
Understanding the Needs of Freesia Roots
Freesia roots thrive in well-draining potting mixes with slightly acidic to neutral pH. Aim for a pH range of 6.0-7.0, as this allows for optimal nutrient uptake and root growth. A mix that’s too alkaline can hinder the roots’ ability to absorb essential nutrients.
When it comes to drainage, freesia bulbs hate soggy feet. Their delicate roots are prone to rot if the potting mix is too dense or waterlogged. To avoid this, incorporate perlite, vermiculite, or grit into your mix for improved aeration and moisture regulation. This will ensure excess water drains quickly, reducing the risk of root decay.
In terms of nutrients, freesia bulbs require a balanced fertilizer during their growing season (spring-fall). A general-purpose, water-soluble fertilizer with an N-P-K ratio of 20-20-20 will suffice. However, avoid using high-nitrogen fertilizers, as these can promote leaf growth at the expense of flower production.
Creating a Suitable Potting Mix
When creating a suitable potting mix for your freesia bulbs, it’s essential to focus on drainage and fertility. Freesias don’t like wet feet, so a well-draining mix is crucial to prevent root rot.
To start, choose a high-quality potting mix specifically designed for tropical plants or bulbs. If you’re using a generic potting mix, make sure to add some organic matter such as compost or worm castings to improve fertility and drainage. A general rule of thumb is to use 20-30% organic matter in your potting mix.
Next, consider adding perlite or vermiculite to enhance drainage and prevent waterlogged soil. Perlite, in particular, helps to break up clay particles and prevents them from becoming compacted, allowing for better air circulation around the roots. A good ratio is 10-20% perlite or vermiculite added to your potting mix.
Mix these components well together before using it to plant your freesia bulbs.
Planting the Bulbs
Now that you’ve selected the perfect freesia bulbs, let’s get started on planting them in your potted containers for a beautiful and fragrant display. We’ll cover the step-by-step process of preparing the soil and potting the bulbs.
Planting Depth and Spacing
When planting freesia bulbs in pots, it’s essential to get the depth and spacing just right. The ideal planting depth for freesia bulbs is about 2-3 times their height above the pot’s surface. For example, if you’re using a smaller bulb that’s only an inch tall, plant it about 2-3 inches deep. Larger bulbs can be planted up to 4-5 inches deep.
The spacing between bulbs also plays a crucial role in ensuring they receive adequate air circulation and sunlight. A general rule of thumb is to space freesia bulbs about 1-2 inches apart from each other, depending on their size and the variety. Some compact varieties can be planted as close as 6-8 inches apart, while larger bulbs need more room to grow.
Keep in mind that over-crowding can lead to a higher risk of disease and pests, so make sure to leave enough space between your freesia bulbs for good air circulation. A well-spaced planting will also encourage healthy growth and blooming. To achieve the right spacing, you can use a small trowel or a marker to measure out the distance between each bulb as you plant them.
Watering After Planting
After planting your freesia bulbs, it’s essential to water them properly to ensure healthy growth. Watering after planting is a delicate process that requires attention to avoid overwatering, which can be detrimental to the bulb’s development.
When watering newly planted freesia bulbs, make sure the soil is moist but not soggy. Check the moisture level by sticking your finger into the soil up to the first knuckle; if the soil feels dry, it’s time for a drink. Water thoroughly until water starts to drain out of the bottom of the pot.
A good rule of thumb is to water when the top 1-2 inches of the soil feel dry to the touch. Avoid getting water on the leaves or crown (where the stem meets the bulb), as this can lead to rot and other problems.
Watering frequency will depend on the environment: potted freesias need more frequent watering than those planted in the ground, especially during hot weather. As a general guideline, check the moisture level every 2-3 days during spring and summer months when growth is rapid. During fall and winter, reduce watering to once a week, as growth slows down significantly.
Caring for Your Freesias
To keep your freesia flowers blooming beautifully, you’ll need to focus on providing them with the right conditions and regular care after they’re planted. This section will walk you through those essential steps.
Lighting Requirements
When it comes to lighting requirements for freesias in pots, it’s essential to provide the right conditions for optimal growth and flowering. Freesias generally prefer bright, indirect sunlight but can tolerate some direct sunlight, especially during the spring months when they’re actively growing.
Direct sunlight can be beneficial for freesias during the day, but be cautious not to expose them to intense afternoon sun, which can cause scorching of the leaves and flowers. East- or west-facing windows are ideal for providing gentle morning or afternoon sunlight.
If you don’t have access to a sunny window, artificial lighting can be a suitable alternative. Use LED grow lights that provide a balanced spectrum of light (around 18-24 hours per day) to promote healthy growth and flowering. Avoid using incandescent bulbs as they produce excessive heat that can damage the plants.
Monitor your freesia’s response to different lighting conditions and adjust accordingly. If you notice signs of stress or discoloration, consider moving them to a spot with filtered sunlight or adjusting the artificial lighting schedule. By providing the right amount of light, you’ll be able to enjoy vibrant blooms and a thriving freesia plant in your pot.
Temperature Control
When it comes to caring for freesias in pots, temperature control is crucial. Freesias prefer temperatures between 65°F (18°C) and 75°F (24°C), making them ideal for indoor spaces with moderate climates. If you live in a region with extreme temperatures, take steps to protect your plants.
During the growing season, avoid placing freesia pots near drafty windows or radiators, as this can cause temperature fluctuations. Instead, position them at least 3-4 feet away from any heat sources. Conversely, if you live in an area prone to frost, consider moving potted freesias indoors during winter months to prevent damage.
To ensure your freesias receive the right amount of warmth, monitor their surroundings closely. If temperatures drop below 55°F (13°C) or rise above 80°F (27°C), move the pots accordingly. Don’t worry if you can’t maintain a perfect temperature; freesias are adaptable and will still produce beautiful blooms with minimal care.
Keep in mind that some varieties of freesia may require slightly warmer temperatures to thrive, so be sure to research your specific variety’s needs before planting.
Fertilizing and Pruning
Now that you’ve got your freesia bulbs planted, let’s talk fertilization – providing them with a nutrient-rich diet to promote healthy growth – and pruning, which will encourage more blooms.
Fertilizer Options
When it comes to fertilizing freesia bulbs in pots, you have several options to consider. Organic and synthetic fertilizers are both suitable for freesias, but they work in different ways.
Organic fertilizers are a great choice if you prefer a more natural approach. They release nutrients slowly into the soil as they break down, providing a steady supply of food for your freesia bulbs. Examples of organic fertilizers include fish emulsion, bone meal, and compost. These options are also environmentally friendly and can improve the overall health of your potting mix.
Synthetic fertilizers, on the other hand, provide a quick boost of nutrients to your freesias. They’re often cheaper than organic options and can produce faster results. However, they can also burn your plant’s roots if overused, so be sure to follow the instructions carefully. Examples of synthetic fertilizers include Miracle-Gro and Scotts Osmocote.
If you’re unsure which type of fertilizer to use, start with a balanced, water-soluble fertilizer. This will give your freesias a gentle boost without overwhelming them. Once they’re established, you can switch to an organic option for long-term nutrition.
Pruning Techniques
When it’s time to prune your freesia flowers and foliage, it’s essential to do so correctly to promote healthy growth and encourage blooming. Pruning freesias can be a bit tricky, but with the right techniques, you’ll be rewarded with vibrant blooms.
To start, remove any dead or dying leaves from the plant as soon as you notice them. This will prevent the spread of disease and encourage new growth. Use clean scissors to snip off any weak or spindly stems, cutting just above a node (where the leaf meets the stem). This will help direct the plant’s energy towards producing more blooms.
Next, trim back the flower stalks after they’ve finished blooming. Cut them about an inch from the base of the plant, using sharp scissors or pruning shears. This will encourage the plant to produce new stems and flowers. By pruning your freesias regularly, you’ll keep them looking their best and encourage more blooms throughout the growing season.
When pruning, always cut at a 45-degree angle just above a node, as this allows for healthy growth and prevents water from collecting on the stem.
Troubleshooting Common Issues
If you’re experiencing problems with your freesia bulbs, such as poor growth or failure to bloom, don’t worry – we’ve got solutions right here. This section will walk you through common issues and their easy fixes.
Pests and Diseases
Pests and diseases can be a significant problem when growing freesias in pots. One of the most common pests affecting freesias is mealybugs, small white insects that feed on plant sap. These pests can be identified by their cottony appearance and sticky substance they secrete. To control mealybugs, you can use neem oil or insecticidal soap, making sure to spray all areas of the plant.
Another common issue is root rot caused by overwatering. This condition can lead to a range of problems, including softening of the bulbs and reduced flowering. Regularly check the soil moisture and adjust your watering schedule accordingly. Make sure the pot has good drainage holes to prevent waterlogged soil.
Diseases such as powdery mildew and botrytis are also possible when growing freesias in pots. To prevent these issues, ensure that your plants receive adequate air circulation and avoid getting the leaves wet during watering. For existing cases of powdery mildew or botrytis, treat with a fungicide specifically designed for use on flowers.
To minimize the risk of pests and diseases, start with healthy bulbs and maintain good hygiene when handling the plant. Avoid sharing equipment between plants and isolate any infected specimens to prevent further spread.
Environmental Stressors
When planting freesia bulbs in pots, it’s essential to be aware of environmental stressors that can affect their growth and flowering. Temperature fluctuations are one common issue that can cause problems for freesias. If the temperature is too low (below 55°F or 13°C), the bulbs may not sprout at all, while temperatures above 75°F (24°C) can cause them to become scorched and weaken.
Another critical environmental stressor is water management. Overwatering can lead to root rot, which will quickly kill the bulb, while underwatering can cause the plant to dry out and fail to bloom. It’s crucial to monitor the soil moisture levels regularly, especially during the first few weeks after planting, when the bulbs are most vulnerable.
To avoid these issues, make sure to provide your freesia pots with a location that receives bright, indirect light but is protected from extreme temperatures and precipitation. Water only when the top 1-2 inches of soil feels dry to the touch, and reduce watering during periods of low humidity or high heat. By being mindful of environmental stressors, you can create an optimal growing environment for your freesia bulbs and enjoy their beautiful blooms all season long.
Blooming and Beyond
Now that you have your freesia bulbs, it’s time to plant them and watch them bloom in pots. This next part of our guide will walk you through the care instructions for these beautiful flowers.
Encouraging Repeat Blooms
Encouraging repeat blooms from freesia bulbs requires attention to aftercare and replanting. To encourage repeat blooming, make sure not to deadhead the flowers completely. Leave a few of the oldest blooms intact to allow the bulb to set seed, which will promote further flowering.
After the blooming period, you can cut back the foliage to about an inch from the base of the bulb. This allows the bulb to focus its energy on recharging and storing nutrients for future growth. Keep the soil moist but not waterlogged during this time.
When replanting freesia bulbs, choose a fresh potting mix and handle the bulbs carefully to avoid damaging them. Plant them at the same depth as before, and water well after planting. It’s also essential to fertilize your freesia bulbs during the growing season with a balanced fertilizer to promote healthy growth and blooming.
Some growers swear by repotting their freesia bulbs every year in the spring, while others prefer to let them go dormant for a period. Experimenting with different approaches will help you determine what works best for your specific climate and conditions.
Overwintering and Storage
As you’ve enjoyed your freesia blooms, it’s now time to think about next year’s show. Proper overwintering and storage of your freesia bulbs will ensure they come back strong and healthy.
First, allow the foliage to die back naturally after blooming, as this helps conserve energy for next season’s growth. Cut off any dead or damaged leaves to prevent rot from setting in.
To store your freesia bulbs, choose a cool, dark place with consistent temperatures between 40°F (4°C) and 50°F (10°C). Avoid storing them near heating vents or radiators, as this can cause moisture buildup and promote rot. You can also wrap the bulbs individually in newspaper or paper bags to protect against moisture.
In ideal conditions, freesia bulbs can be stored for up to six months without drying out. Check on them periodically to ensure they remain dry and free of mold.
Frequently Asked Questions
Can I plant freesia bulbs directly into a pot without preparing the soil first?
Yes, you can directly plant freesia bulbs into a pot filled with well-draining potting mix, but it’s recommended to prepare the potting mix in advance to ensure optimal drainage and root growth.
How long does it take for freesia bulbs to bloom after planting in pots?
Freesias typically take 12-18 weeks to bloom from the time of planting. This can vary depending on factors such as temperature, light exposure, and watering habits.
Can I grow freesia bulbs indoors with low light conditions?
While some freesia varieties can tolerate partial shade, most require bright, indirect light to bloom well. If you plan to grow freesias indoors, place them near an east- or west-facing window for optimal lighting.
How often should I water my freesia bulbs in pots during the blooming season?
Water your freesias when the top 1-2 inches of potting mix feel dry to the touch. This is usually every 7-10 days during the active growing period, but adjust watering frequency based on temperature and humidity levels.
Can I divide and re-pot my freesia bulbs after they have finished blooming?
Yes, you can separate and re-pot freesia bulbs that have finished blooming to encourage new growth. However, make sure to choose a pot with good drainage and use a fresh, well-draining potting mix to prevent root rot.