Are you ready to unlock the full flavor potential of your cooking with fresh, homegrown dill? Planting dill plants can be a bit tricky, but don’t worry, we’ve got you covered. Whether you’re a seasoned gardener or just starting out, learning how to grow and care for dill is easier than ever. In this comprehensive guide, we’ll walk you through the ideal locations for growing dill, step-by-step instructions on sowing seeds and transplanting seedlings, and expert tips on harvesting your crop for maximum flavor.
We’ll also cover some common mistakes to avoid when planting dill, so you can get the most out of your garden. With our advice, you’ll be enjoying fresh dill in no time, adding a burst of flavor to everything from pickling spices to savory sauces.
Choosing the Right Location and Climate
When planting dill, selecting a suitable location is crucial for its growth and flavor. In this next part, we’ll explore how to choose the perfect spot for your dill plants.
Understanding Dill’s Climate Requirements
When it comes to planting dill, understanding its climate requirements is crucial for optimal growth. Dill prefers a temperate climate with temperatures between 65°F and 75°F (18°C and 24°C). This ideal temperature range allows the plant to thrive and produce a healthy crop of fragrant leaves.
If your area experiences extreme temperatures outside this range, it can affect dill’s growth. For instance, if it’s too hot, the leaves may become wilted or develop brown tips. On the other hand, if it’s too cold, the plants may struggle to germinate or grow at a slower rate.
In regions with mild winters and warm summers, like California or the Mediterranean coast, dill can be grown year-round. However, in areas with harsh winters or extreme temperature fluctuations, it’s best to plant dill as an annual crop, sowing seeds in early spring or late summer when temperatures are more stable. By choosing a suitable climate for your dill plants, you’ll be well on your way to enjoying a bountiful harvest of this versatile herb.
Selecting a Sunny Spot with Well-Draining Soil
When it comes to planting dill, selecting a spot that receives full sun is crucial for its growth and development. Dill requires at least six hours of direct sunlight per day to thrive, and ideally, it should get the entire day’s worth of sunlight. If you’re planning to grow dill in a region with cooler climates, you may need to provide some protection from frost, but even partial shade can stunt its growth.
In addition to plenty of sunlight, well-draining soil is also essential for healthy dill growth. Dill is susceptible to root rot if the soil is too moist or waterlogged, which can lead to a range of problems including fungal diseases and pest infestations. To avoid this issue, make sure your soil drains quickly and doesn’t retain excess moisture. You can achieve this by mixing in some compost or perlite into your existing soil.
When choosing a spot for your dill plants, look for areas that receive direct sunlight and have good air circulation to prevent fungal diseases from taking hold. Avoid planting in low-lying areas where water tends to collect, as this can lead to root rot and other issues.
Preparing the Garden Bed
Before you start planting dill seeds, it’s essential to prepare the garden bed. This will give your plants a strong foundation for healthy growth and development. Begin by loosening the soil using a fork or a garden spade. This will break up any compacted soil and allow roots to grow freely.
Next, inspect the bed for weeds and remove them completely. Weeds can compete with your dill plants for water, nutrients, and light, so it’s crucial to get rid of them before planting. If you have a lot of weeds, consider using a weed barrier or mulch to suppress further growth.
If your soil is heavy clay or sandy, you may need to add organic matter such as compost or well-rotted manure. This will help improve the soil structure and fertility, giving your dill plants a nutrient-rich environment in which to thrive. A general rule of thumb is to mix in 2-3 inches of compost or manure into the top 6-8 inches of soil.
Sowing Dill Seeds Indoors or Outdoors
When it comes to sowing dill seeds, you have two main options: starting them indoors where they can get a head start on the growing season, or directly sowing in your outdoor garden.
Starting Dill from Seed Indoors 4-6 Weeks Before Transplanting
To start dill from seed indoors 4-6 weeks before transplanting, you’ll need some basic supplies. Begin by filling a seed tray or small pots with a well-draining potting mix, leaving about an inch at the top for watering. Dampen the soil gently but thoroughly.
Next, sow one dill seed per cell in the seed tray or pot, burying it about ¼ inch deep. This is deeper than you might expect, but trust us – it makes a difference in germination rates and overall plant health. Leave about an inch between each seed to allow for proper growth and development.
Water the soil again after sowing, making sure not to overwater. Then, place the tray or pots in a bright, warm location with temperatures around 70-80°F (21-27°C). Keep the soil consistently moist but not waterlogged during this period. This is crucial for healthy root development and germination.
Within 7-10 days, your dill seeds should have sprouted. Transfer them to larger pots or into individual containers when they have two sets of leaves.
Direct Sowing into the Garden Bed
Direct sowing dill seeds into the garden bed is a straightforward process that requires attention to depth, spacing, and timing. When direct sowing, it’s essential to sow dill seeds on the surface of the soil or just barely cover them with a thin layer of soil. This allows for adequate sunlight penetration and moisture absorption.
Sow dill seeds about ¼ inch (6-8 mm) apart in rows that are 12-18 inches (30-45 cm) apart. You can also sow them closer together, about 1-2 inches (2.5-5 cm) apart, for a more dense planting. Be sure to water the soil gently but thoroughly after sowing.
Timing is crucial when direct sowing dill seeds. In temperate climates, wait until the soil has warmed up and the danger of frost has passed before sowing dill seeds directly into the garden bed. In warmer climates, sow in early spring or late summer for optimal growth. Direct sowing allows you to skip the transplanting process, which can be stressful on young seedlings.
Transplanting Dill Seedlings
Once you’ve germinated your dill seeds, it’s time to transplant them into larger pots or directly into your garden. We’ll walk through the process step by step in this next section.
Hardening Off Seedlings Before Transplanting
Before transplanting your dill seedlings into the garden, it’s essential to harden them off. This process allows the seedlings to gradually acclimate to outdoor conditions, such as intense sunlight, wind, and temperature fluctuations, reducing shock and increasing their chances of survival.
Start by moving the seedlings from a shaded area to partial sun for 1-2 hours a day. Gradually increase the duration over the next few days, eventually exposing them to direct sunlight for short periods. Monitor the seedlings’ responses and adjust the schedule as needed. For example, if they appear scorched or stressed, slow down the process.
After a week of hardening off, your seedlings should be ready to face outdoor conditions. Keep an eye out for signs of stress, such as yellowing leaves or stunted growth. If you notice any issues, provide additional protection until they can adapt fully. To ensure a smooth transition, wait for overcast or cloudy days to transplant the hardy seedlings into their final garden location. This will minimize shock and give them a chance to establish themselves quickly.
Transplanting Seedlings at the Right Time
When it’s time to transplant dill seedlings into individual pots or directly into the garden, timing is crucial for their survival and growth. You’ll want to choose a spot with optimal weather conditions and soil temperature.
Consider the outside weather first. Dill prefers temperatures above 60°F (15°C), but it can tolerate some heat up to 90°F (32°C). However, young seedlings are more susceptible to scorching sun and drying winds. Aim for overcast or partly sunny days when transplanting, and avoid extremely hot or cold spells.
Soil temperature is also essential. Most dill varieties thrive in soil temperatures between 70°F (21°C) and 85°F (29°C). You can check the soil temperature with a thermometer or by gently inserting your finger into the soil up to the knuckle. If it feels warm, it’s ready for transplanting.
For best results, transplant your dill seedlings in the late spring or early summer when the risk of frost has passed and the weather is consistently mild. This will give them the optimal environment to grow and mature without stress.
Caring for Dill Plants
To keep your dill plants thriving, it’s essential to provide them with proper care and attention. This includes regular watering, pruning, and monitoring for pests and diseases.
Watering and Mulching Techniques
When it comes to caring for dill plants, consistent moisture is crucial for their growth and development. Dill requires about 1 inch of water per week, either from rain or irrigation. To ensure your dill plants receive the right amount of water, check the soil daily by inserting your finger into the soil up to the first knuckle. If the soil feels dry, it’s time to water.
Mulching is another effective way to retain moisture and suppress weeds around dill plants. Organic mulches like straw, bark chips, or grass clippings are perfect for this purpose. Apply a 2-3 inch layer of mulch around your dill plants, keeping it a few inches away from the stems to prevent rot. As the mulch breaks down, it will add nutrients to the soil and improve its structure.
To maintain the health of your dill plants, make sure to keep the area around them weed-free by regularly removing any weeds that emerge through the mulch. This will also help prevent competition for water and nutrients. By implementing these simple watering and mulching techniques, you’ll be well on your way to growing healthy, fragrant dill plants in your garden or container.
Fertilizing Dill Plants for Optimal Growth
Fertilizing dill plants is crucial to promote healthy growth and maximize yields. Dill is a nutrient-hungry crop that requires regular feeding to produce lush foliage and robust stalks. When it comes to choosing fertilizers, there are several options available.
Organic options like compost or well-rotted manure provide essential nutrients while maintaining soil health. For more targeted results, consider using balanced fertilizers with an N-P-K ratio of 10-10-10. These formulas offer a mix of nitrogen (N), phosphorus (P), and potassium (K) that promote overall growth.
As for application schedules, feed dill plants when they’re about 6 inches tall. A light sprinkle of fertilizer around the base of the plant is sufficient. Water thoroughly after fertilizing to prevent burning the roots. Repeat this process every two weeks during the growing season, adjusting the frequency based on soil conditions and plant growth.
For example, if you notice your dill plants are struggling with leaf development, consider adding a phosphorus-rich fertilizer to promote healthy root growth. Regular fertilization will not only enhance yields but also improve the overall appearance of your dill crop.
Common Problems and Solutions
As you plant your dill, some issues may arise, such as overwatering or poor growth, which we’ll tackle with practical solutions to get your harvest back on track.
Identifying Pests and Diseases Affecting Dill
When you notice that your dill plants are struggling, it’s essential to identify whether they’re being affected by pests or diseases. Dill is susceptible to various common issues, including those mentioned above. One of the most prevalent pests affecting dill plants is aphids. These tiny insects feed on the plant’s sap, causing curled or distorted leaves and stunted growth. Spider mites are another problem, often seen in hot and dry conditions. They’re microscopic but leave behind a fine web-like substance that can be seen with the naked eye.
Diseases like powdery mildew and root rot also frequently affect dill plants. Powdery mildew appears as white or grayish patches on the leaves and stems, while root rot causes the plant’s roots to decay, leading to yellowing of the leaves and eventual death. Regularly inspect your plants for these issues and take action at the first sign of trouble. Use neem oil or insecticidal soap to control pests like aphids, and treat fungal diseases with a fungicide specifically designed for leafy greens.
Monitor your plant’s growth and adjust watering schedules accordingly. Overwatering can exacerbate root rot, so ensure that you’re not giving your dill plants too much water.
Troubleshooting Tips for Improving Plant Growth
If you’re noticing that your dill plants aren’t thriving as expected, don’t worry – it’s more common than you think! One of the most frustrating issues is poor growth. To address this, ensure that your dill plants are getting enough light. Dill needs full sun to partial shade, so if you’re growing in a shaded area, consider transplanting them to a sunnier spot.
Another issue many gardeners face is yellowing leaves. This can be caused by overwatering or underwatering. Check the soil moisture by sticking your finger into it – if it feels dry, give your dill plants some water. If the leaves are still turning yellow, consider adjusting your watering schedule to ensure consistency.
Additionally, reduced yields might be a problem if your dill plants aren’t getting enough nutrients. Use a balanced fertilizer once a month to give them an extra boost. Also, make sure to harvest your dill regularly – this will encourage the plant to produce new growth and prevent it from flowering.
To troubleshoot these issues effectively, keep an eye on your dill plants’ overall health and adjust their environment accordingly. With a little TLC, you’ll be enjoying fresh homegrown dill in no time!
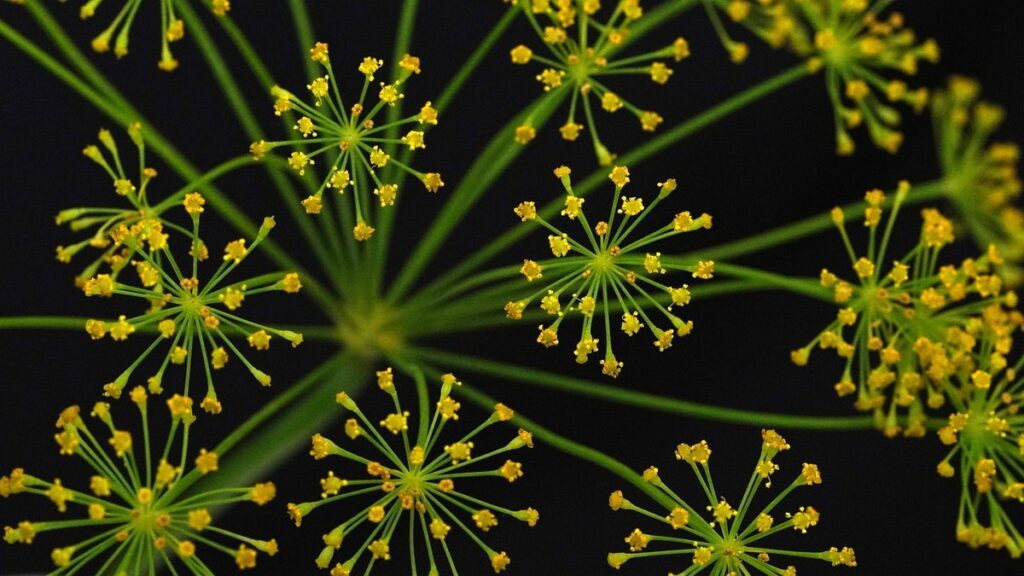
Harvesting Dill for Maximum Flavor
To get the most out of your dill harvest, you’ll want to time it just right and use a few simple techniques to keep those fresh flavors coming all season long.
When to Harvest Dill for Optimal Flavor and Texture
When it comes to harvesting dill for optimal flavor and texture, timing is everything. The ideal time to harvest depends on several factors, including plant height, leaf size, and seed formation.
As a general rule, you can start harvesting individual leaves from the outer stems of the plant when they reach about 6-8 inches in length. This is usually around 20-30 days after sowing. Simply pinch or cut off the top set of leaves, taking care not to damage the stem. This will encourage the plant to produce new growth and prevent it from flowering too quickly.
For a full harvest, wait until the plant has reached its mature height of around 2-3 feet, which is typically around 40-50 days after sowing. Check for seed formation by gently tugging on the seed heads; if they come off easily, it’s time to harvest the seeds. Cut off the entire stem just above a leaf node, leaving about an inch of stem attached to the plant. This will help the plant redirect its energy towards producing new growth and prevent flowering.
Keep in mind that dill is a fast-growing crop, so regular harvesting is essential to encourage continuous production and prevent the plant from becoming leggy. By following these guidelines, you’ll be able to enjoy your freshly harvested dill at its peak flavor and texture.
Techniques for Properly Cutting and Storing Fresh Dill
When harvesting dill for maximum flavor, it’s essential to cut and store the fresh herb properly to preserve its delicate flavor and aroma. To avoid damaging the plants, snip off individual stems of dill just above a node (the point where a leaf meets the stem) using scissors or pinch them off with your fingers. This technique encourages new growth and prevents the plant from flowering prematurely.
For optimal storage, tie fresh dill bunches in small bunches and place them in an airtight container or plastic bag, leaving some room for air circulation to prevent moisture buildup. Store them in the refrigerator at a consistent temperature below 40°F (4°C). You can also wrap the stems in a damp paper towel and store them in a sealed container, which helps maintain humidity.
Another method is to freeze dill by chopping the leaves finely and placing them in an airtight container or freezer bag. Frozen dill retains its flavor and aroma for up to 6 months. To use frozen dill, simply chop it into smaller pieces before adding it to your favorite recipes.
Remember to use fresh dill within a few days of cutting, as its potency begins to decline rapidly after harvesting.
Frequently Asked Questions
Can I grow dill indoors year-round, or is it a seasonal crop?
Yes, you can grow dill indoors year-round with proper care and conditions. However, it’s essential to provide sufficient light, maintain optimal temperatures between 65°F and 75°F (18°C and 24°C), and ensure good air circulation to prevent fungal diseases.
How do I identify the signs of over-watering in my dill plants?
Over-watering can lead to root rot, yellow leaves, and stunted growth. Check for soft, mushy stems, droopy leaves, or a sour smell from the soil. Adjust your watering schedule to ensure the top 1-2 inches of soil dry out between waterings.
Can I harvest dill before it reaches its full height?
Yes, you can start harvesting dill as soon as the leaves are large enough for use, usually around 6-8 inches tall. Pinch or cut off individual leaves to encourage new growth and prevent the plant from flowering prematurely.
How do I protect my dill plants from pests like aphids and spider mites?
Use neem oil or insecticidal soap to control infestations. Regularly inspect your plants, and remove any affected areas to prevent the spread of pests. Encourage beneficial insects like ladybugs or lacewings by planting companion flowers nearby.
Can I store fresh dill in the refrigerator for an extended period?
No, it’s best not to store fresh dill in the refrigerator for too long, as it can become wilted and lose its flavor. Instead, use scissors to cut off individual leaves just before using them, or freeze the tops of the plant by placing them in a single layer on a baking sheet and then transferring them to an airtight container or freezer bag.