Creating nutrient-rich soil is at the heart of every successful garden. But have you ever stopped to think about where all those nutrients come from? Enter vegetable compost, a simple yet powerful way to supercharge your soil and grow healthier, more vibrant plants. By learning how to create vegetable compost, you’ll be on your way to producing rich, fertile soil that’s teeming with life. In this comprehensive guide, we’ll explore the benefits of using vegetable compost, from improved soil structure to increased water retention. We’ll also delve into the different types of materials you can use for composting and share expert tips for a successful composting process. Whether you’re a seasoned gardener or just starting out, this article will show you how to harness the power of vegetable compost to take your garden to the next level.
What is Vegetable Compost and Why Do You Need It?
You might be wondering what vegetable compost is, but let’s start with the basics: it’s a nutrient-rich soil amendment that’s essential for healthy plant growth.
Benefits of Using Vegetable Compost
Using vegetable compost has numerous benefits for gardeners and farmers. One of the primary advantages is improved soil structure. Vegetable compost adds organic matter to the soil, increasing its water-holding capacity and aeration. This results in healthier roots, which can absorb nutrients more efficiently. By incorporating vegetable compost into your gardening routine, you can create a balanced ecosystem that supports plant growth.
Increased nutrient availability is another significant benefit of using vegetable compost. As vegetable waste breaks down, it releases essential nutrients like nitrogen, phosphorus, and potassium. These micronutrients are crucial for plant development, promoting healthy foliage and fruiting. To maximize the nutrient benefits, mix 2-3 inches of vegetable compost into the top 6-8 inches of soil before planting.
Additionally, using vegetable compost can lead to enhanced plant growth. By providing plants with an optimal blend of nutrients, you can boost their resistance to pests and diseases, and encourage more vibrant colors and flavors.
Types of Vegetal Materials for Composting
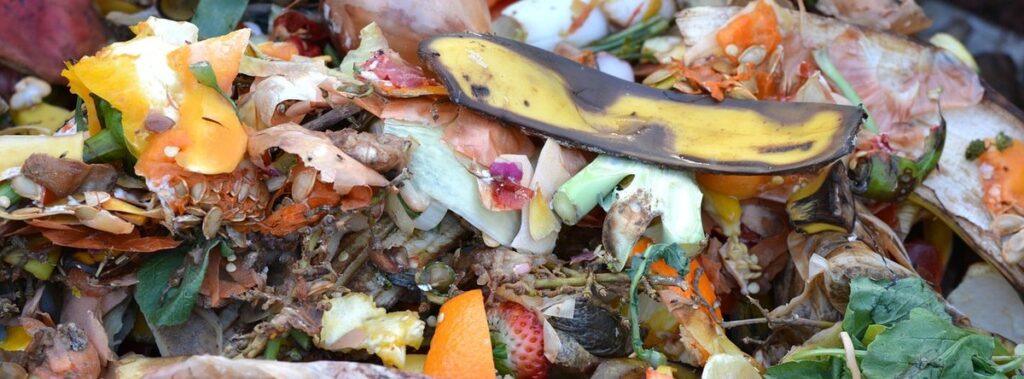
When it comes to vegetable composting, you’ll want to gather a variety of materials to create nutrient-rich soil for your garden. The first type of material to consider is fruit scraps and peels. These high-carbon ingredients provide energy for the microorganisms breaking down the compost, helping to speed up the process.
Next, leaves are an excellent addition to any compost pile. They’re rich in carbon and can help balance out the nitrogen-rich materials like vegetable waste. Simply shred them before adding to avoid compacting the pile.
Grass clippings are another valuable resource for composting, but be cautious not to add too much at once as they can create anaerobic conditions. Mix them with other materials to maintain a healthy carbon-to-nitrogen ratio.
Avoid adding meat, dairy, or oily foods, as these will attract pests and create unpleasant odors. Stick to vegetable waste like peels, rinds, and scraps, which are rich in nutrients and easy to compost. Remember to balance your materials carefully, aiming for 2/3 carbon-rich ingredients like leaves and grass clippings, and 1/3 nitrogen-rich ingredients like fruit and vegetable scraps.
Choosing the Right Location for Your Vegetable Compost Pile
When it comes to setting up a vegetable compost pile, choosing the right location is crucial to ensure success and minimize potential issues. Let’s explore the key factors to consider when selecting an ideal spot for your composting endeavors.
Identifying a Suitable Site for Your Compost Pile
When selecting a location for your vegetable compost pile, it’s essential to consider several factors that will impact the efficiency and effectiveness of the composting process. One crucial aspect is proximity to water sources – ideally, you want your compost pile to be within arm’s reach of a hose or other watering system. This will make it easier to maintain consistent moisture levels throughout the composting cycle.
Another critical consideration is sunlight exposure. Aim for partial shade to prevent overheating and weed growth in the surrounding area. A spot with some sun protection, like under a tree or near a wall, can work well. Wind protection is also vital; you don’t want your compost pile exposed to harsh gusts that might blow away finished compost or disrupt the decomposition process.
When evaluating potential sites for your compost pile, consider these factors and observe how they interact with each other. For example, if the site receives full sun but is also prone to strong winds, it may not be the ideal location. By taking these variables into account, you can set up a thriving compost pile that produces rich, nutrient-dense soil for your vegetable garden.
Preparing the Site for Composting
When preparing your site for composting, it’s essential to clear the area of any debris, weeds, and existing vegetation. This not only ensures a smooth composting process but also prevents potential pests and diseases from affecting your nutrient-rich soil. Begin by raking or using a garden fork to remove any loose materials, taking care to avoid compacting the underlying soil.
Next, create a base layer of organic matter such as straw, bark chips, or shredded leaves. This helps with drainage, suppresses weeds, and adds beneficial microbes to your compost pile. You can also use a 2-3 inch layer of grass clippings or food scraps to kickstart the decomposition process.
Before adding any infrastructure, consider installing a compost bin or enclosure to contain the compost pile and keep pests out. If you’re building a freestanding compost pile, ensure it’s at least 3 feet away from any walls or structures to facilitate easy turning and maintenance.
Understanding the Composting Process
Let’s dive into the composting process and explore how microorganisms break down organic matter to create nutrient-rich soil. This crucial step is essential for creating a balanced compost mix.
The Role of Microorganisms in Composting
Microorganisms are the unsung heroes of composting, breaking down organic matter into nutrient-rich soil that’s essential for healthy plant growth. These tiny microbe powerhouses feed on carbon-rich “brown” materials like leaves and twigs, converting them into a nutrient-dense humus that plants can absorb.
As they work their magic, microorganisms multiply and interact with other microbes, influencing the composting process. Factors like temperature, moisture, oxygen levels, and pH affect microbial activity, which is why it’s crucial to maintain optimal conditions for composting. Too little or too much of these factors can slow down microbial activity, leading to incomplete decomposition.
For example, if your compost pile lacks sufficient oxygen, anaerobic bacteria may dominate, producing unpleasant odors and toxic compounds. Conversely, excessive moisture can suffocate microorganisms, halting the decomposition process altogether. By balancing these elements and creating a favorable environment for microbes, you’ll encourage efficient breakdown of organic matter into nutrient-rich compost. This not only creates healthy soil but also minimizes waste and supports sustainable gardening practices.
Carbon-to-Nitrogen Ratio and Its Impact on Composting
Maintaining an ideal balance between carbon-rich “brown” materials and nitrogen-rich “green” materials is crucial for successful composting. The carbon-to-nitrogen (C:N) ratio determines the rate of decomposition, with a general rule of thumb being 25-30 parts carbon to 1 part nitrogen.
Think of it like baking: too much sugar (carbon) without enough eggs (nitrogen) won’t produce a good recipe. On the other hand, if you have more eggs than sugar, it’ll be unappetizing. Similarly, in composting, excess green materials can lead to unpleasant odors and pests, while brown materials can slow down decomposition.
Aim for 2-3 parts of brown materials (dried leaves, straw, or shredded paper) for every one part of green materials (food scraps, grass clippings, or manure). If you notice your compost pile is too wet or smelly, it may be too rich in nitrogen. To balance this, add more brown materials or aerate the pile to ensure air circulation.
Regularly monitoring and adjusting the C:N ratio will help create a nutrient-rich soil amendment perfect for vegetable gardens.
Building Your Vegetable Compost Pile
Now that you have a solid understanding of the importance of vegetable compost, it’s time to build your own compost pile from scratch and get started on creating nutrient-rich soil. Let’s dive into the process!
Layering Materials for Optimal Decomposition
When building your vegetable compost pile, it’s essential to layer materials strategically to create an optimal decomposition environment. This means combining “green” and “brown” materials in a specific order to achieve the perfect balance of nitrogen and carbon.
Start by adding 3-4 inches of brown materials like dried leaves, straw, or shredded newspaper at the bottom of your pile. These carbon-rich ingredients provide energy for microorganisms to break down the compost. Next, add 2-3 inches of green materials such as kitchen scraps, grass clippings, or manure on top of the brown layer. These nitrogen-rich ingredients fuel the decomposition process.
Continue alternating between brown and green layers, ending with a 4-inch layer of brown material on top to help retain moisture and suppress odors. As you add new materials, gently mix the pile every few days to ensure oxygen reaches all areas. This simple layering technique will create an ideal environment for your compost pile to thrive, breaking down vegetable scraps into rich, nutrient-dense soil.
Maintaining Moisture Levels in Your Compost Pile
Maintaining moisture levels in your compost pile is crucial for effective decomposition and nutrient cycling. A well-balanced mix of “wet” and “dry” materials ensures that the microorganisms responsible for breaking down organic matter thrive.
To achieve this balance, start by adding a 4-6 inch layer of “brown” materials such as dried leaves or shredded newspaper to your compost pile. These dry components help absorb excess moisture and create air pockets for oxygenation. Next, add 2-3 inches of “green” materials like kitchen scraps, grass clippings, or fresh leaves. Green materials are rich in nitrogen and contribute to the carbon-to-nitrogen ratio, but they can also lead to anaerobic conditions if not balanced with sufficient dry matter.
Aim for a mix that’s 2/3 brown materials and 1/3 green materials. Regularly inspect your compost pile to maintain an optimal moisture level, which is like a damp sponge – not soaking wet, nor completely dry. If you notice it getting too soggy or parched, adjust the ratio of “wet” to “dry” components accordingly.
By striking this balance, you’ll create an ideal environment for decomposition and nutrient cycling, producing rich soil perfect for your vegetable garden.
Managing Odors and Pest Issues in Vegetable Composting
As you start composting vegetables, you may encounter odors and pest issues that can be frustrating to deal with. Let’s dive into practical solutions for managing these common problems.
Strategies for Minimizing Unpleasant Odors
Minimizing unpleasant odors is an essential aspect of vegetable composting. When done correctly, composting can be a odor-free process. One way to achieve this is by adding bulking agents such as straw, shredded newspaper, or coconut coir to the pile. These materials help absorb excess moisture and reduce the likelihood of anaerobic conditions that lead to strong odors.
Regular turning of the compost pile is also crucial in minimizing unpleasant odors. By aerating the pile, oxygen levels increase, and microorganisms thrive, breaking down organic matter efficiently without producing foul smells. It’s recommended to turn the pile every 7-10 days during active decomposition stages.
Ensure adequate aeration by maintaining a balance between moisture and carbon-to-nitrogen ratios. A ratio of 2/3 “brown” materials (dry leaves, straw) to 1/3 “green” materials (food scraps, grass clippings) is ideal for promoting aerobic conditions and minimizing odor-causing anaerobic processes.
By implementing these strategies, you can minimize unpleasant odors and create a thriving compost ecosystem that produces nutrient-rich soil.
Preventing Pests from Invading Your Compost Pile
Preventing pests from invading your compost pile is crucial for maintaining a healthy and odor-free composting process. Rodents, flies, and ants are common pests that can be attracted to the nutrient-rich environment of your compost pile.
To prevent rodents, such as mice and rats, from inhabiting your compost, make sure to cover your pile regularly with a thick layer of carbon-rich materials like straw or shredded newspaper. This will not only discourage them from burrowing but also help to regulate moisture levels in the pile. Keep your compost area clean and free of debris, and store any food waste in sealed containers.
Flies can be repelled by incorporating certain materials into your compost, such as coffee grounds or cayenne pepper. These ingredients have natural fly-repellent properties that will keep them away from your compost pile. To prevent ants, avoid placing your compost bin near plants that attract them, like aphid-infested vegetables.
By taking these simple steps to pest-proof your compost pile, you’ll not only maintain a clean and odor-free environment but also ensure the health and quality of your finished compost.
Harvesting and Using Your Finished Vegetable Compost
Now that you’ve patiently waited for your compost to mature, let’s dive into how to harvest and utilize it as a nutrient-rich fertilizer for your garden. We’ll cover every step of the process.
Signs of Finished Compost
When you’re ready to harvest your finished compost, it’s essential to know what to look for. Finished compost has a distinct appearance, texture, and aroma that sets it apart from raw materials.
Finished compost is usually dark brown or black, with an earthy consistency similar to that of the surrounding soil. It should be crumbly but not powdery, and hold together when squeezed in your hand. If it’s too dry, it may crack or break apart easily. On the other hand, if it’s too wet, it might feel soggy or sticky.
The smell of finished compost is a giveaway that it’s ready to use. It should have an earthy, rich scent similar to forest soil. Avoid using compost with strong ammonia smells or acidic odors, as these can indicate incomplete decomposition or contamination.
Tips for Incorporating Compost into Your Garden or Indoor Plants
Incorporating your finished compost into your garden beds, potting mixes, and indoor plants is an exciting step towards creating a thriving ecosystem. One of the simplest ways to incorporate compost is by mixing it into existing soil or using it as a 100% replacement for potting mix in containers. Start with a small amount, about 10-20% of the total volume, and gradually increase the proportion as your plants become accustomed to its rich nutrient profile.
For garden beds, consider layering compost along with other organic matter like leaves, grass clippings, or shredded newspaper to create a nutrient-dense topsoil. In potting mixes, mix 2-4 inches of compost into the first foot of soil, followed by your regular potting mix. For indoor plants, use finished compost as a standalone potting mix or blend it with other ingredients like perlite or vermiculite for improved drainage.
When transplanting seedlings or starting new seedlings in pots, be sure to add 1-2 inches of finished compost on top of the soil to kickstart root growth. Remember to water thoroughly and maintain consistent moisture levels during the initial adjustment period.
Frequently Asked Questions
Can I use vegetable compost on indoor plants?
Yes, you can use vegetable compost for indoor plants as long as it’s fully broken down and free of contaminants. Indoor plants often have sensitive roots, so make sure the compost is fine and not chunky to prevent root damage.
How do I maintain the ideal carbon-to-nitrogen ratio in my compost pile?
Maintaining a balanced carbon-to-nitrogen (C:N) ratio is crucial for efficient decomposition. Aim for a mix of 2/3 “brown” materials (dry, high-carbon items like leaves or shredded newspaper) and 1/3 “green” materials (moist, high-nitrogen items like food scraps or grass clippings). Monitor your pile’s temperature; if it gets too hot, add more brown materials.
What happens if my compost pile starts to smell unpleasantly?
If your compost pile develops an off-odor, check for overwatering. Too much moisture can lead to anaerobic conditions, causing the growth of pathogens that give off foul odors. Balance your C:N ratio and aerate the pile by turning it regularly.
How long does it take for vegetable compost to fully break down?
The time it takes for vegetable compost to break down depends on factors like temperature, moisture levels, and the mix of materials. Generally, a well-maintained compost pile can take anywhere from 2-6 months to produce finished compost. Be patient, as this process allows for optimal nutrient retention.
Can I use vegetable compost if I have pets or allergies?
Finished vegetable compost is generally safe for gardens with pets or allergy sufferers. However, it’s essential to ensure the composting materials don’t attract pests like rodents or insects that might trigger allergies. Regularly inspect your pile and harvest finished compost when it’s free of contaminants and has reached a dark, crumbly texture.