Harvesting honey can be a daunting task for beekeepers, but with the right knowledge and preparation, it can also be incredibly rewarding. Not only does it allow you to reap the benefits of your bees’ hard work, but it’s also an essential step in maintaining the health and productivity of your colony. In this comprehensive guide, we’ll walk you through the entire process of harvesting honey, from pre-harvest preparation to post-harvest care. You’ll learn how to extract nectar efficiently, ensure quality control, and get tips on maximizing your harvest while keeping your bees happy and healthy. Whether you’re a seasoned beekeeper or just starting out, this guide will provide you with the knowledge and confidence to tackle honey harvesting like a pro.
Pre-Harvest Preparation
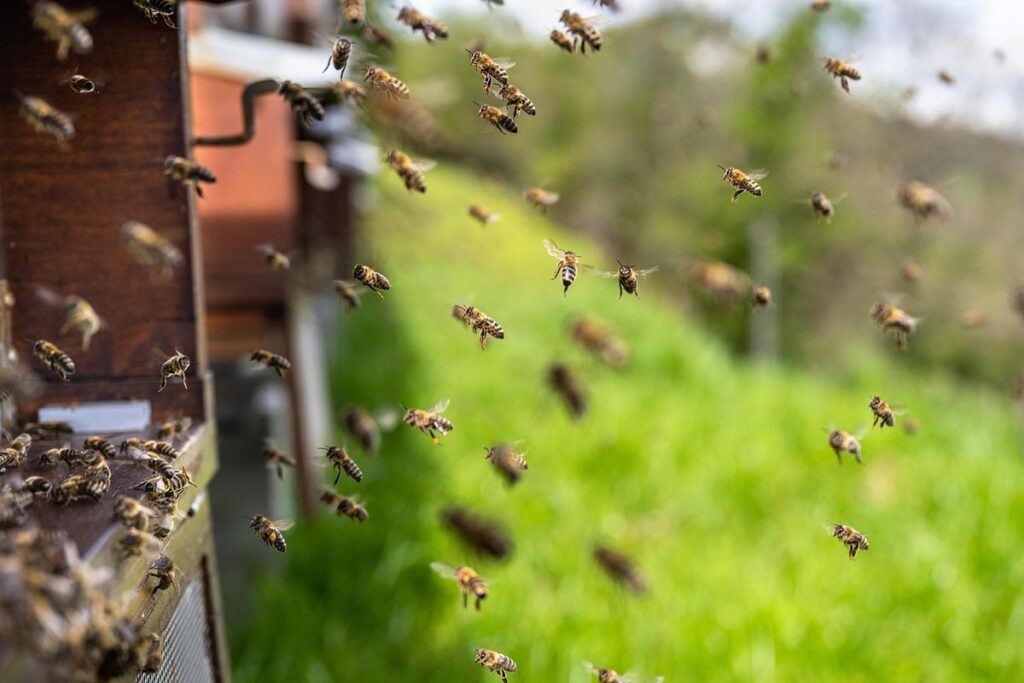
Before you start harvesting, it’s essential to prepare your beehives for the big day by checking on their health and ensuring they’re thriving. A healthy hive is crucial for a successful harvest.
Checking Bee Health and Hive Strength
Before you start harvesting honey, it’s essential to check the health and strength of your bees. A healthy colony is crucial for maintaining a sustainable honey operation. To assess hive health, look for signs of strong growth, such as an expanding brood nest, abundant stores of honey and pollen, and a robust population.
A thriving hive should have a mix of young and old bees, with a clear cast of worker bees, drones, and the queen. Observe your colony’s disease resistance by checking for signs of pests or diseases like varroa mites, American Foulbrood, or Nosema. A clean, well-organized hive is also indicative of healthy bee behavior.
Take note of any unusual behaviors, such as an excessive number of dead bees at the entrance or an unexplained decrease in brood production. If you notice any concerns, take corrective action promptly to prevent long-term damage to your colony. Regular inspections will help you identify potential issues before they become major problems, ensuring a healthy and productive honey harvest.
Ensuring Proper Equipment Maintenance
Proper equipment maintenance is crucial for a successful honey harvest. It’s essential to ensure that all beehive equipment, including frames, supers, and extractors, are clean, well-maintained, and functioning correctly.
Before the harvest season begins, inspect each piece of equipment thoroughly. Check for any signs of damage or wear and tear on frames and supers. Make sure all nails, screws, and other hardware are secure, and replace any broken or damaged components immediately. Cleaning is also essential; use a solution of soap and water to wipe down all surfaces, paying particular attention to areas where honey and wax tend to accumulate.
Regular maintenance will also extend the lifespan of your equipment. For example, extractors should be cleaned after each use to prevent sticky residue from building up and causing problems during future harvests. Frames and supers can also benefit from a thorough cleaning every few months to remove any debris or pests that may have accumulated. By prioritizing equipment maintenance, you’ll be able to tackle the harvest season with confidence, knowing your equipment is ready for the task at hand.
Cleaning and maintaining your extractors is particularly important. These machines are under constant pressure as they extract honey from frames, which can lead to wear and tear on moving parts and seals. To ensure optimal performance, clean your extractor after each use using a soft brush and soap solution. Also, check regularly for any signs of damage or malfunctioning parts.
Preparing for Harvest Timing
Determining the optimal time for harvesting honey is crucial to ensure high-quality yields and prevent damage to the beehive. To determine when to harvest, you need to consider three key factors: nectar flow, moisture content, and market demand.
Start by monitoring nectar flow, which can vary depending on the climate and region. Typically, nectar flow peaks during warm weather and dwindles with the onset of cooler temperatures. As a general rule, wait for at least 6-8 weeks after peak nectar flow to allow the bees to store excess honey in the honeycomb.
Next, check the moisture content of the honey by using a refractometer or hydrometer. Aim for a moisture level between 16% and 18%. If the honey is too wet, it can ferment, affecting its quality and shelf life.
Finally, consider market demand for your honey product. Keep an eye on seasonal trends and adjust your harvest timing accordingly. For example, if you’re planning to sell at a local farmers’ market during the summer months, you may want to time your harvest to coincide with peak demand.
Extracting Honey from the Hive
Now that you’ve prepared your hive for harvesting, it’s time to extract the golden nectar from the honeycomb, a process that requires some finesse and care. In this section, we’ll walk you through each step of the extraction process.
Supering and Uncapping Frames
When it’s time to harvest honey from your hive, you’ll need to prepare the frames for extraction by adding supers and uncapping the comb. To do this safely and effectively, start by identifying ripe honeycomb. Look for frames with a full covering of wax, a golden-brown color, and a slight sheen to the surface – these are indicators that the nectar has been fully ripened.
Next, gently place the empty supers on top of the hive body, ensuring they’re securely attached to prevent them from shifting or falling. This will give the bees room to store their excess honey in the new frames. Be cautious not to disturb the existing comb or disrupt the colony’s activity during this process.
Once the supers are in place, it’s time to uncap the frames. Use a sharp knife or an uncapping tool to carefully remove the wax cappings from the top of each frame, taking care not to crush or damage the delicate honeycomb within. This will expose the ripe honey for extraction – but be sure to leave some cappings intact, as these help prevent contamination during processing.
Extracting Nectar with an Extractor or Crusher-Strainer
Extracting nectar from honeycomb can be done using two main methods: extractors and crusher-strainers. Each method has its own set of advantages and disadvantages.
Extractors are a popular choice for beekeepers, as they allow for the efficient removal of honey from frames without damaging the comb. A centrifugal extractor works by spinning the frames at high speed, causing the honey to be flung out of the cells and collected in a container below. This method is ideal for large-scale operations or when working with multiple frames.
On the other hand, crusher-strainers are a simpler and more manual approach. They consist of a series of rollers that crush the comb, releasing the honey, which then passes through a metal mesh to remove any debris. While this method can be more labor-intensive, it’s often preferred for its gentleness on the comb and ability to extract small amounts of honey.
When using an extractor or crusher-strainer, it’s essential to follow proper sanitation procedures to prevent contamination and ensure the quality of your final product. This includes cleaning the equipment thoroughly after each use and storing it in a dry, pest-free area.
Processing Honey After Extraction
Now that you’ve extracted the honey, it’s time to process and prepare it for storage and enjoyment. This is where things get sweet – literally!
Filtering and Pasteurizing Honey
Filtering and pasteurizing honey are crucial steps in ensuring its quality and safety for consumption. When you extract honey from your beehives, it may contain small particles, air pockets, or even pests like wax moths or bees that can compromise the honey’s purity.
There are two main types of filters used in the honey industry: manual filters and automated filters. Manual filters use a coarse mesh to strain out larger particles, while automated filters employ finer meshes or centrifugal force to remove smaller impurities. Some beekeepers prefer using a combination of both methods for optimal results.
Pasteurization is another critical step that involves heating the honey to kill off any remaining pests or bacteria. This process typically occurs between 145°F and 155°F (63°C to 68°C) for 5-10 minutes, depending on the equipment used. Some beekeepers opt for flash pasteurization at higher temperatures for shorter periods, while others prefer longer heat exposure to ensure thorough sterilization.
For a small-scale operation, using an automated filter is usually more efficient and effective than manual filtering. If you choose to pasteurize your honey, make sure to follow proper temperature controls and monitoring to avoid scorching or caramelizing the honey. Regularly checking your equipment and filters will also help maintain quality control throughout the process.
Bottling and Labeling Harvested Honey
When it comes to bottling and labeling harvested honey, attention to detail is crucial. The type of container you choose can greatly impact the shelf life and quality of your honey. Glass bottles are a popular choice for honey packaging due to their non-reactive properties and ability to preserve the flavor and aroma of the honey.
Labeling regulations vary by country and region, but most require the inclusion of basic information such as the product name, net weight, ingredients, and manufacturer’s address. Make sure to research the specific labeling requirements for your area to avoid any potential issues with sales or distribution.
Packaging considerations also come into play when bottling honey. Airtight containers are essential to prevent moisture from entering the bottle and spoiling the honey. Consider adding a small packet of desiccant or a silica gel pack to absorb any excess moisture in the container.
Quality Control and Testing
Before you start harvesting, it’s crucial to ensure that your honey is of high quality and safe for consumption. This section will walk you through the essential steps of testing and evaluating your harvested honey.
Identifying Quality Issues in Harvested Honey
Identifying quality issues in harvested honey is crucial to maintaining the integrity of your product and ensuring customer satisfaction. One common issue is moisture content, which can affect the honey’s texture, shelf life, and flavor profile. To test for moisture, you’ll need a refractometer or a hydrometer, both of which measure the honey’s water content.
Flavor profile is another critical aspect to consider. Honey’s taste and aroma can vary depending on factors like nectar source, climate, and processing methods. To evaluate flavor, smell the honey regularly during storage and take note of any changes in its scent or taste. A good rule of thumb is to taste a small sample daily.
Contaminants are another quality concern. These can include debris from equipment, pests, mold, or bacteria. Regular cleaning and maintenance of your extractor and other equipment will help minimize contamination risks. Also, check for signs of spoilage such as visible particles, off-odors, or slime on the surface of the honey.
Regular checks throughout the harvest season will help you identify potential issues before they affect the quality of your final product.
Conducting Quality Tests with pH Meters and Other Equipment
When it comes to harvesting high-quality honey, testing its properties is crucial. This involves using specialized equipment to measure factors like pH levels, water content, and impurity levels.
To assess the pH level of your honey, use a pH meter. These devices accurately measure the acidity or alkalinity of a substance by indicating its pH value on an LCD screen. A pH reading between 3.2 and 4.5 is considered optimal for most types of honey. Compare this reading to a standard pH chart provided with your pH meter.
A refractometer can also be useful in determining the water content and sugar levels in your honey. These devices work by measuring how much light bends as it passes through the honey, giving you an accurate percentage reading. This is particularly important for bees, as excess moisture can lead to fermentation and spoilage.
In addition to pH meters and refractometers, use a microscope or spectrophotometer to detect impurities like wax, pollen, or debris in your honey. Regularly calibrating these devices ensures you get accurate readings every time.
Post-Harvest Care and Hive Management
After harvesting your honey, proper post-harvest care is crucial for maintaining a healthy hive. Here, we’ll guide you through essential steps to ensure your bees thrive after the harvest season.
Restoring Hive Strength After Harvest
Restoring hive strength after harvesting honey is crucial for ensuring the long-term health and productivity of your apiary. As bees are at their lowest population during winter months, it’s essential to take proactive steps to rebuild their numbers.
Start by feeding your bees a high-calorie diet, such as sugar syrup or fondant, to supplement their natural nectar flow. This will provide them with the necessary energy to build up their stores and populate new brood. Monitor temperature fluctuations in your beehive and ensure it’s at an optimal 40-50°C (104-122°F) for brood rearing.
Additionally, take this opportunity to inspect your hive for pests and diseases. Look out for signs of mites, small hive beetles, or American foulbrood bacteria. If you detect any issues, consider using integrated pest management techniques to control the problem without harming the colony.
By taking these steps, you’ll be well on your way to restoring your hive strength and ensuring a healthy and thriving colony come springtime. Remember, a strong, robust hive is essential for successful honey production, so prioritize their health and well-being above all else.
Preparing the Hive for Future Crops
Preparing for future crops is an essential aspect of maintaining a healthy and productive hive. As you harvest honey from your bees, it’s crucial to think about the next season’s crop and take steps to ensure the hive remains thriving.
Start by assessing your queen’s performance. If she’s not laying eggs consistently or is showing signs of stress, consider replacing her with a new one. A strong queen is vital for brood rearing and honey production. To promote healthy brood growth, provide an adequate food supply, maintain a stable temperature between 92°F to 95°F (33°C to 35°C), and ensure proper ventilation.
During seasonal maintenance, inspect the hive’s framework and repair any damage or wear. Check for signs of pests, such as mites or small hive beetles, and take action if necessary. This will prevent potential issues from affecting next year’s crop. Additionally, rotate your supers to distribute honey production evenly throughout the hive.
By prioritizing these tasks, you’ll be well-prepared for the next nectar flow and can expect a bountiful harvest of honey.
Conclusion
Now that you’ve successfully harvested your honey, take a moment to appreciate the fruits of your labor. This process requires patience, dedication, and attention to detail, but it’s well worth the effort. As you carefully extract the golden nectar from your beehive, remember to inspect each frame for any signs of pests or disease. Don’t forget to reserve some of that delicious honey for future harvests – bees will need their energy source during the winter months.
As you put away your equipment and give your hive a well-deserved rest, consider taking notes on what worked well this season and what areas could use improvement. This reflection will help you refine your techniques for next year’s harvest. With every passing season, your honey production should only continue to improve – just be sure to stay committed to caring for your bees and their needs.
Frequently Asked Questions
What should I do if I notice a significant drop in honey production after harvesting?
If you’ve noticed a decline in honey production, it’s essential to investigate the cause. Check for signs of disease or pests that might be affecting your colony. Also, consider factors like weather conditions and changes in nectar flow. Make adjustments as needed to ensure a healthy hive and optimal honey production.
Can I harvest honey from a hive with a queen excluder?
A queen excluder can help prevent the queen bee from laying eggs above a certain point in the hive, but it’s not a guarantee of quality honey. If you’re using a queen excluder, ensure that your bees are still storing excess nectar and pollen, which is essential for high-quality honey.
How often should I inspect my beehives after harvesting to prevent disease and pests?
Regular inspections (every 1-2 weeks) are crucial in maintaining the health of your colony. After harvesting, monitor your hive for signs of disease or pests, such as unusual odors, dead bees, or infestations. Take prompt action if you notice any issues.
Can I use a centrifugal extractor to extract honey from frames with multiple combs?
While it’s technically possible, using a centrifugal extractor on frames with multiple combs can be challenging and may lead to inefficient extraction. Instead, consider using a separate extractor for each comb or using a different type of extractor designed for multi-comb setups.
How do I know if the honey is ready to bottle after processing?
After filtering and pasteurizing your honey, it’s essential to test its quality before bottling. Use a hydrometer to check the honey’s moisture content and ensure it meets industry standards (typically below 18%). Also, perform visual inspections for clarity and appearance.