Growing your own thyme herb can add a depth of flavor to your cooking that store-bought herbs just can’t match. But, if you’re new to gardening or haven’t had much luck with thyme in the past, it’s easy to get frustrated with this finicky but rewarding herb. With the right guidance, however, anyone can learn how to grow thyme successfully and enjoy its savory goodness all year round.
In our comprehensive guide, we’ll walk you through everything you need to know about growing thyme, from selecting the perfect variety for your garden to preparing the soil and planting techniques that will give your thyme plants the best chance to thrive. We’ll also share expert tips on how to care for your thyme plants, including pruning, watering, and pest management strategies that will keep your herb garden healthy and productive. Whether you’re a seasoned gardener or just starting out, this guide has got you covered.
Choosing the Right Variety
When growing thyme, selecting the right variety for your climate and cooking needs is crucial. This selection will determine the plant’s hardiness and flavor profile.
Understanding Thyme Types
When it comes to growing thyme, knowing which variety to choose is crucial for success. Thyme comes in a wide range of types, each with its unique characteristics and growing requirements.
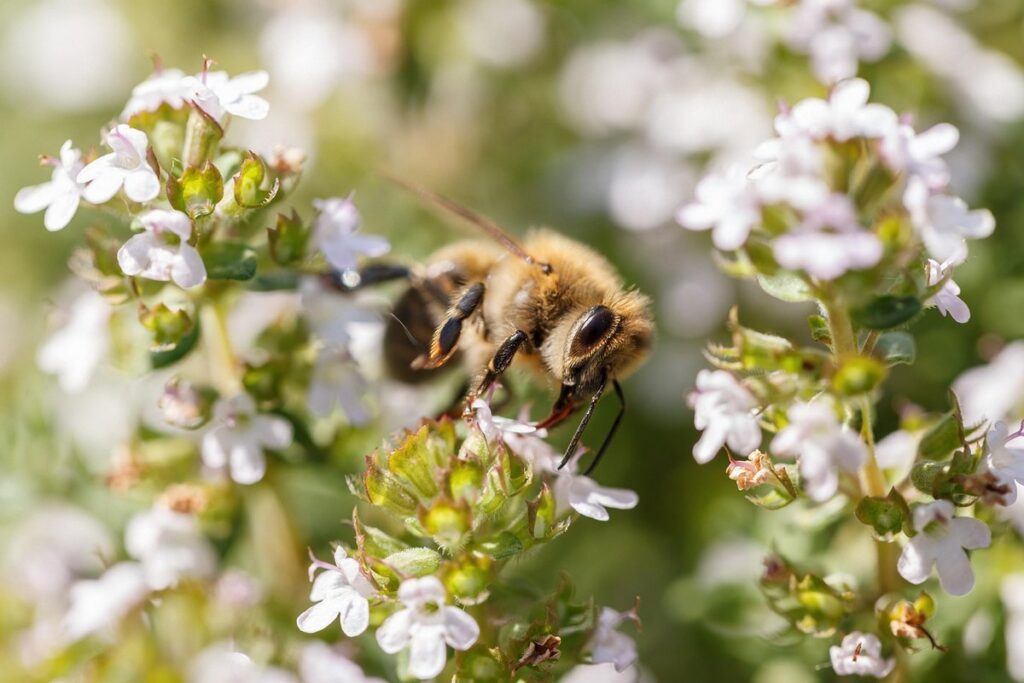
English Thyme (Thymus vulgaris) is one of the most popular varieties, known for its compact growth habit and tiny leaves. It’s an excellent choice for containers or small gardens, as it requires minimal maintenance and can thrive in poor soil. French Thyme (Thymus fructicosus), on the other hand, has a more delicate flavor and fragrance than English Thyme. It prefers well-draining soil and full sun to partial shade.
Lemon Thyme (Thymus x citriodorus) is another popular variety, prized for its citrusy scent and flavor. It’s a bit more challenging to grow than other thyme varieties, requiring consistent moisture and protection from extreme temperatures.
Before selecting a thyme type, consider the space you have available and the level of maintenance you’re willing to commit. If you have limited space or prefer a low-maintenance option, English Thyme may be the best choice. However, if you’re looking for a more flavorful variety, French or Lemon Thyme might be a better fit.
Selecting a Healthy Seedling
When selecting a healthy thyme seedling from a nursery or store, it’s essential to look for signs of good health. A healthy thyme plant should have bright green leaves with no signs of pests or diseases. Check the roots by gently removing the plant from its pot; if they’re thick and white, the seedling is likely to thrive.
Look for seedlings that are between 1-2 inches tall and have at least two sets of true leaves. This indicates a strong root system and good growth potential. Avoid seedlings with wilted or yellowing leaves, as this can be a sign of overwatering or underwatering.
When choosing a thyme variety, consider the flavor profile you prefer. Some popular varieties include ‘English Thyme’, which has a more delicate flavor, while ‘French Thyme’ has a stronger, more pungent taste. Check the plant tag or ask the nursery staff for guidance on the specific characteristics of each variety.
By selecting a healthy seedling and choosing the right thyme variety, you’ll be well on your way to growing a thriving and fragrant herb in your garden.
Preparing the Soil
Before planting thyme, it’s essential to prepare your soil to give these fragrant herbs a healthy start. This involves loosening and aerating the soil to encourage root growth.
Understanding Thyme’s Soil Needs
When it comes to growing thyme, having well-prepared soil is crucial for its success. Thyme thrives in well-draining soil with a slightly acidic pH, ranging from 6.0 to 7.0. If your soil tends to be heavy clay or prone to waterlogging, consider mixing in some organic matter like compost or sand to improve drainage.
Avoid compacting the soil when planting thyme, as this can prevent roots from growing and increase the risk of root rot. Instead, gently spread the seeds or seedlings out evenly, making sure not to overcrowd them. Common mistakes include over-fertilizing, which can lead to weak growth and an abundance of foliage at the expense of essential oils.
To create a thyme-friendly environment, start by testing your soil’s pH level using a DIY kit or sending a sample to a lab for analysis. Based on the results, adjust the soil accordingly with lime to raise the pH or sulfur to lower it.
How to Create a Well-Draining Mix
When growing thyme, it’s essential to create a well-draining mix that will prevent waterlogged soil and root rot. Thyme loves dry conditions, but this doesn’t mean you can neglect watering altogether. A mix with good drainage will help to balance moisture levels, ensuring your plants receive the right amount of water.
To create a well-draining mix for thyme, start by combining 40-50% potting soil with 20-30% perlite or vermiculite. These ingredients improve soil structure and allow excess water to escape quickly. Add 10-20% compost to enhance nutrient levels and 10-20% small rocks or grit to further increase drainage.
A good mix should resemble coarse sand in texture, allowing roots to breathe easily. If you’re using a store-bought potting mix, be aware that many contain high peat content which can retain too much water. Avoid overwatering by allowing the top inch of soil to dry out between watering sessions. This balance is crucial for thyme’s healthy growth and resistance to diseases.
Planting Thyme
When planting thyme, it’s essential to prepare a well-draining soil mix and plant the seedlings at the same depth they were previously growing. This will give them the best chance to thrive in their new home.
Best Time to Plant Thyme
When it comes to planting thyme, timing is everything. The best time to plant thyme depends on your location and climate. In temperate regions with mild winters, spring (March to May) is an excellent time to plant thyme from seed or seedlings. This allows the herb to establish itself before the heat of summer sets in.
In areas with cold winters, fall (September to November) is a better option. Planting in the fall gives thyme a head start on the growing season and allows it to mature before winter. Additionally, planting in the cooler temperatures of fall reduces transplant shock and promotes healthy root development.
If you live in an area prone to extreme weather conditions, such as intense heat or cold snaps, be sure to plant thyme at the right time. For example, if you’re in a region with scorching summers, consider planting thyme in early spring or late summer/early fall when temperatures are milder.
When planning your thyme planting schedule, also keep in mind the specific weather conditions for your area. A light frost can damage or kill newly planted thyme, so wait until the last frost date has passed before planting outside.
Planting Depth and Spacing
When planting thyme seedlings, it’s essential to get the depth and spacing just right. If you plant them too deep, they may struggle to establish themselves, while too much space between them can lead to weak growth and increased competition for resources.
A good rule of thumb is to plant thyme seedlings about 6-8 inches apart from one another, depending on the variety. This allows for healthy air circulation, which is crucial for preventing diseases that thrive in humid environments. As for depth, make sure the crown (where the stem meets the roots) is at soil level or slightly above it.
If you’re planting seeds directly into the ground, sow them about 1/8 inch deep and 6-12 inches apart. Thin out weaker seedlings to maintain a spacing of around 9-12 inches between each plant once they reach 2-3 inches in height. Overcrowding can lead to reduced yields and a higher risk of pests and diseases, so it’s better to err on the side of caution and give your thyme plants some breathing room.
Caring for Thyme Plants
To keep your thyme plants happy and thriving, it’s essential to provide them with proper care, which includes regular pruning, watering, and fertilization. We’ll walk you through these key steps in more detail below.
Watering Thyme: Tips and Tricks
Proper watering is essential for thyme plants to thrive. It’s surprising how often this simple yet critical aspect of care can be overlooked. Watering thyme too much or too little can lead to problems, but finding the sweet spot can make a world of difference.
When it comes to frequency, thyme prefers dry soil between waterings. Aim for every 7-10 days in the summer months and less often during winter when growth is slower. It’s also crucial to avoid overwatering, which can lead to root rot and other issues. Check the top inch of soil daily by inserting a finger or using a moisture meter. If it feels dry, it’s time to water.
As for how much water to use, start with a small amount – about 1-2 cups per plant – and increase as needed based on soil type, humidity, and other factors. Water at the base of the plant rather than overhead, which can encourage fungal growth and other problems. By paying attention to your thyme’s watering needs, you’ll be well on your way to a healthy, fragrant harvest.
Pruning and Training Thyme
Pruning and training thyme plants is an essential part of maintaining their optimal growth and health. When it comes to pruning, the goal is to encourage bushy growth and prevent the plant from becoming leggy. To do this, simply pinch off the top sets of leaves on the stems with your fingers or use a pair of clean scissors. This will help the plant focus its energy on developing more foliage.
Training thyme plants involves guiding their growth in a specific direction. You can achieve this by using stakes or trellises to support the stems as they grow upwards. Alternatively, you can prune the stems back to encourage horizontal growth and create a compact, spreading habit.
Regular pruning also helps prevent the spread of disease and encourages air circulation around the plant, which is essential for healthy growth. Aim to prune your thyme plants every 6-8 weeks during the growing season to keep them looking their best. By following these simple tips, you can enjoy a robust and fragrant thyme plant that adds flavor and charm to your cooking.
Common Problems and Solutions
We’ve all been there: despite our best efforts, thyme just won’t grow. In this section, we’ll tackle some common issues that can trip up even the most enthusiastic herb gardeners.
Pests and Diseases Affecting Thyme
Thyme is generally a low-maintenance herb, but it’s not immune to pests and diseases that can severely impact its growth. Some common issues you may encounter when growing thyme include root rot, powdery mildew, and rust.
Root rot typically manifests as yellowing leaves or a soft, mushy stem at the base of the plant. To combat this, ensure good air circulation around your thyme plants by spacing them out adequately. Avoid overwatering, which can exacerbate the problem – water only when the top inch of soil feels dry to the touch.
Powdery mildew and rust are both fungal diseases that cause white or yellowish spores to form on the leaves of infected plants. These can be treated with neem oil sprays or sulfur-based fungicides, but it’s essential to follow the product instructions carefully to avoid harming your thyme.
Some common pests affecting thyme include spider mites, mealybugs, and aphids. To manage these infestations, inspect your plants regularly and use insecticidal soap or neem oil to control outbreaks. You can also encourage beneficial insects like ladybugs and lacewings by introducing them into your garden – these natural predators will help keep pest populations under control.
Nutrient Deficiencies in Thyme
As a thyme grower, it’s essential to recognize nutrient deficiencies in this herb to ensure optimal growth and flavor. Thyme requires a balanced diet of nutrients to thrive. Nitrogen (N), iron (Fe), and magnesium (Mg) are some of the critical macronutrients necessary for healthy plant development.
Identifying nitrogen deficiency is relatively straightforward: look for pale or yellowish leaves, stunted growth, and reduced leaf density. Iron deficiency can be trickier to spot, but common signs include interveinal chlorosis (yellowing between veins), slow growth, and decreased fruiting. If you suspect a magnesium deficiency, check for distorted or epinastic leaves.
To address these deficiencies, focus on providing your thyme with well-balanced soil amendments. For nitrogen, add compost, manure tea, or fish emulsion to the soil. Iron can be supplied through chelated iron supplements or acidic fertilizers like peat moss. Magnesium-rich substances such as Epsom salt or dolomitic limestone can help correct magnesium deficiencies.
Regular soil testing and monitoring will help you catch any nutrient deficiencies early on, allowing for timely correction and ensuring your thyme grows strong and healthy.
Harvesting and Preserving Thyme
Now that you’ve successfully grown your thyme, it’s time to reap the rewards by harvesting and preserving its flavorful leaves for use in cooking year-round. We’ll guide you through both methods.
When to Harvest Thyme
When to Harvest Thyme
Thyme is ready for harvest when it has reached its full height and most of the leaves are a vibrant green color. Check the stems by gently pinching them between your thumb and index finger; if they release easily, the thyme is mature enough to be harvested.
Timing is crucial when harvesting thyme, as cutting back the plant too early can lead to reduced growth and flavor. Wait until about 6-8 weeks after planting, or when the plant has grown around 2-3 inches tall. Regular pruning encourages bushy growth and prevents flowering, which means more leaves for you to harvest.
Check your thyme plants regularly, as they can be prone to bolting (producing flowers). If this happens, cut back the entire plant to about half its height to encourage new leaf growth. Harvest individual sprigs or stems by cutting them off at the base with scissors or pinch them off between your thumb and index finger.
In most regions, thyme is ready for harvest from mid-summer through early fall. For a continuous supply of fresh leaves, consider harvesting a portion of the plant every week or two during the growing season.
Drying and Storing Thyme
Properly drying and storing thyme is crucial to maintaining its potency and flavor for extended periods. When it comes to preserving thyme for use in soups, teas, or other recipes, there are a few methods you can try.
One popular method is air-drying. Tie the stems together with twine and hang them upside down in a warm, dry location. This allows the leaves to dry slowly, preserving their flavor and aroma. Simply store the dried stems in an airtight container, like a glass jar or paper bag, to keep them fresh.
You can also dry thyme using a food dehydrator or your oven on its lowest temperature setting. To do this, spread the thyme leaves out in a single layer on the dehydrator trays or a baking sheet lined with parchment paper. The drying time will depend on the humidity and temperature of your environment, but it’s usually around 1-2 hours.
Regardless of the method you choose, make sure to store the dried thyme in a cool, dark place to preserve its flavor and aroma.
Frequently Asked Questions
Can I grow thyme indoors, or does it require a lot of sunlight?
Yes, you can definitely grow thyme indoors, especially if you don’t have an outdoor space with plenty of sunlight. Thyme can thrive in indoor conditions as long as it receives bright indirect light and has good air circulation. Choose a container that is at least 6-8 inches deep to accommodate the plant’s spreading roots.
How often should I water my thyme plants, especially during hot summer months?
Water your thyme plants when the top inch of soil feels dry to the touch. During hot summer months, you may need to water more frequently, but be careful not to overwater, as this can lead to root rot. Aim for a consistent moisture level, and avoid getting water on the leaves to prevent fungal diseases.
What are some common pests that affect thyme plants, and how do I get rid of them?
Thyme is susceptible to aphids, whiteflies, and spider mites. To control these pests, use neem oil or insecticidal soap according to the product’s instructions. You can also introduce beneficial insects like ladybugs or lacewings into your garden to help with pest control.
Can I propagate thyme by dividing established plants, or is this method unreliable?
Yes, you can definitely divide and replant thyme, but be sure to do so during the spring or fall when the plant is dormant. Choose healthy stems with a few leaves and trim them into sections about 2-3 inches long. Replant these divisions in well-draining soil, and water thoroughly.
How do I know if my thyme plants are receiving enough nutrients, especially if I’m using poor-quality potting mix?
Check your thyme plants regularly for signs of nutrient deficiencies like yellowing leaves or stunted growth. If you suspect a deficiency, repot the plant in fresh well-draining soil with balanced fertilizer. You can also use a fertilizer specifically formulated for herbs to give your thyme an extra boost.