If you’re new to growing epiphytes or just starting your orchid journey, one type that’s sure to captivate you is the majestic staghorn. These unique plants are not only visually stunning but also relatively low-maintenance, making them perfect for both beginners and experienced growers alike. However, knowing how to grow staghorns successfully can be a bit tricky, especially when it comes to replicating their natural environment and overcoming common issues.
In this comprehensive guide, we’ll walk you through the essential steps of growing staghorns, covering everything from creating the right environment to propagating, fertilizing, pruning, and troubleshooting. Whether you’re looking for basic advice or advanced techniques, our expert tips will help you unlock the full potential of your staghorn and enjoy a thriving plant that brings joy and beauty to any space.
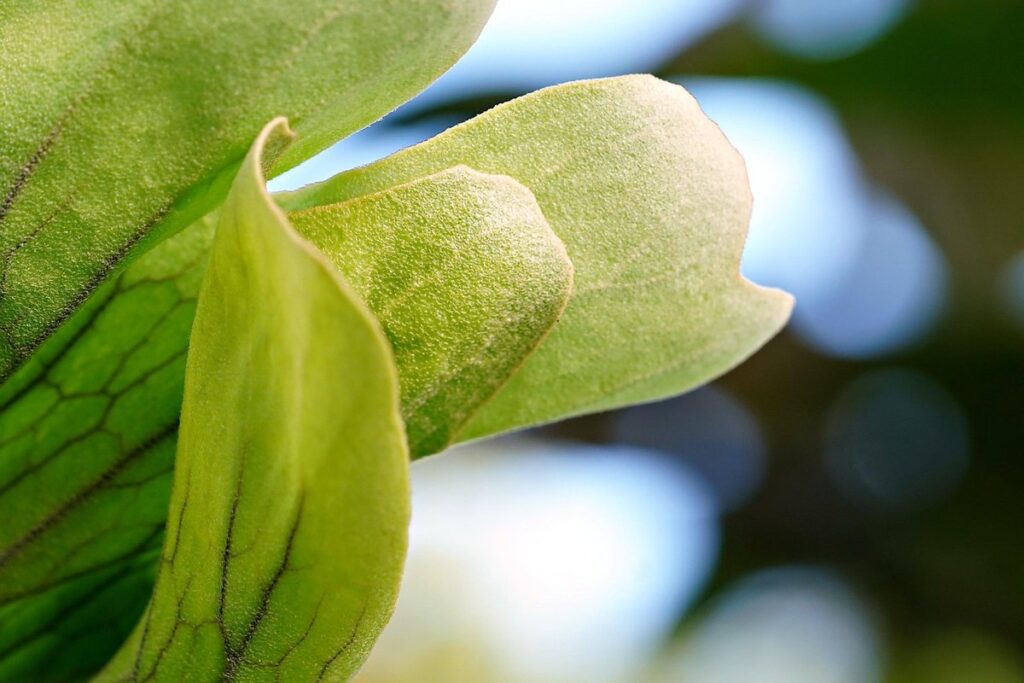
Choosing the Right Environment
When it comes to growing staghorns, selecting a suitable environment is crucial for their health and well-being. In this next part of our guide, we’ll help you determine the perfect spot for your staghorn.
Understanding Staghorn Lighting Requirements
When it comes to growing staghorns, understanding their lighting requirements is crucial for their optimal growth and health. Staghorns prefer bright indirect light, which means they need a balance of intense illumination and gentle filtering. This type of lighting allows them to photosynthesize efficiently without getting scorched by direct sunlight.
To replicate this condition indoors, you can place your staghorn near an east- or west-facing window, where the soft morning or afternoon sun provides gentle illumination. Avoid south-facing windows, which receive intense direct sunlight that can cause scorching. If you don’t have a suitable window location, consider using grow lights specifically designed for low-light plants like staghorns.
Keep in mind that too little light can lead to weak and leggy growth, while too much light can result in burnt leaves and damaged roots. Monitor your staghorn’s response to its environment and adjust the lighting accordingly. Aim for 12-14 hours of bright indirect light per day to promote healthy growth and development.
Temperature Tolerances and Humidity Levels
When it comes to growing staghorns, understanding their temperature tolerances and humidity levels is crucial for optimal growth. Staghorns can thrive in temperatures between 55°F and 75°F (13°C and 24°C), with an ideal range of 60°F to 65°F (16°C to 18°C) being the sweet spot. However, it’s essential to avoid placing them near heating vents or air conditioning units that can cause rapid temperature fluctuations.
Maintaining a humidity level between 50% and 60% is also vital for staghorns. If the environment becomes too dry, the plant may become stressed, leading to brown tips on the leaves. To combat this, you can increase the humidity around your staghorn by placing it on a tray filled with water and pebbles or using a humidifier nearby.
To give you a better idea of what works, many growers report success with staghorns in indoor environments such as bathrooms, kitchens, and living rooms. These areas tend to have consistent temperatures and humidity levels, making them ideal for these epiphytes.
Selecting a Suitable Potting Mix
When growing staghorns, selecting the right potting mix is crucial to ensure their health and well-being. As epiphytes, staghorns don’t need a lot of soil to thrive, but they do require a well-draining mix that can hold moisture without becoming waterlogged. A potting mix specifically designed for epiphytes will typically contain ingredients like perlite or vermiculite, which help with drainage and prevent root rot.
If you’re looking to create your own potting mix at home, a good starting point is to combine one part of a high-quality peat moss or coconut coir with two parts of a well-draining medium such as perlite or bark chips. This ratio can be adjusted based on the specific needs of your staghorns and the climate you’re growing them in.
When choosing a commercial potting mix, look for products labeled as “orchid mix” or “epiphyte mix.” These mixes are typically formulated to meet the unique needs of plants like staghorns, with a balance of moisture retention and drainage. Avoid using regular potting soil, which can retain too much water and cause root rot in staghorns.
Propagation Methods for Staghorns
To successfully grow staghorns, it’s essential to understand how to propagate them effectively. In this next part of our guide, we’ll cover the various methods used to multiply these beautiful epiphytes.
Air Layering and Stem Cuttings
Air layering is a fascinating method for propagating staghorns, allowing you to grow multiple plants from a single mother plant. To start air layering, begin by selecting a healthy stem with at least two nodes (the joint where a leaf meets the stem). Next, make a small incision about 6-8 inches below the first node and insert a small piece of sphagnum moss or coconut coir into the cut area.
As you apply the air layering material, gently wrap it around the stem to hold it in place. Secure with twine or wire if necessary. Roots will begin to develop within 2-3 weeks, depending on factors like temperature and humidity. Aftercare is crucial: ensure the newly formed roots are moist but not waterlogged.
Stem cuttings offer an alternative propagation method for staghorns. Using a sharp, clean tool, take a 4-6 inch stem cutting with at least two nodes from a mature plant. Remove lower leaves to prevent moisture loss and promote rooting. Dip the cut end in rooting hormone powder or liquid before planting it in well-draining soil or a specialized propagation medium. Roots should develop within 1-2 months.
Spores and Division: Propagation Methods for Mature Plants
Spore propagation and division are advanced techniques for mature staghorns that can be used to produce new plants. For experienced growers, these methods offer a way to reproduce their favorite species, but they require patience and attention to detail.
When using spores, you’ll need to collect them from the plant’s sporangia or purchase them from a reputable supplier. Sow the spores on a sterile substrate, such as agar or sphagnum moss, and maintain high humidity until germination occurs. This can take anywhere from several weeks to several months.
Division is another option for mature staghorns. It involves carefully separating the plant’s rhizome into sections, making sure each section has at least one growing point. This method is best used when the plant is actively producing new growth, and it allows you to share multiple offsets with fellow growers. To increase your chances of success, choose healthy plants with plenty of light and water them regularly after division. With proper care, these techniques can help you expand your staghorn collection and introduce new species to your growing space.
Providing Staghorns with Essential Nutrients
To give your staghorn a strong start, it’s crucial that you provide it with essential nutrients from day one. Let’s dive into how to get this right for optimal growth and health.
Fertilizing Your Staghorn: Timing and Dosage
When it comes to fertilizing your staghorn, timing and dosage are crucial factors to consider. Staghorns require a balanced diet of essential nutrients to thrive, and using the right fertilizer can make all the difference.
It’s essential to use a fertilizer specifically formulated for epiphytes like staghorns. These plants have unique nutritional needs that differ from those of terrestrial plants. A balanced fertilizer will provide your staghorn with the necessary nitrogen, phosphorus, potassium, and micronutrients it requires. Look for a fertilizer that is water-soluble or has a slow-release formula to ensure consistent feeding.
As for timing, fertilize your staghorn during the growing season, which typically spans from spring to fall. During this period, apply fertilizer once a month, following the recommended dosage on the product label. Be sure not to over-fertilize, as this can cause more harm than good.
Organic options like fish emulsion or compost tea are also viable alternatives to synthetic fertilizers. These natural supplements promote healthy microbial activity and provide essential nutrients without burning your staghorn’s roots. Mix 1-2 tablespoons of organic fertilizer with water according to the manufacturer’s instructions, and apply it sparingly to avoid over-fertilization.
Micronutrient Deficiencies: Identification and Correction
As you tend to your staghorn’s growth, it’s essential to recognize micronutrient deficiencies that can hinder its development. Magnesium and iron are two common deficiencies that can impact your plant’s health. Identify symptoms such as yellowing leaves, weak stems, or slowed growth.
To diagnose magnesium deficiency, look for distorted leaf tips, interveinal chlorosis (yellowing between the veins), or a general pale color. Iron deficiency often presents with similar yellowing symptoms but typically affects younger leaves more severely. If you suspect either issue, consider sending a soil sample to your local nursery or extension office for analysis.
To correct these issues, fertilize with magnesium sulfate or iron chelates specifically formulated for orchids. Prune affected areas to promote new growth and encourage nutrient uptake. For severe cases, repot the staghorn in fresh potting media to alleviate nutrient deficiencies caused by depleted soil conditions.
Monitor your plant’s response to treatment and adjust accordingly. Regular fertilization schedules can also help prevent micronutrient deficiencies from occurring in the first place.
Pruning and Training Staghorn Epiphytes
Now that your staghorn is thriving, let’s focus on pruning and training to maintain its shape and promote healthy growth. This essential step will help you control its size and encourage new blooms.
Pinching and Tipping: Controlling Growth Patterns
When it comes to cultivating staghorns, controlling their growth patterns is crucial for maintaining balanced and bushy shapes. One effective method for regulating growth is through pinching, which involves carefully removing the terminal buds of the plant’s stems. This technique encourages the development of lateral shoots, promoting a fuller and more compact appearance.
To pinch your staghorn effectively, start by selecting the longest stem on the plant and locate the terminal bud at its tip. Gently twist or cut off the bud using clean pruning shears, taking care not to damage surrounding tissue. Repeat this process for the next longest stem, working your way down the plant as needed.
Tipping is another technique used to regulate growth patterns in staghorns. This involves removing the growing tips of stems to encourage branching and prevent legginess. By regularly tipping your staghorn’s stems, you’ll be able to maintain a balanced shape and promote healthy new growth. Regular grooming also plays a critical role in maintaining plant health – make sure to remove any dead or damaged leaves or stems to prevent disease from taking hold.
Supporting Heavy Foliage and Branches
As staghorns grow and mature, their foliage and branches can become quite heavy, posing a challenge for their support. To prevent damage to the plant and encourage optimal growth, it’s essential to provide adequate support.
You can start by using stakes to hold up large leaves or branches that are at risk of breaking off. Drive the stake gently into the potting mix near the base of the staghorn, making sure not to cause any damage to the roots. You can also use wire to gently tie down long stems or branches to a support system like a trellis.
Some growers find success with using wires in a spiral pattern to provide additional support for heavy growth areas. This method allows for flexibility and can be adjusted as the plant grows. Another option is to repot your staghorn into a larger potting mix that provides better drainage and root room, allowing the roots to spread out and absorb more nutrients.
It’s also crucial to prune your staghorns regularly to promote healthy growth and encourage new branches to grow in a way that minimizes weight distribution.
Common Issues and Pests Affecting Staghorns
As you care for your staghorn, it’s essential to be aware of potential issues that can arise, such as pests like mealybugs and spider mites. We’ll cover common problems to watch out for in this section.
Overwatering: Causes, Symptoms, and Prevention
Overwatering is one of the most common mistakes new staghorn growers make. It’s easy to get carried away with watering schedules, but this can lead to root rot and other issues that are difficult to recover from.
So, what causes overwatering? Incorrect watering schedules are a major culprit. If you’re watering your staghorn too frequently, or not giving it enough time between waterings to dry out slightly, the roots will start to rot. This can happen even if you think you’re providing enough drainage – remember that staghorns have sensitive roots and need air circulation to thrive.
Symptoms of overwatering include yellowing leaves, soft spots on the plant’s surface, or a foul odor coming from the pot. If you notice any of these signs, it’s essential to act quickly by repotting your staghorn in fresh soil and reducing watering frequency.
To prevent overwatering, make sure you’re following a consistent watering schedule that takes into account temperature fluctuations and humidity levels. Check the moisture level of the soil by sticking your finger in the pot – if it feels wet or soggy, wait another day before watering again.
Scale Insects, Mealybugs, and Other Pests
Growing staghorns can be a rewarding experience, but it’s not uncommon to encounter some pesky pests along the way. Scale insects, mealybugs, and spider mites are just a few of the common culprits that can wreak havoc on your prized plants. These tiny troublemakers feed on sap, leaving behind sticky honeydew droplets and curled or distorted leaves.
To detect these issues early on, keep a close eye out for white cottony patches (mealybugs) or brownish-black specks (scale insects). Spider mites are harder to spot, but you might notice fine webbing between the fronds. If left unchecked, these pests can cause significant damage and even kill your staghorn.
To combat these pests, use integrated pest management techniques that combine physical barriers, cultural controls, and biological controls. Inspect your plants regularly for signs of infestation, and isolate any affected areas to prevent spreading. For severe cases, consider introducing natural predators or beneficial insects like ladybugs or lacewings to control the population. With vigilance and the right approach, you can keep these pests at bay and enjoy a thriving staghorn collection.
Advanced Techniques for Experienced Growers
If you’ve been growing staghorns for a while, it’s time to take your skills to the next level and learn some advanced techniques that will help you achieve even more success. We’ll cover expert-level methods for coaxing out maximum growth from these unique plants.
Grafting Staghorn Epiphytes: Theory and Practice
Grafting staghorn epiphytes is an advanced technique that can greatly enhance their growth and success. For experienced growers looking to take their cultivation skills to the next level, understanding the theory behind grafting is essential.
When considering grafting a staghorn, compatibility between the rootstock and scion is crucial. Research has shown that some species of staghorns are more compatible with certain rootstocks than others. For example, Tillandsia ionantha has been successfully grafted onto Phalaenopsis rootstocks, while Tillandsia usneoides has proven difficult to graft due to its thick, waxy leaves.
To achieve success with grafting, it’s essential to choose healthy, disease-free stock and scion plants. Sterilize your tools and work in a clean environment to minimize the risk of contamination. Apply gentle pressure to secure the scion to the rootstock, ensuring they are aligned properly. After grafting, provide bright light and maintain consistent moisture levels to promote healing.
With practice and patience, experienced growers can develop their own unique grafting techniques, increasing their chances of success and expanding their range of staghorn species to cultivate.
Experimentation with Unusual Propagation Methods
For the adventurous and experienced grower, experimenting with unusual propagation methods can be a thrilling way to push the boundaries of staghorn cultivation. While traditional methods like division, spore print, and tissue culture are well-documented, some growers have explored innovative approaches that may not be widely recognized or accepted.
One such method is using the “hanging basket trick.” This involves placing mature staghorn stems in a hanging basket with minimal medium, allowing them to dry out slightly between waterings. This stress-inducing technique can stimulate new growth and even induce flowering in some species. Some growers have reported remarkable success with this method, producing healthy staghorns with desirable traits.
Another experimental approach is using the “peat pot trick.” By placing a mature staghorn stem in a peat pot filled with only a small amount of medium, growers can encourage new growth and root development without disturbing the plant. This technique requires careful monitoring to prevent over-drying, but can be an effective way to propagate staghorns.
Keep in mind that these experimental methods may not always yield consistent results, and some may require more trial-and-error than traditional propagation techniques. However, for experienced growers looking to expand their knowledge and skills, exploring unusual propagation methods can lead to exciting discoveries and breakthroughs.
Frequently Asked Questions
Can I grow staghorns indoors year-round, or do they require a seasonal change of environment?
Yes, staghorns can thrive indoors year-round with proper care. They are adapted to indoor conditions and can tolerate the fluctuations in temperature and humidity that come with season changes. However, be sure to maintain good air circulation and monitor their lighting requirements to ensure optimal growth.
How often should I water my staghorn epiphyte during periods of low humidity?
To avoid overwatering, it’s essential to adjust your watering schedule based on the environment. In low-humidity conditions, reduce watering to once every 10-14 days. Make sure the potting mix is dry to the touch before rehydrating your staghorn.
What are some common micronutrient deficiencies that I should watch out for in my staghorns?
Staghorns are prone to micronutrient deficiencies, particularly magnesium and iron. Monitor your plant’s coloration, growth patterns, and leaf health to detect potential issues early. Yellowing leaves or stunted growth can indicate a lack of essential nutrients.
Can I propagate staghorns using spores, or is this method only suitable for mature plants?
Both immature and mature staghorn plants can be propagated using spores. This method allows you to produce genetically identical offspring with desirable traits. However, it’s essential to follow proper sterilization techniques and provide optimal conditions for germination.
How do I support heavy foliage and branches on my staghorn epiphyte without damaging the plant?
Use a sturdy trellis or stake to support the weight of your staghorn’s growth. Be sure to choose a material that won’t cause damage or leave residue on the plant’s surface. Regularly inspect your staghorn for signs of stress and adjust its placement as needed to prevent breakage or damage.