Growing your own microgreens at home is easier than you think, and with good reason: they’re packed with nutrients, bursting with flavor, and can be harvested in as little as 1-3 weeks. But before you start sowing seeds, it’s essential to understand the benefits of growing microgreens and what makes them so special. From their compact size to their incredible nutritional value, these young greens are a game-changer for home cooks and health enthusiasts alike.
In this article, we’ll take you by the hand through everything you need to know to grow delicious and healthy microgreens at home. We’ll cover the must-have equipment, the best types of soil and lighting, common challenges to troubleshoot, and expert tips on how to keep your microgreen crops thriving. By the end of this article, you’ll be equipped with all the knowledge you need to start growing your own microgreens – so let’s get started!
Understanding Microgreens
Let’s start by understanding what microgreens are and why they’re a great choice for indoor gardening – you’ll be amazed at how easy it is to grow them.
What are Microgreens?
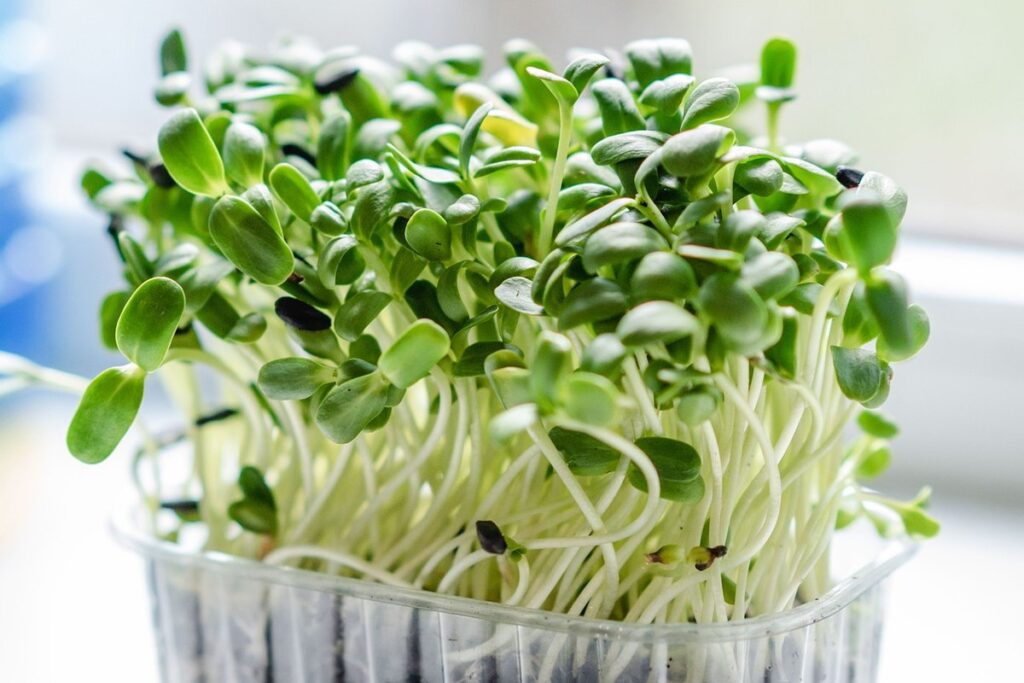
Microgreens are young, nutrient-dense versions of leafy greens and other vegetables that have gained immense popularity in recent years. These miniature greens are typically harvested within 1-3 weeks of germination, when they’re just a few inches tall, making them an ideal choice for small spaces or urban gardens.
One of the main reasons microgreens are so appealing is their incredible nutritional value. They contain up to 40 times more vitamins and antioxidants than their mature counterparts, making them a superfood in their own right. For example, pea shoots have been shown to contain higher levels of protein and fiber than mature peas.
Growing microgreens requires minimal space and can be done indoors or outdoors, making them perfect for small plots, balconies, or even indoor containers. They’re also incredibly easy to grow, requiring only a shallow pot with a growing medium, water, and some indirect sunlight. Whether you’re a seasoned gardener or a beginner, microgreens are an excellent choice for anyone looking to grow their own nutritious food in a space-saving way.
Benefits of Growing Microgreens
Growing microgreens offers numerous benefits that make them an attractive choice for home gardeners and professional chefs alike. One of the most significant advantages is their high nutritional value. Microgreens contain a higher concentration of vitamins, minerals, and antioxidants compared to their mature counterparts. In fact, studies have shown that microgreens can be up to 40 times more nutritious than full-grown leafy greens.
Another benefit of growing microgreens is their incredibly fast growth rate. They typically take anywhere from 1-3 weeks to harvest, depending on the variety, allowing for a continuous crop and minimizing waste. This speed also makes them an excellent choice for indoor growing, as they can thrive in controlled environments with minimal space requirements.
Microgreens are also incredibly versatile in recipes. Their small size and delicate flavor make them perfect for adding a burst of freshness to salads, sandwiches, and smoothies. They can also be used as a garnish or mixed into sauces and marinades for added depth of flavor. Experimenting with different microgreen varieties will reveal new and exciting ways to incorporate them into your cooking repertoire.
Types of Microgreens to Grow
If you’re new to growing microgreens, one of the most exciting parts is getting to choose from an incredible variety of options. There are dozens of types of microgreens that can be grown indoors or outdoors, each with its own unique flavor, texture, and nutritional profile.
Let’s start with some popular favorites. For a salad mix, you can grow a combination of lettuce varieties like red oak, green leaf, and loose-leaf. This will give you a diverse selection to add to sandwiches, salads, and other dishes. Pea shoots are another crowd-pleaser – they’re incredibly easy to grow and can be harvested in as little as 5-7 days. Radish greens are also a great choice for their spicy kick and versatility.
Other options include arugula, beet greens, kale microgreens, and even herb varieties like basil and cilantro. When choosing what to grow, consider your personal taste preferences and the types of dishes you plan to use your microgreens in. Keep in mind that some microgreens are more suitable for indoor growing due to their sensitive nature or specific temperature requirements. Research each type carefully before deciding which ones to bring into your garden.
Choosing the Right Equipment and Supplies
To grow microgreens successfully, you’ll need to choose the right equipment and supplies that meet your specific needs and preferences. This includes selecting a growing medium, containers, and any necessary tools.
Lighting Options for Microgreen Growth
When it comes to growing microgreens, lighting is one of the most critical factors for their health and yield. While natural light can be ideal, not all growers have access to a sunny windowsill or outdoor space. That’s why understanding your options for artificial lighting is essential.
LED grow lights are a popular choice among microgreen enthusiasts due to their energy efficiency and customizable spectrum. They’re available in a range of spectrums that mimic natural sunlight, making them an excellent option for year-round growth. For example, some LED grow lights have a blue-rich spectrum that promotes leafy greens like kale and spinach.
Fluorescent lights are another viable option, but they tend to be less energy-efficient than LEDs. However, they’re often more affordable upfront and can still produce good results. Natural light is also an excellent choice if you have a sunny windowsill or outdoor space, but it’s essential to ensure your microgreens receive the right amount of direct sunlight – typically 12-14 hours per day.
When choosing artificial lighting, consider factors like energy consumption, spectrum, and durability. Some growers even experiment with combining different light sources for optimal growth. By understanding the pros and cons of each option, you can create a tailored lighting system that best supports your microgreens’ needs.
Growing Mediums for Microgreens
When it comes to growing microgreens, the choice of growing medium is crucial for their health and development. There are several options available, each with its own set of benefits and drawbacks.
Soil-based growing mediums are a popular choice for microgreen growers. They offer good drainage and aeration, which can help prevent waterlogged roots and promote healthy root growth. However, soil can be heavy and may require frequent watering, leading to waste and potential pests. Additionally, using soil can be expensive in the long run.
Hydroponics is another option that’s gaining traction among microgreen growers. This method uses a nutrient-rich solution rather than soil, which can lead to faster growth rates and higher yields. However, hydroponic systems can be more complex and require regular maintenance to ensure optimal results.
Coco coir is also an excellent growing medium for microgreens. It’s made from coconut husks and has excellent water-holding capacity, making it ideal for humid environments. Coco coir is also relatively inexpensive compared to soil or hydroponics.
In general, the best growing medium will depend on your specific needs, budget, and preferences. Consider factors like drainage, aeration, and nutrient availability when choosing the right medium for your microgreens.
Containers and Trays for Microgreen Growth
When it comes to growing microgreens, the right container can make all the difference. You’ve got options ranging from simple plastic trays to more sophisticated self-watering systems. Let’s take a look at some of the most popular types.
Plastic trays are a great starting point for beginners. They’re inexpensive, easy to clean, and come in various sizes. However, they can dry out quickly if you forget to water them. To prevent this, make sure to check on your microgreens daily and water as needed.
Fabric pots offer a more natural alternative to plastic. These breathable containers allow excess moisture to escape, reducing the risk of overwatering. Plus, they’re reusable and biodegradable. Keep in mind that fabric pots can be more expensive than their plastic counterparts.
Self-watering systems take container gardening to the next level. These clever designs have a built-in water reservoir that delivers moisture directly to the roots as needed. They’re perfect for busy gardeners or those who tend to forget to water (no judgment!). Some popular self-watering systems include the Oasis Water Reservoir and the Water Storing Tray.
Ultimately, the best container for you will depend on your personal preferences, budget, and growing needs.
Preparing the Growing Environment
Before you start growing microgreens, it’s essential to prepare a suitable environment that mimics their natural habitat. This section will guide you through setting up optimal conditions for your greens to thrive.
Temperature Control for Optimal Growth
When it comes to growing microgreens, temperature control is crucial for optimal growth. Different species have varying ideal temperature ranges, and maintaining these conditions can make all the difference between a bountiful harvest and disappointing results.
For example, basil microgreens prefer temperatures between 60°F (15°C) and 75°F (24°C), while pea shoots thrive in warmer temperatures ranging from 65°F (18°C) to 85°F (29°C). Cress and arugula, on the other hand, do well in cooler temperatures, typically between 55°F (13°C) and 70°F (21°C).
To maintain optimal temperatures for your microgreens, consider using a thermometer to monitor the temperature. Most grow lights come with built-in thermostats that can help regulate temperature fluctuations. Alternatively, you can use fans or ventilation systems to circulate air and keep your growing space at the ideal temperature.
Keep in mind that sudden changes in temperature can shock your microgreens, leading to reduced growth or even death. By maintaining a consistent temperature within the optimal range for your specific variety, you’ll be well on your way to harvesting a lush crop of delicious microgreens.
Humidity and Air Circulation
When growing microgreens, maintaining optimal humidity and air circulation levels is crucial for promoting healthy growth. Humidity, specifically, plays a significant role as it affects the germination process and overall health of your microgreens.
Maintaining too little humidity can cause seeds to dry out before they sprout, while excessive moisture can lead to fungal diseases that are detrimental to your crop’s health. A general guideline for maintaining optimal humidity levels is between 40-70%. This range allows for healthy growth without promoting the spread of disease.
In addition to controlling humidity levels, air circulation also plays a critical role in preventing the spread of disease and maintaining overall plant health. Ensure adequate space between seedlings and provide some air movement using fans or vents to prevent stagnant air from accumulating near your plants. Proper air circulation not only aids in preventing fungal diseases but also promotes better growth by reducing the concentration of ethylene gas, which can inhibit root development.
Regularly check your growing environment for signs of humidity imbalance and adjust as necessary to ensure optimal conditions for healthy microgreen growth.
Watering and Irrigation Systems
When it comes to watering microgreens, getting it right is crucial for their healthy growth. There are several techniques you can employ, each with its own set of benefits and requirements.
One method is manual watering, where you water the microgreens by hand using a cup or a spray bottle. This approach allows you to control the amount of water your plants receive, which is essential for preventing overwatering that can lead to root rot. However, it can be time-consuming, especially if you have a large crop.
Automated drip irrigation systems are another option, where water is delivered directly to the roots of the plants through a network of tubes and drippers. These systems conserve water and reduce evaporation losses, but they can be more expensive to set up.
Hydroponic feeding systems involve suspending the microgreens in a nutrient-rich solution rather than soil. This method allows for precise control over nutrient delivery and requires less water overall. However, it demands regular monitoring of pH levels and nutrient intake to prevent deficiencies or toxicity.
Sowing Seeds and Maintaining Microgreens
Now that you’ve sown your microgreen seeds, it’s time to ensure they receive the right conditions for optimal growth. This includes regular watering, monitoring temperature, and more.
Preparing Seeds for Germination
When it comes to growing microgreens, selecting and preparing seeds is a crucial step that can make all the difference in achieving optimal germination rates. First and foremost, choose high-quality seeds specifically designed for microgreen production. These seeds are bred to have shorter growth periods and more intense flavors, making them perfect for this type of cultivation.
To prepare your seeds for germination, gently rinse them with water to remove any impurities or debris that may be clinging to the surface. Then, soak the seeds in a bowl of lukewarm water (around 70-80°F) for 8-12 hours. This helps to soften the seed coat and encourage uniform germination.
Store your prepared seeds in an airtight container or envelope, making sure they’re kept away from direct sunlight and moisture. It’s essential to keep the seeds cool and dry until you’re ready to sow them, as this will help maintain their viability and ensure optimal germination rates.
Remember, always handle your seeds gently and avoid cross-contamination with other plants or seeds to prevent any potential issues during growth.
Sowing Seeds: Methods and Timing
Sowing seeds is an art that requires precision and patience. When it comes to growing microgreens, timing and spacing are crucial for healthy growth. To begin, you’ll want to start with high-quality seeds specifically designed for microgreen production.
Begin by sowing seeds directly into a prepared growing medium, such as a seed starting mix or a deep layer of coconut coir. For most microgreens, it’s recommended to sow seeds at a depth of 1/4 inch (6-8 mm) and 2-3 times the width of the seed. For example, if you’re sowing pea shoots, you’ll want to sow about 5-7 seeds per inch.
Timing is everything when it comes to microgreen growth. Some varieties, like lettuce and kale, can be harvested in as little as 1-3 weeks, while others, such as radish and arugula, take around 2-4 weeks to mature. Be sure to research the specific needs of your chosen variety to ensure you’re sowing at the right time.
When spacing seeds, consider the mature size of the plant. For small varieties like lettuce and kale, sow 2-3 inches apart, while larger varieties like pea shoots can be sown 4-6 inches apart.
Monitoring and Harvesting Microgreens
Monitoring microgreen growth is crucial to ensure optimal flavor and nutrition. Start by checking on your crop daily, looking for signs of stress or disease such as yellowing leaves, droopy stems, or black spots. Keep the growing medium consistently moist but not waterlogged, and provide adequate light – most microgreens require at least 12 hours of indirect light per day.
Check temperature fluctuations regularly, as some varieties are sensitive to extreme temperatures. For example, pea shoots prefer daytime temperatures between 65-75°F (18-24°C) and nighttime temperatures around 55-60°F (13-15°C). Inspect your microgreens for pests like aphids or spider mites, which can quickly spread disease.
Harvesting is also a critical step. Microgreens are typically ready to harvest within 7-21 days of sowing, depending on the variety. Use scissors to snip off the leaves just above the growing medium, leaving a small portion intact to promote regrowth. Harvest in the morning when the plants are at their highest water content for optimal flavor and nutrition.
Timing is everything – over-harvesting can stress the crop, while under-harvesting can lead to reduced yields.
Common Challenges and Troubleshooting Tips
Growing microgreens can be a breeze, but we all hit roadblocks along the way. Let’s tackle some of the most common challenges you might face when cultivating these young greens.
Pests and Diseases in Microgreens
Growing microgreens can be an enjoyable and rewarding experience, but it’s not without its challenges. One of the most frustrating issues you may encounter is pests and diseases that can damage your crop and ruin the flavor.
Common pests that affect microgreens include aphids, whiteflies, spider mites, and fungus gnats. These tiny insects feed on the plant sap, causing curled or distorted leaves and stunted growth. To control them, try using neem oil or insecticidal soap as a natural deterrent. For severe infestations, use pyrethrin sprays, but always follow the manufacturer’s instructions.
Diseases like powdery mildew, downy mildew, and root rot are also common in microgreens. To prevent them, maintain good air circulation, ensure adequate light, and avoid overwatering. If you notice any signs of disease, remove affected leaves or cut back the entire crop to prevent the spread.
In addition to chemical controls, there are many natural methods for preventing pests and diseases. For example, introduce beneficial insects like ladybugs or lacewings that prey on aphids and other pests. You can also use physical barriers like fine mesh to keep insects away from your plants. Regularly inspecting your microgreens and taking prompt action will help prevent problems before they become severe.
Nutrient Deficiencies and Soil pH Issues
When growing microgreens, it’s not uncommon to encounter nutrient deficiencies and soil pH imbalances. These issues can be caused by a variety of factors, including inadequate fertilization, poor soil quality, or even the type of crop being grown.
To identify nutrient deficiencies, monitor your microgreens’ growth and look for signs such as slow or stunted growth, yellowing leaves, or brittle stems. For example, if you notice that your leafy greens are developing chlorosis (yellowing) on their leaves, it may be a sign of iron deficiency. On the other hand, if your microgreens are experiencing stunted growth and soft, pale leaves, they might be suffering from nitrogen deficiency.
To correct these issues, start by testing your soil pH using a pH meter or kit. Most microgreen varieties prefer a slightly acidic to neutral soil pH (around 6.0-7.0). If your results indicate an imbalance, adjust the pH accordingly. You can use limestone to raise the pH or sulfur to lower it.
Some key nutrients to keep in mind when growing microgreens include nitrogen (N), phosphorus (P), and potassium (K). To ensure adequate nutrient levels, fertilize regularly with a balanced fertilizer, following the manufacturer’s instructions.
Conclusion: Tips for Successful Microgreen Growth
Now that you’ve learned the ins and outs of growing microgreens, it’s time to put your new skills into practice. To ensure successful growth, remember to provide your microgreens with adequate light, water, and temperature control. A general rule of thumb is to harvest your greens when they’re between 1-3 inches tall – any taller and they may become too bitter for taste. When handling your microgreens, be gentle to avoid damaging the delicate leaves.
To keep your microgreen growth on track, maintain a consistent watering schedule and monitor temperature fluctuations in your growing space. By following these simple tips, you’ll be enjoying a fresh crop of nutrient-dense greens in no time. With practice, you can refine your technique and experiment with different varieties to find your favorites. Happy growing!
Frequently Asked Questions
How do I know which microgreen varieties are best for my indoor space?
Choose microgreens that thrive in low-light conditions, such as kale, arugula, or lettuce, if your space has limited natural light. For brighter areas, consider sun-loving options like basil or cilantro.
Can I grow microgreens in a small container or tray with poor drainage?
While it’s possible to grow microgreens in containers with poor drainage, it can lead to root rot and other issues. Consider investing in a well-draining growing medium specifically designed for microgreens or repurposing an old container with drainage holes.
What’s the ideal temperature range for growing microgreens indoors?
Most microgreen varieties prefer temperatures between 65-75°F (18-24°C) during the day and around 55-60°F (13-16°C) at night. Ensure your indoor space maintains a consistent temperature to promote optimal growth.
Can I use regular potting soil for growing microgreens, or do I need a specialized mix?
Regular potting soil can be too dense for microgreen roots, leading to slow growth and poor air circulation. Opt for a specifically designed microgreen growing medium that’s lighter, more aerated, and pH-balanced.
How often should I water my microgreen crop, and what are the signs of overwatering?
Water your microgreens when the top inch of soil feels dry to the touch. Overwatering can cause yellowing leaves, droopy stems, or a slimy texture. Check for these signs and adjust your watering schedule accordingly.