Are you eager to add some crunch to your garden? Growing delicious cabbage at home can be a rewarding experience, but it requires attention to detail. The right variety selection is crucial, as different types of cabbage thrive in specific climates and soil conditions. In this article, we’ll guide you through the process of growing mouthwatering cabbage, from choosing the perfect variety to optimizing your garden’s climate and soil requirements.
We’ll cover everything from the basics of cabbage cultivation to more advanced techniques for maximizing yields. Whether you’re a seasoned gardener or just starting out, our comprehensive guide will provide you with the knowledge you need to grow luscious, flavorful cabbage in your own backyard.
Choosing the Right Variety
With so many varieties of cabbage out there, it can be overwhelming to decide which one is right for your garden. Let’s explore the factors to consider when making your selection.
Understanding Cabbage Types
When it comes to growing cabbage, understanding the different types can be overwhelming, especially for beginners. However, knowing the characteristics of each variety will help you make informed decisions when selecting a cabbage type for personal or commercial growth.
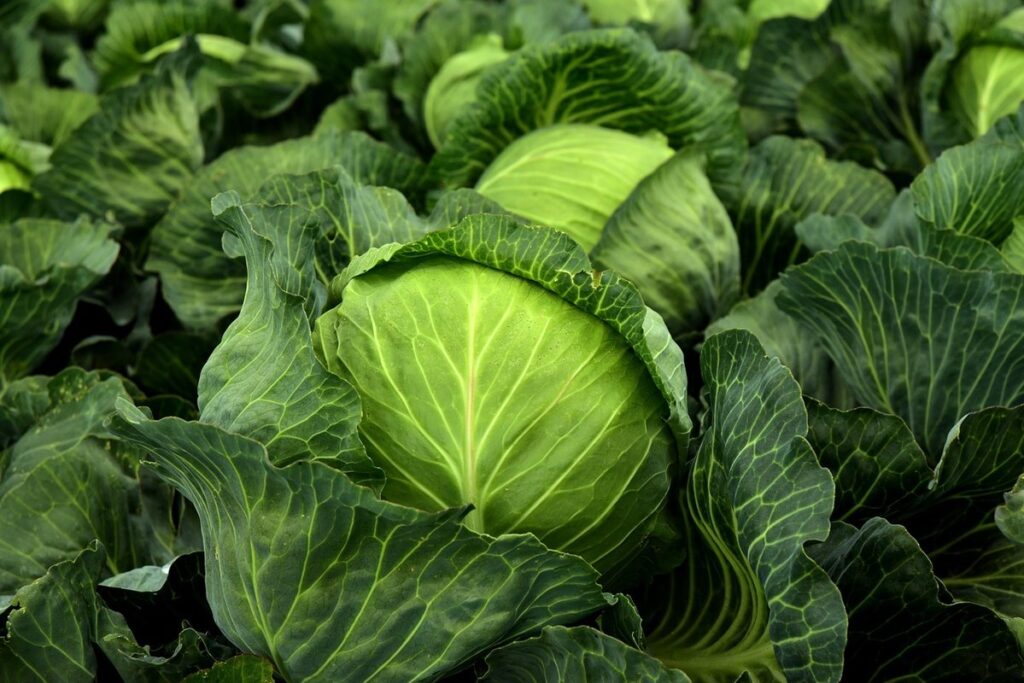
Let’s start with the main types of cabbage: green, red, savoy, and napa. Green cabbages are the most common and versatile type, suitable for slicing, shredding, and sautéing. They have dense, compact heads and are relatively easy to grow. Red cabbages, on the other hand, have a sweet, milder flavor and a beautiful red color, making them perfect for salads and slaws.
Savoy cabbage has a more delicate flavor than green or red varieties and is characterized by its crinkled leaves. It’s an excellent choice for soups and stews. Napa cabbages are also known as Chinese cabbages and have a looser, more delicate head structure compared to other types. They’re great for Asian-style dishes like stir-fries.
When selecting a cabbage variety, consider the climate and growing conditions in your area. If you live in a hot or humid region, choose heat-tolerant varieties like red or savoy cabbages. For cooler climates, green cabbages are a good choice. Ultimately, experiment with different types to find what works best for you.
Climate and Soil Requirements
When it comes to growing cabbage, understanding the ideal climate and soil conditions is crucial for optimal growth. Cabbage prefers a cool and moist climate, with temperatures ranging from 60°F to 70°F (15°C to 21°C). Avoid planting in areas where the temperature consistently drops below 40°F (4°C) or exceeds 80°F (27°C), as this can lead to bolting or poor head formation.
In terms of sunlight, cabbage requires partial shade to full sun, depending on the variety. Aim for at least six hours of direct sunlight per day, but be mindful of extreme temperatures that may damage the leaves. Soil-wise, cabbage thrives in well-draining, fertile soil with a pH between 6.0 and 7.0. Add compost or manure to improve soil fertility and structure.
To ensure consistent moisture levels, water your cabbage plants regularly, but avoid overwatering, which can lead to root rot. Aim for about one inch of water per week, either from rain or irrigation. By providing the right climate and soil conditions, you’ll be well on your way to growing healthy, delicious cabbage.
Preparing the Growing Site
Before planting your cabbage, it’s essential to prepare the growing site by loosening the soil and removing any debris that can hinder healthy growth. This simple step sets your crop up for success.
Planning and Designing the Bed
When it comes to planning and designing a cabbage-growing bed, there are several key considerations to keep in mind. The first step is to determine the ideal location for your bed, taking into account factors such as sunlight, soil quality, and accessibility.
In terms of spacing, cabbages are typically planted 12-18 inches apart, with rows spaced 24-36 inches apart. This allows for good air circulation, which can help prevent disease and promote healthy growth. You may also want to consider companion planting, pairing cabbages with other vegetables that benefit from similar growing conditions.
Some popular companion plants for cabbage include carrots, beets, and onions, as they all require similar levels of moisture and sunlight. Avoid planting cabbage near members of the Brassica family, such as broccoli or cauliflower, as these can be susceptible to similar pests and diseases.
When designing your bed, consider creating a layout that allows for easy access and maintenance. This may involve staggering your plants in rows, rather than planting them in straight lines. By taking the time to plan and design your cabbage-growing bed carefully, you can set yourself up for success and enjoy a healthy, thriving crop.
Soil Preparation and Testing
Before you start planting cabbage seeds, it’s essential to prepare the soil. Cabbage is a heavy feeder crop that requires well-draining, fertile soil with a pH between 6.0 and 7.0. If your soil is too alkaline or acidic, amend it before planting.
To determine the nutrient levels in your soil, perform a soil test. You can purchase a DIY testing kit or send a sample to a lab for analysis. A soil test will provide information on pH levels, nitrogen, phosphorus, potassium, and other essential nutrients. Based on the results, you may need to add fertilizers or lime to adjust the pH.
If your soil is too dense or compacted, consider tilling it before planting. Tilling breaks up clods and improves drainage, making it easier for roots to grow. Aerate the soil by incorporating organic matter like compost or manure to improve its structure and fertility. This will ensure that cabbage plants receive adequate nutrients and water, promoting healthy growth and a bountiful harvest.
Sowing and Transplanting
When sowing or transplanting cabbage, it’s essential to choose a location with well-draining soil and full sun. Make sure to follow these crucial steps for successful planting.
Starting Cabbage Seeds Indoors or Outdoors
When it comes to starting cabbage seeds, you have two primary options: indoors or outdoors. Both methods have their benefits and challenges.
Starting seeds indoors allows for a head start on the growing season. By sowing them 4-6 weeks before the last frost date, you can give seedlings a jumpstart on development. This method also provides protection from early spring frosts and pests. However, indoor conditions can be less than ideal, and seedlings may become leggy if not given enough light.
Directly sowing seeds in the garden is often the preferred method for cabbage. It eliminates the need for transplanting and reduces stress on the seedling. Cabbage prefers cooler temperatures and moist soil, making it an excellent choice for early spring or fall plantings. To direct sow, wait until the soil has warmed to at least 40°F (4°C). Sow seeds 1-2 inches deep and 12-18 inches apart.
Regardless of which method you choose, make sure to provide adequate light, water, and care for your seedlings. This will ensure successful germination and a healthy crop come harvest time.
Hardening Off Seedlings
Hardening off cabbage seedlings is an essential step before transplanting them outdoors. This process allows the seedlings to gradually acclimate to sunlight, wind, and temperature fluctuations, reducing the risk of shock and improving their chances of survival.
To harden off your cabbage seedlings, start by moving them from a shaded area or indoor location to a spot that receives partial sunlight for 1-2 hours a day. Gradually increase the duration over 7-10 days, allowing the seedlings to adjust to direct sunlight. Begin with short periods and extend the time as needed.
Monitor your seedlings’ response to increased exposure by looking for signs of stress such as yellowing leaves or scorched tips. Bring them back indoors if you notice any adverse reactions. Avoid placing seedlings in areas prone to strong winds, which can cause damage or uproot them.
After 7-10 days of hardening off, your cabbage seedlings should be ready for outdoor transplanting. Plant them at the same depth as they were previously and provide adequate moisture to ensure a smooth transition. This step-by-step process helps minimize transplant shock and ensures your cabbage crop gets off to a healthy start.
Caring for Your Cabbage Crop
To ensure a bountiful and healthy harvest, it’s essential to provide your cabbage crop with proper care throughout its growth stages. This section will cover the key tasks involved in maintaining your cabbage plants.
Watering and Mulching Strategies
When it comes to caring for your cabbage crop, ensuring optimal watering and mulching practices is crucial. A consistent moisture supply helps prevent stress and bolting, while suppressing weeds reduces competition for water and nutrients.
Aim to provide about 1-2 inches of water per week, either through rainfall or irrigation. Water deeply but infrequently to encourage deep root growth, rather than shallow frequent watering that can lead to weak and susceptible plants. For example, if you’re using a drip irrigation system, set it to deliver 1 gallon of water per hour for every foot of row.
Mulching around your cabbage plants is also essential. Apply a 2-3 inch layer of organic mulch such as straw, bark chips, or grass clippings. This helps retain moisture in the soil, regulate soil temperature, and suppress weeds. As an added benefit, mulch can act as a physical barrier to prevent pests like slugs and snails from reaching your cabbage plants.
Fertilization and Pest Management
As you care for your cabbage crop, it’s essential to prioritize regular fertilization and integrated pest management (IPM) strategies. These practices not only promote healthy plant growth but also prevent disease and pest infestations that can decimate your harvest.
Fertilize your cabbage plants every 4-6 weeks with a balanced fertilizer containing nitrogen, phosphorus, and potassium. This will provide the necessary nutrients for robust growth, including leafy greens and root development. For example, you can use a 10-10-10 NPK (nitrogen-phosphorus-potassium) fertilizer at a rate of 1 cup per 100 square feet.
To manage pests, adopt an IPM approach that combines physical barriers, cultural controls, and biological or chemical controls as needed. Use row covers to prevent aphids, whiteflies, and other flying insects from reaching your plants. Regularly inspect your crop for signs of pests like cabbage worms, flea beetles, or slugs. For severe infestations, use approved insecticides following the product’s instructions carefully.
Remember, a holistic approach to fertilization and pest management will yield healthier, more productive cabbage crops in the long run.
Common Problems and Solutions
As you grow your cabbage, you may encounter some common issues that can affect its health and success. Let’s tackle these problems together and find simple solutions to get your crop back on track.
Identifying and Managing Pests and Diseases
Cabbage crops can be susceptible to various pests and diseases that can significantly impact yields and overall plant health. Some common issues to watch out for include the cabbage looper caterpillar, which leaves behind a trail of silken threads and has distinctive feeding patterns on the leaves.
Another common pest is the flea beetle, characterized by its jumping behavior when disturbed and small holes in the leaves. Aphids are also prevalent, often appearing as white or black cottony patches on the stems and leaves. These pests can spread diseases such as club root and downy mildew, which manifest with symptoms like yellowing leaves and powdery white growths.
To prevent infestations, maintain a clean garden environment by removing weeds and debris. Use physical barriers to deter pests, such as fine mesh or fine netting around the plants. Crop rotation can also be an effective way to break disease cycles. For control methods, consider using neem oil or insecticidal soap for soft-bodied pests like aphids.
To combat harder-to-reach areas with pests like flea beetles and cabbage loopers, use targeted treatments such as pyrethrin sprays. Regular monitoring is essential to catch issues early and prevent them from spreading.
Troubleshooting Common Growing Issues
If you’re experiencing issues with your cabbage crop, don’t worry – it’s not uncommon! Poor germination and stunted growth are two common problems that can be caused by a variety of factors.
Poor germination can be frustrating, but often the issue lies with the seed itself. Make sure to choose high-quality seeds from a reputable supplier, as this can greatly impact the success of your crop. If you’ve checked the seed quality and it’s still not germinating well, check the soil temperature – cabbage seeds prefer temperatures between 40-70°F (4-21°C) for optimal germination.
Stunted growth can be caused by inadequate light, water, or nutrients. Ensure that your plants are receiving at least six hours of direct sunlight per day and water them consistently, but avoid overwatering which can lead to root rot. Also, consider using a balanced fertilizer specifically formulated for brassicas like cabbage. A deficiency in nitrogen, phosphorus, or potassium can all contribute to stunted growth.
Common signs of nutrient deficiencies include yellowing leaves (nitrogen), weak stems (phosphorus), and purple discoloration on the leaves (potassium). If you suspect a nutrient imbalance, test your soil pH and adjust it accordingly – cabbage prefers slightly acidic to neutral soil conditions.
Harvesting and Storing Your Cabbage Crop
Now that your cabbage crop is mature, it’s time to harvest and store your bounty properly to enjoy its fresh flavor throughout the seasons ahead. Let’s dive into the best methods for harvesting and storing cabbages.
Timing and Technique for Optimal Harvests
When it’s time to harvest your cabbage crop, getting it right can make all the difference. Not only will proper timing and technique help you avoid damage and preserve quality, but it will also ensure that your hard work pays off.
First, let’s talk about determining the ideal harvest time for your specific variety of cabbage. As a general rule, most varieties are ready to be harvested 70-100 days after planting, depending on factors like weather conditions and growth rate. However, some specialty varieties can take up to 120 days or more. To determine when it’s time to harvest, gently dig around the base of the plant with your hands, checking for the size and color of the head. A mature cabbage will be firm, dense, and have a vibrant green color.
When you’ve determined that your cabbages are ready, follow these best practices for harvesting: cut or break off the main stem at soil level, using a sharp knife or pruning shears to avoid bruising the leaves; handle the plants carefully to prevent damage to the delicate heads; and harvest in the morning, when the dew is still present on the leaves.
Storage and Preservation Methods
When it’s time to harvest your cabbage crop, you’ll want to make sure that your bounty stays fresh for as long as possible. Storage and preservation methods can help extend the shelf life of your cabbage, allowing you to enjoy it throughout the year.
One effective method is storing cabbage in a root cellar. These underground spaces maintain a consistent temperature between 32°F and 40°F (0°C and 4°C), which slows down spoilage and keeps your cabbage fresh for several months. Simply trim the leaves, wrap the heads in damp paper bags or cloth, and store them in the root cellar.
Refrigeration is another option, but it’s essential to keep the cabbage away from direct sunlight and heat sources. You can store cabbage in the crisper drawer of your refrigerator, where it will last for 1-2 weeks. Freezing and canning are also viable methods for preserving cabbage, particularly if you have a large harvest or want to enjoy it year-round. To freeze cabbage, blanch it briefly before packing it into airtight containers or freezer bags. For canning, follow safe canning practices to preserve the nutrients and flavor of your cabbage.
Tips for Advanced Growers
If you’re already a seasoned gardener, you’ll want to take your cabbage-growing skills to the next level with these expert tips and tricks. From optimal crop rotation to pest management strategies.
Experimenting with New Varieties and Growing Techniques
As an advanced grower, you’re likely looking to take your cabbage cultivation to the next level. Experimenting with new varieties and growing techniques is a great way to do just that. Have you considered trying out some of the newer hybrid varieties? These unique crosses can offer improved disease resistance, increased yields, or even more desirable flavor profiles.
For example, the ‘Savoy King’ variety boasts a stunning emerald green color and crinkled leaves, making it perfect for adding visual interest to salads. On the other hand, the ‘Early Jersey Wakefield’ offers early maturity and high yields, ideal for commercial growers. You can also experiment with different growing techniques such as hydroponics or vertical gardening to see how they impact your cabbage crop.
Some popular varieties to consider include ‘Red Express’, ‘Golden Acre’, and ‘January King’. When selecting a new variety, be sure to research its specific growing requirements and any potential disease susceptibility. Remember to also keep an eye out for innovative growing techniques that can enhance your yields and improve the overall quality of your cabbage crop.
Commercial-Scale Cabbage Production Considerations
When taking on commercial-scale cabbage production, it’s essential to consider several factors that will impact the success of your operation. Crop rotation is a crucial aspect to think about when planning for large-scale cabbage production. Cabbage belongs to the Brassica genus, which includes other crops like broccoli and cauliflower. Planting these related species in the same soil can lead to disease buildup and reduced yields. To avoid this issue, rotate your cabbage crop with other non-Brassica vegetables or legumes.
Another vital consideration is market demand. Research local demand for cabbage and ensure you’re producing varieties that meet the needs of your target market. Consider factors like seasonality, consumer preferences, and competition from neighboring farms when deciding which types of cabbage to grow.
Finally, don’t underestimate the importance of post-harvest handling. Properly storing harvested cabbage is critical to maintaining its quality and extending its shelf life. Develop a plan for cooling and packaging your harvest promptly after collection to ensure optimal freshness.
Proper planning will help you navigate these challenges and set up a successful large-scale cabbage production operation.
Frequently Asked Questions
How can I determine if my soil is suitable for cabbage cultivation?
Soil pH between 6.0 and 7.0 is ideal for cabbage growth. You can test your soil using a DIY kit or consult with a local nursery to determine its pH level. If your soil is too alkaline or acidic, amend it with lime or sulfur before planting.
What’s the optimal spacing for cabbage plants in my garden?
For optimal growth and air circulation, plant cabbage at 18-24 inches apart in rows that are 3 feet apart. This will also make it easier to mulch and maintain the soil.
How do I prevent pests like aphids and slugs from damaging my cabbage crop?
Introduce beneficial insects like ladybugs or lacewings to your garden, which prey on aphids. Use copper tape or crushed eggshells around plant stems to deter slugs. You can also use row covers to keep these pests away.
Can I grow cabbage in containers or does it require a large bed?
Yes, you can grow cabbage in containers with good drainage, using a well-draining potting mix and providing at least 6 hours of direct sunlight per day. Make sure the container is at least 12 inches deep to accommodate the plant’s taproot.
How long after planting do I need to expect my cabbage crop to mature?
The maturation period for cabbage varies depending on the variety, but most types take around 70-100 days to reach full maturity after transplanting. Monitor your plants’ growth and adjust harvesting times accordingly.