Growing your own peanut plants can be a fun and rewarding experience, but it requires some knowledge and planning. If you’re new to gardening or want to try your hand at growing peanuts for the first time, don’t worry – with the right guidance, you’ll be enjoying fresh homemade peanuts in no time! In this comprehensive guide, we’ll walk you through every step of the process, from preparing the perfect soil to providing optimal climate conditions and care techniques. We’ll cover the essential steps to take your peanut seeds from planting to harvest, so you can enjoy a bountiful yield of delicious peanuts. With our expert advice, you’ll be well on your way to becoming a successful peanut grower.
Preparing the Soil and Climate Conditions
To grow a healthy peanut plant, you’ll want to focus on creating an optimal environment by preparing your soil and adjusting the climate conditions to mimic its natural habitat. This section will guide you through that process.
Understanding Peanut Plant Requirements
When it comes to growing peanuts, understanding the ideal temperature, soil pH, and moisture levels is crucial for optimal growth. Peanuts prefer a warm climate with temperatures between 65°F and 85°F (18°C and 30°C). They thrive in temperatures above 70°F (21°C), but prolonged exposure to heat above 90°F (32°C) can lead to leaf scorch and reduced yields.
Soil pH is also an essential factor. Peanuts grow best in well-draining soil with a pH between 6.0 and 7.0. If your soil has a higher or lower pH, you may need to adjust it before planting. To check the pH level of your soil, you can purchase a DIY testing kit or send a sample to a lab for analysis.
When it comes to moisture levels, peanuts require about 20-25 inches (500-650 mm) of rainfall per year. However, if you live in an area with low rainfall, you’ll need to supplement with irrigation. It’s essential to ensure that the soil drains well to prevent waterlogged conditions that can lead to root rot and other issues. To check for suitable climate conditions in your area, consult a local nursery or extension office for guidance on growing peanuts in your region.
Choosing the Right Variety
When it comes to growing peanuts, choosing the right variety is crucial for a bountiful harvest. With over 20 varieties of peanuts to choose from, selecting the best one can be overwhelming, especially if you’re new to peanut cultivation.
Let’s start by understanding the main types of peanuts: runner, Virginia, and Spanish. Runner peanuts are widely adaptable and suitable for cooler climates, making them an excellent choice for gardeners in areas with shorter growing seasons. They mature relatively quickly, typically within 120 days, and produce a higher yield per acre.
Virginia peanuts, on the other hand, thrive in warmer climates and require more time to mature, taking around 150-160 days to ripen. They are often preferred by commercial farmers due to their high oil content and larger kernels. Spanish peanuts are relatively low-maintenance and can tolerate drought conditions, but they tend to be more sensitive to cooler temperatures.
Before selecting a variety, consider your climate, soil type, and desired harvest time. For example, if you live in an area with mild winters and hot summers, Virginia or Spanish peanuts might be the better choice. But if you have limited space and want to speed up the process, runner peanuts are an excellent option.
Planting Peanut Seeds
When planting peanut seeds, it’s essential to choose a location that receives full sun and has well-draining soil. Follow these steps for successful seed sowing.
Sowing Seeds at the Right Time
When it comes to growing peanuts, timing is everything. The best time to sow seeds depends on various factors like frost dates, daylight hours, and temperature fluctuations. In regions with mild winters, you can plant peanut seeds as early as February or March, about 8 weeks before the last frost date. This allows the plants to mature before the heat of summer sets in.
In areas with cooler springs, it’s essential to wait until the soil has warmed up to at least 65°F (18°C). You can calculate your optimal planting date by checking the average temperature and frost dates for your area. For example, if you live in a region with an average last frost date of April 15th, plant your peanut seeds around March 25th.
Keep in mind that peanuts are sensitive to cold temperatures and will rot if exposed to prolonged periods of moisture when the soil is still cool. By planting at the right time, you’ll give your peanuts the best chance to thrive and produce a bountiful harvest.
Preparing the Soil for Planting
Preparing the soil for peanut seed sowing is an essential step that often gets overlooked, but it’s crucial for a bountiful harvest. Before you start planting, make sure to till the soil at least 8-10 inches deep to loosen and aerate it. This will help break up any compacted layers, allowing roots to grow deeper and water to penetrate more easily.
Next, fertilize your soil with a balanced fertilizer that contains nitrogen, phosphorus, and potassium (NPK). Peanuts are legumes and fix their own nitrogen through symbiotic relationships with rhizobia bacteria in the soil. However, additional nutrients will promote healthy growth and prevent deficiencies. For optimal results, apply 10-20 pounds of NPK per acre.
Drainage is also critical when growing peanuts. Ensure your soil has a slight slope to prevent waterlogging, which can lead to root rot and other problems. If you have heavy clay or sandy soils, consider adding organic matter like compost or well-rotted manure to improve its structure and water-holding capacity.
Caring for Young Peanut Plants
To keep your young peanut plants thriving, it’s essential to establish a strong foundation with proper care and attention during their first few weeks of growth. This is where consistent watering, fertilization, and pruning come into play.
Watering and Irrigation Strategies
When caring for young peanut plants, maintaining consistent moisture levels is crucial during their initial growth stages. Inadequate watering can lead to stress, stunted growth, and increased susceptibility to disease.
One effective way to maintain consistent moisture is through drip irrigation systems. These systems deliver water directly to the roots of the plant, reducing evaporation and runoff. This method also helps prevent fungal diseases that thrive in moist conditions. If you’re using a drip irrigation system, ensure it’s set up to provide about 1-2 gallons of water per hour for young peanut plants.
Another option is using sprinkler systems, which are more suitable for larger areas or for times when rainwater collection isn’t an option. However, be cautious not to overwater, as this can lead to root rot and other issues. When adjusting watering schedules based on weather conditions, consider the following:
* Water every 2-3 days during hot, dry spells.
* Reduce watering frequency by 50% if it rains within a week.
* Increase watering to every day in extremely dry or windy conditions.
Monitor your plants’ response to these adjustments and adjust further as needed.
Managing Pests and Diseases
As you nurture your young peanut plants, it’s essential to keep an eye out for potential pests and diseases that can cause significant damage. Aphids and whiteflies are common culprits, feeding on the plant’s sap and weakening its defenses. These tiny insects can multiply rapidly, so identify them early by checking for curled or distorted leaves.
To control aphid infestations, try using neem oil or insecticidal soap. These organic methods disrupt the life cycle of these pests without harming beneficial insects. For whiteflies, introduce natural predators like ladybugs or lacewings to your garden, as they feed on whitefly eggs and larvae.
Fungal infections are another concern for peanut plants, often caused by overwatering or humid conditions. Look for powdery mildew, leaf spot, or root rot symptoms. To prevent fungal diseases, ensure good air circulation around your plants and avoid watering at night. If an infection does occur, treat with a fungicide specifically designed for peanuts.
By monitoring your plants regularly and implementing these preventative measures, you’ll be better equipped to manage pests and diseases, giving your young peanut plants the best chance to thrive.
Fertilizing and Pruning Peanut Plants
Now that you’ve got your peanut plants growing, it’s time to think about fertilizing and pruning them for optimal yields. We’ll walk you through the best practices for each step in this process.
Nutrient Requirements for Healthy Growth
When it comes to growing healthy peanut plants, providing them with the right nutrients is crucial. Peanut plants require a balanced diet of essential macronutrients and micronutrients to thrive.
Nitrogen (N), phosphorus (P), and potassium (K) are the primary macronutrients that promote plant growth. Nitrogen is responsible for leaf development and green color, while phosphorus helps with root development and flower formation. Potassium, on the other hand, aids in overall plant health and resistance to diseases. A general rule of thumb is to apply a balanced fertilizer containing 10-10-10 (nitrogen-phosphorus-potassium) NPK ratio at planting time and again after 30 days.
To determine if your plants need additional fertilizer, look for signs of nutrient deficiencies such as yellowing leaves, stunted growth, or poor fruit production. A soil test can also help identify any potential nutrient gaps. Based on the results, you can adjust your fertilization schedule accordingly. For example, if the test reveals low phosphorus levels, apply a high-phosphorus fertilizer to promote root development and flower formation.
Keep in mind that excessive fertilizer application can harm your plants, so it’s essential to follow recommended guidelines and monitor your plants’ response to avoid over-fertilizing.
Pruning Techniques for Optimal Yield
Pruning peanut plants is an essential step in maximizing their yield and overall health. Not only does pruning help to control the plant’s shape and promote healthy growth, but it also reduces the risk of disease by removing weak and susceptible areas.
Tip-pruning involves cutting off the tips of the branches to encourage bushy growth and increase yields. This technique should be done when the plants are around 12-18 inches tall, typically in late spring or early summer. By pruning the tips, you’ll stimulate the plant to produce more lateral shoots, which will lead to a more robust harvest.
Hedge-tying is another effective pruning technique for peanut plants. This involves tying the stems together with twine or wire to create a trellis-like structure that supports the plant’s growth. Hedge-tying helps to promote air circulation, which reduces disease risk and promotes even ripening of the peanuts.
Timing is crucial when it comes to pruning peanut plants. For optimal results, prune your plants every 2-3 weeks during the growing season to maintain a balanced shape and encourage maximum yields.
Monitoring and Maintaining Peanut Plants
Regularly checking on your peanut plants is crucial for their health, so let’s dive into monitoring and maintaining these little guys to ensure a bountiful harvest. This section covers the key tasks and checks to keep an eye out for.
Tracking Growth Stages and Yield Potential
As you continue to care for your peanut plants, it’s essential to monitor their growth stages and estimate potential yields. This will help you determine when to harvest and ensure a bountiful crop.
The first stage of flowering typically occurs around 60-70 days after sowing. You’ll notice small yellow flowers emerging from the leaf axils, which will eventually develop into pods. Keep an eye on plant height – if it’s over 2 feet tall, you can expect higher yields.
As the plants mature, observe pod formation. Check for well-filled pods with a good number of kernels. A healthy peanut plant should produce around 30-50 pods per square foot. You can also estimate yield potential by checking the color and shape of the plants’ stems. Green stems indicate more growth, while yellowing or brown stems may signal maturity.
Keep track of these factors to predict your crop’s yield potential. This will help you plan for harvesting and storage. Remember to regularly inspect your peanut plants, and don’t hesitate to consult with a gardening expert if you have any concerns about their progress.
Adapting to Climate Extremes and Other Challenges
As a peanut grower, you’re likely no stranger to dealing with unpredictable weather patterns and extreme climate conditions. Droughts, floods, and temperature fluctuations can be particularly challenging for this crop, which requires specific growing conditions to thrive. When faced with these challenges, it’s essential to adapt quickly and take proactive measures to minimize losses.
One effective strategy is to diversify your water sources and implement efficient irrigation systems. This could involve installing drip irrigation or using mulch to retain moisture in the soil. For example, a study by the University of Georgia found that peanut yields increased by 20% when farmers used conservation tillage and cover crops to improve soil health.
In addition to managing water resources, it’s crucial to monitor temperature fluctuations closely. When faced with extreme heat or cold, take steps to protect your plants, such as providing shade or using row covers to regulate temperature. By being prepared for the unexpected and taking proactive measures, you can reduce the impact of climate-related challenges on your peanut crop.
It’s also important to maintain a strong root system by incorporating organic matter into your soil and avoiding over-tillage. This will help your plants absorb nutrients more efficiently and withstand extreme weather conditions better.
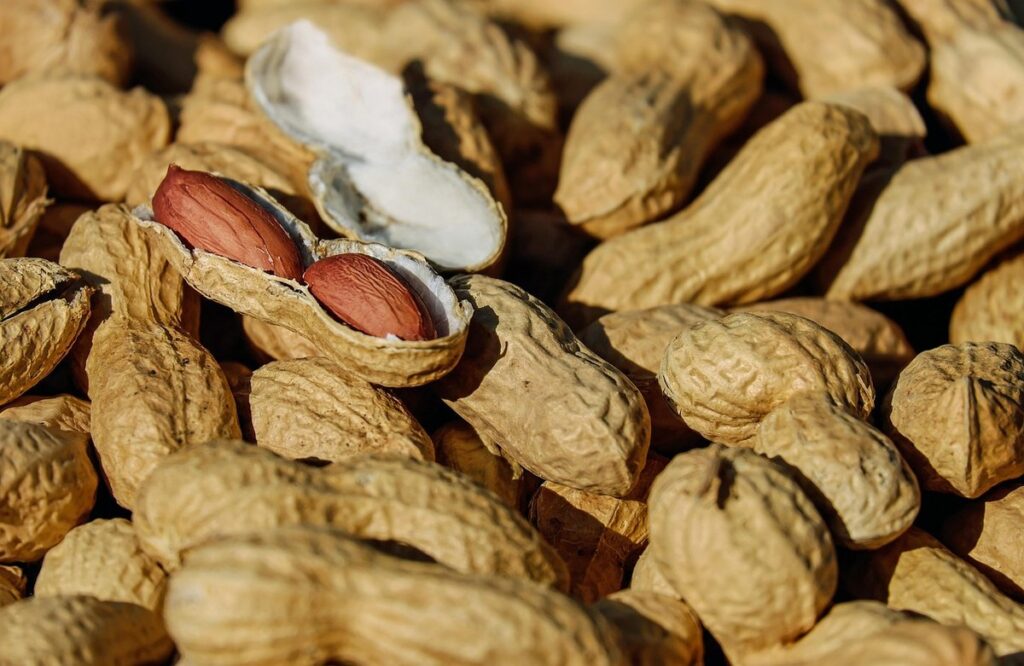
Harvesting and Processing Peanut Crops
Now that you’ve successfully grown your peanut crop, it’s time to learn how to harvest and process them for a delicious yield. This is where patience meets precision as you bring in the fruits of your labor.
Timing the Perfect Harvest
Determining when to harvest peanut plants is crucial for maximizing yields and quality. As the crop approaches maturity, it’s essential to monitor several factors. Pod color is one key indicator of readiness; peanuts typically turn a deep yellow or brown hue as they mature.
However, color alone isn’t enough – you should also check for dryness. Gently dig around the plants with your fingers or a small tool and assess the moisture level. When the pods are dry and brittle, it’s time to harvest.
Consider the yield potential as well; peanut crops usually reach their peak production between 120 to 130 days after sowing. If you notice that the majority of pods have reached maturity but some still look green, don’t delay – it’s better to harvest early rather than risk losing your entire crop due to excessive moisture.
To ensure an optimal harvest time, inspect your peanut plants at least once a week as they approach maturity. This proactive approach will help you catch any signs that might indicate the crop is ready for harvesting.
Techniques for Efficient Harvesting and Storage
Efficient harvesting and storage are crucial steps in growing high-quality peanuts. When it comes to mechanical harvesting methods, peanut combines are often used due to their ability to cut the vines close to the ground. This approach helps minimize waste and reduces labor costs. However, manual harvesting is still practiced in some regions where mechanized equipment is not readily available.
For storage, proper drying and curing techniques are essential to prevent moisture-related issues that can lead to spoilage or mold growth. Drying peanuts to a moisture level below 10% is critical for maintaining their flavor and texture. To achieve this, peanut farmers often use specialized dryers or simply air-dry the peanuts in open areas.
It’s equally important to handle harvested peanuts with care to prevent damage during transportation. Peanut farmers should store them in airtight containers to protect against pests and moisture. Regular cleaning of storage facilities is also necessary to maintain hygiene standards.
Frequently Asked Questions
How can I ensure my peanut plants receive adequate moisture without overwatering?
Make sure to check the soil daily, using a finger test or moisture meter to determine if it’s dry enough for watering. Water when the top inch of soil feels dry, and avoid getting water on the leaves to prevent fungal diseases.
What are some common pests that target peanut plants, and how can I manage them?
Common pests include aphids, whiteflies, and spider mites. Use neem oil or insecticidal soap as a first line of defense against these pests. Regularly inspect your plants for signs of infestation, such as yellowing leaves or sticky substance on the leaves.
Can I grow peanuts in containers, or do they require a large garden bed?
Peanuts can be grown in containers, but ensure the container is at least 12 inches deep and has good drainage holes. Use a high-quality potting mix specifically designed for legumes, and follow regular watering and fertilizing schedules.
How do I know when my peanut plants are ready to harvest?
Check for mature pods by gently tugging on them. When the pods come off easily, it’s time to harvest. Be careful not to damage the stems or roots during harvesting.
What can I use as a natural fungicide to prevent diseases in my peanut crop?
Neem oil is an effective and natural fungicide that can be used against common fungal diseases like powdery mildew and leaf spot. Mix neem oil with water according to the label instructions and spray it on your plants regularly for optimal protection.
Can I grow multiple varieties of peanuts together, or should they be separated?
Growing multiple varieties of peanuts together can lead to cross-pollination, affecting yields and quality. It’s recommended to separate different varieties by at least 10 feet to prevent cross-pollination and ensure better results.