Germinating oak tree acorns can be a fun and rewarding experience, but it requires some patience and knowledge. If you’re interested in growing your own oak tree from scratch, successfully germinating an acorn is the first crucial step. Oak trees are not only beautiful additions to any landscape, but they also provide numerous environmental benefits. However, many people struggle with getting their acorns to sprout. In this article, we’ll take a closer look at how to select and prepare your acorns for optimal germination. We’ll cover the importance of choosing the right type of oak tree, as well as the best methods for stimulating growth. With our guide, you can learn how to successfully germinate your oak tree acorns and set yourself up for a healthy and thriving tree in the years to come.
Choosing the Right Acorns
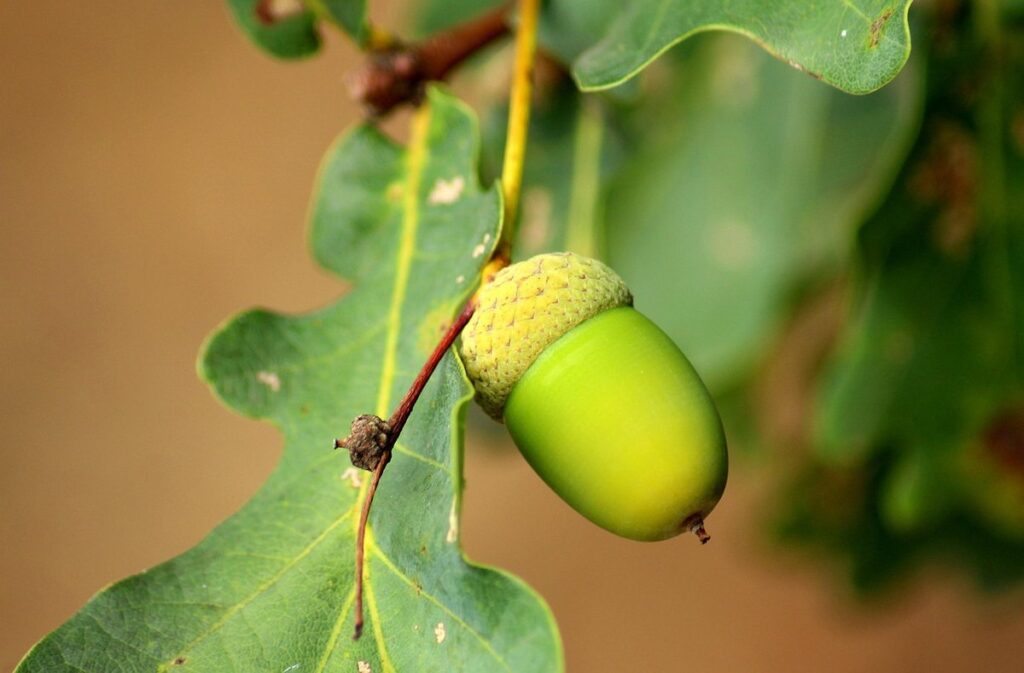
When it comes to germinating oak tree acorns, selecting the right ones is crucial for success. Look for fresh, plump acorns with a healthy cap and no signs of mold or rot.
Selecting Healthy Acorns
When selecting healthy acorns for germination, it’s essential to inspect them carefully. Start by looking for freshness – choose acorns that are plump and have a smooth, intact cap. Avoid those with cracks or signs of drying out, as these can indicate spoilage.
Next, consider the size and shape of the acorn. Healthy oak tree acorns typically range from 1 to 2 inches in length and have a rounded or elliptical shape. Be wary of smaller or irregularly shaped acorns, as these may not contain viable seeds.
It’s also crucial to select acorns from a mature oak tree – ideally one that is at least 10 years old. This ensures the acorn has had time to develop properly and contains the necessary genetic material for healthy growth. Avoid collecting acorns from young trees or those under stress, as these may not produce viable seedlings.
When in doubt, choose acorns with a prominent “eye” – this indicates the presence of a developing embryo. With practice, you’ll become skilled at spotting healthy acorns and selecting the best ones for germination.
Avoiding Infested or Diseased Acorns
When selecting acorns for germination, it’s crucial to inspect them carefully for signs of infestation or disease. Fungus growth can appear as white, cottony patches on the surface of the acorn, while insect damage might manifest as holes or chewed areas.
Some common pests that target acorns include squirrels, mice, and insects like weevils. Check the cap end of the acorn for any signs of gnawing or damage. If the acorn feels soft or mushy to the touch, it’s likely been affected by a fungal disease.
To avoid diseased or infested acorns, inspect them visually and physically before purchasing or collecting. Look for uniform coloration, a hard shell, and a clean appearance. It’s also essential to store acorns in a cool, dry place to prevent further damage from moisture.
If you do encounter damaged acorns, consider sorting through the batch and setting aside healthy ones. Discard any visibly infested or diseased specimens, as these can affect germination rates and overall seed quality. By taking this extra step, you’ll be more likely to achieve successful germination of your oak tree acorns.
Preparing the Acorns for Germination
Now that you have your acorns, it’s time to prepare them for germination. This step is crucial, so let’s dive into the details of how to crack and soak your oak tree seeds.
Cleaning and Soaking
Before you can successfully germinate your oak tree acorns, it’s essential to prepare them for the process. This involves cleaning and soaking the acorns to remove dirt and debris, as well as rehydrating and softening the outer shell.
To clean the acorns, start by gently scrubbing them with a soft-bristled brush or a toothbrush under running water to dislodge any loose dirt and debris. For more stubborn stains or buildup, you can soak the acorns in a solution of 1 part white vinegar to 10 parts water for about an hour before rinsing thoroughly.
Once cleaned, it’s time to soak the acorns. Fill a container with water and add the cleaned acorns. The goal is to rehydrate and soften the outer shell to facilitate germination. A general rule of thumb is to soak the acorns in cold water for 24-48 hours or in warm water (around 70°F/21°C) for 12-24 hours. Monitor the water level and change it as needed to prevent mold growth. This soaking process helps break down some of the outer shell, making it easier for the embryo inside to sprout.
Stripping the Caps
When it comes to germinating oak tree acorns, stripping the caps is an essential step that requires care and attention. The caps, also known as the hulls or cups, are hard outer covers that protect the delicate embryo inside the acorn. Removing them correctly can be a bit tricky, but don’t worry, we’ll guide you through it.
To strip the caps by hand, start by gently grasping the acorn between your thumb and index finger. Hold the acorn firmly, but not too tightly, as this can damage the embryo. Next, pinch or twist the cap slightly until it begins to separate from the rest of the acorn. Continue pinching or twisting until the cap comes off completely.
Using a tool is another effective way to remove caps without damaging the embryo. You can use a pair of tweezers, a small knife or even a specialized oak acorn cap remover. Hold the tool firmly and carefully pry or twist the cap away from the rest of the acorn. Remember to work gently and avoid applying too much pressure, which can damage the delicate inner tissues.
When removing the caps, make sure to handle them carefully, as they can be brittle and prone to breaking. By taking your time and using the right technique, you’ll successfully strip the caps from your oak tree acorns, preparing them for germination.
Starting the Germination Process
Now that you’ve collected and prepared your oak acorns, it’s time to start the germination process, a crucial step in growing these majestic trees from seeds. Follow these steps carefully to ensure success.
Using Water as a Germination Medium
Using water as a germination medium is an effective way to encourage oak tree acorns to sprout. This method allows for controlled humidity and temperature conditions, which are essential for germination. To use water effectively, you’ll need to determine the right ratio of water to acorn. A common starting point is to place one or two acorns in a cup or container filled with about 1-2 cups of water.
It’s crucial to maintain consistent water levels throughout the process. Monitor the water level daily and refill as needed to prevent the water from becoming too low. Aim for a depth of about 0.5-1 inch below the top of the acorn. This ensures that the radicle (primary root) has enough space to grow without being exposed to dry air.
A good rule of thumb is to change the water completely every 2-3 days to prevent bacterial growth and maintain optimal conditions for germination. By following this method, you’ll be able to provide your acorns with a stable environment that promotes healthy growth and development. This approach also allows for easy monitoring of the germination process, giving you early indication of success or potential issues.
Using Alternative Germination Methods (e.g., Sand, Soil)
If you’re looking for alternative germination methods to water, you can consider using sand or soil as a medium. One option is to use a mixture of sand and perlite or vermiculite, which provides excellent drainage and helps prevent fungal growth.
To try this method, fill a container with the prepared mix and gently place the acorns on top, leaving about 1-2 inches between each one. Keep the mix consistently moist but not waterlogged, as this can lead to rot. The sand will help regulate temperature fluctuations and provide better aeration for the developing roots.
Another option is using soil specifically designed for seed germination, such as peat moss or coconut coir-based mixes. These types of soil retain moisture well without becoming too soggy. Make sure to choose a sterile potting mix to minimize contamination risks.
Keep in mind that these methods may take longer than water-germinated acorns, often 2-4 weeks longer. Nonetheless, they offer an interesting alternative for those who prefer or need it.
Providing Optimal Conditions for Germination
To successfully germinate oak tree acorns, you’ll need to replicate their natural environment by providing optimal conditions that mimic those found in the wild. This means carefully controlling factors like temperature and moisture.
Temperature Control
When it comes to germinating oak tree acorns, maintaining optimal temperature conditions is crucial for success. Oak trees typically require a cool winter chill period to break dormancy, but during the actual germination process, they prefer temperatures between 65°F and 75°F (18°C and 24°C). Avoid placing your acorn containers near heating vents, fireplaces, or direct sunlight, as this can cause overheating.
To maintain consistent temperatures, consider using a thermometer to monitor the temperature in your propagation area. You can also use a heat mat or a warm location like a sunny windowsill to provide warmth without overheating. Keep the temperature consistent by avoiding extreme fluctuations, which can shock the developing seedling.
Some oak species are more sensitive to temperature extremes than others. For example, white oaks tend to be more tolerant of cooler temperatures than red oaks. Research the specific needs of your oak tree variety to ensure you’re providing the best conditions for germination.
Light Exposure
When it comes to germinating oak tree acorns, providing optimal light exposure is crucial for successful seedling growth. Oak trees are typically found in woodland environments where they’re exposed to dappled sunlight filtering through the canopy above. However, when germinating indoors, you’ll want to replicate this natural light pattern as closely as possible.
Direct sunlight can be beneficial during the initial stages of germination, but it’s essential to avoid placing acorns directly under intense sunlight for extended periods. This is because direct sunlight can cause the seed coat to dry out and prevent water from penetrating, ultimately hindering germination. Instead, opt for bright, indirect light that’s similar to a north-facing window.
Aim for 4-6 hours of direct sunlight per day or use grow lights with an intensity of around 1,000-2,000 lux. This will provide the necessary photoperiod for germination without causing damage to the seed coat. Monitor your acorns’ progress and adjust their light exposure accordingly – you may find that they require less intense lighting as they mature.
Monitoring and Maintaining the Germination Process
Now that you’ve successfully germinated your oak tree acorns, it’s essential to monitor their progress closely to ensure healthy growth and development. Regular checks will help you identify potential issues before they become major problems.
Checking for Signs of Growth
As you wait for your oak tree acorns to germinate, it’s essential to regularly check on them for signs of growth. This is a critical step in the process, as it allows you to identify any potential issues early on and take corrective action. Start by looking for root development – if the acorn has developed a small white or light brown root, this is a good indication that germination is underway.
Next, inspect the top of the acorn for signs of sprouting. You should start to see a small green shoot emerging from the top, which will eventually grow into a taproot and then a stem. If you notice any mold, mildew, or rot on the surface, it’s likely that the acorn has been contaminated and may not germinate successfully.
If you’re unsure whether an acorn is showing signs of growth, gently dig around it with a blunt instrument to check for root development. Be careful not to damage the delicate roots or disturb the surrounding soil. By keeping a close eye on your acorns, you’ll be able to identify any problems early on and take action to prevent them from affecting the germination process.
Transplanting the Seedlings
When you’ve successfully germinated your oak tree acorns and they’re showing their first set of leaves, it’s time to transplant them into a larger container or directly into the ground. This is an exciting milestone, but it requires careful attention to ensure the seedlings’ continued growth.
Timing is crucial when transplanting seedlings. Wait until they have at least two sets of leaves and are about 2-3 inches tall. Transplanting too early can cause shock and damage to the roots. Once your seedling has reached this stage, choose a location with partial shade and well-draining soil. Oak trees prefer full sun to partial shade, but young seedlings need protection from intense sunlight.
When transplanting, gently remove the seedling from its container or nursery pot, taking care not to disturb the roots. If you’re planting directly into the ground, dig a hole about twice as wide and just as deep as the root ball. Gently place the seedling in the hole, firming the soil around it to secure the roots. Water thoroughly after transplanting, but avoid overwatering which can cause rot.
It’s also essential to harden off your seedlings before transplanting them outdoors. This process involves gradually exposing them to outdoor conditions over a period of 7-10 days. Start by moving them to a shaded area for a few hours a day and gradually increase the duration and exposure to direct sunlight.
Common Challenges and Troubleshooting
Don’t worry if things don’t go as planned right away; we’ll walk you through some common issues that can arise when trying to germinate oak tree acorns.
Dealing with Low Germination Rates
Dealing with low germination rates can be frustrating, especially when you’re excited to see your oak tree acorns sprout. But don’t worry, it’s not uncommon for this to happen. There are several reasons why germination rates might be lower than expected.
One possible cause is the quality of the acorns themselves. If they’re old, moldy, or damaged in any way, they may not germinate well. Make sure you’re using fresh acorns and inspect them carefully before planting.
Another issue could be the storage conditions. Acorns need to stay moist but not waterlogged during the drying process, which can affect their viability. If you’ve stored them in a humid environment or forgotten about them for too long, this might impact germination.
To improve outcomes, try experimenting with different storage methods, such as air-drying or storing them in an airtight container with silica gel to control humidity. You can also try stratifying your acorns by placing them in the refrigerator for 30-60 days before planting. This can help break any dormancy and increase germination rates.
Managing Pests and Diseases
As you nurture your germinated oak tree acorns, it’s essential to be on the lookout for pests and diseases that can harm them. Oak trees are susceptible to various issues, from fungal infections to insect infestations.
Some common pests that target oak tree acorns include rodents, such as mice and squirrels, which can damage or eat the acorns. To prevent this, you can store the acorns in a secure location, such as a rodent-proof container or a secure outdoor enclosure. You can also use repellents like hot pepper spray or commercial rodent deterrents to keep these pests away.
Diseases like oak wilt, root rot, and powdery mildew can affect germinated oak tree acorns. To prevent fungal infections, ensure the growing medium is well-draining and not waterlogged. You can also apply fungicides specifically designed for seedlings or young trees. Regularly inspect your plants for signs of disease, such as yellowing leaves or black spots on the bark.
Prevention is key when it comes to managing pests and diseases. By taking proactive steps, you can reduce the risk of damage to your oak tree acorns and promote healthy growth from the start.
Frequently Asked Questions
What if my acorns don’t germinate even after following the preparation steps?
It’s not uncommon for some acorns to fail germination, even with proper care. Check if your acorn storage environment is too dry or has extreme temperature fluctuations, which can affect germination rates. Make sure you’re providing optimal conditions for germination, including adequate light and moisture. If issues persist, consider using alternative germination methods, such as sand or soil.
Can I use acorns from different oak tree species for germination?
While it’s technically possible to use acorns from various oak tree species, it’s essential to note that some species may not be suitable for germination or may have unique requirements. Stick with species that are well-documented for successful germination, such as white oak (Quercus alba) or red oak (Quercus rubra). Research the specific needs of your chosen species and ensure you’re using acorns from a healthy tree.
How do I know when to transplant my seedlings?
Transplanting should occur when seedlings have 2-3 sets of leaves, indicating they’ve developed a robust root system. Keep an eye out for signs like leaf growth rate slowing down or becoming leggy, which can be indicative of the need for more space. Harden off your seedlings by gradually exposing them to outdoor conditions before transplanting.
Can I use household items as a germination medium?
While it might seem convenient, using household items as a germination medium is not recommended. These materials often lack the necessary nutrients and water-holding capacity for optimal germination. Stick with purpose-designed germination mediums or those specifically designed for plant growth. If you’re interested in exploring alternative methods, research specialized sand or soil mixes.
What if I notice pests or diseases on my acorns during preparation?
Act quickly to address any signs of infestation or disease! Isolate the affected acorn and treat it with a gentle fungicide solution or insecticidal soap. Disinfect your hands, tools, and workspace thoroughly after handling the infected material to prevent further contamination. If issues persist, consider using sterile equipment and environment for future germination attempts.