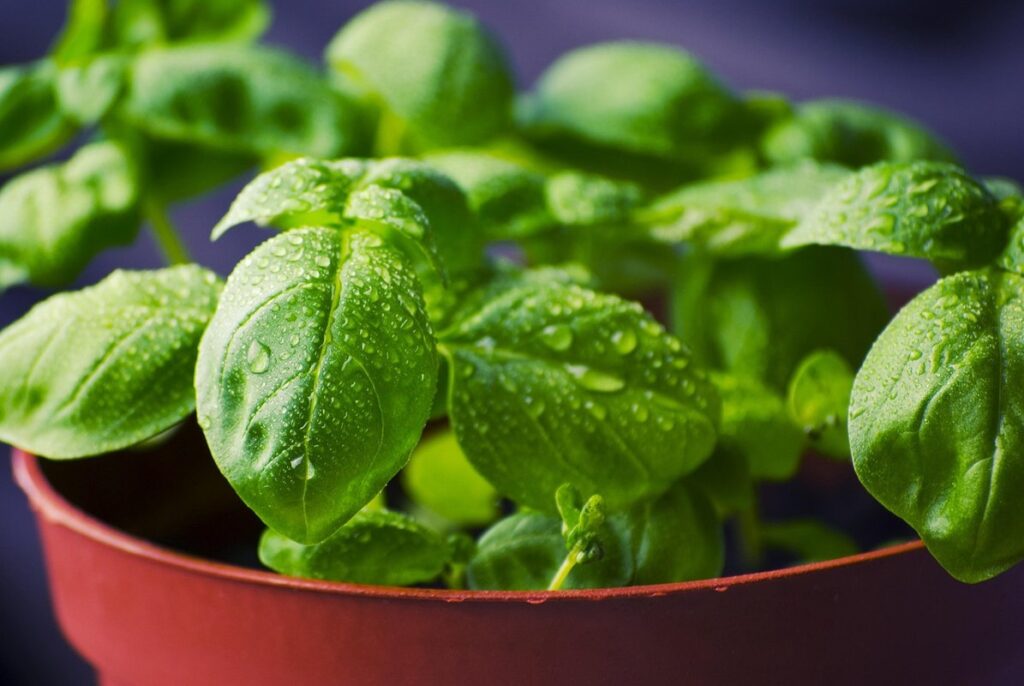
Clipping your basil plants can be a delicate task, but with the right techniques, you’ll be rewarded with bushy growth, vibrant green leaves, and an abundance of fresh flavor. Whether you’re growing sweet Genovese or spicy Thai basil, pruning is essential to keep your plant healthy and thriving. However, many gardeners struggle to clip their basil effectively, leading to wilted stems, weak growth, and a disappointing harvest.
In this article, we’ll share expert tips on how to clip your basil like a pro. From choosing the right pruning shears to post-clipping care and advanced propagation methods, we’ve got you covered. By mastering these techniques, you’ll not only improve your basil’s appearance but also encourage new growth and maximize its flavor potential. So, let’s dive in and explore the art of clipping basil like a seasoned gardener!
Choosing the Right Tool for Clipping Basil
Now that you know when and how to clip your basil, it’s time to choose the right tool for the job. A good pair of scissors or pruning shears will make all the difference in your gardening experience.
Types of Pruning Shears for Basil
When it comes to clipping basil, having the right pruning shears can make all the difference. There are several types of pruning shears available, and each has its own set of pros and cons.
Handheld pruning shears are a popular choice for gardeners. They’re compact, easy to use, and affordable. However, they can be tiring to use if you have a large basil plant or need to prune frequently. Electric pruning shears, on the other hand, offer more power and efficiency. They’re ideal for heavy-duty pruning and can save time in the long run. However, they can be expensive and may require batteries or charging.
Another option is cordless pruning shears, which offer a balance between handheld and electric models. They’re portable and lightweight, making them perfect for gardening on-the-go. Some models even come with adjustable handles and ergonomic grips for comfort during extended use.
When choosing pruning shears for basil, consider the size of your plant, the frequency of pruning, and your personal preference for ease of use and maneuverability.
Blade Material and Size Considerations
When it comes to selecting pruning shears for clipping basil, the type of blade material and size are crucial considerations. A high-quality pair of pruning shears will make a big difference in making the task more efficient and less tiring.
Stainless steel blades are an excellent choice for pruning shears as they are resistant to rust and corrosion, ensuring that your tools remain in good condition even after repeated use. They also maintain their edge well and can withstand the rigors of regular clipping. Titanium-coated blades offer added durability and resistance to wear and tear but may be more expensive.
In terms of size, choose pruning shears with a curved blade that is around 3-4 inches long. This length allows for precision cutting without having to strain your hand or wrist. Look for shears with a comfortable grip and weight distribution that feels balanced in your hand. When selecting the right blade material and size, consider how often you plan to use them and what type of basil you’re growing. A good pair of pruning shears will make clipping basil a breeze and help you maintain healthy plants throughout the season.
Preparing Your Basil Plant for Clipping
Before you start clipping, it’s essential to prepare your basil plant by ensuring it has enough light and water, as these factors will greatly affect its growth. A happy basil plant makes all the difference in getting a fresh harvest.
Watering and Fertilization Before Clipping
Before you start clipping your basil plant, it’s essential to ensure it’s receiving the right amount of water and nutrients. Proper watering and fertilization are crucial for maintaining a healthy and thriving basil plant.
When it comes to watering, aim to provide about 1-2 inches of water per week, either through rainfall or irrigation. Be cautious not to overwater, as this can lead to root rot and other issues. Check the soil moisture by inserting your finger into the soil up to the first knuckle; if the soil feels dry, it’s time for a drink.
As for fertilization, use a balanced fertilizer that’s rich in nitrogen, phosphorus, and potassium (NPK). A 10-10-10 or 20-20-20 ratio is ideal for basil plants. You can apply fertilizer once a week, but make sure to dilute it according to the manufacturer’s instructions.
Some good options include fish emulsion, compost tea, and liquid kelp meal. These natural fertilizers promote healthy growth and prevent pest infestations. Always read the label and follow the recommended application rates to avoid burning your plant’s roots.
By maintaining a consistent watering schedule and providing essential nutrients through fertilization, you’ll be able to harvest your basil regularly and enjoy its fresh flavor all season long.
Pruning to Promote Healthy Growth
When you prune your basil plant regularly, it may seem counterintuitive that this would promote new growth. However, pruning actually stimulates the plant to produce more shoots and leaves, encouraging a bushy development that’s perfect for clipping.
By removing spent flowers and trimming back leggy stems, you’re essentially telling your basil plant to focus its energy on producing fresh new growth rather than seed production. This technique is called “tip pruning,” where you snip off the top sets of leaves to encourage branching. Not only does this promote air circulation within the plant, but it also helps prevent disease by reducing moisture retention and promoting even drying.
In fact, studies have shown that regular pruning can increase basil yields by up to 20%. To maximize these benefits, make sure to prune your basil regularly throughout its growth cycle – ideally every 7-10 days during peak growing seasons. This will keep the plant healthy, productive, and bushy, making it perfect for clipping and using in a variety of dishes.
The Clipping Process: Techniques and Tips
When it comes time to clip your basil, mastering a few simple techniques will help you get the best harvest from your plant. In this next part of our guide, we’ll cover essential clipping strategies and expert tips.
Basic Clipping Technique for Basil Leaves
To clip individual leaves or stems from your basil plant effectively, follow these steps. Begin by identifying the desired leaf or stem, taking care to select those with the largest and most vibrant leaves.
Next, grasp the stem between your thumb and index finger, placing the stem at a 45-degree angle relative to the node (the joint where the leaf meets the stem). Make a clean cut just above the node using a sharp pair of scissors or pruning shears. Cut at an angle rather than straight across to promote new growth.
When clipping individual leaves, consider removing any weak or discolored leaves, which will direct the plant’s energy towards producing more robust and healthy foliage. If you’re harvesting multiple stems, space them about 1-2 inches apart along the stem. This technique encourages the basil plant to produce more branches and maintain its overall shape.
How to Clip the Top of the Plant
When basil plants start producing flower buds, it’s essential to clip them off to direct energy towards leaf production. This process is called “pinching” and can be done at various stages of the growing season.
To pinch or clip the top growth, you’ll need a pair of clean scissors or pruning shears. Inspect your plant for the top set of leaves, which should have two small leaves emerging from the joint below them. Identify the weakest or most leggy stem, and snip it off just above a node (where a leaf meets the stem). This will encourage the plant to focus its energy on producing new leaves rather than seeds.
Timing is crucial when pinching your basil plant. Perform this task during the vegetative growth phase, usually around 6-8 weeks after transplanting. You can also pinch off flower buds as they appear throughout the season. Regular pinching will keep your plant bushy and promote leaf production. By redirecting energy towards leaves, you’ll enjoy a continuous supply of fresh basil for cooking and other purposes.
Post-Clipping Care: Tips for Healthy Regrowth
Now that you’ve clipped your basil, it’s time to focus on nurturing its healthy regrowth. We’ll cover essential tips to promote new growth and prevent common problems.
Aftercare Instructions for Clipped Basil Plants
After clipping your basil plants, it’s essential to provide them with proper aftercare instructions to promote healthy regrowth. Watering is crucial during this period, as the plant will need more moisture to recover from the stress of pruning. Increase watering frequency for the next 7-10 days, making sure not to overwater, which can lead to root rot.
Fertilization is also vital at this stage. You can start fertilizing your basil plants with a balanced fertilizer (20-20-20) once a week. However, if you’re using a liquid fertilizer, reduce the frequency to every 10 days to avoid burning the roots.
Monitor your plant’s temperature and ensure it remains between 65°F to 75°F (18°C to 24°C). This will help prevent stress, which can hinder regrowth. Provide sufficient sunlight for at least 4-6 hours a day, as direct sunlight promotes healthy growth. Keep an eye out for any signs of pests or diseases, and take action immediately if you notice any issues.
Regular pruning and monitoring will also aid in promoting new growth.
Encouraging New Growth with Light and Temperature Control
When you clip your basil, it’s essential to create an environment that encourages new growth and minimizes shock. This involves controlling light exposure and temperature fluctuations.
Light plays a significant role in promoting healthy regrowth. Basil requires bright, indirect light to photosynthesize and produce energy for new growth. However, excessive direct sunlight can cause the plant to become scorched, leading to weak and spindly stems. To avoid this, place your basil plants near an east- or west-facing window, or use grow lights with a balanced spectrum.
Temperature control is equally important. Basil thrives in temperatures between 65°F to 75°F (18°C to 24°C). Avoid placing the plant near heating vents, radiators, or air conditioning units that can cause sudden temperature fluctuations. Keep your basil plants away from drafts and maintain consistent humidity levels to promote healthy growth.
Monitor your basil’s response to light and temperature changes by observing its growth rate, leaf color, and overall health. Adjust the lighting and temperature accordingly to create an optimal environment for new growth.
Common Mistakes to Avoid When Clipping Basil
When clipping basil, it’s easy to get carried away and make mistakes that can harm your plant – here are a few common ones to watch out for.
Over-Clipping: Signs and Solutions
Over-clipping basil can be a common mistake, especially for beginners. When you notice yellowing leaves or stunted growth on your basil plant, it’s likely a sign that you’ve over-pruned it. This can happen when you clip too much of the foliage at once, leaving the plant without enough energy to produce new growth.
To identify if you’re over-clipping, look for these signs:
* Yellowing leaves: If the leaves on your basil plant are turning yellow or pale, it may be a sign that they’re stressed from excessive pruning.
* Stunted growth: If your basil plant is not producing new leaves or stems as quickly as usual, it could be due to over-clipping.
To recover from over-pruning, try these solutions:
* Reduce clipping frequency: Give your basil plant time to recover by reducing the frequency of clippings. This will allow the plant to focus on regenerating its foliage.
* Use scissors carefully: When you do clip your basil, use scissors to snip off only the top sets of leaves, leaving some stem and leaves intact to help the plant continue growing.
By being mindful of these signs and taking corrective action, you can prevent over-clipping and keep your basil plant healthy and thriving.
Improper Handling: Damage Prevention Tips
When clipping basil, it’s essential to handle the plants with care to prevent damage. Improper handling can cause stress to the plant, leading to wilted leaves, broken stems, and even root rot. To avoid this, gently grasp the stem between your thumb and index finger, leaving about an inch of stem intact after each clip.
When removing individual leaves, use a gentle twisting motion with your fingers or a specialized leaf plucker. Avoid tearing or ripping the leaves, as this can cause significant damage. It’s also crucial to handle the stems with care, as bruising or crushing them can lead to infection and reduced growth.
To prevent accidental snapping, make sure to cut just above a node (where a leaf meets the stem) using clean scissors or pruning shears. Regularly trimming your basil plant will encourage new growth and maintain its shape, but be gentle when handling the delicate stems and leaves to avoid causing unnecessary stress. By following these simple tips, you can minimize damage and keep your basil plant thriving.
Advanced Techniques: Variations on Clipping Basil
Now that you’ve mastered the basics of clipping basil, let’s explore some advanced techniques to take your pruning skills to the next level and enhance the flavor of your favorite herb.
Propagating Basil through Stem Cuttings
To propagate new basil plants from stem cuttings, you’ll need to follow these steps. Start by selecting healthy stems with at least two sets of leaves. Cut the stems just above a node (where a leaf meets the stem) using a sharp, clean knife or pruning tool. This will encourage root growth.
Next, prepare your rooting media by filling small pots or containers with a well-draining mix specifically designed for cuttings. You can also use a mixture of perlite and vermiculite as an alternative. Moisten the medium gently but thoroughly, making sure it’s not too wet.
Place the cut ends of the stems into the prepared medium, leaving about 1-2 inches of stem exposed above the surface. Water lightly to settle the medium around the cuttings. Provide bright, indirect light and maintain a consistent temperature between 65°F to 75°F (18°C to 24°C). Keep the soil consistently moist but not waterlogged. Root development typically takes 7-10 days.
Using Clipped Basil for Infused Oils and Vinegars
When you clip basil, you’re not just harvesting fresh leaves – you’re also creating an incredible opportunity to create infused oils and vinegars that will elevate your cooking to new heights. These fragrant liquids can be used as finishing touches for salads, sauces, soups, or even as a marinade for meats. To get started, you’ll need some high-quality glass containers with tight-fitting lids – ideally Mason jars or similar – along with your clipped basil.
To prepare your infused oils and vinegars, simply place a few sprigs of clipped basil in the container, making sure to pack them tightly so that they’re fully submerged under the oil or vinegar. For oils, you can use neutral-tasting carrier oils like olive or grapeseed. As for vinegars, choose a good-quality white wine vinegar or apple cider vinegar as your base.
Store your infused liquids in a cool, dark place and let them steep for at least 2-3 weeks before straining the solids out. You can keep them stored in the fridge to prolong their shelf life.
Frequently Asked Questions
What should I do with the clipped basil leaves after harvesting?
Use them immediately for salads, pesto sauces, or as a garnish. You can also store them in an airtight container in the refrigerator for up to 24 hours or freeze them for later use. This way, you’ll minimize waste and make the most of your harvest.
Can I clip basil leaves too close to the soil?
Yes, it’s generally safe to cut basil leaves right above a node (where a leaf meets the stem) with a pair of clean pruning shears. However, avoid cutting too many nodes in one go, as this can stress the plant. Remove only what you need for immediate use or propagation.
How often should I clip my basil plants for optimal growth?
The frequency of clipping depends on the stage of your basil’s life cycle and its growth rate. For young plants, clip every 7-10 days to encourage bushy growth. For mature plants, reduce clipping to every 2-3 weeks to allow them to focus energy on fruiting.
Can I propagate my basil using only a single stem cutting?
Yes, you can propagate basil from a single stem cutting by placing it in water or a propagation medium with adequate light and warmth. Roots should develop within 1-2 weeks, after which you can transfer the cutting into soil for further growth. This method is perfect for creating new plants without disturbing the mother plant.
What are some common mistakes to avoid when clipping basil?
One common mistake is over-clipping, which can lead to weak and spindly growth. Another error is using dull or dirty pruning shears, which can damage the plant’s tissues and spread disease. Regularly clean your tools and choose sharp ones for optimal results.