Are you ready to give your garden the boost it needs? Creating a thriving ecosystem starts with making the most of your food waste, and that’s where composting comes in. But building a compost bin can be overwhelming if you don’t know where to start. Don’t worry, we’ve got you covered! In this step-by-step guide, we’ll walk you through selecting the perfect location for your compost bin, choosing the right materials, designing it for optimal performance, and providing maintenance tips to keep your bin thriving.
We’ll cover everything from the basics of what makes good composting material to how to avoid common pitfalls that can slow down decomposition. By following our easy-to-follow instructions, you’ll be on your way to creating nutrient-rich soil for your garden in no time. Whether you’re a seasoned gardener or just starting out, this guide is perfect for anyone looking to create a healthy and sustainable garden ecosystem.
Choosing the Right Location and Materials
When building a compost bin, choosing the right location is crucial for maintaining optimal airflow and moisture levels. Next, select materials that are durable and suitable for outdoor use.
Section Overview
When it comes to building a compost bin, selecting the right location is just as important as choosing the right materials. You want your bin to be situated in an area that provides optimal conditions for decomposition and easy access for maintenance.
First, consider the amount of sunlight your bin will receive. Composting requires oxygen, so placing your bin in a shaded area can hinder this process. Aim for a spot that receives direct sunlight for at least 6 hours a day. Additionally, ensure good drainage is available to prevent waterlogged soil and potential messes.
Accessibility is also crucial. Position your bin near a water source, such as a hose or rain barrel, to make frequent watering easy. Moreover, place it in an area where you can easily add materials without straining yourself.
In terms of materials, you’ll need a sturdy base, a durable frame, and mesh or wire for ventilation. A wooden pallet or plastic container can serve as a foundation, while a metal rod and twine can be used to create the frame. Mesh or wire allows air circulation, which is vital for decomposition to occur.
Types of Compost Bin Materials
When it comes to building a compost bin, the type of material you choose can greatly impact its durability, maintenance, and overall effectiveness. Let’s take a look at some popular materials used for compost bins, their pros and cons, and some examples to consider.
Wood is a classic choice for compost bins due to its natural charm and affordability. Cedar wood, in particular, is a popular option because of its resistance to rot and insects. However, it can be prone to cracking over time. On the other hand, plastic compost bins are low-maintenance and easy to clean, but they may not provide adequate ventilation for your compost pile.
Metal compost bins are durable and long-lasting, but they can be heavy and expensive. Recycled materials like old pallets or wire mesh can also be repurposed as a creative and eco-friendly option. For instance, using an old wooden crate or a metal drum can give your compost bin a unique look while reducing waste.
When selecting the material for your compost bin, consider factors such as durability, maintenance needs, and cost. Additionally, think about the aesthetic appeal you want to achieve in your backyard or garden.
Location Considerations
When selecting a location for your compost bin, it’s essential to consider three key factors: sunlight, drainage, and accessibility. Adequate sunlight will allow the microorganisms breaking down the organic matter to thrive, speeding up the composting process. Aim for a spot that receives direct sunlight for at least six hours a day.
Drainage is also crucial to prevent waterlogged piles of compost, which can lead to unpleasant odors and attract pests. Choose a location with good slope or elevate your bin slightly to ensure excess water can drain away from the pile. Avoid areas prone to flooding or standing water.
Accessibility is another critical consideration. Position your compost bin near a watering source and within easy reach of your kitchen or garden, making it simple to add materials as you go. This will also encourage regular maintenance and monitoring of the composting process. Ideally, situate your bin in a well-ventilated area to promote airflow and prevent pest infestations. Regularly turning the pile will help maintain optimal oxygen levels within the composting mass.
Designing Your Compost Bin
Now that we have a solid plan for your compost bin, let’s dive into designing its structure to ensure efficient decomposition and easy maintenance.
Types of Compost Bin Designs
When it comes to designing your compost bin, you have several options to choose from. One of the most popular and easy-to-build designs is a simple wire mesh bin. This type of bin provides excellent airflow, allowing for fast decomposition of organic materials. However, it may not be suitable for areas with high wind or pests, as loose debris can escape.
Another option is a wooden pallet bin, which is eco-friendly and budget-friendly. You can easily assemble the pallets to form a sturdy structure that’s perfect for small-scale composting. This design also allows for easy access to the compost pile. However, it may not be as durable as other materials, and pests like rodents can still find their way in.
For those who prefer a more modern look, DIY plastic bin plans are another viable option. These bins usually feature a sleek and aerated design that makes decomposition faster. They’re also easy to clean and maintain. However, they may not be suitable for very small spaces due to their size requirements.
Consider your specific needs, space constraints, and local regulations before choosing the perfect compost bin design for you.
Measuring and Planning Your Bin
Before building your compost bin, it’s essential to measure and plan its size to ensure it meets your specific needs. Take note of the space where you’ll be placing the bin, considering factors like accessibility, ventilation, and proximity to a water source. Measure the area to determine the optimal bin size.
A general rule of thumb is to build a bin with a minimum volume of 3-4 cubic feet (about 2x2x4 feet). However, this can vary depending on your composting needs. For example, if you’re planning to compost for a large family or have a lot of food waste, you may need a larger bin.
Consider the type of materials you’ll be using to build the bin and plan accordingly. For instance, if you’re using wooden pallets, you can create a bin with adjustable sides to accommodate varying amounts of material. Think about features like easy-turning handles, aeration systems, or even a hatch for convenient access. By planning ahead and customizing your bin to suit your needs, you’ll be able to build an effective composting system that meets your specific requirements.
Considerations for Small Spaces
When it comes to building a compost bin for small spaces, creativity and flexibility are key. One popular solution is to opt for vertical bins, which can be mounted on walls or placed against fences, making the most of available space. These compact designs often feature multiple compartments, allowing you to break down different types of waste in separate sections.
For those with even tighter spaces, consider a compact bin that folds up when not in use. Some models are designed specifically for small balconies or patios and can be easily stowed away when not needed. Another option is the “mini” compost bin, which is roughly the size of a large trash can but still packs enough punch to process modest amounts of waste.
In both cases, consider the space where your compost bin will live – ideally, it should get some shade and protection from strong winds. Make sure to choose materials that fit your small-space setup, such as compact-sized pallets or recycled plastic containers.
Building Your Compost Bin
Now that you have a plan, it’s time to start building your compost bin from scratch. This section will guide you through the process of constructing a sturdy and functional bin.
Step 1: Preparing the Site
Before starting to build your compost bin, it’s essential to prepare the site where it will be placed. This involves clearing debris and leveling the ground to create a solid foundation for your bin.
Clearing debris is a crucial step that will help prevent pests and rodents from being attracted to your compost pile. Start by removing any large rocks, twigs, or other obstructions from the area. Next, sweep the ground clean of any leaves, grass clippings, or other organic matter that might be scattered around. If you have a lawn, consider mowing it short to give yourself more space to work with.
Once you’ve cleared the area, take some time to level the ground. This will ensure that your compost bin sits evenly and doesn’t leak or collapse over time. Use a rake or shovel to even out any bumps or dips in the soil. You can also use a spirit level or a long straight edge to check that the surface is level.
After clearing debris and leveling the ground, take a moment to inspect the site for any other potential issues, such as nearby water sources or overhanging branches. By taking these simple steps, you’ll create a solid foundation for your compost bin and set yourself up for success in the composting process.
Step 2: Constructing the Frame
Now that you have prepared your site and materials for building your compost bin, it’s time to construct the frame. This is a crucial step as it will provide the structural support for your entire project. For this example, we’ll use 2 x 6 untreated lumber for the frame, which can be secured together using screws or nails.
To start, cut four pieces of lumber to the desired length for your bin’s sides and two more for the back and front panels. Assemble the corners by screwing them together with 3-inch screws, making sure they are flush and secure. Next, attach the side panels to the frame using 2-inch screws. Ensure that everything is level and sturdy before moving on.
Before securing the back and front panels, make sure you have enough space for your compost bin’s door or hatch. Attach these panels last, ensuring they fit snugly into place with screws or nails. Finally, double-check that all corners are secure and your frame is sturdy. This will be the foundation of your compost bin, so it’s essential to get this step right.
Step 3: Adding Compost Bin Walls
Adding walls to your compost bin is an essential step in creating a secure and functional structure. Start by preparing the area where you’ll be attaching the walls. Ensure it’s level and clear of any debris.
You can use wire mesh as a wall material, attaching it to the bottom plate using screws or nails. Make sure to leave space for air circulation to prevent moisture buildup. Alternatively, you can use wooden boards or composite materials for a more durable option.
When attaching the walls, ensure they’re evenly spaced and secure. You can use wire ties or zip ties to hold the mesh in place. Consider adding a small overhang at the top of each wall to create a roof-like effect, which will help keep rain out and pests in check. This simple step will significantly enhance your compost bin’s functionality and longevity.
Keep in mind that the type of material you choose will affect the overall appearance and durability of your bin.
Adding Composting Features and Accessories
Now that you’ve built your compost bin, let’s talk about how to enhance its functionality with features and accessories that make composting easier and more efficient.
Options for Turning and Aerating Your Compost
Turning and aerating your compost is an essential process that ensures it breaks down efficiently and maintains its quality. There are several methods to do this, each with its benefits and drawbacks.
One common method is using a pitchfork to turn the compost pile. This tool allows for easy mixing of materials and helps to distribute heat evenly throughout the pile. However, pitching can be physically demanding and may not be suitable for large piles. On average, it’s recommended to turn your compost every 7-10 days, depending on its size.
Another option is investing in a compost turner, which can automate this process. These machines come with rotating drums or blades that break down the material efficiently and reduce manual labor. Some models are designed specifically for small-scale composting and can be a worthwhile investment for large households. Aeration tools like pipes or tubes are also used to introduce oxygen into the pile, promoting microbial activity.
It’s essential to note that over-aerating can damage the microorganisms in your compost. When using any of these methods, it’s crucial to balance aeration with moisture levels and ensure the pile doesn’t dry out completely. By incorporating one or more of these tools into your composting routine, you’ll be able to create a nutrient-rich environment that fosters efficient decomposition.
Adding Odor Control Measures
Reducing odors from your compost bin is an essential aspect of maintaining a healthy and efficient composting process. One way to minimize unpleasant smells is by adding odor-absorbing materials like activated charcoal, baking soda, or zeolite to the bin. These materials can help absorb excess moisture and volatile organic compounds (VOCs) that contribute to odors.
Another effective method for controlling odors is implementing proper ventilation systems within your compost bin. This can be achieved by adding air vents or baffles to allow airflow in and out of the bin. Proper airflow helps maintain oxygen levels, which aids in decomposition and minimizes anaerobic conditions where odor-causing bacteria thrive. Consider installing a fan or using an aerator tool to further enhance ventilation.
When implementing these measures, keep in mind that a balance between odour control and decomposition is crucial. Avoid over-aeration, as this can dry out the compost pile and slow down the decomposition process. A balanced mix of “green” (high in nitrogen) and “brown” (high in carbon) materials will also help regulate moisture levels and prevent excessive odor production.
Optional Features: Trays, Covers, and More
If you’re looking to take your compost bin to the next level, consider adding some optional features that will make it easier to use and maintain. One great option is a tray for collecting finished compost. This is especially useful if you plan on using your compost as a nutrient-rich soil amendment for your garden or indoor plants. Simply place the tray under the compost bin’s exit point, and let it collect the finished compost as it’s discharged.
Another feature to consider is a cover or lid for your compost bin. While not essential, a cover can help reduce pests and odors from escaping. You can also use it to keep curious children and pets out of your compost pile. Some covers come with built-in ventilation systems to ensure airflow within the bin, which is crucial for maintaining optimal composting conditions.
You might also want to look into aerators or turners that make it easy to mix in materials like leaves, grass clippings, and other “brown” materials that can be difficult to incorporate. These tools can help you maintain a balanced carbon-to-nitrogen ratio, which is essential for successful composting.
Maintaining and Troubleshooting Your Compost Bin
Now that you’ve built your compost bin, it’s essential to keep it functioning smoothly, which is why we’re covering the basics of maintaining and troubleshooting common issues.
Monitoring Moisture and Temperature Levels
Monitoring moisture and temperature levels is crucial to ensure that the decomposition process in your compost bin runs smoothly. To do this, you’ll need a moisture meter and a thermometer.
For optimal decomposition, the ideal moisture level for your compost pile should be between 40-60%. If it’s too dry, microorganisms won’t be able to break down organic matter efficiently. On the other hand, if it’s too wet, anaerobic conditions can occur, leading to unpleasant odors and potentially harming plants.
Temperature levels in a compost bin can reach as high as 160°F (71°C), which is a sign that decomposition is happening correctly. However, temperatures above 150°F (65°C) for an extended period can lead to the death of beneficial microorganisms.
Check temperature levels by inserting the thermometer into different parts of the pile and record readings at least once a week. Adjust moisture levels as needed by sprinkling water over the compost pile or adding dry materials like shredded newspaper.
Also, keep in mind that compost piles tend to heat up during summer months due to increased microbial activity and may require additional watering during this time.
Managing Pests and Odors
Managing pests and odors is an essential part of maintaining a healthy compost bin. To minimize these issues, it’s crucial to understand what attracts pests and causes unpleasant odors in the first place. Generally, pests are drawn to sweet or fermented smells, which can be caused by too much green material like food scraps or grass clippings.
To control pest infestations, you can try using natural deterrents such as cinnamon, cayenne pepper, or diatomaceous earth. These substances can be sprinkled on the surface of the compost to repel pests without harming them or the environment.
For odors, turn your compost regularly and maintain a balance between “green” (food scraps) and “brown” (dried leaves or shredded paper) materials. This will help speed up the decomposition process and reduce fermentation smells. You can also add a layer of finished compost on top of the pile to act as a barrier against pests and odors.
Some common pest control methods include hand-picking pests, using physical barriers like chicken wire, or introducing beneficial insects that prey on pest species.
Troubleshooting Common Issues
As you continue to maintain and use your compost bin, you may encounter some common issues that can hinder its efficiency. Mold growth is one such problem that can arise due to excess moisture or inadequate aeration. To prevent this, ensure that you’re adding materials to the bin in moderation, rather than all at once. Regularly turning the contents will also help to maintain air circulation and prevent mold from taking hold.
Another issue that may arise is pest infestations. These can be caused by attracting rodents, insects, or other unwanted critters with your compost’s nutrient-rich environment. To minimize this risk, place your bin in a well-ventilated area away from direct sunlight, and use a lid to keep pests out. You should also balance the carbon-to-nitrogen ratio of your materials by adding equal parts ‘green’ (nitrogen-rich) and ‘brown’ (carbon-rich) waste.
If you do encounter pests or mold, don’t worry – it’s not the end of your composting journey! Simply remove any affected areas, turn the contents thoroughly, and add more carbon-rich materials to balance things out. By staying on top of maintenance and monitoring your bin regularly, you can prevent these issues from arising in the first place.
Conclusion
In conclusion, building a compost bin is a straightforward process that requires some basic materials and tools. By following the steps outlined in this guide, you’ll be able to create a functional and efficient composting system for your home or garden. Remember to always use a sturdy frame and a secure lid to keep pests out and maintain proper airflow. Regularly turning and aerating the compost pile will also help to speed up the decomposition process. With a little patience and maintenance, you’ll be able to turn kitchen scraps and yard waste into nutrient-rich soil that will improve your garden’s fertility and reduce your waste output. By taking the time to build a compost bin, you’re not only doing your part for the environment but also investing in a sustainable gardening practice.
Frequently Asked Questions
How do I know if my compost bin is getting enough airflow?
To ensure optimal decomposition, your compost bin should have adequate ventilation to prevent anaerobic conditions. Check for sufficient gaps between the walls and floor, and consider adding a lid or windows for improved airflow.
What can I do if pests are attracted to my compost bin?
Managing pests requires regular maintenance, such as turning the compost pile regularly, keeping it covered, and using odor control measures like carbon-rich materials or essential oils. You can also use physical barriers or repellents specifically designed for pest control.
Can I use shredded newspaper in my compost bin?
Yes! Shredded newspaper is a great addition to your compost bin, as it helps with moisture regulation, suppresses weed growth, and adds carbon-rich material. Just be sure to mix it well with other materials to avoid creating too much carbon imbalance.
How often should I turn my compost pile?
Turning your compost regularly (about every 7-10 days) helps maintain optimal decomposition rates, prevents matting, and promotes even aeration. Use a pitchfork or shovel to gently turn the pile, taking care not to compact it further.
Can I use kitchen scraps with meat or dairy products in my compost bin?
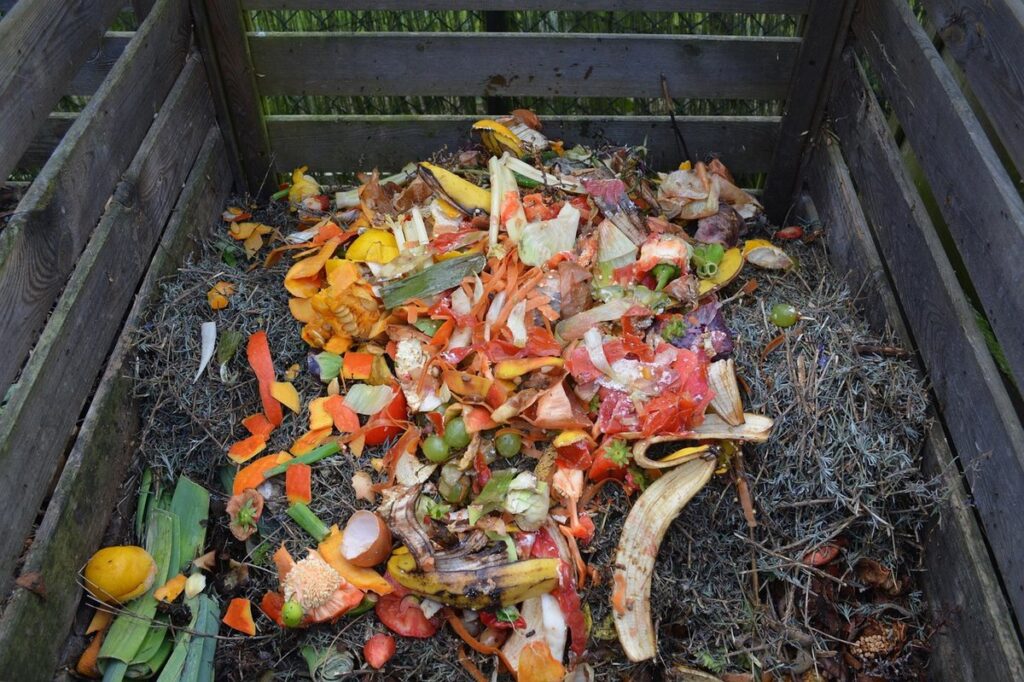
No! Meat and dairy products can attract pests and create unpleasant odors due to high nitrogen content. Stick to adding vegetable peels, fruit scraps, tea bags, coffee grounds, and other non-animal waste materials for a healthy compost ecosystem.