If you’re new to growing plants or looking for ways to add some tropical flair to your indoor space, attaching a staghorn fern is a great place to start. These epiphytes are surprisingly easy to care for and can thrive in a variety of environments with proper attention. But before you bring one home, it’s essential to choose the right type of staghorn fern for your needs. Not all varieties are created equal, after all! In this article, we’ll cover everything from selecting the perfect variety to preparing the environment for optimal growth and addressing common issues that may arise. Whether you’re a seasoned green thumb or just starting out, our step-by-step guide will show you how to attach staghorn ferns with confidence.
Understanding Staghorn Fern Basics
Let’s dive into the basics of staghorn ferns and explore their unique characteristics, growth habits, and ideal conditions for thriving. This will give you a solid foundation to attach them successfully.
What is a Staghorn Fern?
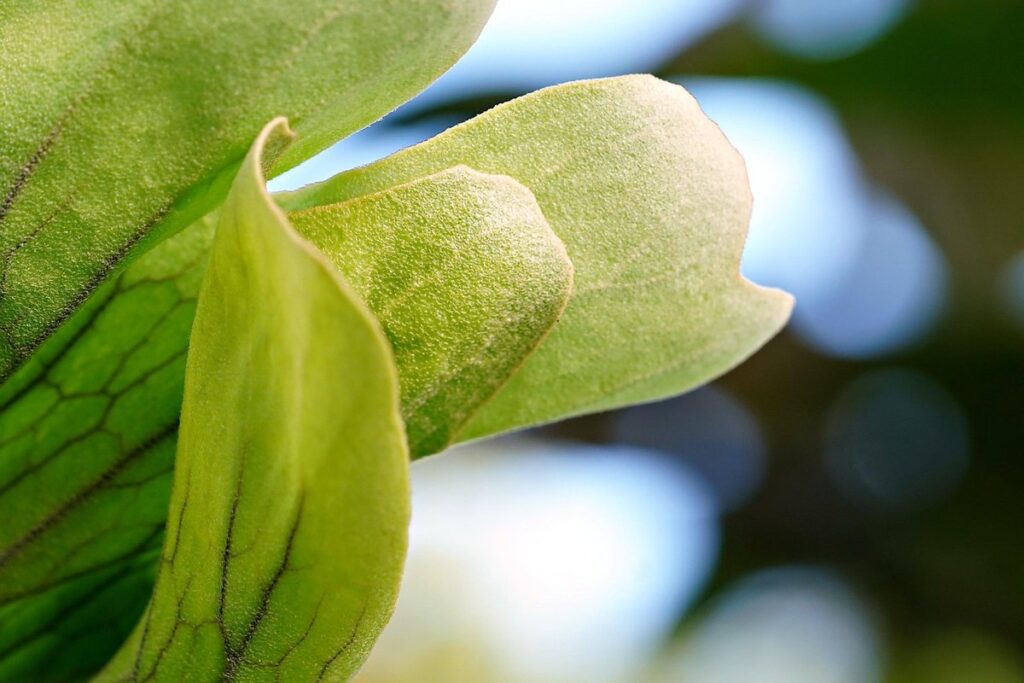
Staghorn ferns (Platycerium bifurcatum) are one of the most unique and fascinating types of epiphytes. They belong to the Polypodiaceae family and are native to tropical regions, including Australia, Africa, and Southeast Asia. These remarkable plants thrive in humid environments, often growing on trees or rocks, where they can absorb moisture and nutrients from the air.
One of the distinctive features of staghorn ferns is their unique growth habit. They produce two types of fronds: the sterile fronds, which are longer and more slender, and the fertile fronds, which are shorter and have a branching pattern resembling antlers or horns. This characteristic gives them their name and makes them stand out among other fern species.
Staghorn ferns are also known for their ability to store water in their leaves, making them drought-tolerant and low-maintenance. They prefer high humidity and bright, indirect light but can adapt to a range of conditions with proper care. By understanding the natural habitat and characteristics of staghorn ferns, you’ll be better equipped to provide the right environment for your plants and ensure they thrive when attached or potted.
Choosing the Right Variety
When it comes to choosing the right variety of staghorn fern for your space, you have several options to consider. Two popular types are Platycerium bifurcatum and Platycerium veitchii.
Platycerium bifurcatum, also known as the common staghorn fern or elkhorn fern, is a more adaptable variety that can thrive in a range of environments. It’s ideal for beginners or those with less experience caring for staghorn ferns. This type is relatively easy to find and tends to be less expensive than other varieties.
On the other hand, Platycerium veitchii is a more delicate and sensitive option. It requires more precise care and can be more challenging to grow. However, it’s also highly prized for its unique appearance and texture.
When selecting a staghorn fern variety, consider factors such as lighting, temperature, humidity, and space constraints in your home or garden. If you’re new to growing staghorn ferns, start with the Platycerium bifurcatum.
Preparing the Plant and Environment
Before attaching a staghorn fern, it’s essential to prepare your plant and environment by ensuring proper lighting, temperature, and humidity levels are met. This will help prevent shock to the delicate fronds.
Selecting the Perfect Mount
When it comes to attaching staghorn ferns, selecting the perfect mount is just as crucial as choosing the right plant. The mount you choose will determine the health and well-being of your fern, so it’s essential to make an informed decision.
First and foremost, consider the humidity level in the environment where your staghorn fern will be placed. A high-humidity mount, such as a sphagnum moss or coconut husk-based mount, is ideal for these plants, which thrive in tropical environments with up to 80% relative humidity. On the other hand, if you live in a drier climate, a mount with a built-in water reservoir or one that allows for regular watering may be more suitable.
Temperature is also an essential factor to consider when choosing a mount for your staghorn fern. These plants prefer temperatures between 65°F and 85°F (18°C and 30°C), so make sure the mount you choose can maintain this temperature range.
Light exposure is another critical consideration, as staghorn ferns require bright, indirect light but may be scorched by direct sunlight. A mount with a canopy or one that allows for easy adjustment of the plant’s position will help ensure it receives the right amount of light.
Adjusting to Indoor Conditions
When bringing your staghorn fern indoors, it’s essential to adjust its environment gradually to prevent shock. This process is called acclimation, and it’s crucial for the plant’s survival.
First, observe how your staghorn fern reacts to indoor lighting conditions. If it’s exposed to direct sunlight, which can be too intense for most species of staghorn ferns, place it near an east- or west-facing window with filtered light. This will allow the plant to adapt gradually without experiencing sudden changes in illumination.
Adjust watering habits accordingly. Staghorn ferns prefer high humidity but tend to dry out faster indoors due to air conditioning and heating systems. Water your staghorn fern thoroughly once a week, but ensure excess water drains from the pot to prevent root rot.
Fertilization also requires adjustment when moving outdoors. As indoor conditions typically lack natural nutrients, use a balanced, water-soluble fertilizer (20-20-20) at half the recommended strength during the first month after bringing your staghorn fern indoors. This will help support its initial adaptation period and promote healthy growth.
Keep an eye on temperature fluctuations as well, as staghorn ferns typically prefer temperatures between 50°F to 75°F (10°C to 24°C).
Attaching the Staghorn Fern
Now that you have a staghorn fern, it’s time to learn how to attach it securely to your chosen mount or surface, making sure it stays healthy and thriving. Let’s dive into the attachment process together.
The Basic Mounting Technique
To attach your staghorn fern to its mount or substrate, start by preparing the soil. Gently remove the plant from its pot and gently wash off excess soil with a soft-bristled brush. This will help prevent compacting the soil further and ensure good air circulation around the roots.
Next, inspect the roots for any dead or damaged areas. Trim these away using sterile pruning tools to promote healthy growth. Then, place a thin layer of sphagnum moss on top of the mount’s surface, leaving enough space for the plant’s rhizome to sit above it. This will help prevent water from accumulating in the soil and reduce the risk of root rot.
Carefully position the staghorn fern’s rhizome on top of the moss, making sure it’s centered and secure. Use a small amount of wire or twine to gently tie the plant in place, taking care not to constrict its growth. Make sure the plant is firm but not too tight, leaving room for expansion.
Finally, gently add more sphagnum moss around the base of the plant, filling any gaps and securing it firmly in place. This will help prevent movement or settling over time, ensuring a stable and secure attachment.
Using a Wire or Twine for Support
When attaching your staghorn fern to a support system using wire or twine, it’s essential to ensure stability and prevent damage from wind or water. To do this effectively, you’ll want to start by choosing the right type of material for the job.
For most applications, a sturdy wire (such as copper or aluminum) is a good choice. You can bend it into a loop that fits around the fern’s rhizome, securing it firmly in place. Make sure the wire isn’t too tight, however, as this can cause damage to the plant’s delicate roots.
Alternatively, you might prefer to use twine or a similar type of cordage. This material is often easier to work with and can be adjusted to fit snugly around the fern without constricting its growth. When using twine, make sure it’s not too loose – this can cause the fern to shift around excessively in the wind.
To maximize stability, try placing the wire or twine loop near the base of the plant, where the rhizome meets the support system. This will help keep the fern securely attached and prevent any potential toppling caused by wind or water.
Caring for Your Attached Staghorn Fern
Once you’ve successfully attached your staghorn fern, it’s essential to provide proper care to ensure its continued health and beauty. Here, we’ll cover key tips for thriving as a new plant owner.
Watering and Humidity Requirements
When it comes to watering and maintaining optimal humidity levels for your attached staghorn fern, it’s essential to get it just right. Overwatering can be detrimental to the plant’s health, causing root rot and other issues.
Start by understanding that staghorn ferns prefer high humidity, typically above 50%. To achieve this, you can place the plant on a tray filled with water and pebbles or use a humidifier nearby. However, avoid misting the leaves excessively, as this can lead to fungal diseases.
Water your staghorn fern thoroughly once a week during the spring and summer months when it’s actively growing. Reduce watering to every 10-14 days in autumn and winter when growth slows down. Use room-temperature water (around 70°F) to avoid shocking the roots.
Check the plant’s potting mix by inserting your finger into the soil up to the first knuckle. If the soil feels dry, it’s time for watering. Aim to provide about 1/2 cup of water per inch of pot diameter. Monitor your staghorn fern’s response and adjust its care accordingly. Remember that every plant is unique, so pay attention to its specific needs.
Fertilization and Pruning
As you continue to care for your attached staghorn fern, fertilization and pruning become crucial steps to promote healthy growth and prevent overgrowth. Fertilizing your staghorn fern provides essential nutrients that help it thrive, but it’s equally important to avoid over-fertilizing, which can lead to weak and leggy growth.
A balanced fertilizer specifically designed for ferns should be applied sparingly during the growing season (spring and summer). Dilute the fertilizer to half the recommended strength to prevent burning your plant’s roots. Water your staghorn fern thoroughly after application to help the nutrients reach the soil.
Pruning is another essential aspect of caring for attached staghorn ferns. Remove any dead or damaged fronds as soon as you notice them, making sure not to cut too much of the leaf at once. This will encourage new growth and prevent the spread of disease. Regular pruning also helps maintain your plant’s shape and promotes air circulation around the leaves, which reduces the risk of fungal diseases.
By fertilizing and pruning your staghorn fern regularly, you’ll be able to enjoy a lush, vibrant display of foliage year-round.
Common Issues and Solutions
When attaching a staghorn fern, you may encounter some common issues that can prevent successful growth. We’ll walk through these potential problems and provide solutions to get your fern thriving in no time.
Pests and Diseases
When attaching staghorn ferns, it’s essential to be aware of common pests and diseases that can affect these plants. One of the most prevalent issues is root rot, which occurs when the roots sit in waterlogged soil or come into contact with standing water. This can cause the roots to rot, leading to a decline in the plant’s overall health.
To prevent root rot, make sure the potting mix is well-draining and that the plant has good air circulation. Avoid overwatering, as this can exacerbate the issue. If you notice any signs of root rot, such as soft or mushy roots, gently remove the affected area and repot the fern in a fresh, dry potting mix.
Other common pests to watch out for include spider mites and mealybugs. These tiny insects feed on the plant’s sap, causing yellowing leaves and stunted growth. To control infestations, treat the plant with insecticidal soap or neem oil according to the product’s instructions.
Adjusting to Changing Environments
As you continue to care for your staghorn fern, you may find that it’s essential to adjust its environment in response to changes in temperature, humidity, or light exposure. This is a crucial step in maintaining the plant’s health and well-being.
When temperatures fluctuate, your staghorn fern may react by changing color or slowing down its growth rate. To adjust for this, you can move it to a spot with more stable temperatures between 40-75°F (4-24°C). Be cautious not to place it near heating vents, radiators, or air conditioning units, as these can cause sudden temperature changes.
Similarly, if your home’s humidity level drops, the fern may dry out quickly. To combat this, you can place the pot on a tray filled with water and pebbles to increase the surrounding moisture. Alternatively, you can group plants together to create a microclimate that maintains higher humidity levels.
Propagating Staghorn Ferns
To successfully propagate your staghorn fern, we’ll dive into the step-by-step process of division and potting new plants. This will help you multiply your favorite species quickly and easily.
Dividing Mature Plants
When your staghorn fern reaches maturity, it’s time to divide and multiply! This process not only helps maintain the health of your plant but also gives you a chance to share this beautiful species with friends and family. To divide mature staghorn ferns, start by preparing the plant for division.
This typically involves soaking the roots in water or a rooting hormone solution to make them easier to separate. Be gentle when handling the roots, as they can be delicate. Next, use a sterile knife or gardening tool to carefully cut through the rhizome (the thick, horizontal stem that connects the fronds) into sections. Each section should have at least one growing point and some roots.
Once you’ve divided your staghorn fern, re-pot each new plant in a well-draining mix specifically designed for ferns. Make sure the pot is slightly larger than the previous one to accommodate any additional growth. Water thoroughly after re-potting, and place the plants back in their usual spot with bright, indirect light. With proper care, your newly divided staghorn ferns should thrive and provide you with even more of these stunning plants to enjoy.
Using Spores for Propagation
Collecting and growing staghorn ferns from spores can be a fascinating process that allows you to create new plants. To start, you’ll need to collect the spores from mature plants when they’re ripe for release, usually during spring or early summer months. This is typically indicated by a change in color of the spore-bearing receptacles.
To germinate the spores, place them on the surface of a sterile potting medium, such as sphagnum moss, and keep it consistently moist but not waterlogged. A clear plastic bag can be used to create a mini-greenhouse effect, maintaining high humidity levels. Make sure to maintain temperatures between 60-80°F (15-27°C), which is essential for spore germination.
Once the spores have germinated into small plants, you’ll need to provide optimal growing conditions. This includes maintaining moderate watering, ensuring good air circulation, and providing filtered or dappled light. As your young staghorn ferns grow, be patient, as it can take several months for them to develop a robust root system and mature fronds.
Frequently Asked Questions
How often should I check the humidity levels around my attached staghorn fern?
Yes, it’s essential to regularly monitor the humidity levels around your staghorn fern, especially when adjusting to indoor conditions. Staghorn ferns thrive in humid environments, typically between 50-80% relative humidity. You can use a hygrometer to measure the humidity levels and adjust your environment accordingly.
Can I attach multiple staghorn ferns to the same mount?
Yes, you can attach multiple staghorn ferns to the same mount, but make sure they have enough space to grow without overcrowding each other. A general rule of thumb is to leave about 2-3 inches between each plant to ensure proper air circulation and growth.
How do I prevent pests like spider mites or mealybugs from infesting my staghorn fern?
Regularly inspect your staghorn fern for signs of pests, such as yellowing leaves or white cottony patches. To prevent infestations, keep your environment clean, avoid overwatering, and isolate new plants before introducing them to your collection.
What if I accidentally damage the roots during the attachment process? Can my staghorn fern still thrive?
Yes, staghorn ferns are relatively resilient and can recover from root damage. However, it’s essential to minimize handling and take extra care when attaching these delicate plants. If you do accidentally damage the roots, make sure to provide your plant with optimal growing conditions, including high humidity and moderate watering.
Can I propagate my staghorn fern using spores?
Yes, some species of staghorn ferns can be propagated using spores, but this method is more complex and less common. For most growers, dividing mature plants or using rhizome cuttings are more practical and effective propagation methods for these unique epiphytes.