Are you tired of struggling with poor soil quality in your raised beds? Do you want to give your plants the best chance at thriving? Amending your raised bed soil is one of the most essential steps in creating a healthy and productive garden. But where do you start? In this article, we’ll take you through a comprehensive guide on how to amend your raised bed soil for optimal plant growth. We’ll cover the importance of testing your soil’s pH levels, balancing them if necessary, and adding nutrient-rich amendments to give your plants everything they need. By following our tips and tricks, you’ll be well on your way to creating a garden paradise in no time.
Understanding Your Soil Type
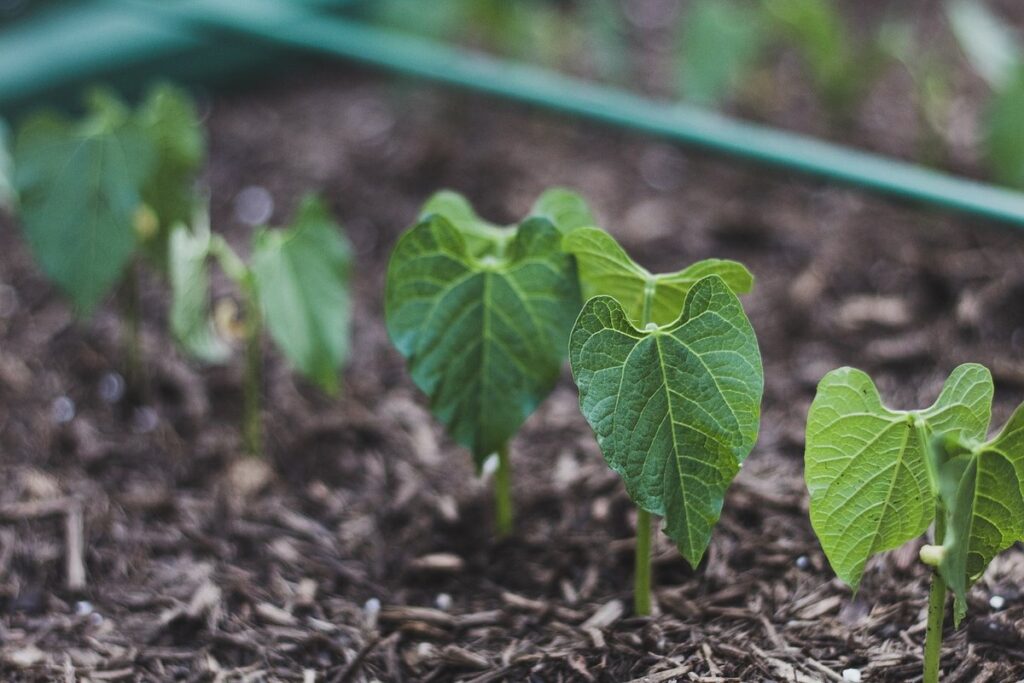
Before we dive into amending your raised bed soil, it’s essential to understand what kind of soil you’re working with. This will help you determine the best amendments for optimal growth and health.
Identifying Your Soil’s pH Level
To grow thriving plants in your raised bed, it’s essential to understand your soil’s pH level. Soil pH measures how acidic or alkaline your soil is, which affects nutrient availability and plant growth. You can determine your soil’s pH using testing kits available at most gardening stores or online tools like the USDA Soil Test Lab.
A pH test kit typically involves scratching a small amount of soil from your raised bed, mixing it with a solution, and then comparing the resulting color to a chart. Online tools usually require you to enter information about your location and soil type, and they’ll provide an estimated pH level based on that data.
A healthy soil pH for most vegetables and fruits falls between 6.0 and 7.0, although some plants like blueberries prefer more acidic conditions (pH 4.5-5.5). If your test reveals a pH outside of this range, you’ll need to amend the soil accordingly. For example, if your soil is too alkaline (high pH), adding elemental sulfur can help bring it down to a more suitable level for plant growth.
Common Soil Types and Their Characteristics
When working with raised beds, it’s essential to understand that different soil types have unique characteristics that can either hinder or help plant growth. Let’s break down the three primary soil types: clay, silt, and sand.
Clay soils are dense and heavy, holding water well but becoming waterlogged when saturated. They’re often found in areas where the water table is high. If you have clay soil in your raised bed, it can be challenging to work with, but adding organic matter like compost can help improve drainage and aeration. Mix in about 2-3 inches of compost to loosen up the clay particles.
Silt soils are finer than sand but coarser than clay. They drain well and retain some water, making them ideal for plants that prefer moist conditions. However, silt soils can be prone to erosion, especially when water is running through the bed. To stabilize the soil, add a 1-inch layer of organic mulch or a small amount of perlite.
Sand soils are coarse and free-draining, but they can also dry out quickly, requiring frequent watering. Adding compost or well-rotted manure can help improve the sand’s water-holding capacity and fertility. Mix in about 2-3 inches of these amendments to create a more balanced soil structure.
Preparing the Raised Bed Site
Before we start amending soil, it’s essential to prepare your raised bed site by clearing debris and leveling the ground for optimal growth. This step sets the foundation for a healthy garden.
Assessing the Site’s Drainage and Sunlight Conditions
When evaluating a site’s drainage and sunlight conditions, it’s essential to consider the long-term impact on your raised bed garden. Start by assessing the area where water tends to collect after rainfall. Check for signs of standing water or areas that remain soggy even after several days of dry weather. This will indicate if you need to make adjustments before amending the soil.
To determine the site’s sunlight conditions, observe the area during different times of day and throughout the year. If your raised bed receives direct sunlight for more than 6 hours a day, it may require additional measures to prevent scorching or drying out of the soil. Conversely, if it receives less than 4 hours of direct sunlight, you might need to consider relocating the bed or using shade cloth.
Check for any nearby structures that could impact sunlight patterns, such as trees or buildings. Also, note the seasonality of sunlight conditions – some areas may receive more intense sunlight during peak summer months and less during winter.
Clearing and Leveling the Area
Before you can start amending the soil in your raised bed, it’s essential to clear and level the area. This step may seem daunting, but trust us, it’s worth the effort. Clearing the site involves removing all debris, including weeds, rocks, twigs, and any other obstructions that could hinder root growth or water flow.
To begin, inspect the area thoroughly, taking note of any large rocks, roots, or other obstacles that may need to be removed. You can use a garden fork or spade to gently pry up weeds, making sure not to damage surrounding soil. Remove debris and set it aside for composting or disposal.
Next, level the ground to ensure proper water flow and root growth. Use a rake or level tool to even out the surface, removing any dips or uneven areas. This step is crucial in raised bed gardening, as poor drainage can lead to waterlogged soil and nutrient deficiencies. A smooth, even surface will also make it easier to add amendments and plant your crops.
Testing Your Soil
To create a healthy and thriving raised bed, it’s crucial to understand what your soil needs before you start amending. Let’s learn how to test your soil for optimal growth.
Choosing the Right Testing Kit or Method
When it comes to determining what amendments are needed for your raised bed soil, testing is crucial. You can choose from a variety of methods, each with its own set of benefits and drawbacks.
One popular option is DIY testing kits, which allow you to collect a sample of your soil and analyze it at home. These kits are often inexpensive and easy to use, but they may not provide as accurate results as lab tests. For example, the pH level determined by a DIY kit might be off by 1-2 units, which can significantly impact plant growth.
On the other hand, sending a sample to a laboratory for analysis provides more precise data on nutrient levels and pH. This method is typically more expensive than DIY kits, but it offers greater accuracy. Consider this option if you’re unsure about your soil’s composition or want to ensure optimal growing conditions for your plants.
If budget is a concern, look into free testing services offered by local extension offices or nurseries. These resources can provide valuable insights and guidance on improving your raised bed soil without breaking the bank.
Understanding Test Results: pH, Nutrient Levels, and Contaminants
When you receive your soil test results, it’s essential to understand what each value means for plant growth and how to interpret the data in relation to raised bed soil amendments. Let’s break down the key components: pH, nutrient levels, and contaminants.
pH is a measure of your soil’s acidity or alkalinity. Most vegetables prefer a slightly acidic to neutral soil pH between 6.0 and 7.0. If your test results show a high pH (above 8.0), it may indicate the presence of lime or calcium-rich fertilizers. Conversely, if your pH is too low (below 5.5), it could be due to excessive acidic materials like peat moss or sulfur.
Nutrient levels are equally important. Soil test kits usually measure nitrogen (N), phosphorus (P), and potassium (K) levels. These macronutrients support plant growth, but excessive levels can harm plants. For example, high nitrogen levels can lead to lush foliage but poor fruiting. Aim for balanced levels: 100-150 ppm N, 20-50 ppm P, and 100-200 ppm K.
Lastly, contaminants like heavy metals (e.g., lead or mercury) or pesticides can be detrimental to plant health. If your test results show elevated contaminant levels, consider using a raised bed soil amendment specifically designed for contaminated soils, such as composted manure or organic matter-rich potting mixes.
Amending Your Raised Bed Soil
Now that you’ve built and filled your raised bed, let’s focus on amending the soil to create a rich and fertile environment for healthy plant growth. This is where the real magic happens!
Adding Organic Matter: Compost, Manure, or Peat Moss
When it comes to adding organic matter to your raised bed soil, there are several options to consider: compost, manure, and peat moss. Each has its own unique benefits and drawbacks that you’ll want to weigh before making a decision.
Compost is a popular choice for amending raised bed soil because of its high nutrient content and ability to improve soil structure. Rich in carbon, nitrogen, and phosphorus, compost can help support healthy microbial growth, increase soil fertility, and even help the soil retain moisture better. However, it’s essential to note that not all compost is created equal – look for a finished product that has been allowed to break down completely.
Manure from herbivores like horses or cows can also add valuable nutrients to your raised bed soil, particularly nitrogen and phosphorus. This natural fertilizer can help support plant growth, but be aware of potential contaminants like heavy metals or pathogens. It’s crucial to ensure the manure is aged and fully composted before applying it to your garden.
Peat moss, on the other hand, provides excellent water retention and acidity regulation in raised bed soil. Its ability to hold up to 20 times its weight in water makes it a great addition for areas with low rainfall or poor soil structure. However, peat moss can also be quite acidic, which may not be suitable for all plants. Be sure to balance out its pH-regulating properties with other amendments if necessary.
When choosing between these options, consider the specific needs of your raised bed garden. For example, if you’re growing vegetables or fruits that prefer well-draining soil, peat moss might be a good choice. However, if you’re working with plants like azaleas or blueberries that thrive in acidic conditions, compost or manure could be more suitable.
Balancing pH Levels with Lime or Sulfur
Adjusting soil pH is crucial for optimal plant growth. An ideal pH range varies depending on the crop type, but most vegetables thrive between 6.0 and 7.0. To adjust your raised bed’s pH using lime or sulfur, you’ll need to test the current pH level.
You can purchase a DIY testing kit or send a sample to a lab for analysis. If your soil is too acidic (low pH), add agricultural limestone (lime) at a rate of 1-2 pounds per 100 square feet. For example, if you’re adding lime to a 4×8 foot bed, use 0.5-1 pound of lime.
On the other hand, if your soil is too alkaline (high pH), add elemental sulfur. Use 1-2 pounds per 100 square feet as a general rule. Keep in mind that these amendments can be hazardous to your skin and eyes, so wear protective gear when handling them. Be cautious not to over-lime or under-sulfur, as this can have negative effects on plant growth.
When adjusting pH, make incremental changes and retest frequently to avoid significant shifts. It’s also essential to mix the amendment thoroughly into the soil to ensure even distribution. By monitoring and adjusting your raised bed’s pH, you’ll create a nutrient-rich environment for your plants to thrive.
Integrating Nutrient-Rich Amendments
When adding nutrient-rich amendments, consider incorporating compost tea, well-rotted manure, or worm castings to enhance soil structure and fertility. These natural additives promote healthy microbial life in your raised bed.
Using Fertilizers: Organic vs. Synthetic Options
When it comes to fertilizing raised beds, you’ve got two main options: organic and synthetic. While both can provide essential nutrients for your plants, they have distinct benefits and drawbacks.
Organic fertilizers, such as fish emulsion, bone meal, or compost tea, are derived from natural sources and promote healthy soil biota. They release nutrients slowly, which encourages balanced plant growth and fosters a robust root system. For example, using fish emulsion can provide a boost of nitrogen, phosphorus, and potassium – the NPK trifecta essential for plant development.
However, organic fertilizers may have limitations in terms of shelf life and availability. Additionally, they can be more expensive than synthetic alternatives. Synthetic fertilizers, on the other hand, offer quick results with high concentration levels but might lead to over-fertilization, which can harm soil microorganisms and contaminate groundwater.
To strike a balance, consider a combination approach: use organic options for long-term benefits and reserve synthetic fertilizers for targeted nutrient deficiencies or when you’re working with poor-quality soil.
Adding Micronutrients and Mineral Supplements
When it comes to growing healthy and thriving plants in raised beds, micronutrient deficiencies can be a common issue. Micronutrients like iron, zinc, copper, manganese, boron, molybdenum, and chlorine are essential for plant growth, but they’re often lacking in soil.
One of the most common micronutrient deficiencies is iron deficiency, which can cause yellowing leaves and stunted growth. To address this issue, you can add iron-rich supplements like ferric sulfate or ferrous sulfate to your raised bed soil. For example, a 1% solution of ferric sulfate can provide up to 10 pounds of iron per acre.
Other micronutrients like zinc, copper, and manganese are also essential for plant growth, but they’re often missing from most soils. Zinc deficiency, in particular, can cause stunted growth and chlorosis (yellowing) of leaves. To address this issue, you can add zinc-rich supplements like zinc sulfate or zinc oxide to your raised bed soil.
Some common mineral supplements that can be added to the soil include:
* Epsom salt: rich in magnesium and sulfur
* Dolomitic limestone: a source of calcium and magnesium
* Gypsum: a source of calcium and sulfur
When choosing micronutrient supplements, consider the specific needs of your plants and the type of soil you’re working with. For example, if you’re growing acid-loving plants like azaleas or blueberries, you may want to add elemental sulfur to lower the pH of your soil.
Remember to always follow the recommended application rates for any supplement, as overuse can cause more harm than good. It’s also essential to test your soil regularly to determine which micronutrients are lacking and to adjust your amendments accordingly.
Maintaining Healthy Raised Bed Soil
Now that you’ve built a thriving raised bed garden, let’s talk about what to do next: maintaining the soil to keep it healthy and productive. Proper care is key to ensuring your plants get everything they need.
Monitoring and Adjusting pH Levels Regularly
Monitoring and adjusting pH levels regularly is crucial to maintaining optimal soil conditions for plant growth. Soil pH can fluctuate due to various factors such as changes in watering schedules, nutrient additions, or even nearby tree roots. To ensure your raised bed’s pH remains balanced, it’s essential to check the pH level at least once a month.
You can purchase a DIY pH testing kit or send a soil sample to a laboratory for analysis. If your test reveals an imbalance, make adjustments accordingly. For example, if your soil is too acidic (pH 5.5 or lower), add lime to raise the pH. Conversely, if it’s too alkaline (pH 7 or higher), mix in elemental sulfur.
Monitor your plants’ responses as well; some may exhibit symptoms like stunted growth or yellowing leaves due to inadequate nutrient availability caused by an incorrect pH balance. Regularly checking and adjusting pH levels will help you create a stable environment that promotes healthy plant development, leading to bountiful harvests and fewer maintenance issues.
Replenishing Organic Matter and Nutrients as Needed
Maintaining healthy raised bed soil requires regular replenishment of organic matter and nutrients. To keep your soil balanced and fertile, establish a routine for adding amendments as needed. This might involve setting aside time each month to inspect the soil and identify areas that need attention.
Monitor the soil’s moisture levels, structure, and pH, and take corrective action if you notice any imbalances. For example, if the soil is too dry or compacted, consider incorporating compost or well-rotted manure to improve its water-holding capacity and aeration. If your raised bed is heavy in clay or sand, mix in organic matter like peat moss or perlite to adjust its texture.
To replenish nutrients, follow a crop rotation plan that includes plants with varying nutrient requirements. Add balanced fertilizers according to the manufacturer’s instructions, taking care not to over-fertilize and harm microorganisms in the soil. Regularly test your soil to determine its nutrient levels and pH, adjusting your amendment schedule accordingly.
Frequently Asked Questions
What if I’m not sure how to interpret my soil test results?
Don’t worry, it’s normal to feel confused! Most soil tests provide a comprehensive report with pH levels, nutrient levels, and contaminant information. If you’re unsure about what your results mean or how to proceed, consider consulting with a local nursery expert or gardening professional for guidance.
Can I use regular household compost in my raised bed?
Yes, you can use regular household compost, but be aware that it may contain weed seeds or other contaminants. To minimize risks, opt for a high-quality, sterile potting mix or create your own worm compost using kitchen scraps and red wiggler worms.
How often should I replenish organic matter in my raised bed?
As a general rule, aim to add 2-4 inches of fresh organic matter (like compost or well-rotted manure) annually. This will help maintain soil health, structure, and fertility while preventing nutrient depletion.
What’s the difference between using lime vs. sulfur for pH balancing?
Lime is used to raise pH levels (make the soil more alkaline), while sulfur is used to lower pH levels (make the soil more acidic). When selecting a product, consider your specific soil needs and consult with an expert if you’re unsure.
Can I use fertilizer in my raised bed at any time of year?
No, it’s generally recommended to avoid fertilizing during the hottest summer months or when plants are under stress. Instead, focus on maintaining balanced pH levels and nutrient availability throughout the growing season.