Air drying mint is a simple yet effective way to preserve this versatile herb, allowing you to enjoy its flavor and fragrance for months to come. If you’re an avid gardener or a fan of homemade teas and recipes, learning how to air dry mint at home can be a game-changer. By drying mint leaves in the air, you’ll be able to retain their natural oils and flavor, making them perfect for brewing tea, adding to salads, or using as a garnish.
In this article, we’ll walk you through the best methods for harvesting, drying, and storing mint leaves at home. We’ll cover everything from choosing the right variety of mint to using specialized equipment like dehydrators and paper bags. By the end of this guide, you’ll be equipped with the knowledge and skills needed to air dry mint like a pro, ensuring that your supply lasts all year round.
Benefits of Air Drying Mint
Air drying mint not only preserves its flavor and aroma, but also allows you to enjoy it year-round without worrying about spoilage. Let’s dive into the benefits that make air drying mint a game-changer!
Why Air Dry is a Better Option
Air drying mint is not only an efficient method but also preserves its natural oils and flavors. Unlike other methods that involve heat, air drying allows you to retain the delicate balance of essential oils in mint leaves.
When you use machines or hot air dryers, they can strip away these oils, leaving your dried mint tasting bland and less potent. This is because high temperatures cause the volatile compounds responsible for the distinct aroma and flavor of mint to evaporate quickly. In contrast, air drying takes place at room temperature, ensuring that these sensitive oils remain intact.
Another significant advantage of air drying is its energy efficiency. No electricity or fuel is required, making it an eco-friendly option for those looking to minimize their environmental impact. Simply hang your mint leaves in a warm, dry spot with good airflow, and they’ll be perfectly dried within a few days.
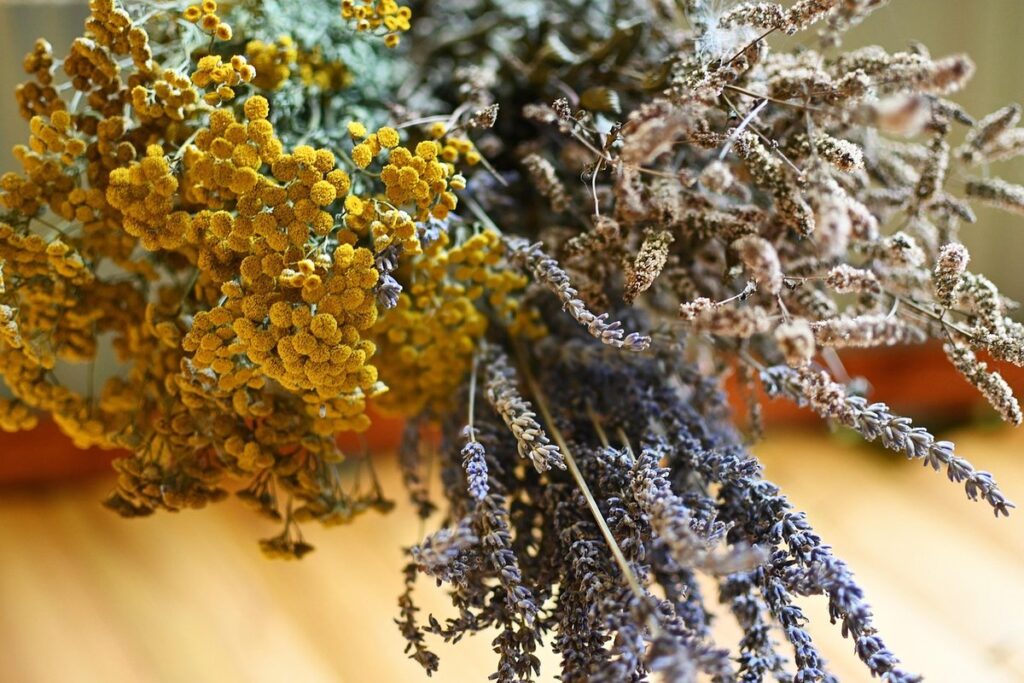
Types of Mint Suitable for Air Drying
When it comes to air drying mint, not all types of mint are created equal. While some mints can be successfully dried using this method, others may not retain their flavor and aroma as well. Here are the most popular types of mint that can thrive when air dried:
Peppermint is one of the easiest types of mint to air dry, thanks to its high oil content which helps preserve the herb’s fragrance. It’s also a popular choice for potpourri and crafts due to its bright green color and distinctive scent.
Spearmint, on the other hand, has a milder flavor than peppermint but still retains a lovely aroma when air dried. Its slightly sweeter taste makes it perfect for teas, salads, and desserts.
Chocolate mint is another popular choice for air drying, with its unique flavor profile that’s both sweet and minty. While it may require a bit more care during the drying process due to its delicate leaves, chocolate mint dries beautifully when done correctly.
In terms of preparation, make sure to choose fresh, healthy-looking mint leaves and tie them in small bunches before hanging them upside down to dry. This will help prevent mold from forming and ensure that your air-dried mint retains its flavor and aroma.
Preparing Mint for Air Drying
To ensure a successful air drying process, it’s essential that you properly prepare your mint by gently washing and trimming it to remove any excess moisture. This step will help the mint dry evenly and prevent mold from forming.
Harvesting at the Right Time
When it comes to harvesting mint for air drying, timing is everything. You want to pick the leaves at the optimal moment to preserve their flavor and aroma. Generally, mint is ready to harvest when the plant has reached about 6-8 inches tall, usually around 60-90 days after planting.
To ensure you’re picking the right time, inspect your mint plants regularly for new growth. Check for fresh, healthy leaves with a vibrant green color. Avoid harvesting during peak heat or intense sunlight, as this can cause the leaves to lose their potency and flavor.
Harvest in the morning, when the dew is still present on the leaves. This will help retain the moisture and aroma of the mint. Use scissors or pinch off individual leaves to avoid damaging the plant. It’s best to harvest just a few sprigs at a time, as this will encourage new growth and prevent the plant from flowering.
Keep in mind that different types of mint have varying harvesting times. Peppermint and spearmint are typically ready for harvest around 60-90 days, while chocolate mint takes longer, around 120 days.
Cleaning and Trimming the Leaves
Before air drying mint leaves, it’s essential to clean and trim them to remove dirt, debris, and excess moisture. This process not only improves the overall appearance of the dried mint but also helps to prevent mold and mildew from forming.
To clean the leaves effectively, gently rinse them under cool running water to dislodge any loose dirt or debris. Use your fingers or a soft-bristled brush to remove stubborn particles, taking care not to bruise the delicate leaves. Next, use a clean towel or paper towels to pat the leaves dry, being careful not to rub too hard and damage the leaves.
Trimming is equally important, as it allows for even drying and helps to prevent overcrowding on the drying surface. Use scissors or pruning shears to trim off any wilted or damaged leaves, cutting just above a node (where a leaf meets the stem) to promote healthy growth. This simple step can make all the difference in achieving high-quality air-dried mint that’s perfect for teas, infusions, and cooking applications.
Setting Up an Air Drying System
Now that you’ve harvested your fresh mint, it’s time to set up a system for air drying – a crucial step in preserving its flavor and aroma. This section will walk you through preparing a space for successful air drying.
Choosing the Right Location
When it comes to air drying mint leaves, choosing the right location is crucial for achieving optimal results. You want a spot that provides the perfect balance of temperature, humidity, and airflow.
Ideally, you should place your mint leaves in a well-ventilated area with good air circulation. This could be a balcony, patio, or even a sunroom. Avoid placing them near windows or doors that are directly exposed to direct sunlight or harsh winds, as this can cause the leaves to dry out unevenly.
A temperature range of 60°F to 70°F (15°C to 21°C) is ideal for air drying mint. This allows for a slow and even evaporation of moisture without promoting mold growth. Humidity levels should also be moderate, between 40% to 50%. Too little humidity can cause the leaves to dry out too quickly, while too much humidity can lead to fungal growth.
When in doubt, you can place your mint leaves on a drying rack or a wire mesh screen. This allows for good airflow and helps prevent moisture from accumulating around the leaves. By considering these factors, you’ll be well on your way to successfully air drying your mint leaves.
Using Desiccants or Silica Gel
When using desiccants or silica gel to control moisture levels and preserve the quality of the dried mint, it’s essential to understand their role in the air drying process. Desiccants work by absorbing excess moisture from the air, creating a dry environment that helps prevent mold and bacterial growth on the mint leaves.
To incorporate desiccants into your air drying system, place them in a separate container or bag with a one-way valve, allowing any moisture to escape while keeping external humidity out. Silica gel packets are particularly popular for this purpose due to their high absorption capacity. For optimal results, ensure that the silica gel is still active by checking its color (fresh silica gel turns pink as it becomes exhausted).
When using desiccants or silica gel, monitor your mint closely and be prepared to adjust as needed. It’s crucial to strike a balance between moisture control and preventing over-drying, which can compromise the quality of the dried mint. For example, if you notice that your mint is drying unevenly or developing white spots (indicative of over-drying), consider adjusting the amount of desiccant used or relocating the container to a more humid area.
The Air Drying Process
To successfully air dry mint, you’ll need to understand the steps involved in allowing the herb to naturally lose its moisture through evaporation and stabilization. This process is crucial for preserving the flavor and aroma of your mint leaves.
Monitoring Temperature and Humidity Levels
Monitoring temperature and humidity levels is crucial during the air drying process to ensure that your mint retains its flavor, aroma, and quality. Ideally, the temperature should range between 60°F to 70°F (15°C to 21°C), while maintaining a relative humidity of 50-60%. Exceeding these limits can lead to mold growth or moisture loss.
To monitor temperature and humidity levels effectively, you can invest in a hygrometer and thermometer. Place them near the drying area, ideally on opposite sides to ensure even readings. Regularly check the readings to make adjustments as needed. For instance, if the humidity is too high, you can increase ventilation by opening windows or using fans.
Maintaining optimal temperature and humidity levels requires patience and attention to detail. Keep an eye out for signs of moisture loss, such as brittle leaves or fading color, which may indicate that the air drying process has gone on for too long. Conversely, if you notice mold growth or musty odors, it’s likely due to high humidity. Adjust your settings accordingly to prevent damage and preserve the quality of your dried mint.
Rotating and Flipping the Leaves
As you air dry your mint leaves, it’s essential to remember that they need to be rotated and flipped regularly to ensure even drying. This step is crucial in preventing mold growth, which can spoil the entire batch of dried mint. When mint leaves are left to dry with one side facing upwards for too long, moisture becomes trapped on the underside, creating an ideal environment for mold to thrive.
To avoid this issue, gently rotate your mint leaves every 2-3 days, making sure each leaf has been turned over at least once. This simple yet effective technique will ensure that the drying process is even and that your dried mint retains its vibrant green color and aroma.
Remember, consistency is key when it comes to rotating and flipping your mint leaves. Aim to do this daily, or at the very least, every other day, especially during the initial stages of air drying. This will also help you catch any signs of mold growth early on, allowing you to take corrective action before it’s too late.
Troubleshooting Common Issues
If you’re running into problems with air drying mint, don’t worry – we’ve got you covered. This section addresses common issues and provides solutions to help you successfully dry your mint at home.
Dealing with Mold or Mildew
Mold and mildew are common issues that can arise when air drying mint, especially if not done correctly. These unwanted growths can ruin your beautiful bundles of dried mint leaves and even pose health risks.
Firstly, identify the signs of mold or mildew: a musty smell, white or black patches on the surface, and an unusual texture. If you notice any of these symptoms, don’t panic! Remove the affected area immediately to prevent further growth. To prevent mold and mildew from occurring in the first place, ensure good air circulation by providing adequate space between bundles.
Also, keep your drying area clean and dust-free. Regularly wipe down surfaces with a damp cloth, and avoid overcrowding your drying rack or tray. For more severe cases, use a solution of water and white vinegar (1:10 ratio) to gently scrub the affected area before rinsing thoroughly.
Remember to dry mint in a well-ventilated area and maintain humidity levels between 40-60%. These conditions will significantly reduce the risk of mold or mildew growth.
Maintaining Quality and Flavor
To preserve the quality and flavor of your air-dried mint, proper storage is crucial. Store dried mint leaves in airtight containers to prevent moisture from seeping in and causing them to become stale. Glass jars with tight-fitting lids are an excellent choice.
Keep your containers away from direct sunlight, as it can cause the flavors to fade quickly. Instead, store them in a cool, dark place like a pantry or cupboard. You can also consider storing them in the refrigerator to prolong their shelf life. However, be sure to check on them periodically and transfer them to an airtight container if moisture accumulates.
When it comes to flavor retention, you can further enhance the quality of your dried mint by using a silica gel packet or a few pinches of kosher salt within the container. These absorb excess moisture and help maintain a stable environment for your dried mint. Regularly inspecting your containers and rotating their contents will also help ensure even drying and prevent any off-flavors from developing.
Storage and Uses for Air Dried Mint
Once you’ve successfully air dried your mint, it’s time to think about how to store it properly to preserve its flavor and fragrance, as well as creative ways to use it.
Long-Term Storage Tips
When it comes to storing air dried mint, proper preservation is key to maintaining its flavor and aroma. To keep your dried mint fresh for a longer period, you’ll want to store it in an airtight container. Glass jars with tight-fitting lids or plastic containers with snap-on covers are ideal options.
Before sealing the container, make sure the air dried mint is completely cool. This will prevent any moisture from accumulating inside the container and spoiling your dried mint. Store the container in a dark place, such as a cupboard or drawer, to protect the mint from direct sunlight which can cause it to fade or lose its potency.
To maintain airflow within the container, you can also use small paper bags or cloth pouches to store the air dried mint. This will allow for gentle circulation of air and help prevent moisture buildup. For optimal storage, label the container with the date and contents, so you can easily keep track of how long it’s been stored.
Regularly check on your stored air dried mint and give it a good stir every few weeks to ensure even drying and prevent clumping. By following these simple tips, you’ll be able to enjoy your air dried mint for months to come while maintaining its aroma and flavor.
Using Air Dried Mint in Recipes
Air dried mint is a versatile ingredient that can be used in a variety of recipes, from soothing teas to refreshing cocktails and decadent desserts. One of the best things about air drying mint is that it allows you to preserve its vibrant flavor and aroma without losing any of its potency.
When it comes to using air dried mint in teas, consider pairing it with soothing herbs like chamomile or lemon balm for a calming bedtime brew. You can also add a few sprigs to your favorite green tea for a refreshing pick-me-up. For a more festive twist, try adding air dried mint to a pitcher of iced tea infused with citrus slices and sparkling water.
In the world of cocktails, air dried mint adds a cooling and herbaceous note that pairs perfectly with gin or vodka. Try muddling a few sprigs with lime juice and sugar for a classic mojito, or infuse your favorite spirit with air dried mint for a unique twist on a summer cocktail. In desserts, air dried mint is a natural fit with sweet treats like chocolate truffles or shortbread cookies – simply chop the dried mint finely and sprinkle it over the top of your dessert before serving.
Frequently Asked Questions
Can I air dry mint leaves that have already started to wilt or turn brown?
Yes, you can still air dry wilted or browning mint leaves, but keep in mind the quality may be affected. Focus on removing any visibly damaged areas and proceed with the drying process as usual. This method is great for salvaging partially spoiled leaves and extending their shelf life.
How long does it take to air dry mint leaves using paper bags?
The time required to air dry mint leaves using paper bags can vary depending on factors like temperature, humidity, and leaf thickness. As a general rule of thumb, you can expect 7-14 days for small bunches or single layers of leaves. Monitor your mint’s progress by checking its color and texture regularly.
What if I don’t have access to a dedicated drying area? Can I still air dry mint indoors?
Yes, you can air dry mint indoors using a well-ventilated area like a closet or cupboard with good airflow. Just ensure the space is not too humid or prone to temperature fluctuations. You may also consider investing in a dehumidifier or fan to maintain optimal drying conditions.
How do I know when my air-dried mint has reached its full potency?
Air-dried mint typically reaches its peak flavor and aroma after 2-3 weeks of proper drying and storage. To check for readiness, inspect the leaves regularly; they should be crispy, fragrant, and slightly flexible. If you notice any signs of mold or mildew, discard the affected batch immediately.
Can I mix air-dried mint with other herbs to create unique blends?
Yes, you can combine air-dried mint with other herbs like basil, lemongrass, or rosemary to create distinctive flavor profiles and aromas. When blending herbs, consider their individual potencies and adjust accordingly to achieve the desired effect in your recipes or tea blends.