Are you looking to add some vibrant color and tropical flair to your garden? Look no further than the stunning hibiscus! With its large, showy flowers and easy-to-grow nature, it’s no wonder why this plant is a favorite among gardeners. But with so many varieties to choose from and specific needs for optimal growth, knowing how to care for your hibiscus can be overwhelming. That’s where our comprehensive guide comes in – covering everything from planting and watering to fertilization and more. In this ultimate guide to hibiscus care, we’ll share expert tips on how to grow a thriving plant that will bring joy and beauty to your outdoor space all season long. Whether you’re a seasoned gardener or just starting out, keep reading for the inside scoop on growing these gorgeous blooms!
Choosing the Right Hibiscus Variety
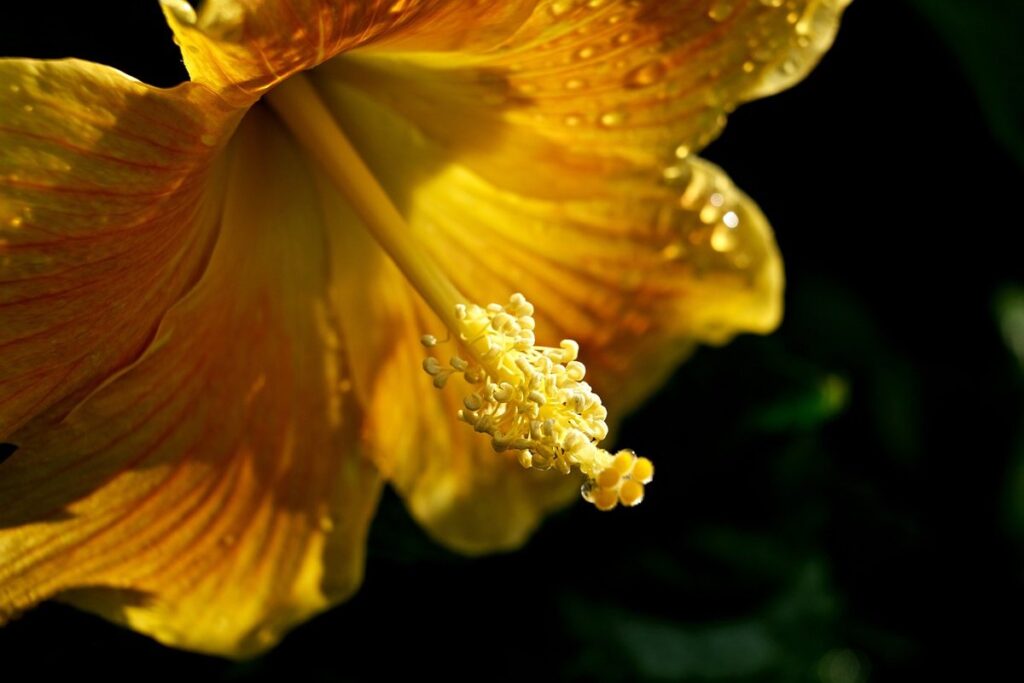
When it comes to growing a thriving hibiscus plant, selecting the right variety is crucial. With so many options available, you’ll want to consider factors like climate, space, and personal preference when making your choice.
Understanding Hibiscus Types
When it comes to choosing the right hibiscus variety, understanding the different types of plants is essential. There are several types of hibiscus plants available, each with its unique characteristics and growing requirements.
For example, tropical hibiscus plants (Hibiscus rosa-sinensis) are known for their large, showy flowers and can grow up to 15 feet tall. They require a warm and humid climate, making them ideal for zones 9-11. On the other hand, hardy hibiscus plants (Hibiscus syriacus) are more compact, growing up to 10 feet tall, and can tolerate cooler temperatures, making them suitable for zones 5-8.
Dwarf varieties, such as ‘Mini Mauve’ or ‘Tahiti’, are perfect for small gardens or containers. These compact plants grow up to 3 feet tall and produce vibrant flowers in a range of colors. They require minimal maintenance and can thrive in partial shade.
When selecting a hibiscus variety, consider the space you have available, your climate, and the level of care you’re willing to provide. With so many types to choose from, you’re sure to find the perfect fit for your garden or indoor space.
Selecting a Location for Your Hibiscus
When it comes to growing hibiscus plants, selecting the right location is crucial for their health and thriving. The ideal spot should receive direct sunlight for at least 6 hours a day, as hibiscus plants love warmth and sunlight to produce those stunning flowers.
Consider the climate in your area too – hibiscus thrives in tropical and subtropical regions with average temperatures between 64°F to 90°F (18°C to 32°C). Avoid planting in areas prone to frost or extreme cold. In colder climates, bring your potted hibiscus indoors during winter months to protect it from damage.
When choosing a location for your hibiscus, also think about air circulation and wind direction. Make sure there’s enough space around the plant for good airflow to prevent fungal diseases. If you’re planting in a container, select a spot with well-draining soil to prevent waterlogged roots.
In general, east- or west-facing locations receive gentle sunlight that is perfect for hibiscus plants. Avoid areas under power lines or nearby structures that may block sunlight or create shaded spots.
By placing your hibiscus plant in the right location, you’ll be setting it up for success and ensuring a vibrant display of beautiful flowers throughout the growing season.
Hardy vs. Tropical: What You Need to Know
When it comes to choosing the right hibiscus variety, one of the most important factors to consider is whether you’re looking for a hardy or tropical plant. While both types can thrive in different environments, they have distinct care requirements that set them apart.
Hardy hibiscus plants are perfect for gardeners living in cooler climates with moderate winters. They can tolerate frost and typically require less maintenance than their tropical counterparts. Hardy hibiscus plants need to be cut back in the fall, allowing them to survive the winter months. This process involves cutting the stems to about 6-8 inches from the ground, which encourages new growth come springtime.
On the other hand, tropical hibiscus plants are ideal for warmer climates with mild winters. They require more frequent watering and fertilization throughout the growing season. Tropical hibiscus plants need protection from frost and should be brought indoors during the winter months to prevent damage.
When deciding between a hardy and tropical hibiscus plant, consider your local climate and the amount of care you’re willing to provide. If you live in an area with cooler winters, a hardy hibiscus plant might be the better choice. However, if you have a green thumb and can devote more time to maintenance, a tropical hibiscus plant could bring vibrant colors and beauty to your garden or indoor space.
Planting and Transplanting Hibiscus
When it comes to growing hibiscus, planting and transplanting at the right time is crucial for its health and success. Let’s dive into the best practices for these essential steps.
Preparing the Soil for Your Hibiscus
When it comes to preparing the soil for your new hibiscus plant, getting it just right is crucial. Hibiscus plants thrive in well-draining, fertile soils with a slightly acidic pH level. The ideal pH range for hibiscus is between 6.0 and 7.0. If your soil tests above 8.0, it may be too alkaline, which can lead to nutrient deficiencies.
To achieve the right balance, you’ll want to test your soil’s pH level before planting. You can use a DIY kit or send a sample to a lab for analysis. Based on the results, you can amend the soil with organic matter like compost or peat moss to adjust the pH.
Hibiscus plants also require a diet rich in nitrogen, phosphorus, and potassium (NPK) to promote healthy growth. You can add a balanced fertilizer during planting time and again after 30 days to give your hibiscus plant an extra boost.
Tips for a Successful Hibiscus Transplant
Transplanting hibiscus plants requires careful planning and attention to detail. Timing is crucial; spring and fall are ideal seasons for transplanting, as the weather is mild and there’s ample moisture in the soil. Avoid transplanting during extreme temperatures or drought conditions.
Before transplanting, prune your hibiscus plant to encourage new growth and prevent shock. Remove any dead or damaged branches, and trim back overgrown stems to about half their length. This will help your plant focus its energy on developing a strong root system.
When transplanting, choose a location with full sun and well-draining soil. Dig a hole that’s twice as wide and just as deep as the root ball of your hibiscus. Gently remove the plant from its container and place it in the new hole. Backfill with a mix of soil and organic matter, tamping it down gently to prevent air pockets.
Aftercare is essential; keep the soil consistently moist but not waterlogged. Mulch around the base to retain moisture and suppress weeds. With proper care, your transplanted hibiscus should thrive in its new location within weeks.
How to Acclimate Your Hibiscus After Transport
When you bring home your new hibiscus plant from the nursery or after relocating it to a different spot in your garden, it’s essential to help it acclimate to its new environment. This transition period is crucial for your plant’s survival and growth.
To begin with, make sure the plant has settled in for at least 24 hours before starting any care routine. This allows it to stabilize and adjust to the change in temperature, humidity, and light conditions. During this time, monitor your plant closely for signs of stress such as yellowing leaves or wilting stems.
Next, inspect the roots for damage caused during transportation. Gently remove any wrapped root balls to assess the condition. If necessary, trim back damaged roots with a sterile tool to encourage healthy regrowth. Provide your hibiscus plant with a suitable pot size and well-draining soil mix to prevent waterlogged conditions that can lead to root rot.
Place your hibiscus in bright, indirect light, but avoid direct sunlight which can cause leaf scorch. Maintain temperatures between 65°F-95°F (18°C-35°C) and keep the plant away from drafts and air conditioning vents. With proper care and attention during this initial acclimation period, your hibiscus will quickly adapt to its new surroundings and thrive in its new environment.
Watering and Humidity Requirements
To keep your hibiscus plant thriving, it’s essential to get its watering and humidity needs just right. This means understanding how much water it requires and maintaining a humid environment.
Understanding the Importance of Watering Frequency
Watering frequency is one of the most critical aspects of hibiscus care. Over-watering can lead to root rot, while under-watering can cause stress and weaken the plant. To determine the ideal watering schedule for your hibiscus, consider three key factors: soil moisture, climate, and plant size.
Check the soil moisture by inserting a finger into the top 2-3 inches of soil. If it feels dry, it’s time to water. In hot climates or during periods of rapid growth, you may need to water more frequently – every 2-3 days in extreme heat, for example. In cooler climates or during dormant seasons, reduce watering to once a week.
For larger hibiscus plants, increase the interval between waterings. Smaller pots require more frequent watering as they dry out faster than larger ones. Keep an eye on your plant’s response and adjust your watering schedule accordingly. As a general rule, allow the top 1-2 inches of soil to dry out before watering again.
Monitor your hibiscus for signs of over-watering, such as yellowing leaves or soft stems. These can be indicative of root rot or fungal infections caused by excessive moisture.
Managing Humidity for a Healthy Hibiscus
Humidity is just as crucial as water when it comes to keeping your hibiscus plant happy and thriving. You see, these tropical beauties are originally from warm, humid climates, so they love an environment that mirrors their natural habitat. When the air is too dry, it causes stress to your plant, leading to weak growth, yellowing leaves, and even pest infestations.
To maintain optimal humidity levels for your hibiscus, you can use a few simple tricks. First, place the pot on a tray filled with water and pebbles. As the water evaporates, it’ll create a humid microclimate around the plant. Another method is to use a humidifier, which can be especially helpful during dry winter months or in extremely arid environments.
In general, aim for a humidity level between 50-60% for your hibiscus. You can check the current humidity level with a hygrometer and adjust accordingly. By keeping the air around your plant comfortable and moist, you’ll enjoy vibrant growth, stunning blooms, and overall better health of your beloved hibiscus.
Common Mistakes in Watering Your Hibiscus
When it comes to watering your hibiscus plant, there are several common mistakes that can lead to problems such as root rot, yellowing leaves, and even the death of your beloved plant. As a responsible hibiscus owner, it’s essential to be aware of these potential pitfalls and take corrective action.
One major mistake is overwatering, which can cause the roots to rot due to excessive moisture. This is particularly true if you’re using a pot with poor drainage or haven’t repotted your plant in a while. To avoid this, make sure the pot has adequate holes for water to escape and consider repotting every 1-2 years.
Another common mistake is underwatering, which can cause stress to the plant and lead to leaf drop. This can be especially true during periods of drought or high temperatures. Check the soil moisture by sticking your finger into it up to the first knuckle; if it feels dry, it’s time for a drink.
Be cautious not to let water collect in the saucer or tray underneath the pot, as this can cause the roots to rot. Finally, avoid getting water on the leaves themselves, as this can lead to fungal diseases that can wreak havoc on your plant.
Fertilization, Pruning, and Pest Control
To keep your hibiscus thriving, it’s essential to provide regular care through fertilization, pruning, and pest control to promote healthy growth and vibrant blooms. Let’s dive into these crucial steps together!
Nourishing Your Hibiscus with the Right Fertilizer
When it comes to nourishing your hibiscus with the right fertilizer, there are several options to consider. As a responsible gardener, you’ll want to choose an organic option that promotes healthy growth without harming the environment.
For organic fertilizers, consider using fish emulsion or bone meal. These natural ingredients release nutrients slowly into the soil as they break down, providing a steady supply of nitrogen, phosphorus, and potassium for your hibiscus. You can apply them every 1-2 months during the growing season (spring-fall), following the manufacturer’s instructions.
Another option is to use compost tea or liquid kelp fertilizer, which provide a balanced blend of micronutrients essential for plant growth. Mix these with water according to the recommended ratio and apply as a foliar spray once a month.
Some popular synthetic fertilizers for hibiscus include Miracle-Gro and Scotts Osmocote. While effective, it’s essential to follow the instructions carefully and avoid over-fertilizing, which can cause more harm than good. A balanced fertilizer (10-10-10) applied every 2-3 months should suffice during the growing season.
Pruning Techniques for a Healthy Hibiscus Shape
Pruning is an essential part of hibiscus care that’s often misunderstood. Many gardeners prune their hibiscus plant without knowing the right techniques, which can lead to damage and stunted growth. To maintain a healthy shape and promote blooming, you’ll want to prune your hibiscus at the right time.
The best time to prune your hibiscus is in late winter or early spring, before new growth begins. This allows you to remove any dead or damaged branches and shape the plant for the upcoming growing season. Prune every 6-8 weeks during the active growing season to maintain a healthy, balanced structure. Remove any weak or spindly growth, cutting it back to about an inch from the node.
When pruning, cut just above a node (where a branch meets the stem), as this is where new growth will emerge. Use clean, sharp tools and make smooth cuts to prevent tearing the bark. For larger branches, make a small notch in the trunk just below the cut, allowing the plant to heal quickly. By following these pruning techniques, you’ll keep your hibiscus looking its best and encourage abundant blooming.
Recognizing and Managing Common Pests and Diseases
As a hibiscus plant owner, it’s essential to recognize common pests and diseases that can harm your beautiful blooms. Some of the most prevalent issues include aphids, whiteflies, mealybugs, spider mites, and scale insects. These pesky critters feed on sap, causing curled or distorted leaves, sticky honeydew residue, and even plant death if left unchecked.
To identify pests, inspect your hibiscus regularly for signs of infestation, such as small moving dots (aphids), white specks (mealybugs), or tiny eggs (scale insects). For diseases like powdery mildew, yellowing leaves, and black spots, look for a dusty, grayish coating on leaves and stems.
To manage these issues, use neem oil, insecticidal soap, or horticultural oil to control pests. For diseases, treat with fungicides containing copper, sulfur, or chlorothalonil. Remember to always read labels carefully and follow instructions for application rates and timing.
Prevention is key: maintain good air circulation, water wisely, and avoid overfertilization to minimize stress on your plant. Regularly inspecting your hibiscus will help you catch problems early, ensuring a thriving, pest-free garden.
Propagation and Winter Care
Now that you’ve got your hibiscus thriving, let’s talk about how to propagate and care for it through the winter months when growth slows down.
Methods for Propagating Hibiscus Plants
Propagating hibiscus plants is an exciting process that allows you to share your favorite varieties with friends and family, or multiply your existing stock. The most effective methods for propagating hibiscus involve stem cuttings and division.
To take stem cuttings, choose a healthy stem from the current season’s growth, making sure it has at least two nodes (the joint where a leaf meets the stem). Cut just above a node using a sharp, clean tool. Remove lower leaves, leaving only two or three sets of leaves at the top. Dip the cut end in rooting hormone powder or liquid to enhance root development. Plant the cutting in well-draining potting mix and water thoroughly. Keep the soil consistently moist but not waterlogged until roots have developed.
Division is another effective method for propagating hibiscus, especially when plants become pot-bound or need rejuvenation. To divide a mature plant, carefully remove it from its container and gently separate the roots using a fork. Replant each section in fresh potting mix, making sure the crown (where the stem meets the roots) is above soil level.
By following these methods, you can successfully propagate new hibiscus plants for your garden or share with others. It’s also a great way to rejuvenate mature plants and encourage healthy growth.
Protecting Your Hibiscus from Winter Damage
As winter approaches, it’s essential to take extra precautions to protect your outdoor hibiscus plant from damage. One of the most effective ways to do this is by covering your plant with a frost blanket or sheeting. This will help retain heat and prevent cold winds from affecting the plant.
If you live in an area where extreme cold snaps are common, consider bringing your hibiscus indoors during the winter months. Choose a location with bright, indirect light, such as a sunroom or south-facing room. Make sure to harden off the plant before moving it indoors by gradually exposing it to indoor conditions over the course of 7-10 days.
When covering or bringing indoors, ensure the plant is not too wet, as this can lead to root rot. Inspect the plant regularly for signs of frost damage and take action promptly if you notice any symptoms. By taking these simple precautions, you can help your hibiscus thrive even during the coldest months.
Bringing Your Hibiscus Indoors During Winter
As winter approaches, it’s time to bring your outdoor hibiscus plant indoors to protect it from frost and freezing temperatures. This process can be a bit challenging, but with the right steps, you’ll ensure your hibiscus survives the winter months in perfect condition.
First, choose a suitable location for your hibiscus indoor. Ideally, this spot should receive bright indirect light, as direct sunlight can cause scorching and discoloration. East- or west-facing windows are ideal for indoor hibiscus placement.
Before bringing your plant inside, inspect it carefully for pests such as mealybugs, spider mites, and scale. Remove any affected leaves or stems to prevent infestations from spreading indoors.
To prepare your hibiscus for the transition, gradually reduce its water intake about two weeks before moving it inside. This will help prevent root rot and other issues associated with sudden changes in environment.
Once indoors, place the hibiscus near a window that receives the right amount of light, and maintain temperatures between 60-70°F (15-21°C). Monitor your plant’s progress closely and adjust its care routine as needed to ensure it thrives throughout the winter.
Frequently Asked Questions
How often should I fertilize my hibiscus plant?
Fertilizing your hibiscus regularly is crucial for its growth and development. A general rule of thumb is to fertilize every 2-3 weeks during the growing season (spring-fall). Use a balanced fertilizer that is high in phosphorus, as this will promote blooming and fruiting.
Can I grow hibiscus plants indoors year-round?
Yes, it’s possible to grow hibiscus plants indoors year-round, but they require specific conditions. Keep them in a bright location with temperatures between 65-75°F (18-24°C) and maintain high humidity levels. Water carefully, as overwatering can be detrimental.
How do I prevent pests from damaging my hibiscus plant?
Common pests like aphids, whiteflies, and mealybugs can cause significant damage to your hibiscus. Regularly inspect your plants for signs of infestation, and use neem oil or insecticidal soap to control outbreaks. Keep your plants in a well-ventilated area to prevent pest buildup.
Can I propagate my hibiscus plant using stem cuttings?
Yes, you can propagate your hibiscus plant using stem cuttings. Take 3-4 inch long cuttings from the tip of the plant and remove lower leaves. Dip the cut end in rooting hormone powder or liquid, then plant it in a pot filled with moistened soil. Keep the soil consistently moist until roots develop.
How do I protect my hibiscus plant from extreme temperatures?
Yes, protecting your hibiscus from extreme temperatures is crucial for its survival. If you live in an area prone to frost or heatwaves, bring potted plants indoors during winter or provide shade cloth to prevent scorching. Mulch around the base of outdoor plants to retain moisture and regulate soil temperature.