Are you ready to take your garden to the next level? If so, let me share with you a game-changing technique that’ll transform your waste into a valuable resource. You see, most people think composting is just about throwing old food scraps and yard trimmings in a pile, but there’s a more efficient way: using eggshells to hatch worms for nutrient-rich compost. This sustainable approach not only reduces waste but also creates a thriving ecosystem in your garden.
By learning how to hatch eggs for composting, you’ll unlock the secret to producing high-quality, fertilizer-rich soil that will make your plants grow stronger and healthier. In this article, we’ll walk you through the benefits of hatching eggs for composting, show you how to set up a successful worm-hatching station, and provide troubleshooting tips to ensure your eggs hatch successfully.
Benefits and Basics of Egg Hatching
If you’re new to hatching eggs for composting, let’s start with the basics: understanding why it’s a great practice and what you need to get started is essential.
What is Egg Hatching and Why Do It?
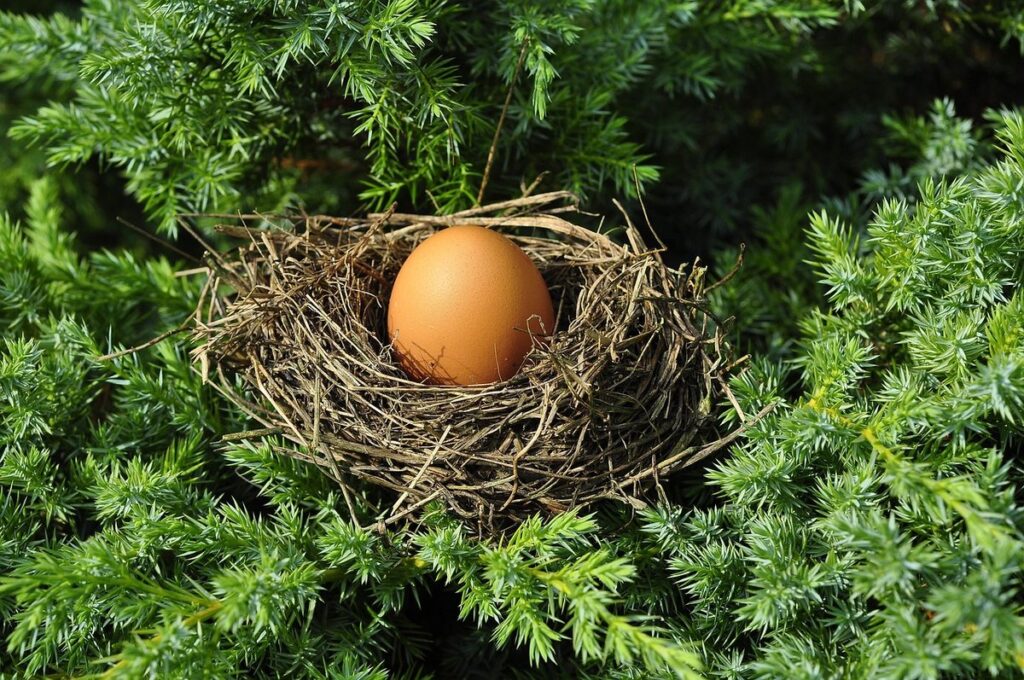
Egg hatching is the process of allowing chicken eggs to incubate and hatch outside of an incubator. It’s a fascinating and rewarding experience for gardeners who are interested in sustainable living and reducing waste. By hatching eggs, you can create new life and provide a unique learning opportunity for yourself and your family.
Not only is egg hatching beneficial for the environment, but it also offers several advantages to gardeners. For one, it provides a way to recycle eggshells, which are rich in calcium and other nutrients essential for plant growth. You can use the shells as compost or mix them into potting soil to give your plants a boost.
Another benefit of egg hatching is that it encourages a closer relationship with nature and fosters an appreciation for the life cycle of animals. By witnessing the miracle of birth, you’ll gain a deeper understanding of the interconnectedness of all living things and develop a greater respect for the natural world.
To get started with egg hatching, choose healthy eggs from your own chickens or purchase them from a local farm. Make sure to handle the eggs gently and store them in a safe place until they’re ready to incubate.
Choosing the Right Eggs for Composting
When it comes to choosing eggs for hatching and composting, there are several factors to consider. Breed is a crucial consideration, as some breeds are better suited for egg laying than others. For example, Leghorns are known for their high fertility rate and ability to produce large numbers of eggs, making them an ideal choice for hatching.
When selecting eggs, size also plays a significant role. Larger eggs tend to have higher fertility rates and better hatchability, while smaller eggs may be more prone to infertility or poor development.
In addition to breed and size, the fertility of the egg is also essential for successful hatching. Look for eggs that are clean, dry, and free of visible cracks or damage. Freshness is key, as older eggs will have lower fertility rates and may not hatch at all.
Some popular breeds for composting include Leghorns, Rhode Island Reds, and Barred Rocks. These breeds tend to produce high-quality eggs with good fertility rates, making them ideal choices for gardeners looking to hatch their own eggs for composting purposes.
Ultimately, the best breed or type of egg will depend on your individual needs and preferences. With a little research and planning, you can choose the right eggs for successful hatching and composting.
Setting Up an Egg Hatching Station
To set up an egg hatching station for garden composting, you’ll need to ensure it’s equipped with the right environment and tools. Start by selecting a suitable location for your incubator, away from direct sunlight and drafts. Next, invest in a high-quality incubator that can maintain precise temperature control between 99°F and 100°F (37°C to 38°C) for optimal hatching.
Egg rotation is also crucial to prevent uneven development and ensure even weight distribution among eggs. A rotating tray or a manual turner will help you rotate the eggs every 8-12 hours without breaking them. Additionally, consider investing in an egg turning device that can be programmed for regular intervals.
When choosing your equipment, look for options with automatic temperature control, humidity regulation, and alarm systems to notify you of any issues. A well-designed incubator will also have a transparent lid or viewing window, allowing you to monitor the eggs without opening the door and disrupting the environment. By investing in quality equipment and following proper setup procedures, you’ll be well on your way to successfully hatching eggs for garden composting.
The Science Behind Egg Hatching
Let’s dive into the fascinating process of how eggs hatch, and I’ll break down the essential steps that lead to a successful hatching experience for your compost. From embryo development to pip formation, it’s a remarkable journey!
Embryonic Development and Stages of Incubation
As you prepare to hatch eggs for your garden composting project, it’s essential to understand the intricate process of embryonic development and incubation. The journey from fertilized egg to hatched chick is a remarkable one, involving several stages that are crucial for successful hatching.
Embryonic development begins about 24 hours after fertilization, when the embryo starts to divide and grow. Over the next few days, it undergoes gastrulation, neurulation, and organogenesis – critical stages that shape its future growth and development. By day 3-4, the embryo has developed into a distinctive shape, with visible eyes, beak, and limbs.
Incubation periods vary depending on species, but most chicken breeds take around 21 days to hatch. Temperature, humidity, and handling play significant roles in maintaining fertility and ensuring healthy chicks. Proper temperature regulation is crucial, as even slight variations can impact embryonic development. For example, temperatures between 99-100°F (37-38°C) are ideal for most chickens.
Factors affecting fertility include egg handling, storage, and incubation environment. To ensure optimal conditions, store eggs in a cool, dry place, away from direct sunlight, and gently transfer them to the incubator or hatching device. A consistent temperature range of 99-100°F (37-38°C) will also promote healthy embryonic development and increase hatch rates.
Factors Affecting Hatch Rates and Success
When it comes to hatching eggs for garden composting, understanding the factors that affect hatch rates is crucial. One of the most significant factors influencing hatch rates is egg quality. Freshness and cleanliness play a critical role in determining the success of incubation.
Proper storage conditions can make all the difference in maintaining egg quality. Store eggs at room temperature (around 65-70°F) for up to two weeks before refrigerating them. This helps slow down embryonic development, reducing the risk of breakage during transport.
Incubator conditions also significantly impact hatch rates. Temperature fluctuations can be detrimental to embryo development. Aim for a consistent temperature range between 99-100°F for most breeds. Maintain humidity levels around 50-60% and ensure adequate ventilation to prevent moisture buildup.
Breed-specific characteristics are another crucial factor to consider. Some breeds, such as Leghorns, have higher hatch rates due to their smaller egg size and efficient incubation process. In contrast, larger breed eggs may require adjustments in temperature and humidity levels. Understanding these factors will help you make informed decisions when selecting eggs for hatching and incubation.
Understanding Flock Health and Hygiene
Maintaining a healthy flock is essential when it comes to hatching eggs for composting. A clean and disease-free environment ensures not only the well-being of your chickens but also the quality of the eggs they produce. When introducing new birds to your flock, vaccination may be necessary to protect them from diseases prevalent in your area.
It’s equally important to implement parasite control measures. Internal parasites like worms can significantly impact egg production and overall health. Regular deworming programs, monitoring of droppings for signs of infestation, and maintaining a clean living environment are crucial steps in preventing parasitic infections.
To ensure optimal flock health, establish a regular routine that includes daily cleaning and disinfection of coops and enclosures, providing adequate ventilation, and monitoring your birds’ behavior and physical condition. A healthy flock is less likely to be affected by diseases, resulting in higher-quality eggs for composting purposes. Consider consulting with local poultry experts or veterinarians for personalized advice on maintaining a healthy and thriving flock.
Preparing Eggs for Hatching and Composting
Now that you’ve collected eggs, it’s time to prepare them for hatching and subsequent composting, which requires careful handling and storage to ensure a successful process. Let’s dive into the details of preparing your eggs.
Collecting and Storing Fresh Eggs
When collecting fresh eggs from your coop, it’s essential to handle them gently to avoid cracking the shells and compromising their quality. Always collect eggs frequently, ideally every 24-48 hours, to prevent overcrowding and stress on the hens. This will also help you identify any potential issues with fertility or cleanliness.
To store eggs for hatching or composting, make sure they are kept in a cool, dry place away from direct sunlight and moisture. The ideal temperature range for storing eggs is between 50-60°F (10-15°C). You can use a designated egg storage container or a cardboard box lined with paper towels to maintain humidity.
When storing eggs for longer periods, you may want to consider using an incubator to slow down the cooling process. This will help preserve fertility and ensure successful hatching. Always check on your stored eggs regularly to monitor their condition and adjust the storage conditions as needed. Regular cleaning of the coop and equipment is also crucial in maintaining egg quality and fertility.
Washing and Sanitizing Eggs for Incubation
When it comes to preparing eggs for hatching and composting, washing and sanitizing is an essential step that shouldn’t be overlooked. Bacterial contamination can lead to reduced fertility rates and even the death of chicks inside the egg. To prevent this from happening, you’ll want to follow a proper cleaning and sanitizing process.
Start by gently washing your eggs in cold water to remove any dirt or debris that may have accumulated on their surface. Use a soft-bristled brush to scrub away any stubborn spots. Next, mix 1 tablespoon of unscented bleach with 1 quart of water and soak the eggs for about 10-15 minutes. This solution will help kill any bacteria that may be present on the eggshell.
After soaking, carefully remove the eggs from the sanitizing solution using a clean scoop or tongs, making sure not to touch the egg itself. Rinse each egg gently with cold water to remove any remaining bleach residue. Once your eggs are clean and sanitized, they’re ready for incubation. Remember to handle them carefully to prevent any damage that could compromise their fertility.
Creating a Hatching Chamber or Incubator
Creating a hatching chamber or incubator is a crucial step in successfully hatching eggs for garden composting. Before you start incubating eggs, it’s essential to have a suitable environment that mimics the natural conditions of a broody hen. You can either purchase an incubator or build one using DIY plans.
When setting up your hatching chamber or incubator, consider ventilation as a top priority. Proper airflow is crucial to prevent the buildup of carbon dioxide and ammonia gases produced by the eggs. Aim for a ventilation rate of around 2-3 exchanges per hour. You can achieve this by installing small vents or fans that allow air to circulate freely.
Temperature control is also vital in an incubator. Most chicken eggs require a temperature range between 99°F (37°C) and 100°F (38°C). You’ll need to invest in a reliable thermometer and heater to maintain this temperature within a margin of ±1°F (±0.5°C). A good rule of thumb is to aim for a slight drop in temperature at night, mimicking the natural decrease in temperature during a broody hen’s resting period.
Remember to also add some humidity to your incubator to prevent eggs from drying out. Aim for a relative humidity of around 50-60%. With proper ventilation, temperature control, and humidity levels, you’ll be well on your way to successfully hatching eggs for garden composting.
Composting with Hatchlings and Eggshells
Adding hatchling waste, including eggshells, can add valuable nutrients to your compost pile. Let’s explore some tips for incorporating these into your garden recycling system.
Nutrient-Rich Fertilizer from Eggshells
Eggshells are an often-overlooked treasure in garden composting. Not only do they provide a natural habitat for hatchlings and other microorganisms, but they also offer a nutrient-rich boost to your soil. One of the key benefits of using eggshells as a fertilizer is their high calcium content. With approximately 2-3% calcium by weight, crushed eggshells can help neutralize acidic soils and promote healthy root development.
In addition to providing essential nutrients, eggshells also have a natural liming effect on soil, which means they can help reduce its acidity over time. This is especially beneficial for gardeners who grow acid-loving plants like blueberries or azaleas. To incorporate eggshells into your compost pile, simply crush them and mix with other organic materials like leaves, grass clippings, or vegetable scraps.
As a rule of thumb, aim to add 1-2 cups of crushed eggshells per 5-gallon bucket of compost material. This will provide a sufficient amount of calcium without overpowering the other nutrients in your pile. By harnessing the power of eggshells, you’ll be creating a more balanced and fertile soil that will reward your garden with robust growth and vibrant blooms.
Integrating Hatchlings into Your Compost System
When you’re ready to integrate hatchlings into your compost system, it’s essential to consider their nutritional needs and waste management. Hatchlings require a diet rich in calcium and protein, which can be challenging to replicate in a composting environment. To address this issue, you can supplement their diet with crushed eggshells or oyster shells, providing them with the necessary calcium they need for growth.
In terms of waste management, it’s crucial to maintain a clean and odor-free environment within your compost system. Hatchlings are sensitive to ammonia levels in their surroundings, so make sure to provide adequate ventilation and balance the carbon-to-nitrogen ratio in your compost pile. Regularly cleaning out any waste or uneaten food will also help prevent the buildup of unpleasant odors.
The environmental impact of incorporating hatchlings into your compost system is relatively low compared to traditional livestock farming. However, it’s still essential to consider their carbon footprint and ensure they’re not contributing to resource depletion. By implementing efficient feeding systems and minimizing waste, you can create a sustainable and eco-friendly environment for both the hatchlings and your garden.
Using Eggshell Tea as a Natural Fertilizer
Using eggshell tea as a natural fertilizer is a great way to give your plants an organic boost. To make eggshell tea, start by collecting clean, dry eggshells and placing them in a large container or bucket. Add water to the container, making sure that the eggshells are fully submerged. Allow the mixture to steep for 24-48 hours, which will allow the calcium and other minerals to leach into the water.
After the steeping process is complete, strain the liquid through a cheesecloth or fine mesh to remove any remaining solids. You’re now left with a concentrated solution of eggshell tea that’s rich in calcium and other nutrients. To apply it, mix 1-2 tablespoons of the tea with 1 gallon of water for a foliar spray or soil drench.
The benefits of using eggshell tea are numerous – it can help to improve plant growth, increase resistance to disease, and even help to neutralize acidic soils. However, be aware that excessive use can lead to an overabundance of calcium in the soil, which may cause problems for plants like tomatoes and peppers that require a balanced nutrient profile.
Troubleshooting Common Issues with Egg Hatching and Composting
If you’re experiencing problems with your egg hatching or composting process, don’t worry – we’ve got some helpful tips to get you back on track. We’ll cover common issues and their solutions here.
Identifying Causes of Failed Hatchings and Low Hatch Rates
Failed hatchings and low hatch rates can be frustrating for even the most seasoned gardeners. To tackle these issues, it’s essential to identify the underlying causes. Temperature fluctuations are a significant concern, as extreme temperatures can stop embryos from developing properly. For instance, if the temperature drops below 60°F (15°C) or rises above 80°F (27°C), hatch rates may suffer.
Humidity imbalances are another critical factor. Eggs need a stable humidity level between 50-70% to facilitate proper moisture transfer and development. If the environment is too dry or wet, it can hinder or even stop the hatching process altogether. Some breeds, such as chickens or ducks, have specific requirements that may not be met by standard incubation conditions.
To troubleshoot these issues, monitor temperature and humidity levels closely during the incubation period. Make sure your incubator or brooder is calibrated correctly, and maintain a consistent environment. Research breed-specific needs to ensure you’re providing optimal conditions for the eggs. By addressing these common causes of failed hatchings and low hatch rates, you can increase the chances of successful hatching and healthy chicks for composting in your garden.
Overcoming Challenges in Maintaining Flock Health and Hygiene
Maintaining flock health and hygiene is crucial to ensure a successful egg hatching process. One of the biggest challenges you’ll face is preventing disease outbreaks among your chickens. This is where vaccination protocols come into play. Consult with a veterinarian to determine which vaccinations are necessary for your region and flock size.
Parasite control is another critical aspect to consider. Regular checks for mites, lice, and fleas can help prevent infestations. Use diatomaceous earth or permethrin dust to control these pests. Make sure to follow the product instructions carefully to avoid harming your chickens.
Biosecurity measures are also vital in preventing the spread of diseases. Implement a strict cleaning schedule for coops, feeders, and waterers. Disinfect all equipment with a solution of 1 part bleach to 10 parts water. Keep new birds isolated for at least two weeks before introducing them to the main flock.
To further prevent disease outbreaks, practice good hygiene around your chickens. Wash your hands thoroughly after handling the birds or their eggs. Store feed and supplies in rodent-proof containers to avoid contamination. By following these tips, you can reduce the risk of health issues within your flock and ensure a successful egg hatching process.
Addressing Composting Concerns and Troubleshooting Tips
One common concern when composting with hatchlings and eggshells is attracting pests to your garden. To minimize this risk, it’s essential to balance the carbon-to-nitrogen ratio in your compost pile. A general rule of thumb is to maintain a mix of 2/3 “brown” materials (dry leaves, straw, or shredded newspaper) and 1/3 “green” materials (food scraps, grass clippings, or eggshells). By maintaining this balance, you can reduce the likelihood of pests like rodents, ants, or flies being attracted to your compost.
Another concern is odors emanating from your compost pile. To minimize unpleasant smells, ensure that your pile is regularly turned and aerated. This allows for better oxygen flow and helps break down organic matter more efficiently. Additionally, adding a 1-2 inch layer of finished compost on top of the pile can help absorb any lingering odors.
As for nutrient imbalances, it’s crucial to maintain the right pH levels in your compost. A pH range between 6.0 and 7.5 is ideal for most composting microorganisms. If you notice your plants are experiencing nutrient deficiencies or excessive growth, consider adding supplements like fish emulsion or alfalfa meal to balance out the mix.
Frequently Asked Questions
What if I notice mold or fungus on my egg hatching station?
Don’t panic! Mold and fungus can be a common issue, especially when introducing new materials like composting worms to your system. To prevent the spread of mold and maintain a healthy ecosystem, ensure good airflow by leaving space between each tray, and regularly clean the area with a mild detergent solution.
Can I use any type of eggs for hatching, or are there specific requirements?
For successful egg hatching, it’s essential to choose fresh, high-quality eggs from healthy chickens. Look for eggs that are free-range, pasture-raised, or from local farms with good animal welfare practices. These eggs will have a higher hatch rate and be more suitable for composting.
How long does it take to see results in my garden after implementing egg hatching for composting?
You’ll likely notice improvements in soil health and fertility within 2-4 weeks of introducing the hatchlings into your compost system. As the worms break down organic matter, nutrient-rich fertilizer will be produced, leading to healthier plants and a more thriving ecosystem.
What’s the best way to handle failed hatches or low hatch rates?
Failed hatches can be frustrating, but they’re not uncommon when starting out with egg hatching for composting. To minimize failures, ensure proper temperature control (around 78-80°F), maintain high humidity levels, and avoid overcrowding your hatching station. If you do experience failed hatches or low hatch rates, analyze the situation, adjust your techniques accordingly, and continue refining your process.
Can I use eggshell tea as a fertilizer immediately after hatching, or is it best to wait?
Yes, you can start using eggshell tea as a natural fertilizer shortly after hatching, but make sure to let the liquid sit for at least 24 hours to allow the nutrients to break down fully. This will help prevent burning your plants’ roots and ensure they receive the full benefits of this nutrient-rich fertilizer.