Onions are one of the most versatile vegetables in our kitchens, but they require careful handling from seed to plate. Harvesting and curing onions properly can make all the difference between a mediocre crop and a bountiful harvest that lasts you through the year. But how do you know when your onions are ready? And what’s the best way to dry and store them to keep them fresh for months on end?
In this guide, we’ll walk you through the entire process of harvesting and curing onions, from assessing their maturity to storing them in a way that preserves their flavor and texture. We’ll cover various harvesting methods, including hand-pulling and digging, as well as provide expert tips on how to dry and cure your onions to keep them fresh all year round. By following our step-by-step instructions, you’ll be able to enjoy your homegrown onions for months to come.
Understanding Onion Maturity
To ensure you harvest and cure onions at their peak, it’s crucial to understand when they’re fully mature. Checking for maturity can be a bit tricky, but there are some simple signs to look out for.
Assessing Readiness for Harvest
To confirm that your onions are mature and ready for harvest, it’s essential to check on them regularly. Start by looking for visual cues such as the tops of the plants beginning to yellow and fall over. This indicates that the bulb is fully formed and has begun to dry out.
Another way to determine maturity is to gently dig around the base of the plant with your fingers or a small tool. If the onion comes out easily, it’s likely ready to be harvested. Be careful not to damage the neck of the bulb as this can cause rot during curing.
A mature onion will typically have a hard, dry skin and a compact, dense shape. Avoid harvesting onions when they are still green and moist, as this can lead to spoilage during storage. Instead, wait until the tops have fully died back and the bulbs are hard to the touch.
Determining the Right Time for Harvest
Determining the right time for harvest is crucial to ensure that your onions are mature and ready to be picked. Weather conditions play a significant role in determining onion maturity. A period of dry weather can cause the tops of the onions to turn yellow and fall over, which indicates that they’re ready for harvest. However, if the weather becomes wet again, it can encourage regrowth, making it challenging to determine when to pick.
Soil moisture is another critical factor to consider. Onions are typically harvested when the soil is dry enough to be worked with a fork. If the soil is too moist, it may damage the bulbs or cause them to rot. Keep an eye on your soil’s moisture levels and wait until they’re dry enough before harvesting.
Effective pest and disease management is also essential in determining onion maturity. Pests like aphids and thrips can weaken the plants, making them more susceptible to disease. Regular monitoring and control measures will help prevent these issues from impacting your harvest timing.
How to Harvest Onions
Now that you’ve grown a bountiful onion crop, it’s time to learn how to harvest them at just the right moment, and then cure them for long-term storage. Let’s get started on this process!
Hand-Weeding and Preparation
As you prepare to harvest your onions, it’s essential to carefully remove weeds that may have grown around them. Hand-weeding is a crucial step to prevent damage to the onion bulbs and ensure they’re healthy enough for curing. To do this, gently dig around the base of each plant with your fingers or a small tool, being careful not to touch or disturb the onions themselves.
Check the soil regularly, as weeds can grow quickly and may be hiding beneath the surface. Use a fork to carefully loosen any stubborn weeds, making sure not to harm the onion roots. Keep in mind that some weeds, like grasses, can be difficult to remove completely without damaging the surrounding soil. Consider applying a shallow layer of mulch or straw around the onions to suppress weed growth and maintain moisture levels.
By taking the time to carefully remove weeds and prepare the area, you’ll create an ideal environment for your onions to thrive during the curing process. This attention to detail will result in healthier bulbs with better flavor and texture.
Cutting vs. Pulling: Choosing the Right Method
When it comes to harvesting onions, you’ll often be faced with two main methods: cutting and pulling. While both techniques can produce great results, the best approach depends on various factors, including the soil type, onion size, and personal preference.
For smaller onions or those grown in well-draining soil, cutting is usually a better option. This method involves carefully slicing through the neck of the plant with a sharp tool, leaving about an inch of stem intact. This approach helps to avoid damaging the delicate roots, which can lead to reduced yields or rotting bulbs. Plus, it’s often easier to harvest smaller onions this way, as they’re more fragile and prone to breakage.
On the other hand, larger onions or those grown in heavier soil may be better suited for pulling. This method involves digging around the plant with a fork, carefully loosening the soil until the bulb is exposed. While it can be more time-consuming than cutting, pulling allows you to harvest the onion whole, roots and all. If you prefer a more hands-off approach or have limited space for cultivating onions, pulling might be the way to go.
Handling Harvested Onions
Now that you’ve harvested your onions, it’s time to dry and store them properly to ensure they stay fresh for a long time. This process is crucial for maintaining their quality and flavor.
Trimming and Cleaning
Once you’ve harvested your onions, it’s essential to trim and clean them properly to prevent moisture from accumulating and causing rot. This process may seem simple, but it’s crucial for the longevity of your harvest.
Start by trimming the necks of the onions, leaving about 1-2 inches of stem intact. Be careful not to cut too much, as this can damage the bulb and lead to spoilage. You can use scissors or a sharp knife to trim the necks. For larger onions, you may need to make multiple cuts to remove excess stem.
Next, gently brush off any dirt or debris from the onions using a soft-bristled brush or a clean cloth. Be gentle, as rough handling can damage the skin and create entry points for bacteria. For particularly stubborn dirt or stains, you can use a mild detergent mixed with water to clean the onions. Rinse thoroughly with cold water to remove any soap residue.
By trimming and cleaning your harvested onions properly, you’ll be able to store them safely and enjoy their flavor for months to come. Remember, prevention is key in maintaining the quality of your harvest, so take the time to do this step correctly.
Curing Process Overview
The curing process is a crucial step in preserving harvested onions and ensuring their quality for storage. This stage is often overlooked, but it’s essential to understand its importance and the steps involved. Think of curing as giving your onions a ‘second skin’ that protects them from moisture, preventing decay and sprouting.
By curing your onions correctly, you’ll be able to enjoy them throughout the year, not just for a few weeks after harvesting. This process also helps to concentrate their natural flavors and aromas, making them more pungent and delicious. In this guide, we’ll cover curing in-depth later on, but it’s worth introducing the basics here.
The key to successful curing is controlling moisture levels. You’ll want to keep your onions dry and well-ventilated, allowing excess moisture to evaporate naturally. This can be achieved by spreading them out in a single layer or tying them in small bunches.
Methods for Curing Onions
Now that you’ve harvested your onions, let’s talk about how to cure them properly to preserve their flavor and shelf life effectively. In this next step, we’ll explore different methods for curing onions at home.
Air Drying: A Simple and Effective Method
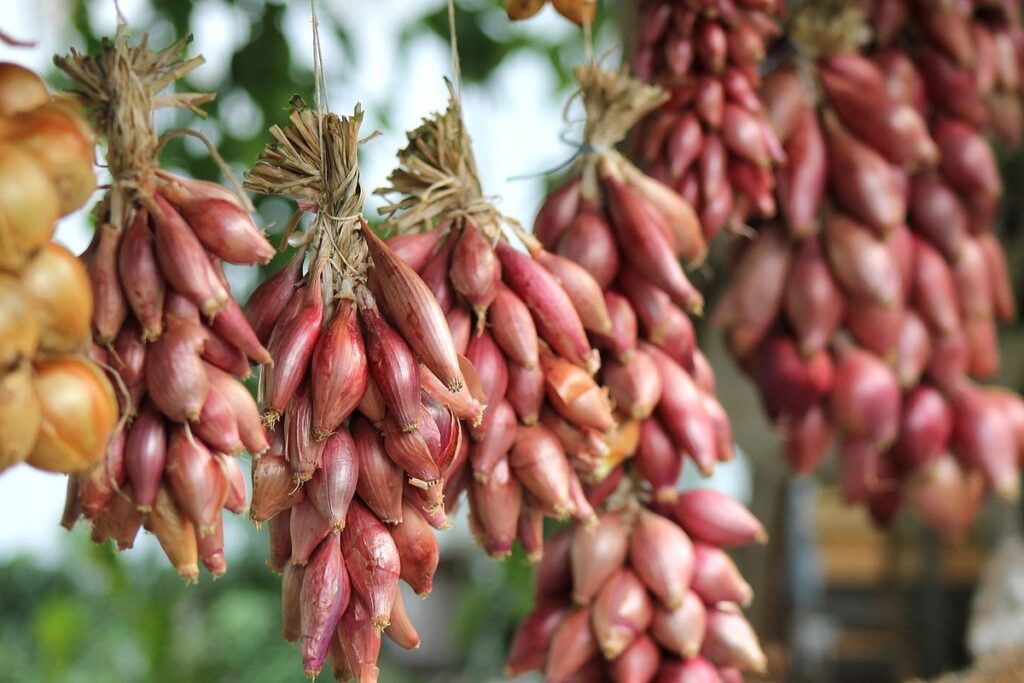
Air drying is one of the simplest and most effective methods for curing onions. This low-cost and low-maintenance approach allows you to preserve your harvest without investing in specialized equipment. The process involves hanging the onions in a well-ventilated area, either indoors or outdoors, allowing them to dry naturally.
To achieve optimal results with air drying, it’s essential to select healthy onions that are free from bruises and moisture. Begin by trimming the tops of each onion, leaving about an inch of stem attached. This helps to prevent moisture loss and promotes even drying. Next, tie a loop of twine or string around the neck of each bulb, leaving enough space between them for air to circulate.
Hang the onions in a warm, dry location with good airflow, such as a shed or a well-ventilated room. Avoid exposing them to direct sunlight or extreme temperatures. Check on the onions regularly, removing any that become discolored or develop mold. Properly dried onions will have a papery skin and a sweet, mellow flavor, making them perfect for long-term storage or use in your favorite recipes.
Tray or Rack Drying: For Larger Quantities
For larger quantities of onions, tray or rack drying is an ideal method to cure them. This approach allows for efficient airflow and easy monitoring of progress, making it suitable for those with more extensive onion harvests.
To implement this method, choose a well-ventilated area with sufficient space to accommodate the trays or racks. Ensure that each onion has some air circulation around it to prevent moisture from becoming trapped. Place the onions in a single layer on the trays or racks, being mindful of their orientation – some prefer to have them facing upwards, while others recommend placing them upside down.
Over time, you’ll need to check on your onions periodically to ensure they’re drying evenly and not developing any unpleasant odors. This may involve gently rotating the trays or racks to redistribute the onions. Depending on the ambient temperature and humidity, this process can take anywhere from a few weeks to several months – be patient and keep monitoring their progress until they reach the desired dryness level.
Storage and Preservation
Now that you’ve harvested and cured your onions, it’s time to store them properly to maintain their flavor and shelf life. In this next step, we’ll cover how to dry and preserve your onions for long-term use.
Long-Term Storage Tips
Proper storage of cured onions is crucial to maintaining their quality and shelf life. To ensure your onions remain fresh for as long as possible, it’s essential to control the humidity level around them. Store them in a cool, dry place with a relative humidity of 60-70%. Avoid storing onions in humid areas like basements or near sinks.
Temperature management is also vital when storing cured onions. Keep them away from direct sunlight and heat sources, as this can cause them to sprout prematurely. A temperature range between 40°F to 50°F (4°C to 10°C) is ideal for long-term storage.
To protect your onions from pests, store them in airtight containers or bags made of breathable materials like paper or mesh. This will prevent moisture buildup and keep insects away. Another option is to hang the onions in small bunches, allowing for air circulation around each bulb. This will help maintain even drying and prevent mold growth.
Regularly check on your stored onions for signs of spoilage, such as sprouting or mold growth. Remove any affected bulbs immediately to prevent the spread of decay.
Freezing and Dehydrating Options
When it’s time to store your onions for an extended period, freezing and dehydrating become viable alternatives. Both methods allow you to preserve onions without the need for a root cellar or other specialized storage facilities.
Freezing is ideal for maintaining onion flavor and texture. Simply peel, chop, and blanch the onions in boiling water for 2-3 minutes before placing them on a baking sheet and freezing. This method is perfect for soups, stews, and sauces where the onion’s texture won’t be compromised. For example, you can add frozen onions directly to your favorite recipes without worrying about the flavor being affected.
Dehydrating, also known as drying, involves removing moisture from the onion to prevent spoilage and bacterial growth. This method is suitable for cooking methods that require chopped or minced onions, such as sautéing or roasting. You can dehydrate onions using a food dryer or by spreading them out on a baking sheet and placing it in a low oven (150°F – 200°F). Once dehydrated, store the onion powder in an airtight container for up to six months.
Keep in mind that both methods will affect the onion’s flavor profile. Freezing helps preserve more of the natural sweetness, while dehydration enhances the onion’s earthy notes.
Frequently Asked Questions
How can I speed up the drying process for larger quantities of onions?
You can use a dehydrator or a food dryer to accelerate the curing process, especially when dealing with large harvests. This method allows you to dry multiple onions at once, reducing the overall time and effort required. Be sure to follow proper temperature and humidity guidelines to ensure optimal results.
What’s the best way to handle onions that are still damp after harvesting?
It’s essential to dry onions thoroughly before curing or storing them. To speed up the drying process, you can gently brush off excess dirt and place the onions in a warm, well-ventilated area with low humidity. Avoid washing the onions, as excess moisture can lead to rotting.
Can I use a combination of air drying and tray drying methods for optimal results?
Yes, combining these two methods can be an effective approach for curing onions. Air drying is ideal for small quantities or when space is limited, while tray drying allows for larger batches and more control over the environment. By using both methods in tandem, you can achieve excellent results.
How do I know if my onions are properly cured, and what are the signs of spoilage?
Properly cured onions should be dry and papery on the outside, with a hollow sound when tapped. Signs of spoilage include soft spots, mold, or a sweet, fermented smell. Regularly inspect your stored onions for any visible damage or odors, and discard any affected bulbs to maintain quality.
Can I store onions in airtight containers, or do I need specialized storage solutions?
Airtight containers can work well for short-term storage (up to 2 months), but they’re not ideal for long-term preservation. For extended storage, consider using specialized onion bags or nets that allow for airflow and moisture control. This will help maintain the onions’ flavor, texture, and shelf life.