Hand pollinating your squash and pumpkins can be a game-changer for home gardeners and experienced farmers alike. Not only does it save time and energy, but it also increases the chances of a bountiful harvest. However, many gardeners struggle with this delicate process, unsure where to start or how to ensure successful pollination.
In this article, we’ll walk you through expert techniques for hand pollinating squash and pumpkins, from selecting the right varieties to post-pollination care. We’ll explore the best methods for maximizing your harvest success, including tips on timing, technique, and tools of the trade. Whether you’re growing a few vines in your backyard or managing a large-scale pumpkin patch, our comprehensive guide will give you the confidence and skills needed to achieve optimal results with hand pollinating squash and pumpkins.
The Importance of Hand Pollination in Squash and Pumpkin Production
Hand pollination is crucial for increasing yields, improving fruit quality, and developing a more resilient squash and pumpkin crop. By mastering hand pollination techniques, you’ll be well on your way to a bountiful harvest.
Understanding the Need for Hand Pollination
When it comes to squash and pumpkin production, hand pollination is often necessary due to the limitations of natural pollinators. These plants rely heavily on bees and other pollinators to transfer pollen between flowers, but certain conditions can reduce their effectiveness.
In ideal circumstances, bees would be able to visit every flower in a squash or pumpkin patch multiple times throughout the day, collecting and transferring pollen as they go. However, this is not always the case. Weather conditions like heavy rain, intense heat, or cold snaps can keep pollinators away from your plants, reducing their chances of successful pollination.
Furthermore, some varieties of squash and pumpkins are particularly sensitive to low pollination rates. These include smaller or more exotic varieties that may require a higher level of precision in order to set fruit successfully. By understanding the importance of hand pollination in these situations, gardeners can take proactive steps to ensure their crops receive the attention they need to thrive.
This is especially true for home gardeners who often have limited space and resources available. Hand pollination allows for greater control over the process, enabling you to carefully transfer pollen between flowers and maximize your chances of successful fruiting.
Benefits of Hand Pollinating Squash and Pumpkins
When you take the time to hand pollinate your squash and pumpkin plants, you’ll be rewarded with increased fruit set and improved yields. One of the most significant benefits is that it allows you to control the pollination process, giving you more flexibility and peace of mind.
By hand pollinating, you can ensure that each flower receives enough pollen for proper fertilization, leading to a higher success rate in fruit set. This is especially important for heirloom varieties or those with low fertility rates. According to a study by the National Gardening Association, hand-pollinated squash and pumpkin plants have shown a 25% increase in fruit yield compared to conventionally pollinated ones.
Hand pollination also allows you to avoid relying on bees and other external factors that can affect pollination efficiency. This is especially beneficial for growers with limited space or those living in areas with low bee populations. To maximize the benefits of hand pollination, be sure to pollinate your squash and pumpkin flowers in the early morning when they are most receptive to pollen.
Choosing the Right Squash and Pumpkin Varieties for Hand Pollination
To ensure successful hand pollination, it’s essential to select squash and pumpkin varieties that are well-suited for manual pollination. Some types thrive better than others under this technique.
Understanding the Pollination Requirements of Different Varieties
When shopping for squash and pumpkin varieties, it’s essential to understand their pollination requirements. Not all types need human assistance, but some do, while others might be self-pollinating or cross-pollinated by bees and other insects. To determine which variety requires hand pollination, examine the seed catalog or plant label.
Look for key phrases like “self-pollinating,” “cross-pollinated,” or “requires human assistance.” Some varieties are specifically bred to be easier to hand pollinate, such as ‘Baby Boo’ pumpkins, while others, like ‘Crookneck’, may require more effort. You can also check the days to maturity and growth habits to determine if a variety is likely to need help.
Even self-pollinating varieties might benefit from hand pollination, especially in areas with limited bee activity or poor pollinator health. Some popular varieties that are often cross-pollinated include ‘Sugar Pie’ pumpkins and ‘Waltham Butternut’. Be aware of these differences when selecting your squash and pumpkin varieties to ensure a successful harvest through hand pollination.
Selecting Varieties with Optimal Fruit Size and Shape
When selecting varieties for hand pollination, it’s essential to consider the optimal fruit size and shape. Larger fruits are often more challenging to pollinate by hand, as they require more precision and effort to ensure successful fertilization. On the other hand, smaller fruits can be easier to manage but may not yield as much volume.
For example, some popular varieties like ‘Baby Boo’ and ‘Table Queen’ produce smaller, sweeter fruits that are perfect for hand pollination. These compact fruits weigh less, making them more manageable for manual pollination. In contrast, larger varieties like ‘Atlantic Giant’ and ‘Big Max’ require more effort to pollinate by hand due to their size and weight.
When choosing a variety, consider the space you have available for your plants. If you have limited space, smaller fruiting varieties are ideal. However, if you have ample space and want to maximize yields, larger varieties may be suitable.
Preparing for Hand Pollination: Tools and Techniques
To successfully hand pollinate your squash and pumpkins, you’ll need to have the right tools and techniques at your fingertips – literally! Let’s take a closer look at what you’ll need.
Gathering the Necessary Equipment
When it comes to hand pollinating squash and pumpkins, having the right equipment is crucial for successful fruiting. You’ll want to start by gathering a few essential tools that will make the process much easier.
First and foremost, you’ll need a pollen brush or cotton swab. This small tool is used to collect and transfer pollen from the male flower to the female flower of your squash or pumpkin plant. Look for one with soft bristles that won’t damage the delicate reproductive parts of your plants. You can also use a small cotton swab, but be gentle not to bruise the flowers.
Next up is a marker to label your plants. This might seem like a small thing, but trust us – it’s easy to get confused between multiple squash and pumpkin varieties, especially as they grow and spread out. Labeling each plant will help you keep track of which one needs pollination, making the process much more efficient.
Finally, don’t forget gloves! They may not be the most glamorous part of hand pollination, but protecting your skin from scratches and potential diseases is crucial. Choose a pair that fits comfortably and provides enough grip to prevent dropping the pollen brush or swab.
By investing in these simple tools, you’ll be well on your way to successful hand pollination.
Understanding the Timing of Hand Pollination
When it comes to hand pollinating squash and pumpkins, timing is everything. You need to know when to perform this delicate process to ensure successful fruiting. To determine the best time for hand pollination, consider the sex of the flowers, the growth stage of your plant, and the weather conditions.
In most vining squash varieties, male flowers appear first, followed by female flowers. The male flowers typically bloom in the morning and wilt by afternoon, while the female flowers remain open throughout the day. This is a critical factor to consider when planning hand pollination, as you’ll need to identify the receptive period of the female flower.
Monitor your plant’s growth stage closely, too. When your squash or pumpkin plant reaches around 6-8 feet in height and has an adequate number of flowers, it’s usually ready for hand pollination. Avoid performing this process when plants are stressed due to heat, drought, or excessive rain, as this can lead to poor fruit set.
Look out for signs like yellowing petals on male flowers, which indicate they’ve done their job and released pollen. This is your cue to carefully transfer the pollen from these male flowers to the receptive female flowers using a small brush or cotton swab.
Performing Hand Pollination: A Step-by-Step Guide
Now that you’ve learned how to identify and prepare your squash flowers, let’s dive into the hands-on process of hand pollination itself.
Identifying Male and Female Flowers
When it comes to hand pollinating squash and pumpkins, understanding the difference between male (staminate) and female (pistillate) flowers is crucial for successful fruiting. At first glance, these flowers may appear similar, but they serve distinct purposes in the pollination process.
Male flowers typically have a long stem with a cluster of stamens at the end, which produce pollen. They usually grow on the periphery of the plant and are often larger than female flowers. In contrast, female flowers have three distinct parts: ovary, style, and stigma. The ovary contains the developing fruit, while the stigma collects pollen from male flowers.
To identify these flowers, examine the reproductive organs at the center of each bloom. If you notice a cluster of stamens with yellow or cream-colored anthers, it’s likely a male flower. Conversely, if you see a prominent pistil with a distinct ovary and stigma, it’s a female flower. By recognizing these differences, you’ll be able to confidently identify which flowers require hand pollination. This will significantly improve your chances of successfully fertilizing the plant and promoting fruit growth.
Collecting and Applying Pollen
Collecting pollen from male flowers is crucial for successful hand pollination. To do this, carefully select male flowers that have fully opened and are displaying a vibrant yellow color. They should also be free of any visible damage or signs of disease. Next, gently brush the center of each male flower with your pollen brush or cotton swab to collect as much pollen as possible.
Once you’ve collected enough pollen, you can apply it to the female flowers using the same brush or swab. It’s essential to target the stigma, which is usually in the center of the flower and resembles a small, yellow knob. Gently rub some pollen onto this area to ensure successful pollination. Be cautious not to damage the delicate reproductive parts of the plant.
It’s also important to note that you can collect pollen from multiple male flowers and apply it to individual female flowers or vice versa – just make sure they’re compatible for cross-pollination purposes. Keep in mind that some squash and pumpkin varieties are self-pollinating, so research your specific type before starting the hand pollination process.
Common Challenges and Solutions in Hand Pollinating Squash and Pumpkins
As you navigate the world of hand pollination, it’s common to encounter challenges that can impact your squash and pumpkin harvest. We’ll tackle these obstacles head-on in this section.
Overcoming Obstacles: Weather, Plant Stress, and Disease
When hand pollinating squash and pumpkins, growers often face various obstacles that can impact fruiting success. Extreme weather conditions such as intense heatwaves, heavy rainfall, or strong winds can disrupt the delicate process of pollination. To mitigate these effects, it’s essential to monitor weather forecasts and plan your pollination schedule accordingly. For instance, if a heatwave is forecasted, try to perform pollinations early in the morning or late in the evening when temperatures are more moderate.
Plant stress caused by nutrient deficiencies, pests, or diseases can also hinder pollination efforts. Be on the lookout for signs of plant stress, such as yellowing leaves, stunted growth, or presence of pests. Take corrective measures promptly to address these issues before they impact pollination. Regularly inspect your plants and remove any diseased or infested sections to prevent further damage.
Disease can also affect hand-pollinated squash and pumpkins. Common diseases include powdery mildew, downy mildew, and fungal infections. Implement integrated pest management (IPM) strategies to minimize disease risks. This may involve using organic or chemical fungicides, practicing good sanitation, and promoting air circulation around your plants.
Troubleshooting Techniques for Fruit Set Failure
If you’re hand pollinating squash and pumpkins but not seeing fruit set as expected, don’t worry – it’s more common than you think. Before assuming that the issue is with your pollination technique, consider the possibility of inadequate plant care or underlying pests/diseases affecting the plants.
Start by examining the plants’ overall health: are they receiving sufficient sunlight and water? Are the soil pH levels within the optimal range for these types of plants? Ensure the temperature fluctuations aren’t causing stress on the plants. Next, inspect your plants for signs of pests (e.g., aphids, whiteflies) or diseases that could be weakening the plant’s ability to produce fruit.
A critical step in troubleshooting is evaluating your pollination technique itself. Check if you’re targeting the correct flowers – ensure both male and female blossoms are receiving adequate pollen transfer. Watch out for signs of self-pollination (e.g., tiny, soft growths near the base of the plant). If none of these factors seem to be contributing to the issue, consider revisiting your pollination timing or technique.
Maximizing the Success of Hand Pollinated Squash and Pumpkins
To ensure your hand pollination efforts pay off, let’s focus on strategies for maximizing yields and optimizing fruit set in your squash and pumpkin patch. We’ll explore key considerations for success.
Tips for Post-Pollination Care
After hand pollination, it’s crucial to provide optimal growing conditions for your squash and pumpkin plants to promote healthy fruit growth. Ensure that the area receives adequate sunlight (at least 6 hours of direct sunlight) and maintain a consistent temperature between 65-70°F (18-21°C). Avoid overwatering, as this can lead to fungal diseases like powdery mildew. Instead, provide about 1 inch of water per week through rainfall or irrigation.
Regularly inspect your plants for signs of pests, such as aphids, whiteflies, and squash bugs. If detected, control them using organic methods like neem oil or introducing beneficial insects like ladybugs. To prevent disease, remove any infected leaves or stems, and apply a fungicide if necessary. Maintain soil fertility by incorporating compost or well-rotted manure to promote nutrient uptake.
Monitor fruit growth closely for signs of stress or irregular development. If you notice an unusually large or small fruit, gently prune nearby flowers or vines to direct the plant’s energy towards the developing fruit. With proper care and attention, your hand-pollinated squash and pumpkins will thrive, producing healthy and abundant harvests.
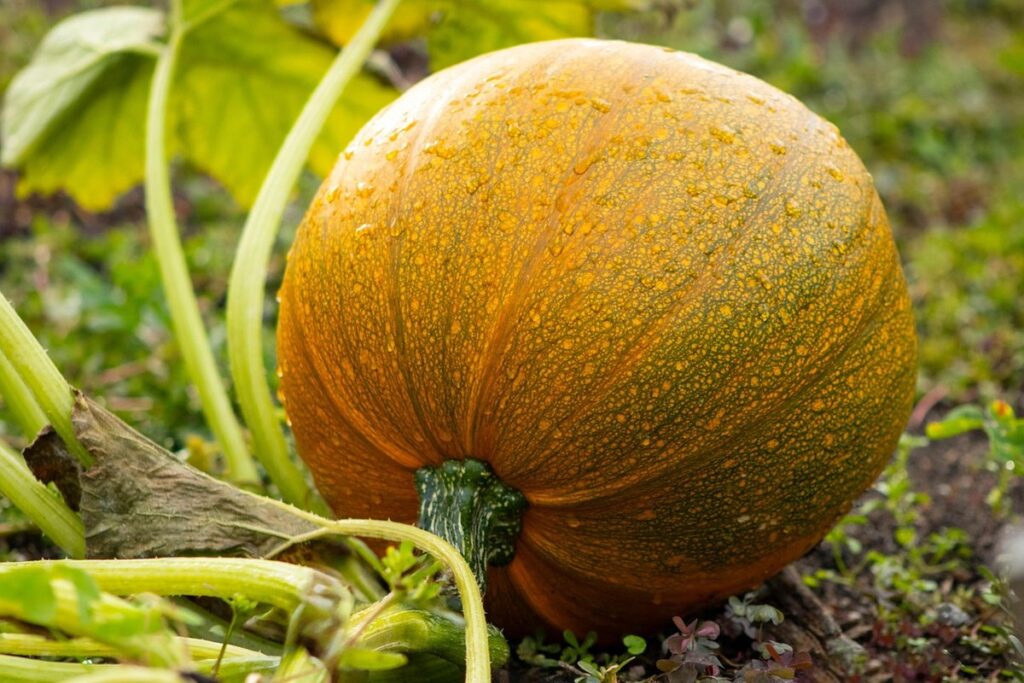
Harvesting and Storing Your Fruits of Labor
When you’ve finally achieved that coveted first harvest of hand pollinated squash and pumpkins, it’s essential to know exactly how to handle them. Harvesting at the right time is crucial – a ripe fruit should have a hard rind, but still be slightly soft to the touch. For example, acorn squash is typically ready when its skin has turned from green to yellow or orange.
To avoid bruising or damaging your precious squash and pumpkins, handle them carefully with clean hands or tools. If you plan to store them for an extended period, choose a cool, dry location with good air circulation. A temperature range of 50-60°F (10-15°C) is ideal for most varieties.
Some storage tips are worth noting: cure your squash and pumpkins by leaving them in direct sunlight for 7-10 days to heal the skin; store them stem-end down to prevent moisture from accumulating at the stem end. By following these simple guidelines, you’ll be able to enjoy your hand pollinated harvest all winter long – perfectly ripened and ready to eat or cook with.
Frequently Asked Questions
Can I hand pollinate squash and pumpkins at any time of day?
Yes, the timing of hand pollination is crucial for success. However, it’s generally recommended to perform hand pollination in the morning when the flowers are still closed. This increases the chances of successful pollination, as the pollen is more viable during this time.
How can I overcome obstacles like weather conditions or plant stress during hand pollination?
While you can’t control the weather entirely, you can take steps to minimize its impact. For example, ensure your squash and pumpkin plants are receiving adequate water and nutrients. Also, consider creating a sheltered area for your plants if extreme weather is forecasted.
What should I do if I’m unsure about identifying male and female flowers?
Male flowers typically have long stems and no ovary at the base of the petals. Female flowers, on the other hand, have a small ovary at the base of the petals. If you’re still unsure, gently touch the base of the flower to check for the presence of an ovary.
Can I use store-bought pollen substitute or do I need to collect my own?
While store-bought pollen substitutes can be used in emergency situations, collecting your own pollen from a healthy male plant is recommended. This ensures the highest quality and purity of pollen, which is crucial for successful hand pollination.
How often should I perform hand pollination on squash and pumpkin plants?
The frequency of hand pollination depends on various factors, including the type of variety, weather conditions, and the health of your plants. As a general rule, you may need to perform hand pollination every 2-3 days during peak pollen production. Monitor your plants closely and adjust your schedule accordingly.