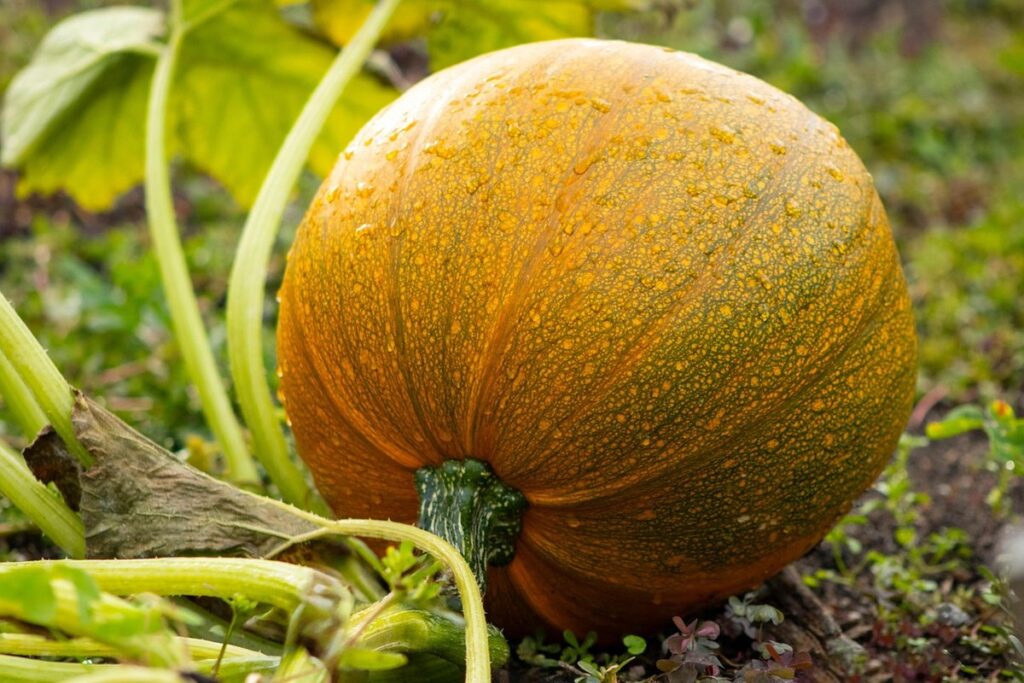
As a gardener, there’s nothing quite like the thrill of watching your hard work come to fruition in the form of a bountiful harvest. But if you’re growing squash, you know that pollination can be a major hurdle to overcome. Whether you’re dealing with male and female flowers or struggling to get your bees to do their job, it’s easy to feel frustrated when those beautiful blooms don’t seem to be doing much of anything. The good news is that hand pollinating squash flowers is easier than you think, and can make all the difference in maximizing your yields. In this article, we’ll show you how to successfully hand pollinate squash flowers, including the optimal conditions, essential tools, and expert techniques you need to get started.
Understanding Squash Flower Anatomy and Requirements
To hand pollinate squash flowers successfully, you need to understand the anatomy of a squash flower and its specific requirements for optimal growth. Let’s dive into what makes these unique flowers tick.
The Importance of Male and Female Flowers
Squash plants produce both male and female flowers, each with distinct characteristics that play crucial roles in pollination. To successfully hand pollinate your squash flowers, it’s essential to understand the difference between these two types of blooms.
Male squash flowers are typically smaller, often yellow or white, and have a long, thin stem attached to the plant’s main vine. They produce the pollen necessary for fertilization, but they don’t contain the ovules that will develop into the fruit. These flowers usually cluster together in groups, making it easy to identify them.
Female squash flowers are slightly larger than male flowers, typically with three petals and a prominent ovary at the base of the flower. They have a short stem attached to the plant’s main vine and produce the ovules that will eventually become the fruit. Female flowers are usually solitary, making them easier to spot on the plant.
To identify these flowers, simply inspect your squash plants regularly, looking for the clusters of male flowers or the individual female blooms. Knowing how to distinguish between male and female flowers is crucial for successful hand pollination, which we’ll discuss in greater detail later in this guide.
Ideal Conditions for Hand Pollinating Squash Flowers
When it comes to hand pollinating squash flowers, having the ideal conditions is crucial for successful pollination and fruit set. The temperature plays a significant role, with optimal temperatures ranging from 65°F to 85°F (18°C to 30°C). Temperatures above or below this range can slow down or even prevent pollination.
Humidity also affects pollination rates, with a relative humidity of 50-70% being ideal. High humidity levels can promote fungal growth and damage the delicate pollen grains, while low humidity can cause the pollen to become too dry and ineffective.
In terms of light conditions, partial shade is best for hand pollinating squash flowers. Direct sunlight can cause the pollen to become dislodged or damaged, reducing pollination rates. Aim for an east- or west-facing location with dappled shade to ensure optimal conditions for successful hand pollination.
If you’re planning to hand pollinate your squash flowers during peak sun hours, consider using a trellis or other support system to provide some shade and protection from intense sunlight.
Preparing Your Plants for Hand Pollination
Before you start hand pollinating, make sure your plants are healthy and ready for the process by following a few essential preparation steps. A little prep work now will pay off in the long run.
Timing of Hand Pollination: Understanding Flowering Cycles
When it comes to hand pollinating squash flowers, understanding the timing is crucial for successful harvests. Most squash plants produce two types of flowers: male and female. The male flowers are typically larger and showier, with bright yellow petals that grow from the stem between each leaf node. These flowers are responsible for producing pollen.
On the other hand, female flowers are smaller and often have a tiny immature fruit at their base. They tend to bloom closer to the main stem of the plant. To determine when your plant is ready for hand pollination, observe its flowering cycle closely. Male flowers usually appear first on the plant, and then they gradually give way to female flowers.
To increase your chances of successful pollination, wait until the morning after a new male flower has opened and transfer pollen from it to the center of a receptive female flower. You can use a small brush or even a cotton swab to collect pollen.
Selecting Healthy Flowers for Pollination
When selecting healthy flowers for pollination, it’s essential to choose both male and female flowers that exhibit the right characteristics. Start by inspecting the blooms on your squash plant. Female flowers typically have a small, immature fruit or ovary at their base, while male flowers have no fruit.
For female flowers, look for ones with fully open petals and a prominent stigma, which is the receptive part of the flower where pollen will be collected. These flowers should also be free from signs of disease or damage. On the other hand, male flowers can have slightly wilted or droopy petals, but they should still be vibrant and have no visible issues.
When selecting multiple flowers for pollination, choose a mix of healthy female flowers (at least two) and one or more robust male flowers to ensure effective transfer of pollen. Avoid using weak or damaged flowers as they may not produce viable seeds, reducing your chances of successful pollination.
Hand Pollination Techniques
Now that you know why and when to hand pollinate, let’s dive into the techniques for effectively transferring pollen from male flowers to female squash blooms. We’ll cover every step in detail.
Preparing the Pollen Donor and Receiving Flower
To successfully hand pollinate squash flowers, it’s essential to prepare both the pollen donor (male flower) and receiving flower (female flower). Start by gently selecting a healthy male flower with prominent anthers. Remove any damaged or wilted petals, taking care not to touch the delicate reproductive parts.
Next, locate a suitable female flower with a prominent ovary. This is often indicated by a slight swelling at the base of the flower. Gently remove any debris or pests that may be present on the flower.
When handling both flowers, remember to handle them gently to avoid damaging their sensitive reproductive parts. Use clean hands and tools whenever possible to prevent cross-pollination with other plants. If you’re using a separate tool for pollination, dip it in 70% ethanol before use to sterilize it. This will help minimize the risk of contamination.
Once both flowers are prepared, you can proceed with the hand pollination process.
Transferring Pollen from Male to Female Flowers
To transfer pollen from male to female flowers effectively, you’ll need a few specialized tools and a gentle touch. Begin by identifying the male and female flowers on your squash plant – the male flowers typically have long stalks and no ovary, while female flowers are larger with a prominent ovary.
For transferring pollen, use a small, clean brush or a cotton swab to collect the fine yellow dust from the anthers (the male reproductive structures) of the male flower. Gently tap the brush or swab against the anther to dislodge the pollen, and then lightly touch it to the stigma (the female reproductive structure) of the female flower.
To avoid over-handling delicate reproductive structures, handle each flower with care, and only collect a small amount of pollen at a time. Avoid touching multiple flowers with the same brush or swab, as this can spread disease between plants. Also, try not to touch the stigmas directly, as they’re highly sensitive and easily damaged.
Tips and Tricks for Successful Hand Pollination
Now that you’ve mastered the basics of hand pollinating squash flowers, let’s dive into some expert tips to ensure your harvest is bountiful and healthy. We’ll cover techniques to boost fertility and prevent common pitfalls.
Managing Environmental Factors Affecting Pollination Rates
When it comes to hand pollinating squash flowers, environmental factors can significantly impact success rates. Temperature fluctuations are one common issue that can throw off the delicate timing of hand pollination. For example, if temperatures drop below 60°F (15°C) or soar above 80°F (27°C), pollen viability and germination may be impaired. Similarly, excessive rainfall can make it difficult to identify and pollinate squash flowers, as the moisture-heavy environment can cause the delicate reproductive structures to become soggy and unrecognizable.
To mitigate these challenges in your garden, consider using row covers or cold frames to create a more stable microclimate. These simple tools can help regulate temperature fluctuations and protect your squash flowers from excessive rainfall. Additionally, be prepared to hand pollinate at different times of day, depending on the weather conditions. If it’s too hot or cold outside, try to schedule your pollination sessions during early morning or late afternoon when temperatures are more moderate. By being adaptable and aware of environmental factors, you can increase the chances of successful hand pollination and enjoy a bountiful harvest.
Common Mistakes to Avoid During the Pollination Process
As you begin hand pollinating squash flowers, it’s essential to be aware of common mistakes that can affect the success of your harvest. One critical error is not removing spent flowers, also known as “debris,” from the plant. This debris can attract pests and create an ideal environment for diseases to thrive, ultimately harming the developing fruit.
Another mistake is over-hand pollinating or over-stimulating the flowers. While it’s crucial to transfer pollen from one flower to another, excessive handling can damage the delicate reproductive structures of the plant, reducing its ability to set seed successfully.
Not timing your pollination efforts correctly can also hinder success. Pollinate in the morning when flowers are at their peak receptivity, as this is when they’re most likely to accept and utilize pollen for fertilization.
Lastly, not observing the squash flower’s natural behavior can lead to misdiagnosis of pollination failure. Watch how the anthers release pollen naturally; some varieties may take longer than others to produce viable pollen. This understanding will help you avoid unnecessary stress on your plants during this critical process.
Hand Pollination Tools and Supplies
To successfully hand pollinate squash flowers, you’ll need a few essential tools and supplies that will help make the process easier and more effective for your harvest. We’ve got you covered with our top picks.
DIY vs. Commercial Hand Pollination Kits
When it comes to hand pollination of squash flowers, you’ll need some tools to collect and transfer pollen effectively. One decision you’ll face is whether to go with a DIY approach or invest in a commercial kit. Both options have their pros and cons.
DIY kits are often made from everyday household items like toothpikes, cotton swabs, and small containers. This method can be cost-effective and allows for customization to fit your specific needs. However, the quality of these tools may vary, and they might not last as long as commercial alternatives. Additionally, if you’re new to hand pollination, using a homemade toolset can be trial-and-error.
Commercial kits, on the other hand, offer a more consistent and reliable experience. They usually come with pre-made tools like pollen baskets, collection brushes, and transfer tubes. These kits are often designed specifically for squash flowers and may include instructional materials or guides. While they can be pricier than DIY options, commercial kits provide a higher level of precision and durability.
Consider the following factors when choosing between a homemade toolset and a commercial kit: your experience level with hand pollination, the size and type of your squash plants, and how often you plan to use these tools. If you’re just starting out or have limited funds, a DIY kit might be a good place to begin. However, if you want a more efficient and reliable process, investing in a commercial kit could pay off in the long run.
Essential Materials Needed for Hand Pollination
To successfully hand pollinate squash flowers, you’ll need a few essential materials. First and foremost, you’ll require pollen sacs from another healthy squash plant with compatible genetics. This is where the magic happens – by collecting pollen from one plant, you can transfer it to the stigmas of your target plant, allowing for fertilization to take place.
You’ll also need anthers, which are the pollen-producing parts of the male flower. These will be used in conjunction with the pollen sacs to collect and store the precious pollen. Next up are tweezers – these will come in handy when gently plucking individual stigmas from your target plant’s female flowers.
Gloves are also a must-have, as they’ll protect your hands from any potential allergens or sap that may be present on the plants. Finally, you’ll need storage containers to hold your pollen sacs and anthers before and after use. These can be simple glass vials or specialized containers designed specifically for plant reproduction.
When selecting your materials, make sure to choose items that are clean and sterile to prevent contamination. With these essentials in hand, you’ll be well on your way to successful hand pollination of your squash flowers.
Advanced Techniques for Improved Pollination Rates
Once you’ve mastered basic hand pollination techniques, it’s time to take your squash harvests to the next level with these expert-approved advanced methods. These tried-and-true tips will boost pollination rates and ensure a bountiful harvest.
Encouraging Fruit Set through Multiple Pollinations
When attempting to encourage fruit set through multiple pollinations, it’s essential to consider the concept of ‘sequential pollination.’ This involves manually transferring pollen from one blossom to another over a period of several days. This technique is particularly effective when working with varieties that require additional assistance to achieve successful pollination rates.
To implement sequential pollination successfully, begin by carefully monitoring your squash flowers for anthesis, which typically occurs in the morning hours when temperatures are at their coolest. Next, utilize a small, clean brush or cotton swab to collect and transfer pollen from one blossom’s stigma to another plant’s anther. Repeat this process daily until you notice signs of fertilization – such as swelling or color changes within the flower.
By adopting sequential pollination techniques, growers can significantly enhance fruit set and, subsequently, overall harvest yields. In some cases, applying a small amount of pollen on multiple days has been observed to result in up to 90% increased success rates compared to single-pollination attempts.
Using Companion Plants to Enhance Pollination
When it comes to hand pollinating squash flowers, leveraging companion planting can significantly enhance pollination outcomes. Companion planting is a technique that involves pairing plants with specific characteristics to improve the growth and yield of target crops, like squash. By strategically placing these companion plants near your squash flowers, you can create an optimal environment for pollinators.
Certain plant combinations have been shown to boost pollination rates. For instance, marigolds repel nematodes that can harm squash roots, while nasturtiums attract beneficial insects and provide shade from intense sunlight. Planting basil nearby can also deter pests like aphids and whiteflies. Another effective combination is pairing zinnias with sunflowers, as the latter’s tall stalks create a trellis for pollinators to navigate.
From experienced gardeners’ practices, we know that planting beans alongside squash is particularly beneficial. These vining plants create a living trellis that allows bees and other pollinators to move freely between flowers. This synergy not only increases pollination but also improves the overall health of your squash crop.
Conclusion: Maximizing Your Hand-Pollinated Squash Crop
Now that your hand-pollinated squash flowers are thriving, let’s focus on harvesting a bountiful crop and ensuring its longevity. This section will share tips for maximizing your yields.
Evaluating Results After Hand Pollination
Evaluating Results After Hand Pollination is crucial to understand what worked and what didn’t. As you’re about to harvest your hand-pollinated squash crop, take a moment to assess its growth stages, fruit size, and quality. This will help you identify areas for improvement and fine-tune your techniques for future seasons.
Start by measuring the days to maturity of your specific squash variety. Compare it to your actual harvest date to see if there were any delays or accelerations in the growth process. Next, evaluate the size and shape of your squash fruits. Are they evenly sized, or are some larger than others? This could indicate issues with pollination, fruit set, or nutrient availability.
Take note of the quality of your squash fruits as well. Are they free of blemishes, bruises, and other defects? If you notice any consistent problems, it may be worth exploring new hand-pollination techniques or adjusting your crop management strategies. By analyzing these factors, you’ll be able to pinpoint what worked well and what didn’t, allowing you to make informed decisions for next season’s hand pollination efforts.
Expanding Your Hand-Pollination Skills to Other Crops
As you’ve mastered the art of hand-pollinating squash flowers, it’s time to expand your skills to other crops that require manual pollination. You might be surprised at just how many plants benefit from a little TLC when it comes to cross-pollination.
For example, tomatoes and peppers are often self-pollinating, but they can still benefit from a gentle buzz of pollen between flowers for optimal fruit set. Cucumbers and melons also rely on manual pollination, as do eggplants and okra. Even some flower varieties like roses, orchids, and lavender require cross-pollination to produce seeds or ensure healthy blooms.
To apply your newfound skills, start by researching the specific pollination requirements for each plant. Some may need a different approach, such as using a small brush to transfer pollen or employing a vibrating motion to dislodge pollen from anthers. Experiment with different techniques and pay attention to how each plant responds.
Remember, every crop is unique, so be patient and adapt your hand-pollination skills accordingly. With practice, you’ll become adept at recognizing the subtle cues that indicate when a plant needs help – saving time, energy, and ultimately, resulting in healthier, more abundant harvests.
Frequently Asked Questions
What are some common mistakes to avoid when hand pollinating squash flowers for the first time?
When starting out, it’s easy to overlook essential details that can make or break your hand-pollination efforts. Some common mistakes include touching female flowers with dirty or pollen-covered hands, which can spread disease and reduce fertilization rates. Another mistake is not carefully selecting healthy male and female flowers, leading to lower pollination success. To avoid these pitfalls, take the time to thoroughly read through our guidelines on timing of hand pollination and selecting healthy flowers for pollination.
How often should I perform hand pollination in my squash garden?
The frequency of hand pollination depends on various factors, including your squash variety, climate, and pest management practices. Generally, it’s recommended to pollinate multiple flowers every 2-3 days during peak flowering periods. This ensures optimal fertilization and prevents unnecessary stress on the plant. Keep track of your plants’ progress and adjust your pollination schedule as needed to maximize yields.
Can I use hand pollination for other types of fruits or vegetables besides squash?
Yes, while our focus has been on squash, many other crops benefit from manual pollination techniques. Cucumbers, melons, and gourds are just a few examples of fruits that can be successfully hand-pollinated using similar methods to those outlined in this article. Be sure to research the specific requirements for your target crop, as some may have unique needs or challenges.
What are some environmental factors I should consider when hand pollinating squash flowers?
Pollination success is heavily influenced by external conditions such as temperature, humidity, and wind direction. When possible, plan your hand-pollination sessions during cooler morning hours to reduce stress on the plant. Avoid areas with strong winds, which can spread pollen and make it difficult to transfer between flowers accurately.
Can I use a DIY kit or should I opt for commercial hand pollination equipment?
While both options are viable, consider your specific needs and preferences when choosing hand-pollination tools. If you’re new to the process, a commercial kit may provide more structure and guidance. However, if you enjoy tinkering and have experience with gardening tools, a DIY approach can be cost-effective and allow for customization tailored to your squash variety’s unique requirements.