Hand pollination is an essential step in growing healthy, thriving pumpkins and squash. Unfortunately, many gardeners rely solely on bees to pollinate their crops, which can be unpredictable due to environmental factors like pesticides, climate change, and even bad weather. By learning how to hand pollinate pumpkins and squash, you’ll not only ensure a bountiful harvest but also take control of your gardening process and adopt more natural methods. In this article, we’ll walk you through the preparation for hand pollination, share expert tips on successful techniques, and show you why manual pollination matters. We’ll cover everything from identifying the right time to pollinate to executing the delicate transfer of pollen, so you can confidently tend to your garden without relying solely on nature’s whims.
Understanding the Importance of Hand Pollination
Understanding the importance of hand pollinating pumpkins and squash is crucial for a successful harvest, ensuring the health and fertility of your plants. In this next step, we’ll explore why it’s so vital to this process.
Why Natural Methods Matter
When it comes to maintaining the health and genetic diversity of pumpkin and squash crops, natural methods like hand pollination play a crucial role. By relying on natural pollinators like bees and butterflies, farmers can inadvertently introduce pests or diseases into their crops, which can have devastating consequences.
Hand pollination, on the other hand, allows farmers to carefully select and transfer pollen from one plant to another, ensuring that the crop is free from potential threats. This method also enables farmers to preserve the genetic diversity of heirloom varieties, which are rich in flavor and nutritional value but often threatened by hybridization.
In fact, a study conducted by the University of California found that hand pollination increased pumpkin yields by up to 25% compared to relying on natural pollinators alone. By taking control of the pollination process, farmers can also monitor for pests and diseases more effectively, reducing the need for pesticides and other chemicals.
Bees vs. Humans: The Role of Natural Pollinators
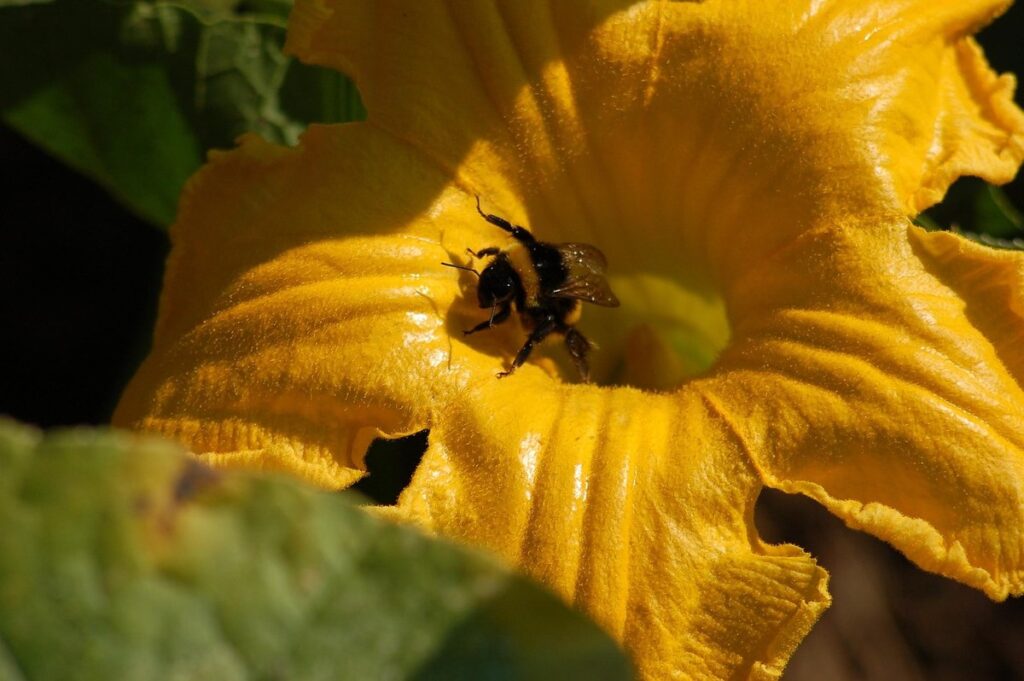
Bees and other natural pollinators play a vital role in plant reproduction, and pumpkins and squash are no exception. These insects transfer pollen from the male reproductive organ of one plant to the female reproductive organ of another, facilitating fertilization. However, sometimes natural pollination isn’t enough. Weather conditions, lack of pollinator populations, or even farm management practices can disrupt this delicate process.
In such cases, human intervention becomes necessary to ensure a successful harvest. This is where hand pollination comes in – a technique that involves manually transferring pollen from the male flower to the female flower. By doing so, you’re giving your pumpkin and squash plants the best chance at producing fruit. While it may seem like a daunting task, with a little practice and patience, anyone can learn the art of hand pollination.
Keep an eye out for signs that natural pollinators are struggling – wilting or discolored flowers, reduced seed production, or even a lack of fruit growth. If you notice these symptoms, consider trying hand pollination techniques to boost your plants’ chances of success.
Preparing for Hand Pollination
Before you start hand pollinating your pumpkin and squash plants, make sure you have all the necessary tools and know how to identify the sex of each flower. This will save you time and effort in the long run.
Choosing the Right Tools
When it comes to hand pollination, having the right tools can make all the difference. You don’t need a lot of specialized equipment, but you will want to invest in some basic tools that will help you transfer pollen effectively and efficiently.
A small, soft-bristled brush or a cotton swab is an essential tool for hand pollination. Look for one with synthetic bristles, as they are gentler on the delicate reproductive parts of the flowers. A brush with natural fibers can be too abrasive and may cause damage to the plant.
Another useful tool is a magnifying glass or a hand lens. This will help you see the reproductive structures more clearly, making it easier to identify which part needs pollination. You can also use a flashlight or a lamp with a strong light source to illuminate the area.
It’s worth noting that some gardeners swear by using a small, clean paintbrush for pollination. However, this is not recommended as it may transfer bacteria and other contaminants from one plant to another.
Timing is Everything: Identifying Pollination Windows
Identifying the perfect pollination window is crucial for successful hand pollination of pumpkins and squash. As a gardener, you need to observe your plants carefully to determine when they are ready for this delicate process.
To begin with, check the flower buds on your pumpkin or squash plant for their color and texture. Typically, male flowers will be smaller and have no fleshy ovary attached to them, while female flowers will have a small ovary and will often look like tiny pumpkins or squash. As these flower buds mature, they’ll start producing pollen and nectar.
Check the timing of your plant’s flowering cycle by keeping an eye on the first male bloom. Once it appears, count back three days to identify when the next female flower is likely to open. This will give you a narrow window for pollination. Consider factors like weather conditions, temperature, and humidity during this period. Keep in mind that hand pollination should take place when there’s adequate moisture but not too much – ideal conditions are usually between 60°F and 80°F (15°C and 27°C).
The Hand Pollination Process
Now that you’ve prepared your plants, let’s dive into the hand pollination process: carefully transferring pollen from one blossom to another by hand. This crucial step ensures a bountiful harvest.
Collecting Pollen
Collecting pollen from male flowers is an essential step in hand pollinating pumpkins and squash. This process requires patience and a gentle touch to avoid damaging the delicate reproductive structures.
To collect pollen, start by locating the male flowers on your pumpkin or squash plant. These flowers typically have thin filaments that extend beyond the petals, indicating their sex. Gently grasp the stem of the male flower just above the node where it meets the vine, and twist it slightly to avoid damaging the delicate reproductive tissue.
Using a small, clean brush or a cotton swab, gently sweep the anther’s pollen-producing surface. This will release loose pollen that can be collected on your tool. You may need to repeat this process several times to gather enough pollen for pollination.
It’s essential to handle the male flowers carefully during this process, as excessive handling can damage the reproductive structures and reduce fertility.
Transferring Pollen
When transferring pollen from the anther to the stigma, it’s essential to handle the delicate reproductive parts with care. To do this effectively, start by selecting a healthy, mature flower with prominent yellow pollen on its anthers. Gently grasp the anthers between your thumb and index finger, taking care not to touch the stigma or any other part of the flower.
Using a small, clean brush (an artists’ paintbrush works well), gently sweep some of the yellow pollen onto the bristles. This will create a small amount of loose pollen that you can then transfer to the stigma. Next, locate the stigma by examining the center of the flower; it’s usually visible as a small, prominent white or yellowish growth.
With your brush now carrying a small amount of pollen, carefully sweep it over the stigma. The goal is to deposit some of this loose pollen onto the stigma’s receptive surface. You may see the stigma begin to change color or develop a slightly sticky texture as it absorbs the pollen – this indicates that pollination has occurred successfully.
This process requires patience and attention to detail, but with practice you’ll become more confident in your ability to transfer pollen effectively.
Tips for Successful Hand Pollination
When it comes to hand pollinating pumpkins and squash, timing is everything. Understanding when and how to transfer pollen can make all the difference in achieving successful cross-pollination.
Avoiding Over-Pollination
When performing hand pollination on pumpkin and squash plants, it’s easy to get carried away with the process. However, over-pollinating can lead to a range of issues that might negatively impact your yields.
Over-pollination occurs when you transfer too much pollen from one plant to another, often causing an imbalance in the delicate dance between male and female reproductive parts. This can result in weak or deformed fruit, reduced seed viability, and increased susceptibility to disease. In extreme cases, over-pollination can even cause a plant’s energy resources to be diverted away from producing healthy fruit towards developing more seeds.
To avoid over-pollination, it’s essential to understand the reproductive structure of your plants. Familiarize yourself with the location of the male (anthers) and female (stigma) reproductive parts on each flower. Pollinate just one or two flowers per day, ensuring you’re targeting the correct stigma for maximum efficacy.
When in doubt, pollinate lightly and observe your plant’s response over time. If you notice a surge in fruit set but also signs of stress or disease, it may be a sign that your pollination efforts are having unintended consequences. Be mindful of these warning signs to adjust your strategy and strike the perfect balance between successful hand pollination and avoiding over-pollination.
Monitoring Progress
After hand pollination, it’s essential to monitor your pumpkin and squash plants regularly to ensure successful fruit set. This means keeping a close eye on their progress every day, checking for signs of fertilization, and making adjustments as needed.
One crucial aspect to monitor is the plant’s receptacle – the part where the flowers are attached. Within 2-3 days after hand pollination, you should start seeing tiny swellings or bulges forming on the receptacle. This indicates that fertilization has occurred, and fruit development will soon follow. If you don’t see these bulges, it may be a sign that the pollination was unsuccessful, and you’ll need to repeat the process.
As your plants continue to grow, check for signs of fruit growth, such as the formation of ridges or stripes on the skin. This usually occurs 7-10 days after hand pollination. By monitoring your plants closely, you can identify potential issues early on and take corrective action, increasing your chances of a successful harvest. Regular checks will also help you detect any signs of pests or diseases that could impact fruit development.
Troubleshooting Common Issues
Don’t worry if things don’t go as planned, we’ve got you covered! This troubleshooting guide will help resolve common problems that can arise when hand pollinating pumpkins and squash.
Identifying Fertilization Failures
When attempting hand pollination, it’s not uncommon for fertilization to fail. There are several reasons why this might happen, and understanding these common pitfalls can help you troubleshoot the issue.
One of the primary causes of fertilization failure is poor pollen quality or timing. If the pollen is old or has been contaminated with dust or debris, it may not be viable for fertilization. On the other hand, if the pollen is applied too late in the day, it may not have enough time to germinate and facilitate fertilization.
Check the pollen’s color and texture – fresh pollen will be a vibrant yellow and feel powdery to the touch. If it appears dry or clumpy, it’s likely past its prime. Also, be mindful of the time you’re applying pollen, as it needs at least 2-3 hours to take effect.
Another potential issue is that the female reproductive structures (stigmas) may not be receptive to pollen due to factors like excessive moisture or heat stress. This can cause the pollen to stick to the stigma but prevent successful fertilization. Monitor your plants for signs of stress and adjust their environment as needed to ensure optimal conditions for pollination.
Some pumpkin and squash varieties are also more prone to fertilization failure than others, so it’s essential to research specific requirements for the types you’re growing. By understanding these common pitfalls and taking steps to mitigate them, you can improve your hand-pollination success rates and enjoy a healthy crop of pumpkins and squash.
Encouraging Healthy Growth
After successfully hand pollinating your pumpkin or squash plant, it’s essential to encourage healthy growth and development. This is crucial for a bountiful harvest. Here are some tips to promote optimal growth.
Adequate Watering: Pumpkins and squash require consistent moisture, especially after hand pollination. Ensure the soil remains moist but not waterlogged. Aim for about 1-2 inches of water per week, either from rainfall or irrigation.
Proper Fertilization: Feed your plants with a balanced fertilizer (10-10-10 NPK) to provide essential nutrients. You can also side-dress with calcium and magnesium supplements to prevent blossom-end rot.
Provide Support: As the fruit grows, it may need support to prevent damage from wind, rain, or pests. Use trellises, stakes, or a soft material like burlap to gently tie the plant’s stems.
Monitor for Pests and Diseases: Regularly inspect your plants for signs of pests or diseases, such as aphids, whiteflies, or powdery mildew. Take action promptly if you notice any issues to prevent further damage.
By following these tips, you’ll be well on your way to growing healthy, thriving pumpkins and squash after hand pollination.
Recording Progress and Planning Ahead
Now that you’ve successfully hand pollinated your pumpkin plants, it’s essential to keep track of progress and make informed decisions for future seasons. This involves monitoring plant growth and planning for next year’s crop.
Keeping a Pollination Journal
Keeping track of your hand pollination efforts is just as important as the process itself. By maintaining a pollination journal, you’ll be able to monitor your progress, identify areas for improvement, and make informed decisions for future seasons.
Begin by setting up a dedicated notebook or using a digital note-taking app on your phone. Each time you perform hand pollination, record the date, weather conditions, and any notable observations about the plants’ receptivity to pollination. Note the specific squash or pumpkin varieties, as some may be more receptive than others.
Include details about the pollination process itself, such as the number of pollen grains transferred, any challenges encountered, and the outcome (successful fertilization or not). This will help you identify patterns and correlations between weather conditions, plant health, and pollination success. Regularly reviewing your journal entries will enable you to refine your techniques, anticipate potential issues, and make data-driven decisions for future hand pollination attempts.
Next Steps: Planning for Future Seasons
Now that you’ve successfully hand pollinated your pumpkins and squash for the current season, it’s time to start planning for the next. This will ensure a continued abundance of these delicious and nutritious vegetables in future years. Begin by reflecting on what worked well this season and what didn’t.
Consider the specific varieties that were most successful and make a note of their characteristics, such as pollination requirements or fruit set times. Also, think about any issues you encountered, like pests or diseases, and how you can address them more effectively next time.
Start mapping out your garden layout for the upcoming season, taking into account the space needed for each variety. Make sure to leave enough room for air circulation and easy access for pollination. You may also want to rotate your pumpkin and squash varieties to avoid depleting the soil of specific nutrients or introducing new pests and diseases.
By planning ahead and incorporating lessons learned from this season, you’ll be well on your way to continued success with hand pollinating pumpkins and squash in future seasons.
Conclusion: The Rewards of Hand Pollinating Pumpkins and Squash
Now that you’ve mastered the art of hand pollinating pumpkins and squash, let’s explore the rewarding benefits of taking your skills to the next level.
The Joy of Natural Gardening
As you’ve discovered the art of hand pollinating pumpkins and squash, it’s time to bask in the joy that comes with natural gardening. There’s something incredibly satisfying about watching these beautiful fruits grow without relying on chemicals or machinery. The process of hand pollination connects you directly to nature, allowing you to appreciate the intricate dance between plants.
Not only do natural methods promote healthier and more resilient crops, but they also invite a sense of mindfulness into your gardening routine. As you carefully transfer pollen from one flower to another, you develop a deeper understanding of the delicate balance within the ecosystem. This awareness fosters a greater appreciation for the land, the plants, and the process itself.
Incorporating natural methods into your garden can have a profound impact on your mental and physical well-being. Being outdoors, surrounded by nature, has been shown to reduce stress levels and boost mood. By embracing hand pollination, you’re not only cultivating pumpkins and squash but also nurturing your own connection with the earth.
Final Tips and Takeaways
As you’ve learned throughout this article, hand pollinating pumpkins and squash requires patience, attention to detail, and a willingness to get up close and personal with these amazing vegetables. To summarize the key takeaways, let’s review the essential steps involved in successful hand pollination: understanding the reproductive anatomy of your plant, timing the pollination process correctly, and gently transferring pollen from one flower to another.
It’s also crucial to remember that not all varieties are suitable for hand pollination, so make sure you’ve selected a type that responds well to this method. Don’t be discouraged if it takes some practice – with time and experience, you’ll become more comfortable navigating the intricacies of pumpkin and squash reproduction.
In addition to these key points, keep in mind that even the most careful hand pollinators can face setbacks due to environmental factors or pest/disease pressure. Stay vigilant, monitor your plants closely, and be prepared to adapt your approach as needed. By embracing this unique aspect of gardening, you’ll unlock a deeper appreciation for the complex relationships within the plant kingdom and reap the rewards of successful hand pollination – healthy, disease-resistant, and delicious pumpkins and squash!
Frequently Asked Questions
What if I notice some of my pumpkin plants are already pollinated? Should I still hand pollinate them?
Yes, it’s essential to continue hand pollinating even if you see some natural pollination occurring on your plants. This ensures every flower has a chance to be fertilized, which is crucial for a bountiful harvest.
How can I troubleshoot common issues with pollen transfer, like no visible growth or stunted development?
If you’re experiencing issues with pollen transfer, check the timing of your hand pollination process and ensure it aligns with the optimal pollination windows. Additionally, inspect your plants for signs of pests or diseases that might be affecting fertilization.
Can I use a different type of tool for collecting and transferring pollen, like a makeup brush?
While other tools can work in a pinch, dedicated pollen collection and transfer tools are specifically designed to handle the delicate process effectively. Using alternative materials may lead to reduced efficiency or even damage to your plants.
What if I accidentally over-pollinate my pumpkins – will they still be usable?
Yes, but it might affect their quality. Over-pollination can cause an abundance of seeds, potentially resulting in weak or deformed fruits. However, this doesn’t necessarily mean the entire crop is unusable; you may still harvest some healthy pumpkins.
How do I know when my squash or pumpkin plants have reached maturity and are ready for hand pollination?
Check your plants’ growth stages and look for signs of readiness, such as fully formed flowers and an established fruit set. Hand pollinate when the female flowers (those with a small stem and ovary) appear, usually around 30-45 days after planting, depending on the specific variety.