Growing your own witch hazel at home can be a rewarding experience, especially for those interested in herbal remedies. This versatile shrub is not only beautiful with its fragrant flowers but also packed with medicinal properties that have been used for centuries to soothe skin irritations and other ailments. However, growing witch hazel requires some basic knowledge of its needs and challenges. Climate considerations play a crucial role in determining the success of your plant, as it thrives best in well-drained soil and cooler temperatures. In this article, we’ll cover the essential tips for propagating, caring for, and harvesting witch hazel, including propagation methods, common challenges to expect, and how to tap into its medicinal potential. Whether you’re a seasoned gardener or just starting out, we’ll guide you through the process of growing healthy, thriving witch hazel at home.
Understanding Witch Hazel Basics
Witch hazel is a unique and fascinating plant, but before you start growing it, let’s dive into its essential characteristics. Understanding these basics will set you up for success in cultivating this beautiful shrub.
What is Witch Hazel?
Witch hazel is a shrub native to North America, prized for its diverse uses and striking appearance. Its history dates back centuries, with Native American tribes utilizing the plant’s bark, leaves, and twigs for medicinal purposes, including treating skin irritations and wounds.
Originating in the eastern United States and southeastern Canada, witch hazel thrives in moist environments, often growing along streams and rivers. This adaptability has allowed it to spread throughout various regions, becoming a staple in many gardens and landscapes.
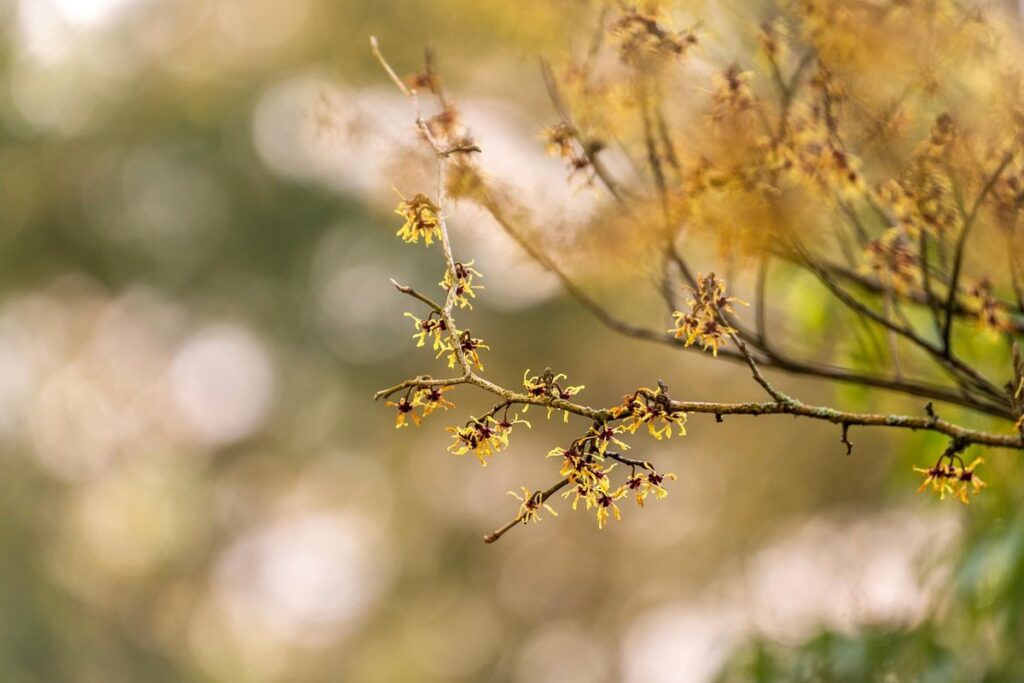
The shrub’s basic characteristics set it apart from other plants. Witch hazel is typically between 15 to 25 feet tall, with a broad, rounded crown. Its leaves are elliptical or ovate in shape, measuring up to 4 inches long. The flowers, however, are what truly make this plant stand out – they bloom in fall, emitting a distinctive, sweet fragrance that attracts pollinators.
When considering growing witch hazel, it’s essential to understand its needs and habits. By doing so, you can successfully cultivate this versatile shrub in your own garden or landscape.
Types of Witch Hazel
When it comes to growing witch hazel, there are two main types to consider: American witch hazel (Hamamelis virginiana) and Asian witch hazel (Hamamelis mollis). While both share some similarities, they also have distinct differences that can impact their growth habits, hardiness zones, and uses.
American witch hazel is a more compact shrub, typically growing 6-12 feet tall and wide. It thrives in USDA zones 3-9 and prefers moist, well-drained soils. This type is known for its fragrant, spidery flowers that bloom in late winter to early spring, providing a welcome splash of color during the cold season. American witch hazel is often used as a ornamental plant or in medicinal applications.
Asian witch hazel, on the other hand, can grow up to 20 feet tall and wide, making it a more sprawling shrub. It prefers warmer climates, tolerating USDA zones 5-8, and requires well-drained soils with high acidity. Its flowers are also highly fragrant but bloom in late fall to early winter, creating a stunning display of color against the backdrop of autumn foliage. Asian witch hazel is often used as a medicinal plant or in traditional Chinese medicine.
When choosing between these two types, consider your climate and the specific use you have in mind for your witch hazel plant.
Choosing the Right Variety for Your Needs
When growing witch hazel, it’s essential to select a variety that thrives in your specific climate and meets your desired plant characteristics. This section will guide you through choosing the perfect type for your needs.
Climate Considerations
When growing witch hazel, it’s essential to consider the ideal climate conditions that will allow this beautiful plant to thrive. As a rule of thumb, witch hazel prefers well-drained acidic soils with a pH between 5.5 and 6.5. This means if you’re planning to grow witch hazel in an area with alkaline soil, you’ll need to amend the soil with sulfur or peat moss to bring it down to the optimal range.
When it comes to sunlight, witch hazel prefers partial shade, especially in warmer climates. In areas where the temperature often reaches above 75°F (24°C), providing your witch hazel with some afternoon shade will help prevent scorching of its delicate leaves and flowers. Conversely, if you live in a cooler climate, you can grow witch hazel in full sun.
To adapt to different environments, consider these tips: For warmer climates, plant witch hazel near a north-facing wall or under a tree with a dense canopy for natural shade. In areas with poor drainage, raise the bed or container to improve soil aeration and prevent waterlogged conditions. By understanding your local climate and adjusting accordingly, you’ll be well on your way to growing healthy, thriving witch hazel plants.
Planting Location and Soil Preparation
When planting witch hazel, it’s essential to select a location that provides optimal conditions for growth. When choosing a spot, consider the amount of sunlight the area receives. Witch hazel prefers full sun to partial shade, but some varieties can tolerate more shade than others. Make sure the location receives at least 4-6 hours of direct sunlight per day.
Soil pH is also crucial for witch hazel’s growth. This plant thrives in slightly acidic to neutral soils with a pH between 5.5 and 7.0. If your soil is too alkaline, it may affect the nutrient availability and overall health of the plant. Check your soil pH before planting by purchasing a DIY kit or consulting with a local nursery.
Another critical consideration is water drainage. Witch hazel doesn’t like wet feet, so ensure the planting location has good air circulation and drainage to prevent root rot. Avoid low-lying areas where water tends to collect. If you have heavy clay or poorly draining soil, consider raising the bed by 6-8 inches to improve drainage.
Before planting, prepare the soil by loosening it to a depth of about 12-18 inches. Remove any debris, weeds, and existing vegetation. Add compost or well-rotted manure to enrich the soil and improve its structure. This will give your witch hazel a healthy start and promote optimal growth throughout the seasons.
Propagation Methods for Witch Hazel
When it comes to growing witch hazel, propagating new plants from existing ones is a great way to share your harvests and create more space in your garden. Let’s explore some popular methods for propagating witch hazel.
Seeds vs. Cuttings: A Comparison
When it comes to propagating witch hazel, two popular methods are using seeds and cuttings. While both techniques have their advantages, there are significant differences between the two.
Using seeds can be a cost-effective and simple way to propagate witch hazel, as they are readily available in most nurseries and online stores. However, seed germination rates can be low, ranging from 20-50%. This is due to various factors such as the age of the seed, storage conditions, and environmental factors. Moreover, seeds may take several months or even years to mature, which can lead to a longer waiting period for the desired results.
On the other hand, using stem cuttings is a more reliable method that yields higher success rates, typically between 70-90%. Cuttings are taken from mature stems during the dormant season and rooted in a controlled environment. This method not only reduces the time it takes for witch hazel to mature but also ensures consistency in its growth pattern.
Ultimately, choosing between seeds and cuttings comes down to your personal preference and goals. If you’re looking for a faster and more reliable option, stem cuttings are the way to go. However, if you’re on a tight budget or want to experiment with different varieties, seeds might be a better choice.
Taking Cuttings and Planting Seeds
When it comes to propagating witch hazel, taking cuttings and sowing seeds are two effective methods to achieve success. Taking softwood cuttings is a great option for witches’ brew varieties as they tend to root easily. To take softwood cuttings, choose fresh growth in the spring or early summer, making sure the stem is still flexible. Cut 5-7 inch sections from the tip of the stem, just below a node, using a sharp, clean knife or pruning tool. Remove lower leaves and dip the cutting into rooting hormone powder to increase chances of success. Plant the cutting in a pot filled with a well-draining seed starting mix, firming it gently around the cutting.
For sowing seeds indoors, choose a container that is at least 6-8 inches deep to accommodate the taproot. Sow seeds about 1/4 inch deep and 2-3 inches apart in a seed starting mix, watering well after planting. Keep the soil consistently moist but not waterlogged until germination, which can take anywhere from 30 days to several months. Once seedlings have two sets of leaves, they’re ready for transplanting into larger pots or directly into the garden.
For sowing seeds directly in the garden, choose a location with full sun and well-draining soil. Sow seeds about 1/4 inch deep and 2-3 inches apart in late spring or early summer when the danger of frost has passed. Water regularly during the first growing season to establish a strong root system.
When taking hardwood cuttings, it’s best to take them in the fall, as this allows the new growth to harden off before winter. Cut 6-12 inch sections from the current year’s growth, just above a bud eye, using a sharp knife or pruning tool. Remove lower leaves and dip the cutting into rooting hormone powder to increase chances of success. Plant the cutting in a pot filled with a well-draining seed starting mix, firming it gently around the cutting.
Keep in mind that hardwood cuttings can take longer to root than softwood cuttings, often taking several months or even up to a year to establish a strong root system.
Care and Maintenance for Optimal Growth
To ensure your witch hazel plant thrives, you’ll want to familiarize yourself with proper care and maintenance techniques that promote optimal growth. Regular pruning and watering are key to keeping your plant healthy and strong.
Watering and Fertilization Needs
Growing witch hazel requires careful attention to its watering and fertilization needs. Overwatering is a common mistake that can lead to root rot, while underwatering can cause stress and negatively impact flowering. To avoid these issues, it’s essential to establish a consistent watering schedule.
Water your witch hazel when the top 1-2 inches of soil feel dry to the touch. This is usually once a week during spring and summer months, but adjust the frequency based on weather conditions. Mulching around the base helps retain moisture and suppress weeds. Fertilize your witch hazel in early spring with a balanced, water-soluble fertilizer (20-20-20). You can also use compost tea as a natural alternative.
When choosing fertilizers, look for products labeled ‘acid-loving’ or specifically formulated for deciduous shrubs. Avoid overfertilizing, as this can damage the plant’s roots and lead to excessive leaf growth at the expense of flowering. Soil pH should be maintained between 6.0-7.0, with a mix of organic matter like peat moss or perlite added to improve drainage and prevent waterlogged conditions.
A well-balanced fertilizer (10-10-10) can also be used in late summer or early fall, but avoid feeding during the winter months when the plant is dormant. Keep an eye on your witch hazel’s response to fertilization, adjusting the frequency and type of fertilizer as needed to promote healthy growth and abundant flowering.
Pruning Techniques for Shape and Health
Pruning your witch hazel is an essential part of its care and maintenance routine. Not only does it promote healthy growth by removing diseased or damaged branches, but it also encourages the plant to produce more blooms. Regular pruning helps maintain a desirable shape and size, ensuring that your witch hazel remains a stunning addition to your garden.
When it comes to pruning witch hazel, timing is everything. The best time to prune is immediately after blooming, typically in late spring or early summer. This allows the plant to put energy into producing new growth rather than focusing on flower production. To promote healthy growth and encourage blooming, remove any crossing or rubbing branches, as well as any weak or spindly stems.
For maintenance pruning, focus on shaping the plant to maintain a balanced silhouette. Cut back stems by about one-third to one-half, making clean cuts just above a leaf node using sharp, sterile pruning tools. Avoid over-pruning, which can stress the plant and lead to disease or pest issues. With regular pruning, your witch hazel will thrive and continue to provide beautiful blooms for years to come.
Common Challenges and Solutions for Witch Hazel Growers
As you navigate the world of witch hazel cultivation, it’s common to encounter a few pesky problems that can put your harvest at risk. Let’s tackle some of the most frustrating challenges and their clever solutions.
Pests and Diseases: Identification and Management
As a witch hazel grower, you’re likely to encounter pests and diseases that can damage your plants. Let’s take a closer look at some common culprits: aphids, spider mites, root rot, and powdery mildew.
Aphids are small, soft-bodied insects that feed on plant sap, causing curled or distorted leaves. Spider mites, on the other hand, are tiny, eight-legged arachnids that suck plant juices, leaving behind fine webbing. To manage these pests, use a combination of physical barriers (fine mesh or row covers) and chemical controls (insecticidal soap or neem oil). For example, spray insecticidal soap on the undersides of leaves to control aphid infestations.
Diseases like root rot and powdery mildew can also wreak havoc on your witch hazel plants. Root rot is often caused by overwatering, which leads to fungal growth in the roots. To prevent this, ensure good drainage and avoid wateringlogs. Powdery mildew, a fungal disease characterized by white, powdery patches on leaves, can be controlled using copper-based fungicides or sulfur dust.
To maintain healthy plants and prevent pest and disease issues, adopt integrated pest management (IPM) strategies that combine physical, cultural, and chemical controls. Regularly inspect your plants for signs of pests or diseases, and take action promptly to prevent infestations from spreading.
Environmental Stressors: How to Adapt
As a witch hazel grower, you’re likely no stranger to unpredictable weather patterns. Extreme conditions like droughts, floods, and frosts can wreak havoc on your plants’ growth and health. But don’t worry – there are ways to mitigate the impact of these environmental stressors.
Droughts, for instance, can cause witch hazel leaves to wilt and drop, while severe waterlogging can lead to root rot. To combat drought conditions, ensure that your soil has good drainage and mulch around the base of your plants to retain moisture. Water thoroughly but infrequently to encourage deep root growth. During floods, consider installing a French drain or elevating your planting beds to prevent waterlogged soil.
Frost damage can be particularly devastating for witch hazel, which typically blooms in late winter. Protect your plants by covering them with a frost blanket or bringing potted varieties indoors during prolonged cold snaps. Regularly inspect your plants for signs of stress, such as yellowing leaves or curled stems, and take prompt action to prevent further damage.
By adapting to these environmental challenges, you can reduce the risk of damage to your witch hazel crop and keep your plants healthy year-round.
Harvesting and Using Witch Hazel for Medicinal and Aromatic Purposes
Once your witch hazel has reached maturity, it’s time to harvest its valuable bark and leaves for medicinal and aromatic purposes. Learn how to extract and use these versatile plant parts responsibly.
Preparing Witch Hazel Infusions and Oils
When it comes to harnessing the medicinal and aromatic properties of witch hazel, creating homemade infusions and oils is a simple yet effective way to reap its benefits. To start, you’ll need some fresh or dried witch hazel leaves, bark, or roots. For an infusion, place 1-2 tablespoons of your chosen part in a clean glass jar, cover it with boiling water, and let it steep for 10-15 minutes.
Strain the mixture through a cheesecloth or fine-mesh sieve into another container, discarding the solids. You can store the liquid in the fridge for up to two weeks. For oil infusions, use a carrier oil like olive or coconut, and follow the same steeping process as above. After straining, you’ll have a potent infusion that can be used topically or taken internally.
When it comes to witch hazel oil, also known as “hydrosol,” you can use a steam distillation apparatus or purchase a commercial kit specifically designed for this purpose. This method yields an aromatic oil rich in antioxidants and anti-inflammatory compounds, ideal for skin care and wound healing.
Crafting Products with Witch Hazel Extracts
When it comes to harnessing the potential of witch hazel extracts, one of the most exciting applications is in crafting products for personal care and home. You can incorporate these extracts into your skincare routine, create natural remedies, or infuse them into potpourri blends. The versatility of witch hazel makes it an excellent addition to various homemade products.
For instance, you can use witch hazel extract as a base for a toning mist that balances skin pH and reduces the appearance of pores. Mix 1/4 cup of witch hazel extract with 2 cups of distilled water in a spray bottle. Add a few drops of your preferred essential oil for a refreshing scent.
To create a natural insect repellent, blend equal parts witch hazel extract and apple cider vinegar in a small bowl. Dip a cotton ball into the mixture and apply it to areas prone to bug bites. This concoction can help deter mosquitoes and other pesky insects without exposing you to harsh chemicals.
When crafting potpourri blends, use witch hazel extract as a preservative to extend the shelf life of your dried flowers and herbs. Combine 10 drops of witch hazel extract with 1 cup of dried petals in a decorative bowl for a fragrant centerpiece that lasts longer than usual.
Conclusion: Growing a Healthy and Flourishing Witch Hazel
Growing a healthy and flourishing witch hazel requires dedication, patience, and a willingness to adapt. You’ve made it through the challenges of propagation, pruning, and pest management – now it’s time to reap the rewards. As your witch hazel shrub matures, be sure to monitor its water intake carefully, reducing it during periods of heavy rainfall or excessive moisture. Regular pruning will also continue to promote healthy growth and encourage new flower blooms.
To ensure the longevity of your plant, take note of any changes in its appearance or behavior – timely interventions can prevent serious issues down the line. With consistent care and attention, your witch hazel should continue to thrive for years to come. As you nurture this remarkable shrub, remember to appreciate its beauty and unique characteristics – after all, a happy plant is a reflection of a happy gardener!
Frequently Asked Questions
How do I know if my witch hazel is receiving the right amount of sunlight?
When growing witch hazel, it’s essential to ensure your plant is getting sufficient sunlight. As a general rule, witch hazel requires at least 6 hours of direct sunlight per day. However, in warmer climates, it may benefit from some afternoon shade to prevent scorching. Observe your plant’s behavior and adjust its location accordingly to promote healthy growth.
Can I grow witch hazel indoors, or is it best suited for outdoor cultivation?
While witch hazel can be grown indoors, it typically thrives better outdoors in well-drained soil and cooler temperatures. However, if you’re determined to grow it indoors, choose a large container with good air circulation and maintain a consistent temperature between 60-75°F (15-24°C). Keep in mind that indoor conditions may limit the plant’s overall growth and flowering potential.
How often should I harvest witch hazel leaves or twigs for medicinal purposes?
For optimal use of witch hazel’s medicinal properties, it’s recommended to harvest the leaves and twigs in the spring and summer months when they’re most potent. Avoid harvesting during droughts or extreme weather conditions, as this can reduce the plant’s natural oils and effectiveness. Harvest only what you need, leaving enough for the plant to maintain its health.
Can I use witch hazel in combination with other herbal remedies?
Yes, witch hazel is often used in conjunction with other herbs for enhanced medicinal properties. Its astringent and anti-inflammatory qualities make it an excellent addition to blends for soothing skin irritations or wounds. When combining witch hazel with other herbs, consider their individual effects and potential interactions to ensure safe and effective use.
How long does it take for witch hazel to mature and produce flowers?
Witch hazel typically takes 2-5 years to reach maturity after planting from seed. However, if you’re using cuttings or other propagation methods, the process may be faster (around 1-3 years). Once your plant has reached maturity, it will begin producing fragrant yellow flowers in late winter or early spring, signaling its readiness for harvest and use.