If you’re craving the sweet taste of fresh, juicy watermelon but don’t have space for a sprawling garden, you’re not alone. With the right techniques and equipment, you can grow these luscious fruits in containers right on your balcony or patio. Not only does container growing make it possible to enjoy watermelons year-round, but it also opens up a world of flexibility when it comes to choosing varieties that thrive in smaller spaces.
In this comprehensive guide, we’ll walk you through the essential steps for growing watermelon in containers, from selecting the perfect pot and soil to providing optimal conditions for maximum flavor. Whether you’re a seasoned gardener or just starting out, our expert tips will have you enjoying homegrown watermelons in no time. By following these simple yet effective strategies, you’ll be able to grow juicy watermelons with ease, even in the smallest of spaces.
Choosing the Right Container and Location
When it comes to growing watermelon in containers, selecting the right pot and placing it in an ideal location is crucial for a successful harvest. We’ll walk you through both considerations here.
Selecting a Container Size
When selecting a container for growing watermelons, it’s essential to choose one that can accommodate the mature plant. Watermelon vines can spread out quite a bit, so you’ll want a container with enough width and depth to give them room to grow. A good rule of thumb is to opt for a container at least 12-18 inches deep and 24-36 inches wide.
The material of the container is also crucial. Plastic containers are lightweight and inexpensive, but may not provide adequate drainage holes. Ceramic or terracotta pots are a better option as they allow for air circulation and water to escape freely. Wooden planters can add a touch of rustic charm, but make sure they have sufficient drainage holes to prevent waterlogged soil.
When it comes to the depth of the container, remember that watermelon roots need room to grow downward, so don’t choose a shallow planter. Also, ensure the container has at least 6-8 inches of space between the soil and the rim for watering ease. Finally, consider the size of your harvest – bigger containers will yield larger fruits!
Considering the Container’s Material and Durability
When selecting a container for growing watermelon, it’s essential to consider its material and durability. Different materials offer varying levels of weight, impact on soil quality, and overall performance.
Plastic containers are lightweight, inexpensive, and easy to clean. However, they can harbor bacteria and may leach chemicals into the soil. If you choose plastic, ensure it’s BPA-free and has adequate drainage holes to prevent waterlogging.
Ceramic or terra cotta containers provide good insulation and breathability but can be heavy and prone to cracking. They also require more maintenance due to their porosity. On the other hand, metal containers are durable and resistant to pests, but they can conduct heat and potentially damage the roots.
Consider using a container made from recycled materials for an eco-friendly option. These often have a similar weight and durability profile as plastic while reducing waste.
Ultimately, choose a material that balances your needs for durability, weight, and ease of maintenance with the potential impact on soil quality and plant growth.
Preparing the Soil and Fertilizer
Before we dive into the fun part – planting your watermelon seeds – let’s get our containers ready by preparing the perfect soil and fertilizer mix. This is crucial for a healthy start to your melon’s journey.
Mixing a Balanced Potting Mix
When mixing a balanced potting mix for watermelon plants in containers, it’s essential to consider the key components that will provide optimal growing conditions. A well-balanced potting mix typically consists of peat moss, vermiculite, and perlite.
Peat moss helps retain moisture and regulate soil pH levels, while vermiculite improves drainage and aeration. Perlite, on the other hand, adds structure and prevents waterlogging. Aim for a ratio of 2:1:1 (peat moss:vermiculite:perlite) as a starting point.
Watermelon plants prefer a slightly acidic to neutral soil pH, ranging from 6.0 to 7.0. A balanced potting mix should also provide adequate nutrients for the plant’s growth. Look for a mix that contains essential micronutrients like magnesium and sulfur.
When selecting a potting mix, read the label carefully to ensure it meets your watermelon plant’s needs. If you’re mixing your own blend, remember to adjust the pH levels by adding dolomitic limestone or elemental sulfur according to the manufacturer’s instructions. This will prevent nutrient deficiencies and promote healthy growth in your watermelon plants.
Selecting the Right Fertilizers
When it comes to selecting the right fertilizers for your watermelon plants in containers, you have several options to choose from. Organic and synthetic fertilizers are two of the most popular types available.
Organic options like compost tea and fish emulsion are excellent choices for container-grown watermelons. Compost tea is a liquid solution made by steeping compost in water, which provides beneficial microorganisms that promote healthy root growth. Fish emulsion, on the other hand, is a natural fertilizer derived from fish bones and offal, rich in nitrogen, phosphorus, and potassium.
Synthetic fertilizers like NPK (nitrogen-phosphorus-potassium) are also widely available. These products provide a balanced mix of essential nutrients that promote plant growth. However, be cautious not to over-fertilize your watermelons, as this can lead to weak fruit and poor flavor.
To apply fertilizers correctly, start with a small dose and gradually increase the amount based on your plants’ response. For example, if you’re using an NPK fertilizer, follow the manufacturer’s instructions for application rates. Also, consider the pH level of your soil and adjust the fertilizer accordingly to ensure optimal nutrient uptake by your watermelon plants.
Planting Watermelon Seeds or Seedlings
When growing watermelon in containers, you have two main options: planting seeds directly into your pot or starting with seedlings. We’ll cover both methods to help you get started.
Starting from Seeds
Starting from seeds is an excellent way to grow watermelon in containers. One of the main advantages of this method is higher germination rates compared to using seedlings. When you sow seeds directly into a container, they have more room to develop their root system, which can lead to healthier and more vigorous plants.
To get started, choose a container with good drainage, at least 5-gallon capacity, and fill it with a high-quality potting mix specifically designed for containers. Sow 2-3 seeds about 1 inch deep and 6-8 inches apart from each other. Water the soil gently but thoroughly, making sure not to wash away the seeds.
Keep the soil consistently moist during the germination period, which typically takes around 5-7 days. Once the seedlings emerge, reduce watering to about 1 inch per week, allowing the top 2-3 inches of soil to dry out between waterings. Provide warmth by placing the container in a sunny location with temperatures ranging from 70°F to 80°F (21°C to 27°C). With proper care and attention, your seeds will germinate, and you’ll be on your way to growing delicious watermelon in containers.
Transplanting Seedlings into Containers
When transplanting seedlings into larger containers, it’s essential to minimize shock and promote healthy root growth. Start by hardening off your seedlings 7-10 days before transplanting. This process involves gradually exposing them to outdoor conditions, such as direct sunlight and wind, over the course of a week.
To reduce transplant shock, choose containers with good drainage and a slightly larger size than the original pot. Use a high-quality potting mix specifically designed for container gardens. Gently remove the seedling from its pot, taking care not to disturb the roots. Place the seedling in the new container, making sure the soil level is the same as it was before.
Water thoroughly after transplanting and keep the soil consistently moist during the first few weeks. Avoid overwatering, which can lead to root rot and other issues. By following these steps, you’ll give your watermelon seedlings a healthy start in their new containers. This will set them up for success as they grow and mature throughout the season.
Providing Adequate Watering and Humidity
To grow a healthy watermelon, it’s essential to ensure your container is receiving just the right amount of moisture – but how do you get that balance just right?
Understanding Watermelon’s Water Requirements
Watermelon plants require adequate watering to produce an abundance of juicy fruits. However, overwatering can be detrimental to their health, so it’s essential to understand their water requirements. The climate you live in plays a significant role in determining the frequency and amount of water your watermelon plant needs.
In hot and dry climates, watermelon plants require more frequent watering, typically every 2-3 days during the peak summer months. Conversely, if you’re growing in cooler temperatures or areas with high humidity, you may only need to water every 4-5 days. Keep an eye on your plant’s leaves; if they start to wilt or turn yellow, it’s a sign that the soil is dry and needs watering.
The size of the container also affects water requirements. Smaller containers tend to dry out faster than larger ones, so you may need to water more frequently. A good rule of thumb is to check the soil moisture by inserting your finger into the soil up to the first knuckle. If the soil feels dry, it’s time for watering.
Water at the base of the plant rather than overhead to avoid washing away the nutrients and causing fungal diseases. Aim to provide about 1-2 gallons of water per day for every small to medium-sized container (less than 14 inches in diameter). Monitor your plant’s response to adjust your watering schedule accordingly, ensuring optimal growth and fruit production.
Maintaining Optimal Humidity Levels
Maintaining optimal humidity levels is crucial for watermelons growing in containers. Watermelon plants thrive in warm and humid environments, typically above 60% relative humidity. However, container-grown plants often lose moisture quickly due to their exposed roots and soil surface area.
One effective method to maintain humidity levels is by using a misting system. This involves installing a network of fine nozzles around the plant that release a fine spray of water at regular intervals. For example, you can set up an automated misting system that releases 2-3 ounces of water per day. This not only maintains optimal humidity but also cools down the plant.
Another method is to cover the soil with a clear plastic sheet. By doing so, you create a mini-greenhouse effect, trapping moisture and heat close to the plant’s roots. However, make sure to remove the sheet during the hottest part of the day or when temperatures exceed 90°F (32°C) to prevent overheating.
Regularly check your plants’ leaves for signs of water stress and adjust your humidity levels accordingly.
Managing Pests and Diseases
When growing watermelon in containers, pest control and disease prevention are crucial. This section will walk you through common issues to watch out for and how to manage them effectively.
Identifying Common Pests and Diseases
As you nurture your watermelon plants in containers, it’s essential to be aware of common pests and diseases that can compromise their health. Keep a close eye out for aphids and whiteflies, which are notorious for sucking the sap from leaves and stems, causing curled or distorted growth. Powdery mildew is another prevalent disease that appears as a white, powdery coating on leaves, while fusarium wilt can be identified by yellowing leaves and droopy vines.
To monitor your plants’ health, inspect them regularly for these signs. You can also use sticky traps or fine-mesh screens to catch aphids and other flying pests. For diseases like powdery mildew, improve air circulation around the plants by pruning nearby vegetation or using trellises. To prevent fusarium wilt, avoid overwatering and ensure your watermelon containers have good drainage holes.
To take preventative measures, use crop rotation strategies to break disease cycles. Also, consider using neem oil or insecticidal soap to control pest populations. By staying vigilant and taking proactive steps, you can minimize the risk of pests and diseases affecting your container-grown watermelons.
Using Organic or Integrated Pest Management (IPM) Techniques
When it comes to growing watermelon in containers, minimizing chemical usage is crucial for maintaining soil health and ensuring a bountiful harvest. That’s why incorporating organic or Integrated Pest Management (IPM) techniques into your routine can make all the difference.
One effective IPM strategy is introducing beneficial insects, such as ladybugs or lacewings, which prey on common watermelon pests like aphids and whiteflies. You can purchase these beneficial insects online or obtain them from local nurseries. To encourage their presence, create a welcoming environment by planting companion plants like marigolds, basil, or mint.
Another natural pest control method is using neem oil. Derived from the seeds of the neem tree, this oil disrupts insect growth and development, preventing infestations before they start. Mix neem oil with water according to the label instructions and spray it on your watermelon plants when necessary. Remember to always spot-treat specific areas rather than spraying entire plants.
To further reduce chemical usage, monitor your plants regularly for signs of stress or disease, addressing issues promptly to prevent widespread problems. By combining these organic methods with careful monitoring, you can create a balanced ecosystem that promotes healthy growth and minimizes pest and disease issues.
Monitoring Progress and Harvesting Watermelon
As you tend to your container-grown watermelons, it’s essential to monitor their progress closely to ensure they reach optimal ripeness for a bountiful harvest. Regular checks will also help prevent potential issues.
Tracking Plant Growth and Health
Regular observation is crucial when growing watermelon in containers. As you monitor your plant’s progress, keep an eye on three essential parameters: leaf health, stem thickness, and fruit size. Healthy leaves should be a deep green color with no signs of discoloration or damage. If you notice any issues, such as yellowing or curling leaves, it could be due to nutrient deficiency, overwatering, or pests.
Check the stem’s thickness regularly, as this will indicate the plant’s overall health and growth rate. A thick, sturdy stem is a sign of a strong, healthy watermelon plant. On the other hand, a weak or thin stem can lead to poor fruit production.
As your watermelon begins to grow, monitor its size closely. Check for any signs of uneven development or unusual growth patterns. If you notice that one side of the fruit is growing faster than the other, take prompt action by adjusting the plant’s position in the container or pruning the affected area.
Keep a close eye on these parameters and take action promptly if you notice any issues. With regular observation and proper care, your watermelon plant should thrive in its container, producing a healthy and delicious fruit.
Timing the Perfect Harvest
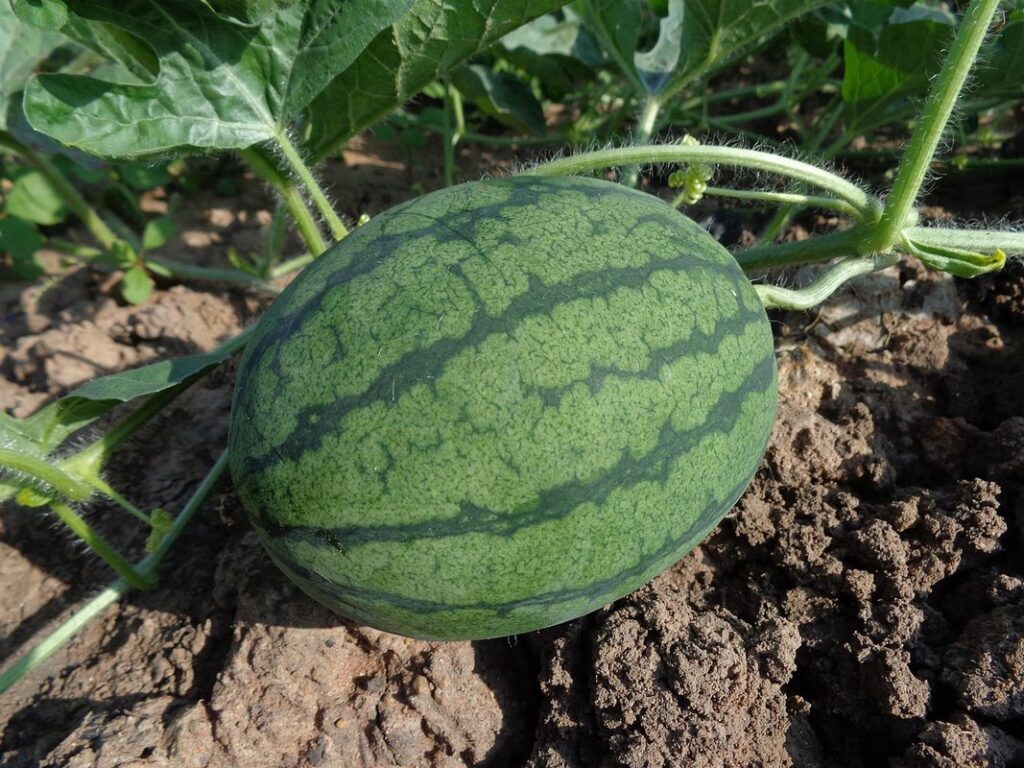
When it comes to harvesting watermelons from containers, timing is everything. You’ll want to catch them at the peak of ripeness to enjoy their sweet flavor and optimal texture. So, how do you determine when to harvest? One way is by checking the color. A ripe watermelon will typically turn yellow or cream-colored on one end, which is where it rested on the soil during ripening.
Another indicator is weight. Ripe watermelons are heavy for their size. Pick up your container-grown watermelon and gently rock it back and forth. If it’s heavy and has a deep, hollow sound, it’s likely ready to be harvested. Additionally, check the underside of the melon for a yellow spot, which indicates where it rested on the soil during ripening.
To ensure you’re harvesting at peak ripeness, check your watermelon daily towards the end of its growth period. Use these indicators together – color, weight, and the telltale yellow spot – to determine when your container-grown watermelon is ready for harvest.
Frequently Asked Questions
Can I grow watermelon in containers year-round, regardless of the season?
Yes, you can grow watermelons in containers year-round with proper care and maintenance. Since container growing allows for more control over the environment, you can adapt to changing seasons by adjusting the watering schedule, providing protection from extreme temperatures, and selecting varieties that thrive in specific conditions.
How do I prevent pests and diseases when growing watermelon in containers?
To prevent pests and diseases, inspect your plants regularly for signs of infestation or infection. Use organic or integrated pest management (IPM) techniques to control unwanted growth, such as introducing beneficial insects or practicing good sanitation. Keep the container clean, remove weeds, and maintain optimal humidity levels to create an environment less conducive to disease.
Can I grow watermelon in a small balcony with limited space?
Yes, you can grow watermelons in a small balcony with limited space by selecting compact varieties that are specifically bred for container growing. Choose a smaller pot (at least 12-18 inches wide and deep) and make sure it has good drainage to accommodate the plant’s root system.
How do I know when my watermelon is ripe?
Timing the perfect harvest can be tricky, but look for these signs: a creamy yellow spot on the underside of the fruit, a dull thud sound when tapped with your knuckles, and a slight give when pressed. Harvesting at the right time will ensure optimal flavor and texture.
Can I reuse containers for growing watermelon in subsequent seasons?
Yes, you can reuse containers for growing watermelons in subsequent seasons as long as they are properly cleaned and disinfected to prevent the spread of diseases. Make sure to remove any remaining soil, scrub the container with soap and water, and rinse thoroughly before refilling it with fresh potting mix and starting a new crop.