Growing delicious tomatoes can be a challenge, but with the right container and care, you’ll be enjoying a bountiful harvest in no time. One of the most popular ways to grow tomatoes is in a bucket, and it’s easy to see why: buckets are compact, versatile, and perfect for small spaces or balconies. But what sets a successful tomato crop apart from an unsuccessful one? Choosing the right soil, seed starting techniques, and ongoing care all play crucial roles in growing healthy, productive plants.
In this article, we’ll break down the steps to grow tomatoes in a bucket, from selecting the ideal container to harvesting your ripe tomatoes. We’ll cover expert tips on soil selection, seed starting, pruning, and pest management to ensure you get the best possible results. Whether you’re a seasoned gardener or just starting out, our guide will give you the confidence to grow juicy, flavorful tomatoes in your very own bucket.
Choosing the Right Container
When growing tomatoes in a bucket, selecting the right container is crucial to ensure your plants receive adequate drainage and air circulation. Consider factors like size, material, and drainage holes when making your choice.
Selecting the Perfect Buckets Size and Material
When it comes to growing tomatoes in a bucket, selecting the right size and material is crucial for optimal growth. A bucket that’s too small will limit root development, while one that’s too large may lead to excessive watering needs. For compact tomato varieties, a 5-10 gallon bucket is ideal, providing enough room for roots to spread without wasting space.
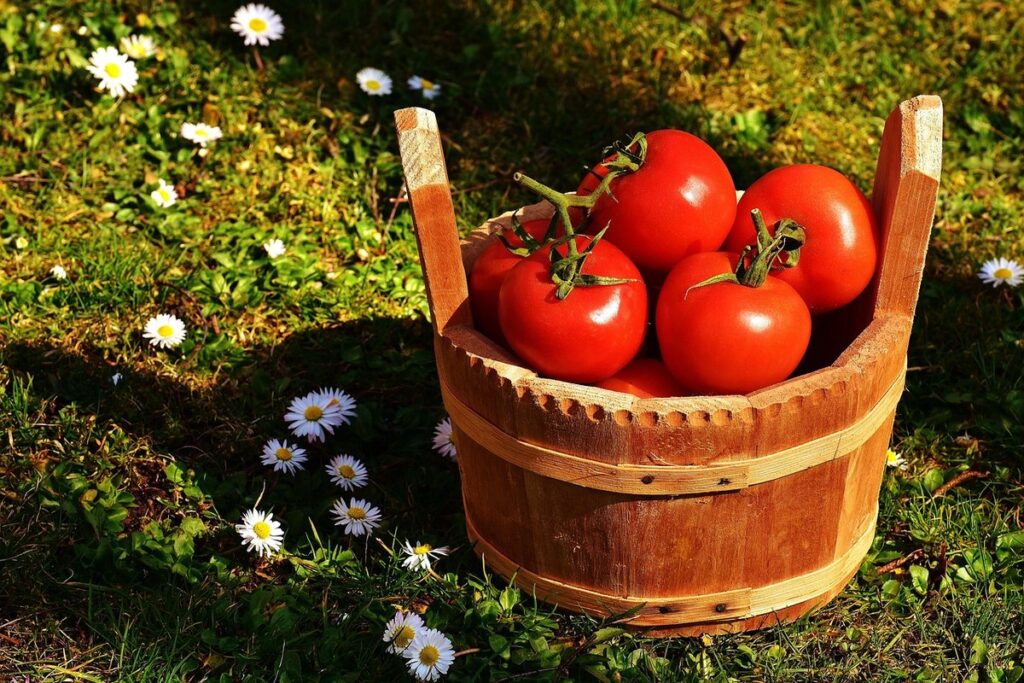
The material of your container is also important. Plastic buckets are lightweight, easy to clean, and inexpensive, but may retain heat, which can harm tomatoes in warmer climates. Wooden containers, on the other hand, provide better insulation and can be more durable than plastic. However, they may require periodic treatment to prevent rot and insect infestations.
Consider your local climate when choosing a bucket material. In cooler areas, a wooden or metal container can help retain heat, while in warmer regions, a lighter-colored plastic bucket can reflect sunlight and reduce temperatures. Ensure the bucket has adequate drainage holes (at least 2-3) to prevent waterlogged soil and root rot.
Preparing the Container for Tomato Growth
Before planting your tomato seedlings into the bucket, it’s essential to prepare the container for optimal growth. Start by drilling a few holes on the bottom of the bucket for drainage. This will prevent waterlogged soil and root rot, which can be detrimental to your tomatoes’ health. A general rule of thumb is to drill 2-3 holes with a diameter of about an inch.
Next, place a saucer or tray under the bucket to catch any excess water that might spill out during watering. This will make cleanup easier and prevent any potential mess on your patio or balcony. For added protection against root rot, consider adding a layer of gravel or broken pottery at the bottom of the bucket before filling it with soil.
To sterilize the container, fill the bucket with hot water and let it sit for about an hour. This will help kill off any bacteria or fungi that might be present on the surface. Once you’ve prepared the bucket, make sure to provide your tomato plants with proper ventilation by keeping them at least 6-8 inches away from any walls or structures. Adequate sunlight exposure is also crucial – choose a spot that receives direct sunlight for at least 6 hours a day.
Soil Selection and Preparation
Now that we’ve got our bucket setup, it’s time to focus on selecting the right soil for your tomatoes to thrive. Choosing the wrong soil can be a major obstacle in getting those delicious fruits growing.
Understanding Tomato Soil Requirements
When growing tomatoes in a bucket, choosing the right soil is crucial for their healthy development. Tomatoes require well-draining, fertile soil that’s rich in organic matter. Aim for a mix with a pH between 6.0 and 7.0, as this range allows for optimal nutrient uptake.
To achieve the ideal pH level, you can test your bucket soil using a pH meter or by sending it to a lab for analysis. If your soil is too acidic (low pH), add dolomitic limestone to raise the pH. Conversely, if it’s too alkaline (high pH), mix in some peat moss or elemental sulfur.
Ensure your tomato soil has adequate nutrient levels. A balanced fertilizer with a ratio of 10-10-10 N-P-K (nitrogen-phosphorus-potassium) is a good starting point. You can also add compost, manure tea, or fish emulsion to boost the organic matter content. Aim for a mix that’s at least 20% compost or well-rotted manure to provide essential nutrients and improve soil structure.
Mixing Your Own Compost or Using Store-Bought Options
When it comes to growing tomatoes in a bucket, having the right potting mix is crucial for their health and productivity. You have two main options: mixing your own compost or using store-bought mixes. Both methods have their pros and cons.
Making your own compost allows you to control the ingredients and ensure they are free from additives and chemicals that can harm your tomatoes. Start by collecting kitchen scraps, leaves, and grass clippings, then mix them with a carbon-rich material like shredded newspaper or coconut coir. Let it decompose for several weeks, turning it regularly, until you get a rich, earthy-smelling compost.
Using store-bought mixes is convenient, but be aware that some may contain fertilizers or other additives that can promote excessive growth, making your tomatoes more prone to disease. Some popular options include organic potting mixes and those specifically designed for containers.
If repurposing household waste isn’t an option for you, consider using a combination of store-bought mix and homemade compost as a compromise. This way, you’ll get the benefits of both worlds: controlled ingredients and added nutrients.
Seed Starting and Transplanting
Now that you have a thriving seedling, it’s time to transfer it into your bucket garden. Learn how to carefully transplant your tomato seedlings into their new container home successfully.
Preparing Seeds for Indoor Germination
Selecting the right seeds for indoor germination is crucial when growing tomatoes in a bucket. Choose varieties that are specifically bred for container growing and have a compact growth habit to ensure they thrive in your mini-greenhouse. Look for seed packets or online descriptions that mention ‘dwarf’ or ‘patio’ tomatoes, which are perfect for small spaces.
When sowing seeds indoors, keep the following tips in mind: sow seeds ¼ inch deep in a seed starting mix, about 1-2 weeks before the last frost date in your area. Maintain a consistent temperature between 65-70°F (18-21°C) to encourage germination. Avoid overwatering by checking the soil daily and providing adequate drainage.
Some common issues with seed starting include inadequate light, insufficient heat, or incorrect watering practices. To avoid these problems: use grow lights if you don’t have a sunny windowsill, invest in a heating mat for temperature control, and water carefully to prevent over-saturation. By following these guidelines, you’ll be well on your way to successfully germinating tomato seeds indoors, ready for transplanting into your bucket garden when the time is right.
Transplanting Seedlings into Buckets
When transplanting seedlings into buckets, it’s essential to handle their delicate roots with care. Start by gently removing the seedling from its pot, taking note of the root system’s orientation. If the roots are circling or growing out of the soil surface, use a fork to carefully tease them apart and encourage them to grow downwards.
Next, prepare your bucket by adding a layer of high-quality potting mix specifically designed for containers. This type of mix will help maintain optimal drainage and nutrient levels. Adjusting the soil pH is also crucial – tomatoes prefer a slightly acidic to neutral soil pH (around 6.0-7.0). You can test your potting mix’s pH using a soil testing kit or add a pH adjuster according to the manufacturer’s instructions.
Finally, provide necessary support systems for your tomato seedlings. A trellis or cage will help keep them upright and encourage vertical growth. Make sure it’s securely attached to the bucket to prevent it from toppling over in the wind. Plant your seedling at the same depth as before, firming the soil gently around its base. Water well after transplanting to settle the roots and provide enough moisture for establishment.
Ongoing Care and Maintenance
Now that your tomato plants are thriving, it’s time to think about how you’ll keep them healthy and productive throughout their lifespan. We’ll cover ongoing care and maintenance tips to ensure a bountiful harvest.
Watering and Fertilizing Tomatoes in Containers
When growing tomatoes in containers, it’s essential to pay close attention to watering and fertilizing. Since buckets tend to dry out faster than traditional garden beds, you’ll need to monitor moisture levels more frequently.
Check the soil daily by inserting your finger into the soil up to the first knuckle. If the soil feels dry, it’s time for a drink. Water thoroughly until water drains out of the bottom of the bucket. However, be cautious not to overwater – this can lead to root rot and other issues.
To prevent overwatering, use a well-draining potting mix specifically designed for containers. You can also use a moisture meter to get an accurate reading of the soil’s moisture levels. As for fertilizing, feed your tomatoes with a balanced fertilizer (10-10-10) once a week during the growing season.
Keep in mind that tomatoes grown in containers require more frequent feeding than those grown in traditional garden beds. A general rule of thumb is to feed them when they’re about 6-8 inches tall and continue to fertilize every two weeks until harvest time.
Pruning and Training Tomato Plants
Pruning and training your tomato plants is crucial for maximum growth and productivity. When growing tomatoes in a bucket, it’s essential to provide support as the plant grows to prevent damage from wind, rain, and weight.
Tip pruning involves removing the tip of the stem (about 6-8 inches from the top) to encourage bushy growth and more fruiting branches. This technique helps control the height of the plant and promotes a fuller shape. To do this, simply cut off the top inch or two of the stem with scissors or pruning shears.
Staking is another essential technique for supporting indeterminate tomato plants as they grow. You can use stakes made from bamboo, wood, or metal, and tie the plant to it using twine or clips. Caging is a more space-efficient option, where you place a wire cage around the plant as it grows. This provides support while allowing for better air circulation and sunlight penetration.
Remember to prune your tomato plants regularly, removing weak or spindly growth, to promote healthy development and encourage fruiting. By pruning and training your tomato plants correctly, you’ll be rewarded with a bountiful harvest of delicious homegrown tomatoes!
Common Issues and Troubleshooting
Don’t worry if things don’t go as planned right away, common issues can pop up when growing tomatoes in a bucket. We’ll walk you through solutions to get your plants back on track.
Dealing with Pests and Diseases in Container-Grown Tomatoes
When growing tomatoes in containers, it’s essential to be aware of the common pests and diseases that can affect your crop. Hornworms are a major problem for tomato growers, particularly those using containers. These large green caterpillars feed on leaves, stems, and fruits, causing significant damage. To prevent hornworm infestations, inspect your plants regularly, removing any eggs or larvae you find. Use neem oil or Bt (Bacillus thuringiensis) to control the population.
Another issue that can impact container-grown tomatoes is blossom end rot. This condition occurs when the plant’s calcium levels become imbalanced due to fluctuations in watering and nutrient availability. To prevent blossom end rot, ensure consistent moisture levels by checking the soil daily. Mulching around the plant also helps retain moisture and regulate temperature. If you notice any symptoms of blossom end rot, increase your feeding schedule with a balanced fertilizer.
Tomato spotted wilt virus (TSWV) is another common problem affecting container-grown tomatoes. This viral disease causes yellow or white spots on leaves and reduces fruit production. To minimize the risk of TSWV transmission, avoid sharing garden tools or transplanting infected plants to new containers. Implement proper sanitation practices by cleaning your tools regularly with a 3% bleach solution.
Regularly inspect your plants for signs of pests or diseases, taking prompt action when you identify any issues. Keep your gardening area clean, and maintain good hygiene habits to prevent the spread of diseases through contaminated soil and tools. With these prevention methods in place, you can enjoy a bountiful harvest from your container-grown tomatoes.
Harvesting Your Bucket Grown Tomatoes
Now that your bucket-grown tomatoes are ripe and ready, it’s time to harvest them carefully to avoid damaging the delicate fruit. We’ll walk you through how to do this safely in a way that preserves their flavor and texture.
Determining Optimal Maturity and Ripeness
When it comes to harvesting bucket-grown tomatoes, determining their optimal maturity and ripeness is crucial for achieving sweet flavor and tender texture. One of the most reliable indicators of tomato ripeness is observing color changes. Tomatoes typically start out with a pale green or yellowish tint, gradually deepening into shades of orange, red, and finally, their signature bright red hue.
In addition to color cues, examine the tomato’s texture for signs of readiness. Ripe tomatoes will yield to gentle pressure but should still retain some firmness. Avoid squeezing too hard, as this can damage the fruit and cause it to spoil faster.
Another key factor is the stem end – a ripe tomato will easily come off at the stem with a slight twist. If it’s difficult to remove or the stem breaks off cleanly, the tomato may not be fully ripe yet.
Keep in mind that some varieties of tomatoes take longer than others to ripen, so observe their specific growth patterns and adjust your harvesting schedule accordingly.
Tips for Maximizing Tomato Yields from Small Spaces
When growing tomatoes in a bucket, maximizing yields from small spaces is crucial. To make the most of limited space, consider using vertical gardening techniques such as trellising or cages to train your tomato plants to grow upwards. This will not only save floor space but also encourage fruiting and flowering by promoting better air circulation and sunlight penetration.
To further optimize your space, incorporate companion planting into your bucket garden. Planting basil or mint alongside tomatoes can improve growth rates and flavor, while marigolds repel nematodes that might harm your plants. Be sure to plant companion species around the perimeter of your tomato plant, leaving enough space for them to grow without crowding out your main crop.
Harvesting continuously throughout the season is also key to maximizing yields. Regularly remove lower leaves and weak growth to direct energy towards fruit production. This process, called “de-suckering,” allows plants to focus on ripening existing fruits rather than producing new ones.
Frequently Asked Questions
Can I use a bucket with no drainage holes for growing tomatoes?
Yes, but it’s not recommended as it can lead to waterlogged soil and root rot. Look for buckets with built-in drainage holes or drill them yourself to ensure proper drainage.
How often should I fertilize my container-grown tomato plants?
Fertilize your tomato plants every 1-2 weeks during the growing season, using a balanced fertilizer (10-10-10 NPK). This will provide essential nutrients for optimal growth and fruit production. You can also consider using compost tea or worm castings for added benefits.
Can I grow cherry tomatoes in a bucket?
Yes, cherry tomatoes are an excellent choice for container growing. They require less space and support compared to larger varieties, making them perfect for small spaces like balconies or patios. Choose compact or dwarf cherry tomato varieties for best results.
What’s the ideal pH range for soil when growing tomatoes in containers?
Tomatoes prefer a slightly acidic to neutral soil pH between 6.0-7.0. If your tap water is alkaline, consider using rainwater or distilled water to prevent pH fluctuations that can affect plant growth and nutrient availability.
How do I handle common pests like aphids and whiteflies on my container-grown tomatoes?
Regularly inspect your plants for signs of pests. Use neem oil or insecticidal soap to control infestations. For more severe cases, consider introducing beneficial insects like ladybugs or lacewings that feed on these pests. Maintain good hygiene by washing hands and equipment to prevent cross-contamination.