If you’re short on space but big on flavor, the Tom Thumb pea plant is definitely worth considering for your small garden or container. This compact variety may be tiny in size, but it packs a punch when it comes to yields. With its high-yielding ability and versatility, growing Tom Thumb peas can be a game-changer for those with limited space. However, it’s not all smooth sailing – there are also some unique challenges that come with caring for these peas from seed to harvest. In this article, we’ll delve into the benefits and drawbacks of growing Tom Thumb peas, including tips on how to care for them, troubleshoot common issues, and make the most of their compact size. By the end, you’ll be equipped to successfully grow these high-yielding wonders in even the smallest of spaces.
Section 1: Introduction to Tom Thumb Peas
Let’s get started with the basics of growing and caring for your very own Tom Thumb pea plant, a compact and adorable addition to any garden.
What Are Tom Thumb Peas?
Tom Thumb peas are a compact variety of garden pea that has been delighting growers and cooks alike for generations. Originating from Europe, these diminutive gems were first introduced to the UK in the early 19th century. What sets Tom Thumb peas apart from other varieties is their remarkable growth habit – they grow to be only about 2-3 feet tall, making them an ideal choice for small gardens, containers, or even indoor growing.
Their compact size means that these peas can thrive in tight spaces without sacrificing yields. In fact, Tom Thumb peas are known for producing a high number of pods per plant, often weighing in at around 1-2 ounces each. This is due to their unique characteristics, including a shorter growth period and a more vigorous production habit.
One of the most notable features of Tom Thumb peas is their sweet, tender flavor, which is often described as having a hint of sweetness compared to other pea varieties. Whether you’re looking to add them to salads, soups, or simply enjoy them steamed as a side dish, Tom Thumb peas are sure to please even the pickiest of eaters.
Advantages of Growing Tom Thumb Peas
Growing Tom Thumb peas offers numerous advantages that make them an excellent choice for gardeners of all skill levels. One of the primary benefits is their compact size, which allows you to grow multiple plants in a small space. This makes them ideal for container gardening, vertical gardens, or even balconies with limited square footage.
In addition to their space-saving design, Tom Thumb peas are also known for their high yield. With proper care and support, these plants can produce up to 3-4 pounds of fresh peas per season, making them a great choice for families or individuals looking to enjoy a steady supply of homegrown produce.
Another advantage of growing Tom Thumb peas is their resistance to certain diseases. Unlike some other pea varieties, Tom Thumb peas are less susceptible to powdery mildew and fusarium wilt, two common issues that can plague pea plants in warm and humid climates. This makes them a great choice for gardeners who want to minimize the risk of disease and enjoy healthy, thriving plants all season long.
Their resistance to disease also means you’ll need to use fewer pesticides and fungicides, making Tom Thumb peas a more sustainable option for environmentally conscious gardeners.
Section 2: Choosing the Right Variety and Preparing the Soil
When it comes to growing Tom Thumb pea plants, selecting the right variety is crucial for optimal performance. Let’s dive into choosing a suitable variety and preparing your soil for success.
Selecting the Perfect Tom Thumb Pea Variety
When selecting a Tom Thumb pea variety, there are several factors to consider. First and foremost, think about disease resistance. Some varieties are bred with built-in immunity to common pea diseases such as powdery mildew and root rot. This is especially important if you’re growing in an area prone to these issues.
Another key consideration is growth habits. Do you want a bush-type variety that produces multiple harvests or a vining type that’s better suited for trellising? Tom Thumb peas come in both forms, so choose the one that fits your garden layout and needs.
Lastly, consider the desired harvest period. Some varieties are bred for early spring production while others mature later in the season. If you want to enjoy fresh peas as soon as possible, look for varieties with shorter days to maturity.
When evaluating specific varieties, be sure to read reviews from other growers and check the seed packet or catalog description for these details.
Preparing the Garden Bed for Tom Thumb Peas
When preparing the garden bed for Tom Thumb Peas, it’s essential to get the soil right. These compact gems thrive in well-draining, rich soil with a slightly acidic pH between 6.0 and 7.0. To achieve this, test your soil pH and amend it if necessary.
Tom Thumb Peas require a diet of nitrogen-rich nutrients, phosphorus for root development, and potassium for overall health. A balanced fertilizer or compost can provide these essential micronutrients. You can also add a handful of well-rotted manure or fish emulsion to give your plants an extra boost.
Before sowing, rake the soil to loosen it to a depth of about 8-10 inches. This allows the roots to grow deep and strong. If you’re using raised beds, make sure they are at least 6-8 inches high to provide adequate space for root development.
Keep in mind that Tom Thumb Peas prefer cooler temperatures, so it’s best to plant them in early spring or late summer/early fall when the weather is mild. This will ensure optimal growth and reduce stress on your plants. By following these steps, you’ll be well on your way to growing a thriving crop of delicious Tom Thumb Peas.
Section 3: Sowing and Spacing Tom Thumb Peas
When it comes to growing your Tom Thumb peas, proper sowing and spacing is crucial for optimal growth. Let’s dive into how to do this correctly.
When to Plant Tom Thumb Peas in Your Region
When it comes to planting Tom Thumb peas, timing is everything. The ideal sowing time varies depending on your region’s climate and frost dates. To give you a head start, here are some regional guidelines for sowing Tom Thumb peas.
In cooler climates with short growing seasons (USDA Hardiness Zones 3-5), plant Tom Thumb peas as soon as the soil can be worked in early spring, about 4-6 weeks before the last frost date. This allows the plants to mature before the first frost.
For warmer climates (USDA Hardiness Zones 6-8), you can plant Tom Thumb peas in late winter or early spring, about 2-4 weeks after the last frost date. In these regions, the growing season is longer, and the plants have a better chance of maturing before the heat sets in.
In areas with mild winters (USDA Hardiness Zones 9-11), you can sow Tom Thumb peas year-round, but be mindful of the hottest summer months when temperatures soar above 80°F. Sow seeds in the morning or late afternoon to avoid extreme heat stress.
Remember to check your local frost dates and adjust the planting schedule accordingly. A little planning will ensure a bountiful harvest of these compact, yet productive peas.
Sowing Seeds and Maintaining the Right Spacing
When sowing seeds of Tom Thumb peas, it’s essential to get them off to the right start. Begin by preparing a seedbed with a mix specifically designed for legumes. Sow the seeds 2-3 inches apart and about 1 inch deep, making sure not to compact the soil as you sow. Water gently but thoroughly after sowing.
For optimal growth, maintain a spacing of around 4-6 inches between rows. This will allow for good air circulation and prevent disease from taking hold. Companion planting can also be beneficial – planting Tom Thumb peas with marigolds or nasturtiums can help deter pests and attract pollinators. In contrast, avoid planting them near members of the Brassica family, as these may compete with your peas for water and nutrients.
Remember to sow multiple rows, as this will encourage bushy growth and prevent the plants from becoming leggy. Keep in mind that Tom Thumb peas are compact varieties and can thrive in smaller spaces – even a small container garden or vertical planter can be home to several rows of these tasty legumes.
Section 4: Caring for Tom Thumb Peas Throughout Their Life Cycle
As your Tom Thumb pea plant grows, it’s essential to know how to care for it throughout its life cycle to ensure a bountiful harvest of delicious and nutritious peas. This section will cover the specific needs at each stage.
Watering and Mulching Techniques for Healthy Growth
Watering Tom Thumb peas requires attention to both frequency and depth. Aim to water your plants when the top 1-2 inches of soil feels dry to the touch. This is usually every 3-4 days during hot weather, but may be less often if it’s cooler or you’re providing adequate shade.
To prevent overwatering, which can lead to fungal diseases and root rot, make sure not to water directly on the leaves. Instead, gently pour water around the base of each plant, allowing it to soak into the soil gradually. Be cautious with young seedlings – they have shallow roots and require consistent moisture to develop properly.
Mulching Tom Thumb peas also plays a crucial role in maintaining their health. Apply a 2-3 inch layer of organic mulch (such as wood chips or straw) around each plant, keeping it 1-2 inches away from the stems. Mulch retains moisture, suppresses weeds, and moderates soil temperature. Avoid using plastic or synthetic materials, which can cause more harm than good by increasing soil temperature and preventing necessary air circulation. Regularly replenish the mulch as needed to maintain its effectiveness.
Supporting the Plant and Encouraging Abundant Harvests
As your Tom Thumb pea plants grow, they’ll need some support to reach their full potential. Without proper support, these compact gems can become leggy and produce fewer pods. Trellising is an excellent way to provide the necessary structure for your Tom Thumb peas.
You can use a simple trellis or a teepee-style one, and gently twine the stems around it as they grow. Another option is to stake individual plants using tomato stakes or pea sticks. Make sure the support is sturdy enough not to topple over in the wind.
To promote healthy growth, ensure your Tom Thumb peas receive at least 6 hours of direct sunlight per day. Keep the soil consistently moist but not waterlogged, and fertilize regularly with a balanced fertilizer. By providing these conditions, you’ll be encouraging your plants to produce an abundance of tender shoots and delicious pods.
Remember to gently guide the stems as they grow towards the support to prevent damage and promote even growth. This simple attention will pay off in the end, as your Tom Thumb peas reward you with bountiful harvests throughout the season.
Section 5: Managing Pests and Diseases in Tom Thumb Peas
As you continue growing your Tom Thumb peas, it’s inevitable that pests and diseases will try to invade your compact garden. Here we’ll cover common issues and offer practical tips for keeping these unwanted visitors under control.
Common Pests Affecting Tom Thumb Peas
When it comes to growing Tom Thumb peas, one of the most significant challenges you may face is pest infestation. These compact peas are particularly vulnerable to certain pests that can cause damage to the plant and reduce yields. Some common pests affecting Tom Thumb peas include:
* Aphids: These small, soft-bodied insects feed on sap, causing curled or distorted leaves.
* Slugs and snails: They chew holes in leaves and flowers, often at night when they are most active.
* Pea moths: The larvae of these moths can cause significant damage by eating the peas themselves.
To prevent infestations, keep your garden clean, remove weeds that provide shelter for pests, and ensure good air circulation around plants. Regularly inspect your Tom Thumb peas, looking for signs of pest activity like white powdery patches (aphid honeydew), holes in leaves or flowers, or actual pests themselves.
If you do spot any pests, act quickly to treat the affected areas with insecticidal soap or neem oil. For severe infestations, consider using systemic pesticides as a last resort. To minimize the risk of pest issues, grow resistant varieties and implement integrated pest management strategies that include crop rotation and physical barriers.
Recognizing and Addressing Disease Issues
Tom Thumb peas are generally resistant to diseases, but they can still be susceptible to certain issues. One of the most common problems is powdery mildew, which causes a white, powdery coating on the leaves and stems. To address this, remove any affected areas immediately and treat the plant with a fungicide specifically designed for vegetables.
Another potential issue is root rot, often caused by overwatering or waterlogged soil. This can be prevented by ensuring good drainage in the pot and avoiding wetting the plant’s crown. If you do notice symptoms of root rot, carefully remove the affected roots and repot the pea plant in fresh, well-draining soil.
Regularly inspect your Tom Thumb peas for signs of disease, such as yellowing leaves or black spots. Keep an eye out for aphids and whiteflies, which can transmit diseases to the plant. To prevent infestations, keep your growing area clean and use neem oil or insecticidal soap as a preventative measure.
Section 6: Harvesting and Enjoying Your Tom Thumb Pea Crop
Now that your Tom Thumb pea plants are thriving, it’s time to reap what you’ve sown – literally! Learn how to harvest and enjoy your compact crop in this final section.
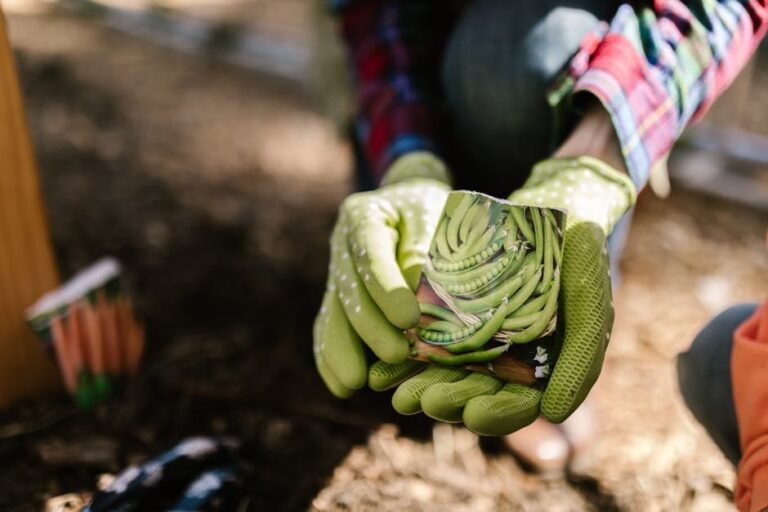
Determining the Optimal Harvest Time for Tom Thumb Peas
Determining the optimal harvest time for Tom Thumb peas is crucial to enjoy their sweetness and tender pods. One of the most obvious signs that your peas are ready is a slight yellowing or drying of the pods, especially around the stem end. This usually occurs about 7-10 days after they reach their full size.
To ensure you’re picking at the right time, perform regular taste tests by plucking a few pods and checking for sweetness and tenderness. If they snap easily when bent and have a sweet, slightly grassy flavor, it’s time to harvest! Harvesting too early can result in underdeveloped peas, while waiting too long may lead to over-ripeness.
As you develop your harvest schedule, keep an eye on the plants’ overall condition. Tom Thumb peas are naturally compact, but they still require some support. When the pods start to fill with peas, gently twist them around the stem to encourage even growth and prevent podding from becoming too dense.
By monitoring these visual cues and incorporating regular taste tests into your harvest routine, you’ll be able to pick your Tom Thumb peas at their peak sweetness and enjoy them in a variety of dishes.
Storing and Preserving Freshly Harvested Tom Thumb Peas
Now that you’ve harvested your Tom Thumb peas, it’s time to store and preserve them for later enjoyment. With a few simple methods, you can enjoy these tender pods throughout the year. One of the most popular methods is freezing, which helps retain their flavor and nutrients. To freeze Tom Thumb peas, simply blanch them in boiling water for 2-3 minutes, then immediately plunge them into an ice bath to stop the cooking process. Once cooled, transfer the peas to airtight containers or freezer bags and store them in the freezer.
Another method is canning, which allows you to preserve the peas in a vacuum-sealed environment. To can Tom Thumb peas, follow safe canning procedures to avoid spoilage and foodborne illness. This involves packing the peas into clean, sterilized jars and processing them in a boiling water bath for 20-30 minutes.
Drying is also an effective method for preserving Tom Thumb peas, especially if you live in a dry climate or have limited freezer space. To dry the peas, simply spread them out on a paper bag or tray lined with parchment paper and place them in a low-temperature oven (150°F – 200°F) or dehydrator. Once dried, store the peas in airtight containers to maintain their crunchiness and flavor.
Section 7: Troubleshooting Common Issues with Tom Thumb Pea Plants
As you continue to grow and care for your Tom Thumb pea plants, it’s only natural that unexpected issues will arise, so let’s tackle some common problems together. We’ll cover the solutions to get your plants back on track in this section.
Identifying and Resolving Common Problems
If you’ve been growing Tom Thumb pea plants and are encountering issues with their growth or yields, don’t worry – it’s a common problem many gardeners face. One of the most noticeable signs of trouble is yellowing leaves, which can be caused by overwatering or underwatering. To resolve this issue, make sure to check your soil moisture regularly and adjust your watering schedule accordingly.
Another common problem with Tom Thumb pea plants is poor growth. This could be due to inadequate sunlight, nutrient deficiencies, or pests/diseases attacking the plant. Inspect your plants carefully for signs of damage or infestation and take action promptly if needed. You can also try adjusting the plant’s position in the garden or adding a balanced fertilizer to provide essential nutrients.
Reduced yields are another issue many growers experience with Tom Thumb pea plants. This might be due to factors such as inadequate support, poor air circulation, or extreme weather conditions. To boost your harvest, ensure that the plants have adequate trellising and make sure there’s sufficient space between them for good airflow.
Tips for Reviving Struggling Plants
When Tom Thumb pea plants start struggling, it can be disheartening. However, with some TLC and adjustments to their care routine, you can help them bounce back. One of the most critical factors is nutrient levels. Check if your plant is receiving a balanced fertilizer specifically formulated for peas. A lack of nitrogen, phosphorus, or potassium can cause stunted growth and yellowing leaves.
Adjust the pH level in your soil if necessary, as Tom Thumb pea plants prefer slightly acidic to neutral conditions (around 6.0-7.0). Also, ensure proper watering habits – overwatering can lead to root rot, while underwatering causes dehydration. Consider repotting with fresh potting mix and pruning any weak or damaged growth.
Additionally, inspect your plant for pests like aphids or whiteflies, which can weaken the plant’s immune system. Regularly check for signs of disease such as powdery mildew or downy mildew. With a little patience and attention to detail, you should see your Tom Thumb pea plants recovering in no time.
Keep an eye on temperature fluctuations – ideally, maintain a consistent temperature between 60°F-70°F (15°C-21°C) for optimal growth. Avoid placing your plant near drafts or extreme temperatures.
Frequently Asked Questions
Can I grow Tom Thumb peas indoors, or do they require direct sunlight?
Yes, you can grow Tom Thumb peas indoors with sufficient lighting. While they prefer direct sunlight, a well-lit indoor space with at least 4-6 hours of direct sunlight per day will also yield a successful harvest.
How often should I water my Tom Thumb pea plant, and what are the signs of overwatering?
Water your Tom Thumb peas when the top inch of soil feels dry to the touch. Overwatering can lead to root rot and other issues. Keep an eye out for yellowing leaves, soft stems, or a general decline in plant health.
Can I use companion planting with Tom Thumb peas? Which plants make good neighbors?
Yes, companion planting is beneficial when growing Tom Thumb peas. Planting with marigolds, nasturtiums, or calendulas can deter pests and add nutrients to the soil.
What’s the optimal spacing for sowing Tom Thumb pea seeds in a container garden?
For best results, sow Tom Thumb pea seeds 2-3 inches apart in containers that are at least 6-8 inches deep. This allows for proper root development and encourages a robust harvest.
How long does it take to mature from seed to harvest with Tom Thumb peas? Can I expect multiple crops per season?
Tom Thumb peas typically mature within 50-60 days after sowing seeds in warmer climates. You can expect one main crop per season, but some gardeners have reported success with a second, smaller harvest if the plant is properly supported and cared for.