Growing your own nutrient-rich sprouts in jars is easier than you think, and with just a few simple steps, you can enjoy a fresh harvest right on your kitchen counter. For those who want to supercharge their meals with vitamins and antioxidants, learning how to grow sprouts in jars is a game-changer. But where do you start? Choosing the right jar and selecting high-quality seeds are crucial for optimal growth. In this article, we’ll take you through everything from seed selection to harvesting and storing your precious crop. You’ll learn tips and tricks for ensuring your sprouts stay fresh and healthy, so you can enjoy them at their best. Whether you’re a seasoned gardener or a beginner, our guide will show you how to grow delicious and nutritious sprouts in jars with minimal fuss.
Choosing the Right Jar for Your Sprouts
When it comes to growing sprouts in jars, selecting the right container is crucial. In this section, we’ll explore the essential factors to consider when choosing a jar for your sprouting needs.
Factors to Consider When Selecting a Jar
When selecting a jar for growing sprouts, it’s essential to consider several factors beyond just aesthetics. The right jar size, material, and shape can significantly impact the success of your sprouting endeavors.
First and foremost, think about the amount of space you have available and the quantity of sprouts you want to grow. A general rule of thumb is to start with a smaller jar (around 1-2 quarts) for small batches of seeds or microgreens. This size allows for even germination and makes it easier to maintain humidity levels.
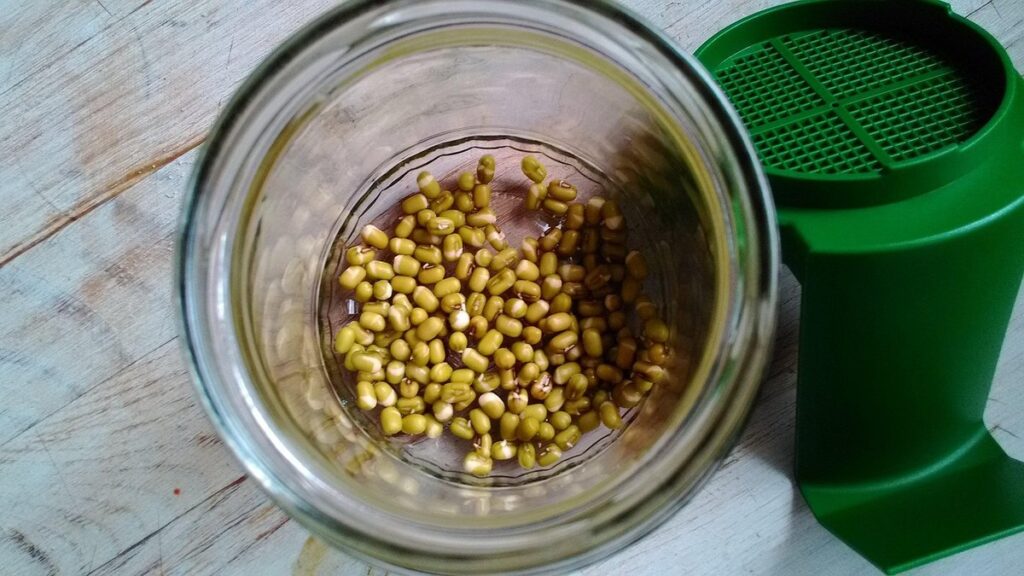
The material of your jar is also crucial. Glass jars are ideal, as they allow for easy visibility and won’t impart any flavors or chemicals into the soil. Plastic containers, on the other hand, may retain moisture and potentially harbor bacteria. When choosing a glass jar, ensure it has a wide mouth to facilitate easy rinsing and maintenance.
Finally, consider the shape of your jar. A narrow neck can make it difficult to reach the growing area for maintenance or harvesting. Look for jars with a wider base and a more gradual slope to ease access.
In terms of drainage and aeration, you’ll want to ensure your jar has adequate holes or mesh to allow excess water to escape. This will prevent waterlogged soil and promote healthy root growth. Some popular options include jars with built-in strainers or those featuring small holes at the bottom for optimal drainage.
Understanding Jar Materials: Glass vs. Plastic
When it comes to growing sprouts in jars, one of the most important decisions you’ll make is what material to use for your container. The two most common options are glass and plastic, each with its own set of benefits and drawbacks.
Glass jars are a popular choice among sprout enthusiasts due to their durability and non-porous nature. They can withstand extreme temperatures, making them ideal for cold-soaking seeds or for storing sprouts in the fridge. Glass is also easy to clean and resistant to scratches, which means your jar will last for many harvests.
On the other hand, plastic jars are cheaper and more lightweight than their glass counterparts. However, they may harbor bacteria and mold due to their porous nature, requiring more frequent cleaning. Some plastics, such as BPA-containing types, can also leach chemicals into your sprouts, potentially affecting their nutritional value or even posing health risks.
When choosing between the two, consider what’s most important to you: durability, ease of maintenance, or budget.
Preparing the Jar for Sprouting
Before you start sprouting, it’s crucial to prepare your jar by washing and rinsing it thoroughly to prevent any contaminants from affecting your future growth. This step ensures a healthy environment for your seeds to thrive in.
Cleaning and Sterilizing Your Jar
Properly cleaning and sterilizing your jar is crucial before using it to grow sprouts. This step may seem trivial, but it plays a significant role in ensuring the health and safety of your sprouts.
Bacteria, fungi, and other microorganisms can be present on the surface of the jar, which can contaminate your seeds and lead to mold, mildew, or even food poisoning. To avoid this, make sure to wash your jar thoroughly with warm soapy water after each use.
Next, sterilize the jar using one of two methods: boiling or UV light exposure. Boiling is more effective for thorough sterilization. Fill a pot with water and submerge the jar in it for 10-15 minutes. Remove the jar from the water with oven mitts, as it will be hot to handle.
Alternatively, you can place the jar under direct sunlight using a UV light. This method takes longer, typically around an hour or two, but is still effective in killing bacteria and other microorganisms.
Once sterilized, dry the jar thoroughly before filling it with seeds and water. This step ensures your sprouts grow healthy and contaminant-free, making them safe to consume.
Creating a Suitable Environment for Sprouting
Creating an optimal environment for sprouting is crucial to ensure your seeds germinate and grow into healthy, nutrient-rich sprouts. Temperature control is essential, as most sprouting seeds thrive between 65°F (18°C) and 75°F (24°C). Avoid placing the jar near direct sunlight or heat sources, which can cause the temperature to fluctuate.
Humidity levels are also vital for successful sprouting. A humid environment helps keep the seeds hydrated and promotes germination. To maintain optimal humidity, cover the jar with a cloth or plastic bag, making sure it’s not too tight to prevent moisture buildup. Check the jar daily to ensure it’s not becoming too soggy.
Light exposure is another critical factor. Direct sunlight can cause the sprouts to become leggy and weak. Instead, place the jar near an east- or west-facing window with filtered light. If you don’t have a suitable window, use grow lights specifically designed for indoor gardening. This will provide the necessary spectrum without overheating the seeds.
Regularly inspect your jar for signs of condensation on the lid or walls. This can indicate that the environment is too humid, and you may need to adjust the covering material or position the jar slightly ajar. By monitoring temperature, humidity, and light exposure, you’ll create an optimal environment for your sprouts to thrive.
Selecting the Right Seeds for Your Jar
Choosing the right seeds is crucial to growing a healthy and thriving sprout, so let’s explore the options available for your jar. Consider factors like seed size, type, and storage requirements.
Factors Affecting Seed Quality: Freshness, Type, and Quantity
When it comes to growing sprouts in jars, selecting high-quality seeds is crucial for optimal results. But what exactly makes a seed “high-quality”? One key factor is seed freshness. Just like fresh produce at the grocery store, seeds have a limited shelf life and can quickly go stale if not stored properly. Check the packaging or expiration date to ensure you’re working with the freshest possible seeds.
Another important consideration is seed type. Different types of seeds are suited for specific sprouts, such as broccoli, alfalfa, or mung beans. Choose a seed that’s well-suited for your desired outcome and climate. For example, broccoli seeds thrive in cooler temperatures, while alfalfa seeds prefer warmer conditions.
Finally, the quantity of seeds you use can also impact your jar’s success. Too few seeds may result in sparse growth, while too many can lead to overcrowding and poor air circulation. As a general rule, start with 1-2 tablespoons of seeds per quart-sized jar and adjust as needed based on your specific experience and environment.
When it comes to seed selection, quality really does matter. By considering factors like freshness, type, and quantity, you’ll be well on your way to growing healthy, delicious sprouts in jars.
Understanding Seed Germination Rates
When selecting seeds for your jar, understanding seed germination rates is crucial to ensure optimal growth and success. Germination rate refers to the percentage of seeds that sprout within a specific timeframe, usually 3-7 days. To calculate this rate, divide the number of seeds that have sprouted by the total number of seeds planted.
For example, if you plant 10 seeds and 6 of them germinate within 5 days, your seed germination rate is 60%. This can be affected by various factors such as seed quality, storage conditions, moisture levels, and temperature. High-quality seeds typically have a higher germination rate than old or low-grade seeds.
Interpreting seed germination rates is also essential to ensure you’re planting the right amount of seeds for optimal growth. A good rule of thumb is to plant more seeds than you need, as this allows for some variability in germination rates. For instance, if your desired sprout yield is 10-12 inches tall and dense, start with a minimum of 5-7 seeds per jar.
Keep in mind that different seed varieties have varying optimal temperatures for germination. Research the specific temperature requirements for your chosen seeds to ensure ideal growing conditions. By understanding and considering these factors, you’ll be better equipped to choose the right seeds for your jar and achieve healthy, thriving sprouts.
Planting Seeds in Your Jar
Now that you have your seeds and jar, it’s time to plant them correctly to ensure healthy sprouting – let’s get started! This is where attention to detail really matters.
Proper Seed Placement and Covering
When planting seeds in your jar, proper placement is crucial for optimal growth. Start by placing 1-2 tablespoons of soil at the bottom of the jar, depending on its size. This will provide a solid base for the seeds to germinate. Next, sow your chosen sprouting seeds about 1/4 inch deep and 1-2 inches apart from each other. This distance allows for proper air circulation and prevents overcrowding, which can lead to mold and fungal growth.
Covering the seeds is also essential. You can use a fine layer of soil or a specialized growing medium like vermiculite. Spread it evenly across the top of the seeds, making sure not to bury them further than recommended. Some gardeners prefer to cover with a thin layer of water instead, which helps maintain humidity and promotes germination.
Aim for about 1-2 mm of covering material, just enough to keep the seeds moist without suffocating them. Make sure the jar is filled to within an inch or two from the top, leaving space for expansion during growth. By following these guidelines, you’ll be well on your way to successfully planting and growing healthy sprouts in your jar.
Watering and Monitoring Techniques
Proper watering and monitoring are crucial for successful sprouting. Overwatering can lead to mold and root rot, while underwatering can cause stunted growth. To get it right, start by checking the soil moisture daily. Stick your finger into the soil up to the first knuckle, and if the soil feels dry, it’s time to water.
Water your seeds gently but thoroughly, making sure the soil is consistently moist. Avoid getting water on the leaves or crown of the seedling, as this can cause fungal diseases. The ideal watering schedule will depend on the climate and humidity in your area. In general, you’ll want to water your sprouts every 1-2 days during the first week, then gradually decrease frequency as they grow.
Signs of successful germination include a small white root emerging from the seed, followed by a green shoot breaking through the surface. Keep an eye out for these milestones and adjust your watering schedule accordingly. If you notice any issues or suspect mold, gently remove affected areas with sterile scissors to prevent further damage. With attention to detail and a consistent routine, you’ll be enjoying fresh, healthy sprouts in no time.
Caring for Your Sprouts After Germination
Now that your sprouts have germinated, it’s time to focus on keeping them healthy and thriving. This next step is crucial to ensure your jarred greens continue to grow strong and delicious.
Understanding Nutrient Requirements
Growing sprouts in jars requires attention to their nutrient needs. Macronutrients like nitrogen (N), phosphorus (P), and potassium (K) are essential for healthy growth. Nitrogen promotes leaf development, while phosphorus supports root growth and overall development. Potassium helps with overall plant health and resistance to disease.
Micronutrients, although necessary in smaller amounts, play a crucial role as well. Calcium (Ca) is vital for cell wall formation and can be provided through organic sources like eggshells or dolomitic limestone. Iron (Fe) aids in chlorophyll production and can be supplemented with ferrous sulfate. Other essential micronutrients include zinc (Zn), copper (Cu), manganese (Mn), boron (B), molybdenum (Mo), and chlorine (Cl).
To ensure your sprouts receive the necessary nutrients, consider using a balanced fertilizer specifically designed for indoor plants or microgreens. Alternatively, you can use compost tea as a natural alternative. A general rule of thumb is to apply a 5-10-5 N-P-K ratio fertilizer once a week during the first two weeks of growth and then reduce frequency to once every ten days.
Managing Pests and Diseases in Your Jar
As your sprouts grow, they can become vulnerable to pests and diseases that can compromise their health. Common issues include aphids, whiteflies, and spider mites, which can spread quickly if not addressed promptly. These tiny insects can cause leaves to distort, turn yellow, or develop black spots.
To prevent infestations, keep your jar clean by washing it regularly with soap and water. Remove any debris or dead plant matter, as these can attract pests. Ensure proper air circulation around the jar to prevent moisture buildup, which can foster fungal growth.
Diseases such as powdery mildew, leaf spot, and root rot can also threaten your sprouts’ well-being. These often result from overwatering or inadequate light exposure. Regularly inspect your plants for signs of disease, like white powdery patches on leaves or soft, mushy stems. To manage diseases, adjust your watering schedule to prevent waterlogged soil and provide adequate light. Consider using organic pest control methods, such as neem oil or insecticidal soap, to address infestations.
Monitor your sprouts closely for any signs of pests or disease and take action promptly if you notice issues.
Tips for Harvesting and Storing Your Sprouts
Now that your sprouts are growing, it’s time to learn how to harvest them at their peak freshness and store them for a longer shelf life. Let’s dive into some essential tips for achieving optimal results!
Identifying Optimal Harvest Time
When it’s time to harvest your sprouts, you’ll want to look for visual cues and texture checks that indicate they’re ready. One of the most obvious signs is the length of the sprout itself. Typically, sprouts will reach their full height within 7-10 days after sowing, but this can vary depending on factors like temperature, light exposure, and nutrient availability.
As you inspect your sprouts, look for a slight yellowing or browning at the base of the stem, just above the growing medium. This is often accompanied by a slight drooping or bending of the leaves. Meanwhile, check the texture of the leaves by gently pinching them between your fingers. When they’re fully developed and ready to eat, the leaves will be crisp and tender.
It’s worth noting that over-harvesting can lead to a decrease in yield, so it’s better to err on the side of caution and harvest your sprouts when they’re just at their peak. To ensure you don’t miss the optimal harvesting time, consider monitoring your sprouts daily for 2-3 days before harvesting. This will give you a sense of when they’ll be ready to eat in their full glory.
Proper Storage Techniques to Maintain Freshness
To maintain the freshness and quality of your jar-grown sprouts, proper storage techniques are essential. Once you’ve harvested your sprouts, transfer them to a clean glass container with a lid, such as a Mason jar or a similar airtight container. This will help keep them away from direct sunlight and prevent moisture buildup.
Wrap the container in plastic wrap or aluminum foil to create a barrier between the sprouts and any air that might enter the container. You can also use a beeswax wrap for this purpose, which is more eco-friendly. Place the wrapped container in the refrigerator to slow down the aging process. Make sure the container is completely sealed before storing it in the fridge.
Refrigeration tips include keeping the sprouts away from strong-smelling foods, as they can absorb odors easily. Also, store them at a consistent temperature between 32°F and 40°F (0°C to 4°C). By following these storage techniques, you’ll be able to enjoy your jar-grown sprouts for up to 5 days after harvesting.
Conclusion: The Benefits of Growing Sprouts in Jars
Now that you’ve learned the ins and outs of growing sprouts in jars, it’s time to reap the rewards! One of the most significant benefits is the sheer convenience – with a jar, you can grow sprouts anywhere, anytime. No need for a dedicated garden or large space; just grab a jar and get started.
You’ll also save money by not having to buy fresh produce at the store, and reduce your environmental impact by minimizing transportation emissions. Plus, growing your own sprouts allows you to control the quality of what you eat – no pesticides or preservatives here! To make the most of this system, be sure to rotate your jar every few days and keep it clean to prevent contamination. With a little practice, you’ll be enjoying fresh, healthy sprouts in no time!
Frequently Asked Questions
What are the ideal conditions for a suitable environment for sprouting?
To ensure optimal growth, maintain a consistent temperature between 70-80°F (21-27°C) with indirect light. Avoid direct sunlight and extreme temperatures to prevent shocking your sprouts.
How often should I water my sprouts, and what’s the best way to monitor their moisture levels?
Water your sprouts lightly but thoroughly once or twice a day, depending on the climate and jar size. Monitor moisture levels by feeling the weight of the jar or checking for condensation on the lid.
Can I grow multiple types of sprouts in the same jar?
Yes! You can experiment with growing multiple types of sprouts, like alfalfa, broccoli, and mung beans, together. However, ensure you have enough space and are not overcrowding the jar, which may lead to poor growth or pest issues.
How do I know when my sprouts are ready for harvest?
Identify optimal harvest time by inspecting your sprouts daily. Harvest them when they’ve reached 1-2 inches in height, with visible roots and green leaves. Overgrown sprouts can become bitter, so don’t hesitate to check regularly.
Can I reuse a jar for growing new sprouts after cleaning and sterilizing?
Yes! If you properly clean and sterilize your jar between uses, it’s safe to reuse it for growing new sprouts. However, consider replacing old jars periodically to prevent bacterial buildup and maintain optimal growth conditions.