Snap peas are one of the most popular garden vegetables for good reason: they’re easy to grow, delicious to eat, and bursting with nutrients. If you’re new to gardening or just looking to add some variety to your summer harvest, growing snap peas is a great place to start. But with so many varieties to choose from, not to mention the importance of selecting the right soil and providing adequate support for these climbing legumes, it’s easy to feel overwhelmed.
In this comprehensive guide, we’ll walk you through everything you need to know to grow and harvest snap peas successfully, from choosing the perfect variety for your climate and taste preferences to managing pests and diseases that can impact your crop. Whether you’re a seasoned gardener or just starting out, our tips and tricks will help you enjoy a bountiful snap pea harvest all season long.
Understanding Snap Pea Varieties
When growing snap peas, understanding the different varieties can be a game-changer for your harvest. Let’s dive into the key characteristics of popular snap pea types to help you choose the best fit for your garden.
Choosing Between Sugar Ann and Golden Crown
When it comes to growing snap peas, two popular varieties often come to mind: Sugar Ann and Golden Crown. Both are high-yielding and delicious, but they have some key differences that may make one more suitable for your garden than the other.
Sugar Ann is a compact variety, maturing in as little as 50 days. It’s perfect for small gardens or containers, producing an abundance of sweet, tender pods. With its bush-type growth habit, Sugar Ann is also great for intercropping with other vegetables.
Golden Crown, on the other hand, is a taller variety that requires support. It matures in about 60 days and produces large, flat pods with a sweeter flavor than Sugar Ann. Golden Crown’s climbing habit makes it ideal for trellises or arbors, where it can make the most of its space.
When choosing between these two varieties, consider your garden’s layout and space constraints. If you have limited room, Sugar Ann is a great choice. But if you have more space to spare and want to maximize your yields, Golden Crown may be the better option.
Considerations for Dwarf vs. Standard Varieties
When deciding which type of snap pea to grow, you’ll likely come across two popular options: dwarf and standard varieties. While both have their advantages, they differ significantly in terms of space requirements and harvest expectations.
Dwarf snap peas are perfect for small gardens or containers. They mature faster (around 50-60 days) and produce smaller, yet still delicious, pods. This compact growth habit makes them ideal for urban gardeners or those with limited space. However, the yield may be lower compared to standard varieties.
Standard snap peas, on the other hand, take around 60-70 days to mature and require more space (around 3×3 feet per plant). They produce longer, thicker pods that are perfect for snacking, salads, or stir-fries. While they offer a higher yield than dwarf varieties, their larger size makes them less suitable for small gardens.
Consider your garden’s specific needs and constraints when choosing between these two options. If you’re short on space, dwarf snap peas might be the better choice. But if you have more room to spare and want a bountiful harvest, standard varieties could be the way to go.
Preparing the Soil for Snap Peas
Before planting snap peas, it’s crucial to prepare your soil properly by loosening and aerating the top layer. A well-prepared bed will ensure healthy growth from day one.
Testing and Conditioning the Soil
When it comes to growing snap peas, the health of your soil is crucial for success. But before you start sowing seeds, it’s essential to test and condition your soil to create a suitable environment for these nutrient-hungry vegetables.
To begin, take a soil sample from several areas of your garden and send it off to a lab for analysis. This will give you an accurate reading on your soil’s pH level, as well as its nutrient levels – including nitrogen, phosphorus, and potassium. A general guideline is that snap peas prefer slightly acidic to neutral soil with a pH between 6.0 and 7.0.
If your test results reveal a need for amending, now’s the time to act. Add organic matter like compost or well-rotted manure to improve drainage and fertility. You can also incorporate lime to raise the pH if it’s too low. For example, adding 1 cup of dolomitic limestone per 10 square feet can help neutralize acidic soil.
Another important aspect is ensuring your soil has sufficient calcium and magnesium, which snap peas need for optimal growth. If your test results indicate deficiencies in these minerals, consider applying dolomitic limestone or crushed eggshells to enrich the soil.
Incorporating Organic Matter and Compost
When preparing your garden bed for snap peas, incorporating organic matter and compost is essential to create an optimal growing environment. Organic matter, such as well-rotted manure or peat moss, helps improve soil structure by increasing its water-holding capacity, aeration, and nutrient availability. This can be particularly beneficial in sandy soils that drain quickly.
Compost adds valuable nutrients like nitrogen, phosphorus, and potassium to the soil, supporting healthy growth and development of your snap peas. It also acts as a natural fertilizer, reducing the need for synthetic chemicals. To make compost more accessible, consider making your own using kitchen scraps and yard waste. Alternatively, purchase high-quality compost from reputable suppliers.
When incorporating organic matter and compost into your garden bed, mix them in at a rate of about 2-4 inches deep. You can also use a mulch made from wood chips or straw to retain moisture and suppress weeds. Keep in mind that snap peas prefer slightly acidic soils with a pH between 6.0 and 7.0. Regularly testing your soil will help you determine the best amendments to make for optimal growth.
Sowing Snap Peas at the Right Time
Knowing when to sow snap peas can be a bit tricky, but don’t worry, we’ve got you covered – in this section we’ll explore the ideal timing for sowing these tasty treats.
Determining Planting Dates Based on Climate and Region
When it comes to growing snap peas, knowing when to plant is crucial for optimal growth and flavor. However, the ideal planting time varies depending on your climate and region. To determine the right planting date for your area, you’ll need to consider two key factors: frost dates and temperature requirements.
First, let’s talk about frost dates. Most regions have a last frost date in spring and a first frost date in fall. For snap peas, which are sensitive to extreme temperatures, it’s essential to wait until the soil has warmed up and the risk of frost has passed. In general, you can plant snap peas 1-2 weeks after the last frost date.
Next, consider your region’s temperature requirements. Snap peas prefer cooler temperatures between 40°F and 70°F (4°C and 21°C). If you live in a hot climate, it’s best to plant them in early spring or late summer/early fall when temperatures are milder. On the other hand, if you live in a cool climate, you can plant them directly into the garden as soon as the soil can be worked.
To find your specific planting dates, check the average frost dates for your area and consult with local nurseries or gardening experts for guidance on temperature requirements. By taking these factors into account, you’ll be able to grow delicious and healthy snap peas in your region.
Techniques for Direct Sowing vs. Seed Starting
When it comes to growing snap peas, you have two primary options: direct sowing and seed starting. While both methods can be effective, they each have their own advantages and disadvantages.
Direct sowing involves planting seeds directly into the garden bed at the right time for your climate. This method allows the young seedlings to develop in place, where they’ll receive optimal sunlight and soil conditions. Direct sowing is often preferred by seasoned gardeners because it eliminates the need for transplanting, which can be stressful for delicate seedlings.
However, direct sowing may not always yield consistent results, especially if your weather is prone to frost or extreme temperatures. In these cases, starting seeds indoors in seed trays can provide a head start on the growing season.
Seed starting involves planting seeds in a controlled environment, such as a greenhouse or indoor grow space, 4-6 weeks before the last frost date. This method allows you to get a jumpstart on the growing season and reduce the risk of seedlings being damaged by frost. However, it requires more equipment and care than direct sowing.
Ultimately, both methods have their place in a snap pea garden. Consider using a combination of both for optimal results – direct sow some seeds into warm weather, while starting others indoors to get a head start on the season.
Supporting Snap Pea Growth with Trellises and Stakes
When your snap pea plants start to grow, they’ll need some extra support to reach their full height and produce a bounty of delicious pods. Let’s explore how trellises and stakes can help.
Designing a Support System for Optimal Growth
When designing a support system for optimal snap pea growth, consider the mature size of your plants and their tendency to sprawl. Aim for a trellis or stake system that will provide sturdy support without causing damage from wind and rain. A good rule of thumb is to install supports when the seedlings are around 6-8 inches tall.
To build an effective trellis, use materials like wood or metal with a strong base and a framework that allows for easy climbing. Consider using a “T” or “A-frame” design, as these provide excellent support for snap peas’ climbing habit. When building a stake system, choose sturdy stakes spaced about 3-4 feet apart to provide adequate support.
Keep in mind the wind direction and precipitation patterns in your area when deciding on the placement of your trellis or stakes. In areas with high winds, it’s essential to anchor your supports securely into the ground to prevent them from toppling over. By investing time and effort into designing a solid support system, you’ll be able to enjoy a bountiful harvest of healthy, productive snap peas.
Installing and Maintaining the Support Structure
Installing the support structure for your snap peas is an essential step to ensure they grow upright and healthy. When choosing a location for the trellis or stake, consider the mature height of the plants and allow enough space for them to spread out. For a compact variety, you can use a shorter stake or trellis, while taller varieties require more substantial support.
Once installed, train your snap peas to climb by gently twining their stems around the support. You can also use soft ties or clips to secure the stems in place. Make sure not to tie the stem too tightly, as this can damage the plant. To encourage vertical growth, remove any lower leaves that may touch the soil, promoting air circulation and preventing disease.
Regular maintenance is crucial to keep your trellis system stable and functional. Check the structure regularly for signs of wear or damage, and replace any broken or worn-out components promptly. Keep the area around the support free from weeds and debris, which can attract pests and diseases that may harm your plants. By following these best practices, you’ll be able to create a sturdy and reliable trellis system that will support your snap peas throughout their growth cycle.
Monitoring and Controlling Pests and Diseases
As you tend to your snap pea plants, it’s essential to keep a watchful eye out for pests and diseases that can quickly ruin a harvest. This section will cover common issues and methods for prevention.
Identifying Common Issues with Snap Peas
When growing snap peas, it’s essential to be aware of common pests and diseases that can impact their growth. Two of the most prevalent issues are aphids and spider mites. These tiny creatures feed on the sap of the plant, weakening its defenses and making it more susceptible to disease. To identify an infestation, look for white cottony patches on the underside of leaves or stems, which indicate the presence of aphid eggs.
Powdery mildew is another common problem that can affect snap peas. This fungal disease causes a white powdery coating to form on leaves and stems, reducing photosynthesis and eventually killing the plant if left unchecked. Regularly inspect your plants for these symptoms and take action promptly if you notice any issues.
To prevent infestations, maintain good air circulation around your plants and keep the soil consistently moist but not waterlogged. This will help reduce stress on the plants and make them less appealing to pests.
Organic Solutions for Pest and Disease Management
When it comes to managing pests and diseases on your snap pea crop, you don’t have to reach for harsh chemicals. Organic solutions are not only better for the environment, but they can also be just as effective.
One popular option is neem oil, a natural pesticide that can help control aphids, whiteflies, and other soft-bodied pests. Mix it with water according to the label instructions and spray it on your plants to keep these pesky insects at bay. You can also use diatomaceous earth, a powder made from fossilized algae, to dehydrate and kill slugs and snails.
Crop rotation is another key strategy for managing pests and diseases. By changing up the type of crop you grow in a particular spot each season, you break the life cycle of pests that are specific to certain plants. For example, if you grew snap peas in a particular bed last season, try rotating to a different crop like tomatoes or cucumbers this year. This can help reduce the risk of disease and pest infestations.
Remember, organic solutions may take some trial and error to get right, but they’re often worth the effort for a healthier garden ecosystem.
Harvesting and Enjoying Your Snap Peas
Now that your snap peas are ripe, it’s time to harvest them at their peak flavor and texture, ensuring you enjoy every crunchy bite. Learn how to pick and prepare them for a delicious snack or side dish.
Determining the Optimal Harvest Time
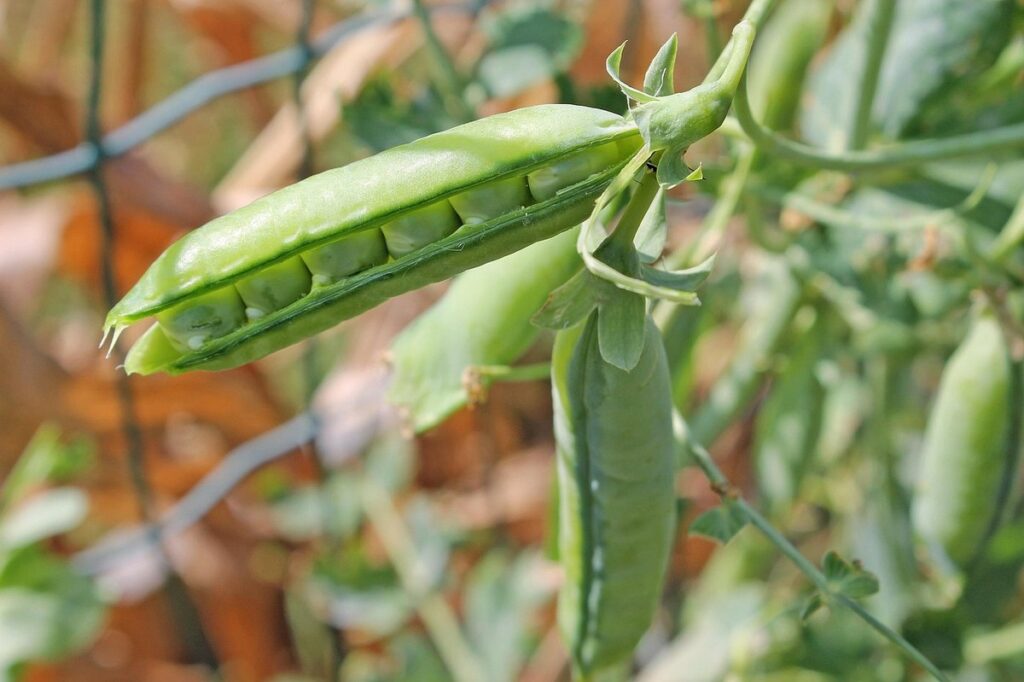
When it comes to determining the optimal harvest time for your snap peas, there are several factors to consider. The first and most obvious one is color. Typically, snap peas will turn from a pale green to a bright green or yellow-green color as they mature. However, this can vary depending on the specific variety you’re growing.
To check if your snap peas are ready to harvest, gently feel the pods. They should be plump and firm, but not hard or woody. The peas inside should also be tender and easy to bite through. If you notice that some of the pods are larger than others, it’s best to pick them all at once to encourage the plant to focus its energy on producing more.
Another way to determine harvest readiness is by checking for size. Most snap pea varieties will be ready to harvest about 50-60 days after sowing, when they reach a length of around 3-4 inches (7-10 cm). If you’re unsure whether your snap peas are ready, try gently tugging on the stem. If it comes off easily, the peas are likely ready to eat.
Storage and Handling Tips for Maximum Freshness
When it comes to preserving the freshness and flavor of your homegrown snap peas, proper storage and handling are crucial. To start, make sure you harvest your snap peas when they’re dry, as excess moisture can lead to mold and spoilage.
For short-term storage, keep your snap peas in a cool, dry place such as a pantry or cupboard. Store them in a breathable container like a mesh bag or paper bag, allowing for airflow to prevent moisture buildup. You can also store them in the refrigerator, but make sure they’re not overcrowded and are kept away from strong-smelling foods that might affect their flavor.
To maintain maximum freshness, it’s essential to handle your snap peas gently to avoid bruising or damaging them. When washing, use a soft brush or gentle water flow to remove any dirt without stripping the pods of their natural waxy coating. For longer storage periods, consider freezing or canning your snap peas to retain their flavor and nutritional value.
Regularly check on your stored snap peas for signs of spoilage, such as sliminess or mold growth. By following these simple tips, you’ll be able to enjoy your homegrown snap peas at their peak freshness throughout the season.
Frequently Asked Questions
Can I grow snap peas in containers if I have limited space?
Yes, you can definitely grow snap peas in containers. Just make sure to choose a compact variety like Sugar Ann, which is bred for container gardening and has a smaller root system. Use a well-draining potting mix and provide support with a trellis or stake. Keep the soil consistently moist, but not waterlogged.
How do I prevent aphids from infesting my snap peas?
Aphids can be a nuisance on snap peas! To prevent them, make sure to inspect your plants regularly for signs of infestation. Use neem oil or insecticidal soap as a preventative measure, and consider introducing beneficial insects like ladybugs or lacewings to your garden. Keep your plants healthy by providing adequate nutrients and water.
Can I harvest snap peas in the morning or afternoon?
The optimal time for harvesting snap peas is in the early morning, when the dew is still present on the plants. This helps to prevent moisture loss during handling and keeps the pods crisp. Avoid harvesting in the heat of the day, as this can cause the peas to become limp.
How do I support multiple rows of snap peas?
If you’re growing multiple rows of snap peas, it’s essential to provide a sturdy support system to keep them upright. Use a trellis or stake for each plant, and consider installing a row cover to help retain moisture and suppress weeds. Make sure the supports are securely anchored in the soil to prevent them from toppling over.
Can I use regular pea gravel instead of compost to improve drainage?
While regular pea gravel can help with drainage, it’s not as beneficial as incorporating compost into your soil. Compost adds organic matter that improves soil structure and fertility, making it easier for plants like snap peas to absorb nutrients. Mix in a 2-3 inch layer of compost before planting, and top-dress the bed with additional compost after harvesting.