Are you a seasoned gardener or just starting out with growing herbs? Either way, you’ll want to know how to properly care for your sage herb plant. With its unique flavor and aroma, sage is a staple in many kitchens around the world. But cultivating this versatile herb requires some attention to detail, from selecting the right variety to harvesting it at the peak of freshness.
In this comprehensive guide, we’ll walk you through the essential aspects of growing and caring for your sage plant. From choosing the best soil and fertilization methods to mastering pruning techniques and pest management strategies, we’ve got you covered. We’ll also share expert tips on how to harvest and preserve your sage leaves, so you can enjoy its flavor year-round. Whether you’re a seasoned gardener or just starting out, this guide will help you grow healthy, thriving sage plants that bring joy and flavor to your cooking.
Choosing the Right Sage Variety
When selecting a sage variety, you’ll want to consider factors like climate, soil type, and desired growth habits to ensure you choose one that thrives in your garden conditions. Let’s explore some popular options together!
Understanding Different Types of Sage
When it comes to growing sage, you’ll find that there are several varieties to choose from. Each one has its own unique characteristics and uses in the kitchen. Common sage, also known as Salvia officinalis, is perhaps the most well-known variety. It’s a hardy perennial herb with gray-green leaves and purple flowers. This type of sage is commonly used in cooking and is often paired with poultry and stuffing.
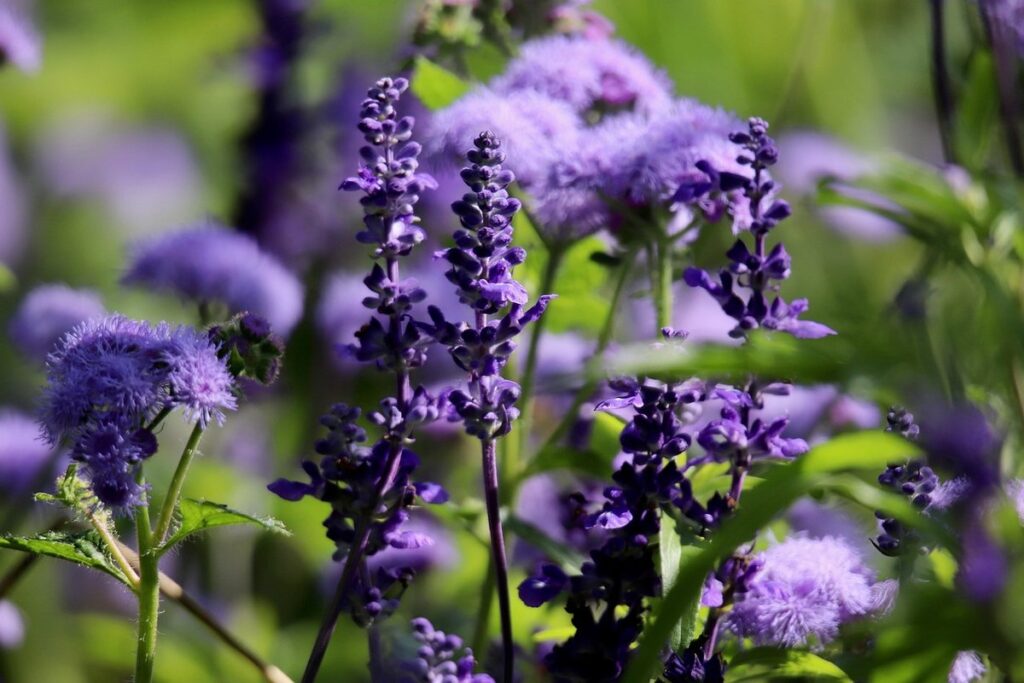
If you’re looking for something a bit more vibrant, consider growing purple sage (Salvia purpurascens). This variety has beautiful purple flowers that add a pop of color to any garden or bouquet. Golden sage (Salvia aurea) is another popular option, known for its bright yellow flowers and slightly sweet flavor. Another type of sage worth mentioning is tri-color sage, which features leaves with white, pink, and green stripes.
When choosing a variety of sage, think about how you plan to use it in your cooking. Some types of sage are better suited to drying or preserving than others. Consider factors like climate, soil type, and desired flavor profile when selecting the perfect sage for your garden.
Selecting Sage Varieties for Specific Climates
When selecting sage varieties for your garden, it’s essential to consider the climate you live in. Sage plants are native to the Mediterranean region and typically thrive in areas with warm summers and mild winters.
For Mediterranean climates, choose varieties like ‘Purpurea’ or ‘Tricolor’, which can tolerate dry spells and intense sunlight. These varieties have a more compact growth habit and produce smaller leaves, making them ideal for container gardens or areas with limited space.
In tropical climates, look for heat-tolerant varieties like ‘Rubrum’ or ‘Campanulata’, which can handle high temperatures and humidity levels. These varieties tend to grow taller and produce larger leaves, requiring more frequent pruning to maintain shape.
For temperate climates with cooler winters, choose varieties like ‘Common Sage’ or ‘Garden Sage’, which can tolerate some frost but prefer well-draining soil and full sun. Remember to provide protection during harsh winter months by mulching around the base of the plant.
Ultimately, research the specific climate requirements for your area and select a sage variety that suits those needs. This will ensure your sage plant grows strong and healthy, producing an abundance of fragrant leaves throughout the growing season.
Planting and Soil Requirements
When planting a new sage herb, it’s essential to choose the right location and prepare the soil properly to ensure your plant thrives. Let’s dive into specific requirements for planting and soil care.
Preparing the Perfect Soil Mix
When it comes to growing sage plants, having the right soil composition is crucial for their health and productivity. Sage prefers well-draining soil that’s rich in organic matter, with a pH level between 6.0 and 7.0. To create an ideal mix, you can combine potting soil, compost, and perlite or vermiculite.
A general rule of thumb is to use one part of perlite or vermiculite to two parts of potting soil. This will help improve drainage and prevent waterlogged soil, which can lead to root rot in sage plants. Compost adds essential nutrients and improves the soil’s structure, but be sure to use it in moderation – about 10-20% of the total mix.
If you’re creating a custom mix from scratch, start with a base of peat moss or coconut coir, which will help retain moisture. Then add compost, perlite or vermiculite, and finally, a balanced fertilizer. Keep in mind that sage plants can tolerate a wide pH range, but they’ll thrive best in slightly acidic to neutral soil.
Where to Plant Sage: Sunlight, Temperature, and Wind Considerations
When planting sage, it’s essential to consider three crucial factors: sunlight, temperature, and wind. Sage requires full sun to partial shade, meaning it needs at least 4-6 hours of direct sunlight per day. If you’re growing sage in a region with intense heat, provide some afternoon shade to prevent scorching.
Temperature is also vital for healthy sage growth. This Mediterranean native thrives in temperatures between 65°F and 75°F (18°C and 24°C). Avoid planting sage in areas with frost, as it can be damaged by temperatures below 32°F (0°C).
Wind protection is equally important, especially in coastal regions or exposed locations. Sage can become scorched and develop brown edges if subjected to strong winds. To mitigate this, plant sage in a sheltered spot or create a windbreak using nearby plants or a trellis.
Remember, sage is relatively drought-tolerant, but consistent moisture promotes robust growth. When choosing a location, consider the microclimate of your garden and select a spot that receives sufficient sunlight while offering some protection from harsh winds.
Watering and Irrigation
When it comes to keeping your sage plant healthy, proper watering and irrigation are crucial, which is why we’ll dive into the specifics of how often to water and when to provide supplemental moisture.
How Often to Water Your Sage Plants
When it comes to watering your sage plants, frequency is crucial. The ideal schedule depends on several factors, including climate and soil type.
In hot and dry climates, sage plants require more frequent watering, typically every 2-3 days during the peak summer months. In contrast, cooler and more humid environments can tolerate less frequent watering, around once a week. It’s essential to monitor your plant’s response to different watering schedules to determine its specific needs.
The type of soil you’re using also plays a significant role in determining the optimal watering schedule. Well-draining soils tend to dry out faster, while dense soils retain moisture longer. If your sage plant is pot-bound or in a shallow pot, it may require more frequent watering as the soil dries out quickly.
To avoid overwatering, check the soil moisture by inserting your finger into the soil up to the first knuckle. If the soil feels dry, it’s time for a drink. Water thoroughly until water drains from the bottom of the pot, and then wait 24 hours before checking again.
Drip Irrigation vs. Soaker Hose: Which is Best for Sage?
When it comes to watering your sage herb plant, choosing the right irrigation system can make all the difference. Two popular options are drip irrigation and soaker hose systems, both of which offer efficient watering solutions. But how do you decide between them?
Drip irrigation systems deliver water directly to the roots of the plant through a network of tubes and emitters. This type of system is particularly effective for sage, as it reduces evaporation and runoff, ensuring that your plant gets exactly what it needs when it needs it. With drip irrigation, you can also expect to see up to 30% reduction in water consumption.
Soaker hose systems, on the other hand, use a single hose with tiny pores to release water slowly along its length. These hoses are often less expensive than drip irrigation systems and can be an excellent choice for smaller gardens or areas where flexibility is key. However, soaker hoses can sometimes lead to overwatering if not properly monitored.
Ultimately, the decision between drip irrigation and soaker hose comes down to your specific needs and garden layout. If you’re looking for precision watering and a significant reduction in water waste, drip irrigation might be the way to go. But if you have a smaller space or prefer a more low-maintenance option, soaker hoses could be the better choice.
Fertilization and Pruning
Proper fertilization and pruning are crucial for your sage plant’s health, helping it thrive and maintain its signature flavor and aroma. In the following tips, we’ll cover how to do both effectively.
Fertilizing Your Sage Plants: Organic Options and Timing
When it comes to fertilizing your sage plants, you’ll want to opt for organic options that promote healthy growth without compromising the plant’s delicate ecosystem. Compost is an excellent choice, as it provides a slow release of nutrients while also improving soil structure and microbial activity. Mix 1-2 inches of compost into the top layer of soil during the spring or fall when plants are dormant.
Another option is fish emulsion, which is derived from natural fish waste and is rich in nitrogen, phosphorus, and potassium. Dilute it with water according to the manufacturer’s instructions (usually 10:1 ratio) and apply as a foliar spray once a month during the growing season. Keep in mind that sage plants require less fertilization than other herbs, so avoid over-fertilizing, which can lead to weak growth and reduced flavor.
Timing is also crucial when it comes to fertilizing your sage plants. Feed them lightly in early spring when new growth begins, and again after harvesting individual leaves or stems. This will give the plant a boost without promoting excessive foliage. Remember to water thoroughly after applying any fertilizer to prevent burning the roots.
Pruning Techniques to Promote Healthy Growth
When pruning your sage plant, it’s essential to use techniques that promote healthy growth and prevent disease. To do this, start by removing any dead or damaged leaves or stems. Cut these areas off at the base of the plant using clean, sharp pruning shears.
Next, focus on shaping your sage plant to encourage bushy growth. Trim back the tips of the longest stems by about one-third, cutting just above a leaf node (where a leaf meets the stem). This will help the plant direct its energy towards producing new growth and prevent it from becoming leggy.
For established plants, prune about one-quarter of the foliage in the spring to maintain their shape and promote healthy growth. This will also encourage your sage plant to produce more flowers and leaves throughout the season. Remember to disinfect your pruning shears between cuts to prevent the spread of disease. Regular pruning will not only keep your sage looking its best but also help it thrive over time.
Pest and Disease Management
Sage herb plants can be susceptible to pests and diseases, so it’s essential to know how to identify common issues and take action to prevent their spread. We’ll walk you through some practical tips for maintaining a healthy sage plant.
Common Pests Affecting Sage Plants: Identification and Control
As a sage plant owner, you may encounter some common pests that can damage your plants and affect their flavor and aroma. Two of the most prevalent pests affecting sage plants are aphids and whiteflies.
Aphids are small, soft-bodied insects that feed on plant sap, causing curled or distorted leaves. To control aphid infestations, inspect your plants regularly for signs of infestation, such as sticky honeydew droplets or actual aphids on the stems and leaves. Use neem oil or insecticidal soap to kill aphids, making sure to spray both the upper and lower surfaces of the leaves.
Whiteflies are tiny insects that resemble small moths and feed on plant sap, similar to aphids. They can transmit diseases like yellowing and stunted growth. To control whitefly infestations, introduce beneficial insects like ladybugs or lacewings that prey on them. You can also use sticky traps or fine mesh screens to prevent whiteflies from reaching your plants.
Regularly inspecting your sage plants for signs of pests will help you catch infestations early and take prompt action to control the problem.
Managing Fungal Diseases: Prevention and Treatment Strategies
Sage plants are susceptible to various fungal diseases that can be detrimental to their health. Root rot and leaf spot are two common issues that affect sage plants. Root rot occurs when the roots of the plant become waterlogged, providing an ideal environment for fungi to grow. This is often caused by overwatering, which can lead to root decay. Leaf spot, on the other hand, appears as yellow or black spots on the leaves and is usually a sign of fungal infection.
To prevent fungal diseases from affecting your sage plants, ensure good air circulation around them. This can be achieved by spacing them out adequately in your garden or pot. Regularly inspect your plants for any signs of disease, and take prompt action if you notice anything unusual. If you’re growing your sage plants indoors, make sure the soil is well-draining and avoid overwatering.
If you do encounter fungal diseases, there are various treatment options available. For root rot, remove the affected plant from its pot and trim away any rotten roots. Repot the sage plant in fresh, well-draining soil to prevent further waterlogging.
Harvesting and Preserving
Now that you’ve nurtured your sage plant, it’s time to reap the rewards of your hard work. This next step is crucial for enjoying your fresh herbs year-round.
When to Harvest Your Sage Leaves: Optimal Timing and Frequency
When it comes to harvesting your sage leaves, timing is everything. You want to pluck them at the right moment to ensure they’re fresh and flavorful for cooking and preserving. Generally, it’s best to harvest individual leaves or stems when they’ve reached their full size, but before the plant starts to flower.
Check on your sage plants regularly, usually around 60-90 days after sowing seeds or transplanting seedlings. Gently pinch off a few leaves from the top of the stem using your fingers or a pair of scissors. This will encourage new growth and prevent the plant from flowering prematurely. For larger harvests, you can cut back entire stems to about one-third of their height, just above a node (where a leaf meets the stem). This will help maintain the plant’s shape and promote bushy growth.
Some signs that your sage is ready for harvesting include: leaves becoming slightly woody at the base, or the plant starting to develop small yellow flowers. Harvesting regularly also helps prevent fungal diseases from taking hold.
Tips for Drying and Storing Fresh Sage Leaves
When it comes to preserving the flavor and aroma of fresh sage leaves, proper drying and storage are crucial. To start, tie a bunch of fresh sage leaves together with twine, allowing air to circulate around each leaf as they dry. You can hang them upside down in a warm, dark place or use a food dehydrator set at its lowest temperature setting.
For faster results, spread out individual leaves on paper towels and leave them in a single layer in the oven at its lowest temperature (usually around 150°F). Monitor their progress every few hours until they are completely dry and crumbly. Alternatively, you can air-dry them by placing them between two sheets of parchment paper and leaving them for a week or more.
To store dried sage leaves, transfer them to an airtight container, such as a glass jar with a tight-fitting lid. Keep the container in a cool, dark place like your pantry or cupboard. You can also freeze dried sage leaves by placing them in an airtight bag or container and storing it in the freezer.
When using stored sage, rehydrate the leaves by steeping them in hot water for a few minutes before adding to recipes.
Frequently Asked Questions
Can I grow sage indoors, or does it require outdoor conditions?
Yes, you can grow sage indoors with proper lighting and temperature control. However, it’s essential to replicate the herb’s natural sunlight requirements by placing it near a sunny window (at least 4-6 hours of direct sunlight) or using grow lights. Indoor sage plants may not produce as much foliage, but they will still thrive.
How do I protect my sage plant from pests during harsh winters?
Yes. To shield your sage plant from pests during cold months, mulch around the base to retain moisture and regulate soil temperature. You can also use physical barriers like fine-mesh screens or row covers to prevent pests like aphids and spider mites from reaching your plant.
How long does it take for a newly planted sage seedling to mature?
A newly planted sage seedling typically takes 3-4 weeks to establish itself after transplanting. Once established, it will start producing leaves within 6-8 weeks. Be patient, as the growth rate of sage can vary depending on factors like soil quality and climate.
Can I use a standard potting mix for my sage plant, or do I need a specific one?
A dedicated herb potting mix is ideal for sage plants because it contains ingredients that promote healthy root development and drainage. Standard potting mixes may lack these essential characteristics, which can affect your sage’s growth and overall health.
How often should I inspect my sage plant for signs of disease or pests, especially during the growing season?
Regular inspection is crucial to catch potential issues early on. We recommend checking your sage plant every 1-2 weeks, especially during peak growing seasons (spring-fall). Be aware of common pests like aphids and spider mites, as well as fungal diseases that can affect sage plants if left unaddressed.