Growing your own potted mint can be a game-changer for any herb enthusiast. Not only is mint incredibly easy to grow, but it’s also a versatile and fragrant addition to a variety of dishes, from cocktails to salads. However, many people struggle with keeping their potted mint plants healthy and thriving – which is why we’ve put together this comprehensive guide on how to grow and care for potted mint.
In this article, we’ll walk you through the basics of choosing the right variety of mint for your space, as well as expert tips on fertilizing, pruning, and overwintering your potted mint plants. We’ll also cover some common issues that may arise when growing mint in pots, and provide troubleshooting solutions to get your plants back on track. Whether you’re a seasoned gardener or just starting out, this guide is designed to give you the confidence and knowledge you need to grow healthy, thriving potted mint year-round.
Choosing the Right Variety
When it comes to growing potted mint, selecting the right variety is crucial for a thriving plant. Let’s explore the best types of mint to choose from and their unique characteristics.
Selecting a Hardy and Fragrant Mint Species
When selecting a mint species for container growing, it’s essential to consider hardiness and fragrance levels. Peppermint (Mentha piperita) is a popular choice, known for its high oil content and intense flavor. However, it can be quite aggressive and may require more frequent pruning.
Spearmint (Mentha spicata), on the other hand, is a softer variety that’s less invasive but still offers a sweet and refreshing fragrance. It’s an excellent option for smaller pots or areas where mint needs to be contained.
Chocolate Mint (Mentha x piperita f. citrata ‘Chocolate’) boasts a unique, mellow aroma with hints of chocolate. While it’s less hardy than Peppermint, it still thrives in containers and requires regular watering.
When choosing between these varieties, consider your climate and growing conditions. Hardy mint species like Peppermint can tolerate cooler temperatures and frost, while softer varieties like Spearmint may require protection during harsh winters. Be sure to select a variety that suits your region’s hardiness zone and provide adequate care for optimal growth.
Some popular mint hybrids, such as Lemon Mint (Mentha x piperita f. citrata ‘Lemon’) and Ginger Mint (Mentha x gracilis), offer distinct flavors and fragrances while still being relatively easy to grow in containers.
Understanding Soil Requirements for Mint
When it comes to growing mint in pots, understanding the soil requirements is crucial for its optimal growth. Mint plants prefer well-draining soil with a slightly acidic pH, ranging from 6.0 to 7.0. This means you’ll want to avoid using regular garden soil, as it can compact and prevent proper drainage.
Using potting mixes specifically designed for herbs can be a great solution. These mixes are typically formulated to retain moisture while still allowing excess water to drain away quickly. You can find these mixes at most gardening stores or online. When choosing a potting mix, look for keywords like “herb-specific” or “well-draining” to ensure you’re getting the right type.
To give your mint plant the best chance of thriving, make sure the soil is consistently moist but not waterlogged. You can check this by sticking your finger into the soil up to the first knuckle; if it feels dry, it’s time for a drink. A slightly acidic pH will also help prevent root rot and other issues that can plague mint plants in poor soil conditions.
Preparing the Container
Before you start growing mint, it’s essential to prepare a container that will provide your plant with the right conditions for thriving. Choose a pot with good drainage and a suitable size for your mint variety.
Selecting the Perfect Pot Size and Material
When it comes to selecting the perfect pot size and material for your mint plant, there are several factors to consider. First, think about the mature size of your mint plant. Mint can grow quite aggressively, so you’ll want a container that’s at least 6-8 inches deep to accommodate its extensive root system.
A general rule of thumb is to choose a pot that’s slightly larger than the one used for herbs like basil or cilantro. This will give your mint room to spread out and prevent it from becoming waterlogged, which can lead to root rot.
In terms of material, look for pots made from breathable materials like terracotta or ceramic. These allow for good air circulation and moisture regulation, which is essential for healthy mint growth. Avoid using plastic pots, as they can retain too much heat and cause your mint to overwater. Additionally, consider the color of your pot – a lighter color will help reflect sunlight and prevent overheating.
When choosing a container, also think about the weight: choose one that’s easy to move around or place in different locations.
Adding a Layer of Protection Against Pests and Diseases
When growing potted mint, it’s essential to take steps to protect the plant from pests and diseases that can harm its roots. One effective way to do this is by using physical barriers. For example, you can place a thin layer of fine mesh or netting over the soil to prevent insects like whiteflies and aphids from reaching the roots.
Biological controls are another option for managing pests. Introduce beneficial nematodes into the soil to attack and kill microscopic pests that feed on plant roots. These tiny worms are harmless to plants but deadly to grubs, fungus gnats, and other root-dwelling insects. To prevent disease, regularly inspect your potted mint for signs of trouble. Look for yellowing or browning leaves, black spots, or powdery mildew. Catch issues early on by monitoring the plant daily, especially after watering.
To keep pests at bay, maintain good hygiene around your plants. Remove any dead or dying plant material to prevent fungal diseases from taking hold. Keep the soil moist but not waterlogged, as this can lead to root rot and other problems. Regularly repotting your mint in fresh, well-draining potting mix will also help keep pests out.
Planting and Watering
To grow potted mint successfully, you need to plant it at the right time and water it regularly. Let’s dive into some essential tips for planting and keeping your mint hydrated.
Proper Planting Techniques for Mint in Containers
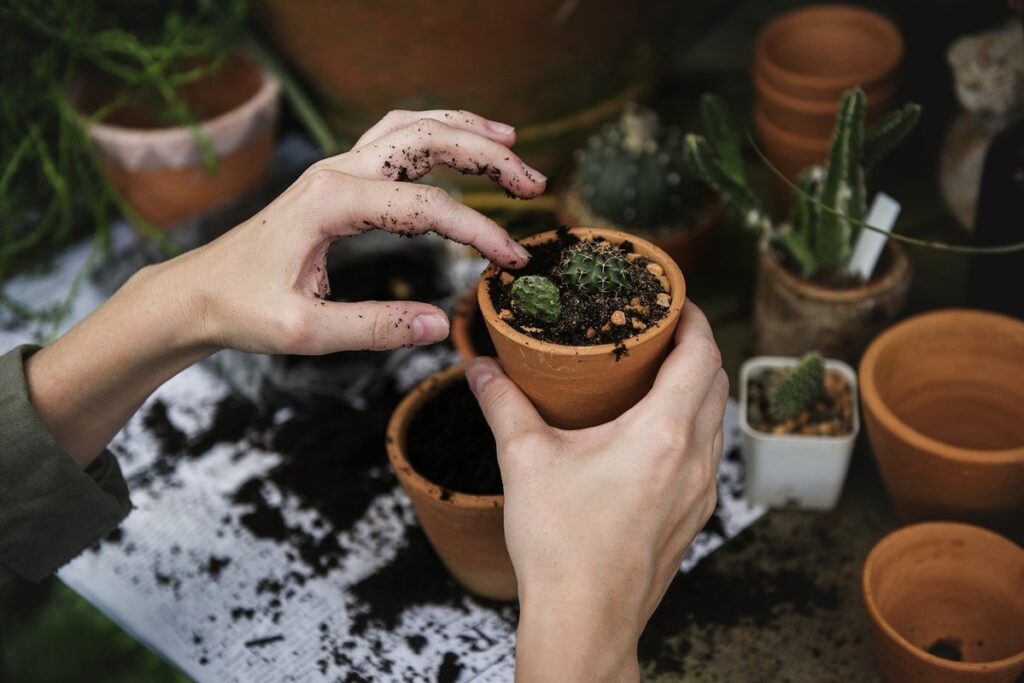
When planting mint seedlings in containers, it’s essential to take into account their delicate nature and preference for a shallow layer of soil. To begin, choose a container that is at least 6-8 inches deep to give the roots enough room to grow.
Gently remove the seedling from its pot, taking care not to disturb the roots. If the roots are circling or growing out of the pot, gently tease them apart with your fingers. Then, place the seedling in the container and fill it with a well-draining potting mix, leaving about 1/4 inch of space between the soil surface and the top of the container.
Be sure not to bury the leaves or crown of the plant, as this can cause rot and other problems. Instead, position the seedling so that the crown (where the stem meets the roots) is just above the soil level. This will help prevent water from collecting around the crown and reduce the risk of root rot.
As a general rule, mint prefers moist soil but not standing water, so make sure to water carefully after planting.
Maintaining Optimal Moisture Levels for Your Potted Mint
When it comes to growing potted mint, maintaining optimal moisture levels is crucial. Overwatering can lead to root rot, a common problem that’s easily preventable with proper care. To avoid this issue, you’ll want to check the soil moisture regularly.
Stick your finger into the soil about an inch deep, and if the soil feels dry, it’s time to water. If it’s already moist, wait another day or two before checking again. You can also perform the “water test” by gently tugging on the leaves; if they come off easily, the plant is likely thirsty.
The ideal moisture level for potted mint is slightly damp but not soggy. If you notice your mint starting to yellow or develop brown spots, it may be a sign that the roots are rotting due to too much water. To correct this, repot the plant in fresh soil and reduce watering frequency. Keep an eye on your mint’s moisture levels, and you’ll enjoy a healthy, thriving plant with plenty of fragrance and flavor to offer.
Fertilizing and Pruning
To keep your potted mint happy and thriving, you’ll need to fertilize it regularly and prune it back occasionally to maintain its shape. Here’s how to do it just right!
Providing Nutrients for Healthy Growth Through Fertilization
Mint plants are hungry feeders and need regular fertilization to produce healthy growth. A balanced fertilizer with a 10-10-10 ratio (nitrogen-phosphorus-potassium) is an excellent choice for potted mint, but you can also opt for an organic alternative like fish emulsion or compost tea.
When choosing an organic option, make sure it’s specifically labeled as “for edible plants” to avoid any potential contamination. For example, if you’re using a fertilizer that contains bone meal, it might attract pests that could harm your mint leaves.
Apply the fertilizer according to the product’s instructions, but generally, a balanced fertilizer is applied once a month during the growing season (spring-fall). Dilute the fertilizer with water as recommended by the manufacturer to avoid burning your plant’s roots. If you’re using an organic option, follow the same schedule and dilution ratio.
Some gardeners also swear by adding a small amount of Epsom salt (magnesium sulfate) to their fertilization routine, claiming it promotes healthy leaf growth and improves resistance to disease.
The Importance of Regular Pruning for Mint’s Health and Aesthetics
Regular pruning is an essential aspect of maintaining healthy and aesthetically pleasing potted mint plants. When left unpruned, mint can become leggy and unruly, leading to a decrease in its fragrance and flavor. Regular pruning not only maintains the plant’s shape but also promotes healthy growth by removing weak and diseased stems.
To prune your potted mint effectively, start by gently grasping the leaves at the base of the stem and working your way up. Cut back any leggy or damaged branches to about one-third of their length using sharp, clean scissors or pruning shears. This will encourage new growth and prevent the plant from becoming too dense.
Make sure to prune your mint regularly, ideally every 1-2 weeks during the growing season. By doing so, you’ll be able to maintain a compact shape, promote healthy growth, and enjoy an abundance of fresh leaves throughout the year.
Tips for Overwintering Potted Mint
To keep your potted mint thriving year-round, it’s essential to provide it with some extra TLC during the colder months. This section shares expert tips for successfully overwintering your containerized mint.
Bringing Your Potted Mint Indoors Before Frost Sets In
As winter approaches, it’s essential to take steps to protect your potted mint from harsh frost conditions. One effective way to do this is by bringing the plant indoors before the first frost sets in. This will not only ensure its survival but also allow you to continue enjoying fresh mint leaves year-round.
Check the weather forecast for your area and bring your potted mint inside when the temperature drops below 40°F (4°C). Choose a bright, cool location with temperatures between 50-60°F (10-15°C) to mimic the plant’s natural habitat. Avoid placing it near direct sunlight or heating vents, as this can cause the soil to dry out quickly.
To prepare your potted mint for indoor life, repot it in a container with good drainage holes and use a well-draining potting mix. Water the plant thoroughly before bringing it inside, but make sure not to overwater, which can lead to root rot.
By taking these simple steps, you’ll be able to enjoy your potted mint throughout the winter months and have fresh leaves available for cooking and other uses when they’re needed most.
Maintaining Your Potted Mint’s Health During Dormancy
As winter approaches and your potted mint begins to go dormant, it’s essential to keep a close eye on its condition. During this period, your plant may appear wilted or dry, but with proper care, you can ensure it remains healthy until spring returns.
To monitor your potted mint’s health during dormancy, check the soil moisture regularly by sticking your finger into the soil up to the first knuckle. If the soil feels dry, water sparingly – overwatering can be detrimental during this period. You should also inspect the leaves for signs of damage or pests, and remove any dead or damaged leaves to prevent the spread of disease.
Additionally, keep an eye on your potted mint’s temperature requirements. Most mint varieties prefer temperatures between 35°F to 45°F (2°C to 7°C) during dormancy, so move it to a protected location if necessary. A bright, east-facing window is ideal for providing gentle light while still allowing the plant to conserve energy.
By paying attention to your potted mint’s condition and adjusting its care accordingly, you’ll be well on your way to enjoying a thriving, healthy mint plant come springtime.
Troubleshooting Common Issues
Mint can be finicky, and we’re here to help you resolve common problems like yellowing leaves, stunted growth, and pests that might be ruining your potted mint. Let’s tackle these issues together!
Identifying and Addressing Signs of Nutrient Deficiencies or Diseases
As you tend to your potted mint plant, it’s essential to be aware of potential signs that may indicate nutrient deficiencies or diseases. A healthy mint plant typically exhibits vibrant green leaves and a robust growth habit. However, if you notice any unusual changes, don’t hesitate to take action.
Firstly, let’s discuss common nutrient deficiencies. Yellowing leaves can be a sign of nitrogen deficiency, while pale or washed-out leaves may indicate an iron deficiency. If your mint plant is experiencing stunted growth or slow development, it could be due to inadequate phosphorus levels.
On the other hand, diseases such as root rot and powdery mildew can also affect potted mint plants. Root rot often presents with soft, mushy stems and leaves that are yellowing or browning. Powdery mildew appears as a white, cotton-like coating on the leaves’ surface.
To address these issues, ensure your plant receives well-draining soil and adequate light. Prune affected areas to prevent the spread of disease. For nutrient deficiencies, consider using balanced fertilizers that meet your mint plant’s specific needs. Monitor your plant’s progress closely, making adjustments as necessary to promote healthy growth.
Dealing with Pests Like Aphids, Spider Mites, and Mealybugs in Your Potted Mint
When it comes to growing potted mint, there are several common pests that can cause problems for even the most experienced gardeners. Aphids, spider mites, and mealybugs are some of the most notorious culprits when it comes to infesting potted plants like mint.
Aphids are small, soft-bodied insects that feed on plant sap, causing curled or distorted leaves. They reproduce quickly, often leading to an outbreak within a matter of days. To control aphid populations, try spraying your mint plant with a strong jet of water to dislodge them. You can also use neem oil or insecticidal soap to kill off any remaining aphids.
Spider mites are tiny, spider-like insects that feed on plant sap, causing yellowing or bronzing of the leaves. They thrive in dry conditions and can be difficult to spot with the naked eye. To control spider mite populations, increase the humidity around your mint plant by placing it on a tray filled with water and pebbles. You can also use a mild soap solution to spray the leaves and stems.
Mealybugs are small, white insects that feed on plant sap, causing stunted growth and yellowing of the leaves. They often cluster together in large groups, making them easy to spot. To control mealybug populations, try spraying your mint plant with a strong jet of water to dislodge them. You can also use neem oil or insecticidal soap to kill off any remaining mealybugs.
By following these simple steps and using organic methods to control pest populations, you can keep your potted mint healthy and thriving. Remember to inspect your plants regularly for signs of infestation and take action quickly to prevent an outbreak from occurring.
Conclusion
Now that you’ve successfully grown and harvested your potted mint, it’s time to wrap up with a few final tips for continued care. Let’s review what you need to do.
Recap of Key Takeaways for Growing Healthy Potted Mint
In conclusion to our comprehensive guide on growing potted mint, let’s recap the key takeaways that will help you successfully cultivate this versatile herb. By following these essential points, you’ll be well on your way to enjoying fresh and fragrant mint from the comfort of your own home.
First and foremost, it’s crucial to choose a high-quality potting mix specifically designed for indoor plants. This will provide your mint with the optimal balance of nutrients and water retention needed for healthy growth. A good rule of thumb is to repot your mint every 6-8 weeks as the roots become too dense for their container.
Next, ensure you’re providing your potted mint with sufficient light. While it’s true that mint can thrive in partial shade, direct sunlight will encourage bushy growth and prevent legginess. Aim for at least 4-5 hours of indirect sunlight or supplement with grow lights if necessary.
Regular watering is also vital for maintaining a healthy potted mint plant. Water your mint when the top inch of soil feels dry to the touch, but avoid overwatering which can lead to root rot. A good habit to develop is to water your mint in the morning, allowing the leaves to dry off throughout the day.
In addition to providing optimal growing conditions, it’s essential to prune and harvest your potted mint regularly. Prune back leggy stems, trim off flowers, and pinch off leaf tips to encourage new growth and prevent the plant from becoming too woody. Regular harvesting will also help maintain a healthy balance of oils that give mint its distinctive flavor and aroma.
By incorporating these key takeaways into your potted mint care routine, you’ll be rewarded with an abundance of fresh, fragrant leaves perfect for cooking, tea, or even natural remedies. Remember to always monitor your plant’s specific needs, making adjustments as necessary to ensure a thriving and healthy potted mint garden.
Frequently Asked Questions
How do I prevent my potted mint from taking over the pot?
Preventing mint from taking over requires regular pruning to control its growth. Prune your mint plant back by one-third every week or two, and make sure to remove any roots that have escaped the container. This will help keep your mint in check while still allowing it to thrive.
Can I grow potted mint indoors year-round, even without a lot of natural light?
Yes, you can grow potted mint indoors with minimal natural light. Choose a location near an east- or west-facing window, and consider using grow lights if necessary. With proper care, your indoor mint plants should remain healthy and fragrant throughout the year.
How often do I need to fertilize my potted mint plant?
Fertilize your potted mint plant regularly, ideally every 1-2 weeks during the growing season. Use a balanced fertilizer (10-10-10 NPK) and follow the manufacturer’s instructions for application rates. This will provide your mint with essential nutrients for optimal growth.
Can I use store-bought potting mix specifically designed for herbs like potted mint?
Yes, using store-bought potting mix can be beneficial for growing potted mint. These mixes are typically formulated to promote healthy root development and prevent waterlogged soil, which is essential for mint’s growth. Look for a mix that contains ingredients like perlite or vermiculite.
How do I know if my potted mint plant has a nutrient deficiency?
Common signs of nutrient deficiencies in potted mint include yellowing leaves, stunted growth, and reduced fragrance. Inspect your plant regularly, and address any issues promptly by adjusting your fertilization schedule or consulting with a gardening expert.