Growing delicious potatoes can be a challenge, especially when space is limited. But did you know that with the right container and some simple tips, you can successfully grow mouth-watering spuds in your backyard or even on your balcony? Whether you’re a seasoned gardener or just starting out, learning how to grow potatoes in containers can open up a whole new world of culinary possibilities.
This comprehensive guide will walk you through everything you need to know to get started. We’ll cover the best container options for growing potatoes, including tips on size and material. You’ll also learn about the perfect soil mix for optimal yields, as well as expert advice on planting and harvesting techniques to ensure a bountiful harvest. From seed to plate, we’ve got you covered – let’s get started on your journey to growing delicious potatoes in containers!
Choosing the Right Container and Soil
Choosing the right container and soil is crucial for a healthy potato harvest, so let’s dive into the specifics of what you’ll need. From pot size to drainage requirements, we’ve got it covered!
Container Options: Plastic, Wooden, or Fabric
When it comes to choosing a container for growing potatoes, you have several options: plastic, wooden, and fabric containers. Each material has its own set of advantages and disadvantages that can impact the health and yield of your potato crop.
Plastic containers are a popular choice because they are inexpensive, lightweight, and easy to clean. They also provide good drainage and aeration for the potatoes. However, they can retain heat and may require additional ventilation to prevent overheating. For example, you can use 5-gallon plastic buckets with drainage holes drilled in the bottom.
Wooden containers offer a more rustic approach to container gardening. They are breathable, which allows for better air circulation around the potatoes. However, they can be heavy and may require more maintenance than other materials. Wooden barrels or crates work well as potato containers.
Fabric containers, such as burlap sacks or grow bags, provide excellent air circulation and moisture-wicking properties. They also allow for easy harvests by simply lifting out the entire bag of potatoes. However, they can be prone to damage from pests and may require additional support.
Selecting the Perfect Soil Mix
When it comes to growing potatoes in containers, selecting the right soil mix is crucial for optimal results. A well-draining potting mix specifically designed for container gardening will help prevent waterlogged conditions that can lead to rot and other issues.
You can either create a homemade blend using a combination of peat moss, perlite, or vermiculite, or purchase a pre-mixed variety from a reputable nursery or online retailer. A good rule of thumb is to look for mixes that contain at least 50% organic matter, such as compost or worm castings, which will help retain moisture and provide nutrients.
When selecting a pre-mixed blend, check the label for specific ingredients and their proportions. Some popular options include Miracle-Gro Potting Mix or Pro-Mix All Purpose Potting Mix. Avoid using regular garden soil in containers, as it can compact over time and prevent proper drainage.
Preparing the Container and Potatoes
Before you start growing potatoes, it’s essential to prepare your container and potato crop for success. This means getting your container ready for planting and preparing your potatoes for a healthy start.
Conditioning the Container: Sterilization and Drainage
Before filling your container with soil and seed potatoes, it’s crucial to prepare it properly. This involves cleaning and sterilizing the container to prevent disease and pests from affecting your potato crop. Start by washing the container thoroughly with soap and warm water to remove any dirt or debris. Then, submerge it in a solution of 1 part bleach to 10 parts water for at least an hour. This will help kill any bacteria or fungi that may be present.
After sterilizing the container, make sure it has proper drainage holes in the bottom. If your container doesn’t have built-in drainage, you can drill some holes about an inch from the bottom. This is essential to prevent waterlogged soil and root rot. You can also add a layer of small rocks or broken pottery at the bottom of the container for extra drainage.
It’s also a good idea to use a potting mix specifically designed for containers, as it will retain moisture but still drain excess water well. By taking these simple steps, you’ll create an environment that is conducive to healthy potato growth and minimize the risk of common container-borne diseases.
Choosing the Right Potato Variety for Containers
When it comes to growing potatoes in containers, choosing the right variety is crucial for success. ‘New’ or ‘Early’ potatoes are ideal for container growing due to their compact growth habits and shorter maturity periods. These varieties typically take between 70-100 days to mature, making them perfect for container gardens where space is limited.
Some popular ‘New’ potato varieties include ‘Nicola’, ‘Charlottes’, and ‘Jersey Royals’. They produce high-quality tubers with a tender skin and delicious flavor. ‘Earlies’ like ‘Maris Peer’ and ‘Kestrel’ are also excellent choices, producing small to medium-sized tubers that are ready to harvest in as little as 70 days.
When selecting a potato variety for your container garden, consider the climate you live in and the amount of time you have available before the first frost. If you’re new to growing potatoes, start with a ‘New’ or ‘Early’ variety to ensure success. Remember to choose disease-resistant varieties to minimize the risk of fungal diseases like late blight and scab.
Planting Potatoes in Containers
If you’re eager to grow potatoes in a small space, planting them in containers is a fantastic option. This section will walk you through the process of preparing your container for potato success.
Sowing Seed Potatoes: Depth and Spacing Guidelines
When sowing seed potatoes in containers, it’s essential to get the depth and spacing just right. For ‘new’ varieties, which are harvested about 10-12 weeks after planting, sow them 2-3 inches deep in a container that is at least 6-8 inches deep. Make sure the “eyes” of the potato (the buds from which new growth emerges) are facing upwards.
For ‘true’ varieties, which take around 14-16 weeks to mature, plant them 4-5 inches deep in a container with a minimum depth of 10 inches. This allows for more extensive root development and better tuber formation.
When planting, leave about 2-3 inches between each seed potato to allow for proper growth and air circulation. You can also add a layer of mulch or compost on top of the soil to retain moisture and suppress weeds. Be gentle when handling the seed potatoes to avoid damaging them, as this can reduce the chances of successful germination.
Watering and Mulching Tips for Container-Grown Potatoes
Container-grown potatoes require careful attention to watering and mulching to ensure optimal growth. When it comes to watering, it’s essential to strike a balance between keeping the soil consistently moist and preventing waterlogged conditions. Overwatering can lead to rotting of the tubers, while underwatering may cause them to become misshapen.
To avoid these issues, check the moisture levels in your container at least once a week by inserting your finger into the soil up to the first knuckle. If the soil feels dry, it’s time to water. Water thoroughly until you see water coming out of the drainage holes. However, make sure not to let the pot sit in water – this can cause the roots to rot.
Mulching around potato plants has numerous benefits. It retains moisture, suppresses weeds, and regulates soil temperature. Use a thin layer (about 1-2 inches) of organic mulch like straw, wood chips, or bark nuggets around your container-grown potatoes. This will not only keep the area weed-free but also provide a barrier against pests and diseases.
Caring for Your Container-Grown Potato Crop
Now that you’ve successfully grown your container potatoes, it’s time to focus on their care and maintenance to ensure a bountiful harvest. Here we’ll cover essential tips for keeping your crop healthy.
Monitoring Soil Temperature and pH Levels
Monitoring soil temperature and pH levels is crucial for a healthy growth environment of your container-grown potatoes. Soil temperature affects tuber formation, while pH levels impact nutrient availability. To ensure optimal conditions, you’ll need to monitor these factors regularly.
To check soil temperature, use a thermometer probe specifically designed for soil measurements. Insert it about 4-6 inches deep into the soil, and take readings at the same time each day. For potatoes, the ideal temperature range is between 40°F (4°C) and 70°F (21°C). If temperatures drop below this range, you may need to use row covers or bring your containers under a cold frame.
When it comes to pH levels, potatoes prefer a slightly acidic to neutral soil pH, ranging from 4.5 to 7.0. You can purchase a soil testing kit or send a sample to a lab for analysis. Based on the results, you may need to adjust your fertilizer application or add lime to raise the pH. For example, if your test reveals an overly acidic soil pH, adding dolomitic limestone can help neutralize it.
Keep in mind that container-grown potatoes are more susceptible to extreme temperature fluctuations and nutrient imbalances due to their confined root zone. Regular monitoring and adjustments will ensure a healthy and productive crop.
Common Pests and Diseases in Container-Grown Potatoes: Prevention and Treatment
Container-grown potatoes are susceptible to various pests and diseases that can significantly impact their yield and quality. To prevent these issues, it’s essential to be aware of the common culprits.
Aphids, whiteflies, and potato beetles are frequent visitors to container-grown potatoes. These pests feed on sap, causing curled or distorted leaves. To manage them, use neem oil or insecticidal soap as a preventative measure. Regularly inspect your plants and remove any infested areas to prevent the pest from spreading.
Diseases like powdery scab, late blight, and early blight can also affect container-grown potatoes. Powdery scab is caused by a bacterium that creates white or grayish patches on the tubers. Late blight, which is often associated with cool and wet weather, causes black spots on leaves and stems. To prevent powdery scab, ensure good air circulation around your plants. For late blight, remove any infected areas promptly, and treat with a fungicide if necessary.
To maintain healthy container-grown potatoes, rotate your containers regularly to avoid soil-borne diseases. Use well-draining potting mix and keep the area around your plants clean to prevent pests from laying eggs or spreading disease spores.
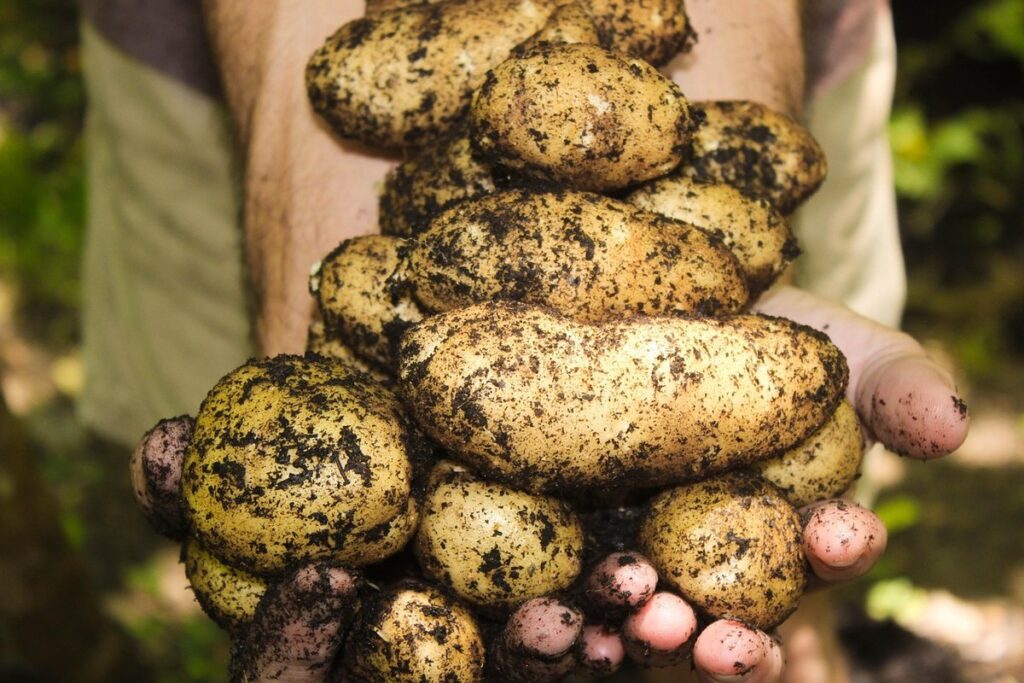
Harvesting Your Container-Grown Potatoes
Now that your container-grown potatoes are mature, it’s time to harvest them carefully to avoid damaging the tubers. Learn how to dig and lift your homegrown spuds successfully in this section.
Determining Maturity: Visual Cues for Harvest Time
When it comes to harvesting container-grown potatoes, timing is everything. You want to pick them at the right moment to ensure maximum flavor and minimal waste. To determine if your potato crop is ready for harvest, you’ll need to inspect for visual cues.
For ‘new’ or ‘early’ varieties, look for plants that have started to yellow or die back. This is a sign that the tubers are mature and ready to be dug up. Check the soil carefully, as new potatoes often grow right under the surface. Gently dig around the base of the plant with your fingers, feeling for any enlarged tubers.
For ‘maincrop’ varieties, which take longer to mature, look for a more dramatic visual change. The plants will start to die back and turn brown, and you may see small shoots emerging from the soil. This is a sign that the main crop of tubers has formed and is ready to be harvested. Use a fork to gently loosen the soil around the base of the plant before lifting it out to reveal your prize potatoes.
Tips for Harvesting and Storing Container-Grown Potatoes
When you’re finally ready to harvest your container-grown potatoes, it’s essential to do so carefully to avoid damaging the tubers. Start by gently digging around the base of the plants with a fork, being careful not to pierce or bruise the potatoes.
Once you’ve loosened the soil, use a soft-bristled brush to sweep away any remaining dirt from the surface of the tubers. This will make them easier to handle and help prevent dirt from getting stuck in the storage containers.
To store your harvested potatoes, choose a cool, dark place with good ventilation, such as a basement or a root cellar. Avoid storing them near heat sources or direct sunlight, as this can cause the potatoes to sprout or rot quickly.
For short-term storage (up to 2 weeks), you can keep the potatoes in their containers or bags, allowing them to breathe by placing them in paper sacks or mesh bags. For longer-term storage, transfer the potatoes to a breathable container like a wire basket or a paper bag, making sure they don’t touch each other to prevent moisture from accumulating and causing rot.
Troubleshooting Common Issues in Container-Grown Potatoes
If you’re encountering problems growing potatoes in containers, don’t worry – we’ve got you covered. This section tackles common issues and offers practical solutions to get your crop back on track.
Addressing Pests and Diseases Before They Spread
When growing potatoes in containers, it’s essential to stay vigilant for signs of pests and diseases that can wreak havoc on your crop. Inspect your plants regularly, checking for yellowing leaves, black spots, or white powdery coatings. These early warning signs can indicate the presence of aphids, potato beetles, or fungal infections like late blight.
One common issue is the Colorado potato beetle, which can devour entire leaves in a matter of days. To control these pests, use neem oil or insecticidal soap to repel them. For fungal diseases, remove any affected foliage and treat the area with fungicides specifically labeled for container-grown potatoes.
Early detection is key; act quickly to prevent minor issues from becoming major problems. Keep your containers well-ventilated and maintain a consistent watering schedule to reduce stress on your plants. Monitor temperature fluctuations as well, which can trigger disease outbreaks. Regularly inspecting your plants will help you catch potential issues before they spread and cause significant damage to your crop.
Overcoming Common Growing Challenges: Light, Temperature, and Water Issues
When growing potatoes in containers, it’s common to encounter challenges related to light, temperature, and water. Insufficient light can lead to weak and spindly growth, while extreme temperatures can cause tuber formation issues.
One of the most significant light-related concerns is finding a location with sufficient sunlight for your container-grown potatoes. Potatoes require at least 4-6 hours of direct sunlight per day to produce well. If you’re short on outdoor space or have limited sunlight in your area, consider using grow lights indoors. These can be placed above the containers, providing the necessary light spectrum and intensity.
Temperature fluctuations also pose a significant challenge. Potatoes prefer cooler temperatures between 40-70°F (4-21°C), but can tolerate warmer temperatures up to 80°F (27°C) for short periods. Avoid placing your container in areas with drafts or near heating vents to prevent sudden temperature changes.
When it comes to watering, it’s essential to strike a balance between keeping the soil consistently moist and avoiding waterlogged conditions. Potatoes need about 1-2 inches of water per week, either from rainfall or irrigation. Monitor the moisture levels by checking the soil regularly, and adjust your watering schedule accordingly.
Frequently Asked Questions
How do I ensure my container-grown potatoes receive enough light?
While it’s true that potatoes can tolerate partial shade, they still need plenty of direct sunlight to produce a bountiful harvest. Consider placing your containers near a sunny window or under grow lights to provide at least 4-6 hours of direct sunlight per day.
What if I notice pests or diseases in my container-grown potato crop?
Don’t panic! Common issues like aphids, slugs, and powdery scab can be easily prevented with proper care. Regularly inspect your plants for signs of infestation or infection, and use organic pest control methods whenever possible.
Can I reuse containers from last season’s potato harvest?
Yes, as long as you properly clean and disinfect them. Sterilize the container by soaking it in a 10% bleach solution, then rinse thoroughly before filling with fresh soil mix. This will help prevent the spread of diseases and ensure a healthy start for your new crop.
How often should I water my container-grown potatoes?
The key to successful potato growth is consistent moisture levels. Water your containers when the top inch of soil feels dry to the touch, usually every 2-3 days during hot weather. Avoid overwatering, which can lead to rot and other issues.
What’s the best way to store harvested container-grown potatoes?
To keep your freshly dug potatoes fresh for longer, store them in a cool, dark place with good ventilation. You can also consider storing them in paper bags or breathable containers to maintain humidity levels. Avoid exposing them to direct sunlight or extreme temperatures.