Growing pole beans on a trellis is one of the most effective ways to maximize your garden space while reaping a bountiful harvest. Not only do trellises provide support for these climbing legumes, but they also help keep the soil organized and make harvesting easier. However, growing pole beans can be intimidating if you’re new to gardening or unsure about how to care for them.
In this article, we’ll take you through every step of growing pole beans on a trellis, from selecting the right variety to preparing your trellis and soil, supporting those long vines, watering and fertilizing tips, and finally, harvesting. By following our comprehensive guide, you’ll be well on your way to enjoying a successful crop of delicious and nutritious pole beans. With the right techniques and attention to detail, you can enjoy a thriving garden full of these easy-to-grow legumes.
Choosing the Right Variety and Equipment
To grow pole beans successfully on a trellis, you’ll need to choose a variety that’s well-suited for your climate and equipment that can support their vigorous growth.
Selecting the Perfect Pole Bean Variety
When selecting a pole bean variety for your trellis, you’ll want to consider the unique characteristics of each type. There are several popular varieties, including Kentucky Wonder and Blue Lake, each with its own growth habits and ideal conditions.
Kentucky Wonder is a classic variety that’s known for its high yields and easy-to-grow nature. It prefers well-drained soil and full sun, making it an excellent choice for trellises in sunny areas. On the other hand, Blue Lake is a bush-type pole bean that thrives in cooler temperatures and moist soils. This variety is ideal for growers who live in regions with mild winters or want to extend their growing season.
When choosing a variety, consider your specific climate, soil type, and desired harvest time. You can also experiment with different varieties to see which ones work best for you. Some other factors to keep in mind include disease resistance, pod size, and flavor. For example, if you’re looking for a compact variety that’s resistant to powdery mildew, try ‘Romano’ or ‘Maxibel’. By selecting the perfect pole bean variety for your trellis, you’ll be well on your way to growing a bountiful harvest of delicious beans.
Preparing Your Trellis System
When it comes to growing pole beans on a trellis, having a sturdy and reliable system is crucial. A well-designed trellis will not only provide support for the climbing beans but also make harvesting easier and more efficient.
You can either build or purchase a trellis system, depending on your preferences and budget. If you’re handy with tools, building a trellis from scratch can be a fun DIY project. You’ll need to choose durable materials such as wood or metal, and ensure that the structure is tall enough (at least 6 feet) to accommodate the mature height of the pole beans.
If you prefer to purchase a pre-made trellis, consider investing in a high-quality one made from weather-resistant materials like recycled plastic or copper. Among the various types of trellises available, teepee, vertical, and living trellises are popular options for growing pole beans.
A teepee trellis is an ideal choice for small gardens or containers, as it provides excellent support for multiple plants while occupying minimal space. A vertical trellis, on the other hand, is perfect for larger spaces, allowing you to grow multiple rows of pole beans in a compact area. A living trellis, made from a mixture of plants like peas and cucumbers, adds an extra layer of interest to your garden and can help to create a natural screen.
When selecting or building your trellis system, remember to consider the mature size of the pole beans (around 8-10 feet) and ensure that it is anchored securely in the ground to prevent damage from wind or other external factors.
Soil Preparation and Planting
Now that we’ve covered how to build your trellis, let’s focus on preparing the soil and planting your pole beans for a strong start to their growth. This is where patience and planning really pay off!
Preparing the Soil for Pole Beans
Before you start planting pole beans on your trellis, it’s essential to prepare the soil for optimal growth. Pole beans require a rich source of nutrients, particularly nitrogen, phosphorus, and potassium. A well-draining soil with a pH between 6.0 and 7.0 is ideal for these legumes.
To determine the nutrient levels in your soil, consider getting a soil test kit or sending a sample to a lab for analysis. This will help you identify any deficiencies and take corrective measures. If your soil is lacking in nutrients, amend it with organic matter like compost or manure tea. Compost can be made at home by adding kitchen scraps and leaves to a bin, allowing it to break down over time.
When using compost, mix 2-3 inches of it into the top 6-8 inches of soil before planting. Alternatively, use manure tea as a liquid fertilizer. This is made by steeping animal manure in water for several days, then straining and using the resulting liquid as a fertilizer. These amendments not only provide essential nutrients but also improve soil structure and fertility.
Keep in mind that pole beans are heavy feeders and will deplete soil nutrients if not replenished regularly. Regularly adding organic matter to your soil will ensure a continuous supply of nutrients for your plants, promoting healthy growth and high yields.
Sowing Seeds and Transplanting Seedlings
When it comes to growing pole beans on a trellis, timing is everything. The optimal time to plant pole beans depends on your climate and region. In general, you want to plant when the soil has warmed up to at least 60°F (15°C). In areas with mild winters, you can start planting as early as late winter or early spring. In colder climates, it’s best to wait until the last frost date has passed.
Direct sowing is a popular method for growing pole beans on a trellis. This involves sowing seeds directly into the ground where they will be growing. The benefits of direct sowing include reduced transplant shock and better root development. To direct sow, create a furrow about 1 inch deep and 6-8 inches wide in your prepared soil. Place two to three seeds per station, depending on the variety, and cover with a thin layer of soil.
Alternatively, you can start seedlings indoors 2-3 weeks before transplanting them outside. This is especially useful if you live in an area with a short growing season or want to get a head start on the season. To transplant, harden off your seedlings by gradually exposing them to outdoor conditions over the course of 7-10 days. Once they’re ready, dig a hole about twice as wide and just as deep as the root ball, and gently place the seedling in its new home. Water thoroughly and provide support for the trellis as needed.
Keep in mind that transplanting can be a bit more tricky than direct sowing, but with proper care and attention, your pole beans should thrive. Make sure to choose a location with full sun and well-draining soil to ensure the best results.
Providing Support and Training
To ensure you get the best results from your trellised pole beans, we’ll cover essential tips on providing ongoing support and training as they grow. Regular care is crucial for a thriving harvest.
Installing Trellis Supports and Clips
Properly installing trellis supports and clips is crucial to keep your pole beans upright and prevent them from falling off. To start, you’ll need a sturdy trellis that can support the weight of the plants as they grow. Choose a location with full sun and well-draining soil to promote healthy growth.
Next, attach trellis supports to the ground using stakes or anchors. These will provide additional stability and prevent the trellis from toppling over in strong winds. For smaller spaces, you can use freestanding trellises or teepees that are specifically designed for pole beans.
Now it’s time to add clips and twine or netting to secure the beans to the trellis. You can use wire clips, zip ties, or even old clothespins to gently tie the stems to the trellis. Be sure to leave enough space between each clip to allow for air circulation and prevent fungal diseases.
When using twine or netting, make sure it’s not too tight, as this can damage the plant’s bark. Instead, aim for a gentle tension that keeps the beans upright without restricting growth. With proper installation, your pole beans will thrive on their trellis, producing an abundance of delicious harvests throughout the season.
Training Pole Bean Plants
Training pole bean plants is an essential step to ensure they grow upwards and produce a bountiful harvest. To gently tie and train the vines, you can start by creating a supportive structure. This can be achieved through a “three-sisters” planting method where corn stalks are planted alongside beans and squash. As the beans climb, use soft twine or plant clips to secure them to the trellis. Alternatively, install horizontal wires between the vertical supports to provide additional support for the vines.
As the plants grow, continue to gently tie the stems to the wires or trellis using soft materials that won’t damage the leaves. Make sure to leave enough space between each wire for easy access and growth. Be careful not to constrict the plant’s growth by tying it too tightly. With regular training, your pole beans should be growing up the trellis in no time.
Watering, Fertilizing, and Pest Management
Now that your pole bean plants are thriving on their trellis, let’s talk about how to keep them healthy and strong through proper watering, fertilizing, and pest management practices. This crucial care will ensure a bountiful harvest.
Adequate Moisture and Watering Schedule
Maintaining consistent moisture levels is crucial for pole beans growing on a trellis. During peak growth periods, especially when pods are forming, water requirements increase significantly. If the soil dries out, it can lead to reduced yields and even plant death.
To avoid overwatering, check soil moisture regularly by inserting your finger into the soil up to the first knuckle. This is a more accurate method than relying on visual cues like wilting leaves or soil color. Water when the top 2-3 inches of soil feels dry. For pole beans, it’s essential to water deeply but infrequently to encourage deep root growth.
In hot weather, aim for about 1 inch of water per week, either from rainfall or irrigation. Avoid frequent shallow watering that can lead to weak and spindly plants. Also, consider using drip irrigation or soaker hoses, which deliver water directly to the roots, reducing evaporation and runoff. This approach will help you strike a balance between providing enough moisture for your pole beans and avoiding overwatering issues.
Organic Fertilization Methods for Pole Beans
When it comes to fertilizing your pole beans on a trellis, you’ll want to focus on organic methods that promote healthy plant growth without degrading the soil quality. One effective approach is to use natural fertilizers like fish emulsion. This liquid solution is made from fermented fish waste and is rich in nutrients such as nitrogen, phosphorus, and potassium.
You can also try compost tea or manure tea as alternative options. These teas are brewed by steeping compost or animal manure in water, releasing beneficial microbes that support soil health. For example, a study showed that using compost tea increased yields of pole beans by up to 20% compared to non-treated controls.
To use these fertilizers effectively, start by applying them at the recommended dilution rates during the seedling stage and continue every two weeks throughout the growing season. You can also mix in a balanced organic fertilizer like fish bone meal or alfalfa meal into the soil around the base of your trellis for an extra nutrient boost.
Common Challenges and Troubleshooting
As you set up your trellis and plant those seeds, unexpected issues can arise. In this section, we’ll tackle some common problems and provide troubleshooting tips to keep your pole beans thriving.
Identifying Common Issues: Yellowing Leaves, Pests, and Diseases
As you’re growing pole beans on a trellis, it’s not uncommon to encounter some common issues that can impact their health and productivity. Yellowing leaves are one of the most frequent problems you may face, often caused by nutrient deficiencies or diseases.
When it comes to yellowing leaves, there are several potential causes. One possible reason is a lack of essential nutrients like nitrogen, iron, or magnesium. Regularly inspect your plants for signs of nutrient deficiency and adjust your fertilizer schedule accordingly. For instance, if the older leaves are turning yellow while the new growth remains green, it could indicate a potassium or magnesium shortage.
Another common cause of yellowing leaves is disease. Powdery mildew, bacterial leaf spot, and bean rust are some of the most prevalent issues you may encounter. Be on the lookout for white, powdery patches on the leaves (powdery mildew), tiny black spots with a red ring around them (bacterial leaf spot), or yellowish patches with dark green islands (bean rust). If you notice any of these symptoms, remove infected leaves to prevent the disease from spreading.
Pests are another common issue that can damage your pole bean plants. Common culprits include aphids, whiteflies, and spider mites. Regularly inspect your plants for signs of pest infestation and take action promptly if necessary. Use neem oil or insecticidal soap to control aphid populations, while introducing beneficial insects like ladybugs or lacewings can help regulate whitefly numbers.
To minimize the risk of common issues, maintain a clean growing environment, avoid overwatering, and keep your plants well-ventilated. By being vigilant and addressing potential problems early on, you can enjoy a bountiful harvest of delicious pole beans.
Harvesting Your Pole Beans
Now that your pole bean plants are thriving on their trellis, it’s almost time to harvest – but when exactly is the right moment? Learn how to tell.
Determining Optimal Maturity
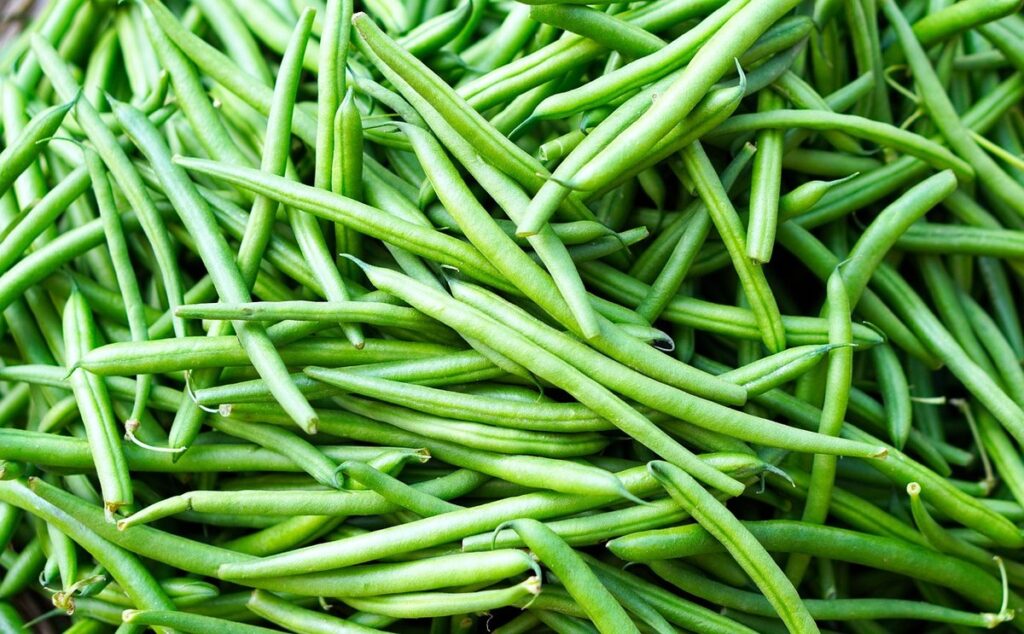
When it comes to harvesting pole beans grown on a trellis, timing is everything. The ideal moment to pick them depends on their size, color, and texture. A general rule of thumb is to check for pods that are between 4 to 6 inches long and about 1/2 inch in diameter. Look for a vibrant green or yellow color, depending on the variety, as they should be slightly tender but not mushy.
To determine if your pole beans are ready, gently pinch one of the pods. If it snaps easily with minimal resistance, it’s ready to be picked. Avoid squeezing the pod too hard, which can damage the stem and potentially harm the plant. For larger harvests or commercial growers, a machine harvester can be an efficient option for collecting mature pole beans.
Hand-picking, however, allows you to carefully select individual pods at their peak ripeness, reducing waste and preserving delicate varieties. Regardless of your chosen method, make sure to harvest your pole beans regularly to encourage continued production throughout the growing season.
Tips for Extending the Harvest Season
One of the joys of growing pole beans is enjoying them for an extended period. To prolong the harvest season and make the most of your crop, try these expert tips.
Succession planting is a great way to extend the harvest. By planting small batches every 1-2 weeks, you can have a continuous supply of beans throughout the summer months. This technique works best if you have a long enough growing season, typically 70-90 days or more. Start by preparing the soil and installing your trellis before planting the first batch. As each new batch matures, remove the spent vines to make room for the next planting.
Another effective method is using shade cloth to protect your beans from intense heat and frost. This breathable fabric allows air to circulate while filtering out harsh sunlight. By covering your plants during extreme weather conditions, you can safeguard them from damage and continue harvesting. Alternatively, use row covers to shield your beans from frost and extend the harvest season into early fall. When using these techniques, ensure good air circulation around your plants to prevent moisture buildup and diseases.
Frequently Asked Questions
Can I grow pole beans on a trellis if my garden space is partially shaded?
Yes, you can still grow pole beans on a trellis even with partial shade. Choose varieties that are tolerant of shade, such as Kentucky Wonder or Blue Lake. Keep in mind that pole beans grown in the shade may produce smaller yields and take longer to mature.
How often should I water my pole bean plants when using a trellis?
Water your pole bean plants regularly, providing about 1-2 inches of water per week. Avoid overwatering, which can lead to disease and root rot. Water at the base of the plant to keep the leaves dry and prevent fungal growth.
Can I use a trellis that’s not specifically designed for pole beans?
Yes, but make sure it’s sturdy enough to support the weight of the plants and their fruit. Look for a trellis with vertical supports or a wide base to provide stability. You can also add additional support structures like clips or twine to ensure the plant stays upright.
How do I know when my pole bean plants need more support?
Check your plants regularly for signs of weakness, such as toppling over or leaning away from the trellis. Install additional supports or adjust existing ones as needed to prevent damage and promote healthy growth. Regular pruning can also help control the plant’s vigor.
Can I harvest pole beans before they reach full maturity?
No, it’s best to wait until your pole bean plants have reached optimal maturity for maximum flavor and texture. Check the seed package or consult with a local gardening expert to determine when your specific variety is ready for harvesting.