Growing your own fresh herbs can be one of the most rewarding experiences in gardening, and dill is no exception. Not only is it relatively easy to grow, but its delicate flavor and aroma add a whole new dimension to countless dishes. However, many gardeners struggle with getting their dill plants to thrive, leading to disappointing harvests and wasted potential.
In this article, we’ll cover everything you need to know about growing healthy and delicious dill, from selecting the right variety for your needs to preparing the perfect soil conditions. We’ll also share expert tips on sowing seeds, pruning, and caring for your dill plants to ensure a bountiful harvest all season long. Whether you’re a seasoned gardener or just starting out, our comprehensive guide will give you the confidence to grow the freshest, most flavorful dill imaginable – right in your own backyard!
Choosing the Right Variety of Dill
With so many varieties of dill to choose from, selecting the right one for your garden can be overwhelming. Let’s explore some popular options together.
Understanding Dill Types: Fresh vs. Dried
When working with dill, you’ll often come across two main types: fresh and dried. While they may seem interchangeable, each has its unique characteristics, uses, and effects on plant growth.
Fresh dill is the preferred choice for most recipes due to its vibrant flavor and aroma. It’s typically used as a garnish or added towards the end of cooking time to preserve its delicate oils. Fresh dill is more expensive than dried but offers a fresher taste experience. If you’re planning to use fresh dill, make sure to store it properly in the refrigerator to maintain its potency.
Dried dill, on the other hand, is often used for long-term storage and as a cost-effective alternative to fresh. It’s commonly used in pickling recipes or added to soups and stews for its mellow flavor. Dried dill can be stored at room temperature for up to six months but may lose some of its potency over time.
When choosing between the two, consider your recipe requirements and cooking style. Fresh dill is ideal for light, delicate dishes, while dried dill suits heartier recipes that require a more subtle flavor profile.
Selecting a Dill Variety for Your Climate
When selecting a dill variety for your garden, it’s essential to consider the specific climate and growing conditions in your area. Different regions experience varying temperatures, moisture levels, and sunlight patterns, which can impact a plant’s growth and productivity.
To determine the best dill variety for your climate, look at its hardiness zone rating. Dills typically thrive in USDA zones 3-10, but some varieties are more tolerant of extreme conditions than others. For example, ‘Fernleaf’ is suitable for cooler climates (zones 3-6), while ‘Mammoth’ performs well in warmer temperatures (zones 7-9).
Check the plant’s description or consult with a local nursery to learn about its specific climate preferences. Some dills are more resistant to heat stress, drought, or frost than others. By choosing a variety that matches your local climate and growing conditions, you’ll be able to grow healthy and productive dill plants all season long.
Some popular dill varieties for different climates include:
* ‘Fernleaf’ (zones 3-6) – compact growth habit and cooler temperature tolerance
* ‘Mammoth’ (zones 7-9) – large leaves and warm temperature tolerance
* ‘Dukat’ (zones 4-8) – versatile and adaptable to various conditions
Preparing the Soil for Dill Growth
Before you can even plant your dill seeds, it’s essential to prepare the soil properly. Learn how to create a nurturing environment that will help your dill grow strong and healthy.
Testing and Conditioning Your Soil
Before you start planting dill seeds, it’s essential to test and condition your soil to ensure it’s suitable for their growth. Dill is a sensitive crop that requires well-draining, fertile soil with a pH between 6.0 and 7.0. A simple pH test kit can help determine if your soil needs adjustment.
To conduct a pH test, follow these steps:
* Choose a spot in your garden where you plan to plant dill, ideally after a rainfall or watering.
* Use a small trowel to scoop up a handful of soil from the chosen area.
* Insert the pH testing strip into the soil and wait for the recommended time (usually 10-30 seconds) before reading the results.
If your test reveals an acidic or alkaline reading, don’t worry! You can make adjustments by adding lime to raise the pH or sulfur to lower it. A general rule of thumb is to add 1 tablespoon of lime per square foot for every point you want to raise the pH.
For example, if your soil has a pH of 5.8 and you want to adjust it to 6.8, add 4 tablespoons of lime per square foot.
Adding Organic Matter for Improved Drainage and Fertility
Adding organic matter to your soil is one of the most effective ways to improve its structure, drainage, and fertility. When dill plants grow in well-draining, fertile soil, they’re less likely to suffer from waterlogged conditions that can lead to root rot and other issues.
To incorporate organic matter into your soil, start by adding a 2-3 inch layer of compost or well-rotted manure. You can also mix in some peat moss or coconut coir to help retain moisture while improving drainage. As you plant dill seeds, gently dig the soil with a fork to loosen it and create space for roots to grow.
A general rule of thumb is to add 10% to 20% organic matter to your soil based on its volume. For example, if you have a raised bed that’s 4 feet by 8 feet, you’d need about 1-2 cubic feet of compost or manure. As the organic matter breaks down, it will release nutrients and microorganisms that help support healthy dill growth.
Regularly adding organic matter to your soil is especially crucial for container gardens, where plants can quickly become waterlogged due to poor drainage. By incorporating organic matter, you’ll create a more balanced ecosystem that promotes healthy plant growth and reduces the risk of common problems like fungal diseases and pests.
Sowing Seeds and Transplanting Dill
When it comes to growing dill, knowing when and how to sow seeds and transplant your plants is crucial for their success. Let’s dive into the specifics of sowing seeds and transplanting dill.
Direct Sowing vs. Starting Indoors: What’s Best for You?
When it comes to growing dill, many gardeners are torn between direct sowing and starting seeds indoors. While both methods have their advantages, the best approach for you depends on several factors.
Direct sowing involves planting dill seeds directly into the ground when the weather is suitable. This method has some benefits, including faster growth rates and stronger root systems. Dill plants grown through direct sowing tend to be more resistant to pests and diseases, as they’re exposed to beneficial soil microorganisms from the start. For example, if you live in a region with mild winters and warm summers, direct sowing might be the better option for you.
On the other hand, starting dill seeds indoors allows for earlier germination and a head start on the growing season. This method is ideal for regions with cool or short growing seasons. Indoor seedlings also give you more control over temperature and humidity levels, reducing the risk of damage from extreme weather conditions. However, indoor-grown plants may require additional care when transplanted outdoors to adapt to new soil and light conditions.
Consider your local climate, available space, and desired harvest time to decide between direct sowing and starting indoors. If you’re short on time or want a quick crop, starting seeds indoors might be the way to go. But if you have a long growing season and prefer a low-maintenance approach, direct sowing could be the better choice for you.
How to Transplant Dill Seedlings Successfully
Transplanting dill seedlings requires careful handling to prevent shock and promote healthy growth. Before transplanting, make sure the seedlings have at least two sets of true leaves to increase their chances of survival. Start by gently removing the seedling from its container, taking care not to damage any roots.
To minimize stress on the plant, it’s essential to handle the roots as little as possible during transplantation. You can either use a dibble or a blunt instrument to create a small hole in the new potting mix for the seedling, or gently place the roots into the new soil and firm it around the base of the plant.
When transplanting directly into the garden, choose a location with full sun and well-draining soil. Harden off the seedlings by gradually exposing them to outdoor conditions over the course of 7-10 days before transplanting them outside. Water thoroughly after transplanting, and keep the soil consistently moist during the first few weeks to ensure successful establishment.
Watering and Providing Support for Dill Plants
To ensure your dill plants thrive, it’s essential to provide them with the right amount of water and support. A well-watered plant is more likely to produce healthy leaves and seeds.
Maintaining Optimal Moisture Levels for Healthy Growth
Maintaining optimal moisture levels is crucial for healthy dill growth. Consistent moisture encourages robust root development and promotes the production of fragrant foliage. However, overwatering can lead to weak stems, reduced yields, and increased susceptibility to diseases like powdery mildew.
To strike the right balance, ensure that your soil drains well. A mix with good aeration will allow for excess water to escape quickly, reducing the risk of root rot. Check the moisture levels by inserting your finger into the soil up to the first knuckle; if it feels dry, it’s time to water. Aim for about 1-2 inches of rainfall or irrigation per week.
Monitor temperature fluctuations as well. Dill thrives in temperatures between 60°F and 80°F (15°C and 27°C). Avoid watering when the sun is intense, allowing the plants to absorb moisture during cooler hours. For optimal results, maintain a consistent moisture schedule throughout the growing season, taking care not to overwater or underwater your dill crop.
Supporting Tall Dill Stands with Trellises or Stakes
When tall dill plants start to grow, they can quickly become top-heavy and prone to collapse. To prevent this from happening, you’ll need to provide them with some additional support. One effective way to do this is by using trellises or stakes.
Trellises are ideal for compact varieties of dill that have a more sprawling growth habit. Simply attach the trellis to a stake in the ground and gently tie the stems of your dill plant to it using twine or wire. As the plant grows, you can adjust the ties to keep them snug but not too tight.
Stakes are better suited for taller dill varieties that need more support. You can drive stakes directly into the soil near the base of the plant and then tie the stems to it using a soft material like twine or cloth. Make sure the stake is securely positioned in the ground so your plant doesn’t topple over.
It’s also essential to space your supports correctly, taking care not to overcrowd your plants. This will give them enough room to breathe and absorb nutrients from the soil.
Common Pests and Diseases Affecting Dill Plants
When growing dill, you’ll inevitably encounter common pests and diseases that can threaten your harvest. Learn how to identify and control these issues in this crucial section.
Identifying and Managing Common Dill Pests
As you tend to your dill plants, it’s essential to keep an eye out for common pests that can cause significant damage. Some of the most common pests affecting dill are aphids, whiteflies, spider mites, and caterpillars. These tiny creatures feed on the sap of the plant, causing curled or distorted leaves.
Aphids are particularly notorious for spreading diseases between plants. To control aphid infestations, introduce beneficial insects like ladybugs or lacewings to your garden. You can also use neem oil or insecticidal soap as a foliar spray to repel these pests. Regularly inspecting your plants and removing any infected areas will help prevent the spread of disease.
Caterpillars are another significant pest that feeds on dill leaves, often leaving behind a trail of frass (insect waste). Hand-picking these caterpillars from the plant is an effective way to control infestations. You can also use Bt (Bacillus thuringiensis) spray or spinosad to kill caterpillar larvae.
Whiteflies and spider mites are harder to detect, but their presence often leads to yellowing leaves and a sticky substance on the plant’s surface. Regularly spraying your plants with water, ensuring thorough coverage of all areas, can help dislodge these pests.
Recognizing and Treating Fungal and Bacterial Diseases in Dill
When growing dill, it’s essential to be aware of common diseases that can affect your plants. Fungal and bacterial infections are two types of diseases you should look out for.
Fungal diseases often manifest as yellowing leaves or a white powdery coating on the stems and leaves. This is due to fungi such as powdery mildew, downy mildew, or fusarium wilt. Bacterial diseases, on the other hand, can cause soft rot, which leads to brown discoloration of the stems and leaves.
To identify fungal diseases, look for distinctive signs like white or grayish patches, a fluffy growth, or blackened leaf tips. Bacterial diseases often exhibit symptoms such as watery spots, slimy areas, or a strong unpleasant odor.
Prevention is key when it comes to managing these diseases. Make sure your dill plants are receiving sufficient air circulation and adequate watering. Remove any infected leaves or stems immediately to prevent the disease from spreading.
When treating fungal infections, you can use fungicides specifically designed for seedlings or young dill plants. For bacterial diseases, copper-based products can be effective in controlling the spread of infection. Regularly inspect your plants and take prompt action if you notice any signs of disease.
Harvesting and Preserving Fresh Dill
Now that you’ve grown a bountiful dill crop, it’s time to harvest and preserve your fresh dill for future use in cooking and recipes. Learn how to dry, freeze, and store this versatile herb for maximum flavor.
Timing and Methods for Harvesting Fresh Dill
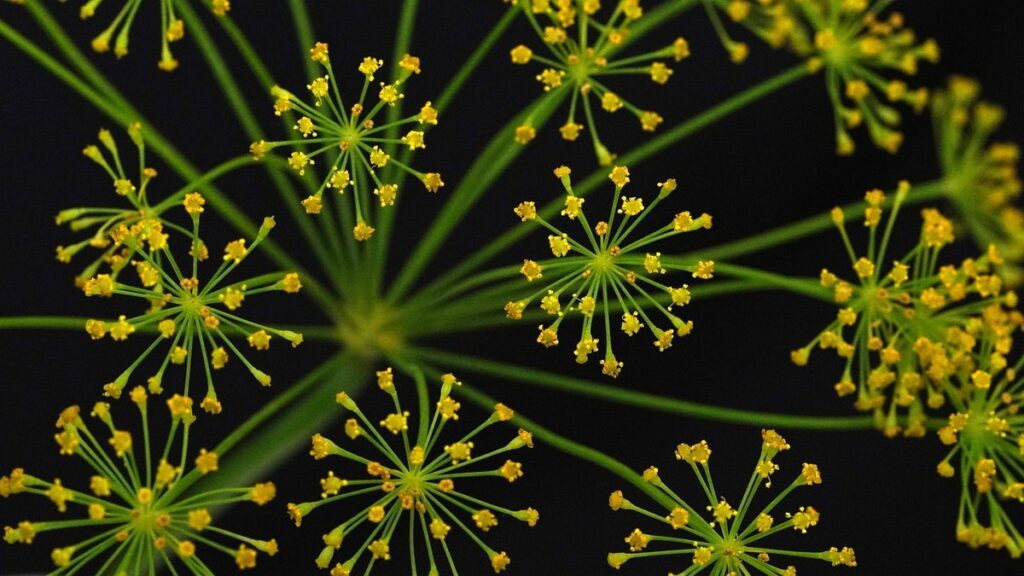
When it comes to harvesting fresh dill, timing is everything. You want to catch the herb at its peak flavor and aroma, which typically occurs when the flowers have just begun to form. Check your plants daily for this optimal stage, as it can happen quickly.
For warm-season crops like dill, the ideal time to harvest is in the morning after the dew has evaporated but before the heat of the day becomes too intense. This ensures that the herb’s essential oils are at their highest concentration.
To harvest fresh dill, you have several methods at your disposal:
* Pinch off individual stems as needed, leaving enough foliage for continued growth
* Use scissors to cut back the entire plant, about one-third from the top, promoting new growth and encouraging a bushy shape
* Harvest the leaves in succession, allowing the plant to focus its energy on producing more delicate and flavorful new growth
By harvesting your dill at the right time and using the correct methods, you’ll be rewarded with an abundance of fresh, delicious herbs for your kitchen.
Preserving Dill Through Freezing, Dehydrating, or Fermenting
Preserving fresh dill is essential for enjoying its flavor year-round. When it comes to preserving dill, you have several techniques at your disposal: freezing, dehydrating, and fermenting. Each method offers unique benefits and advantages.
Freezing is a simple way to preserve dill. Simply chop the fresh dill, place it in an airtight container or freezer bag, and store it in the freezer. Frozen dill is perfect for soups, stews, and sauces. It’s also great for adding to pickling spices or making homemade dill pickle relish.
Dehydrating is another effective method for preserving dill. You can use a food dehydrator or your oven on its lowest temperature setting. Dehydrated dill retains its flavor and aroma while taking up less space in your pantry. Use it as a seasoning or mix it with other herbs to create a delicious blend.
Fermenting is a great way to preserve dill while also creating a tangy, probiotic-rich condiment. To ferment dill, you’ll need a jar, some salt, and fresh dill. Place the dill in the jar, cover it with brine (water and salt), and let it sit at room temperature for 3-5 days. The resulting fermented dill is perfect for adding to sandwiches or using as a topping for vegetables.
When choosing how to preserve your dill, consider the recipe you plan to use it in. For example, if you’re making a dill-based sauce, freezing may be the best option. If you want to add fresh flavor to soups and stews, dehydrating could be the way to go.
Troubleshooting Common Issues with Dill Growth
When you’re growing dill, it’s not uncommon to encounter some setbacks. In this next part of our guide, we’ll help you troubleshoot common problems that can affect your plant’s health.
Addressing Common Problems Like Yellowing Leaves or Stunted Growth
One of the most frustrating issues you can face as a dill grower is dealing with yellowing leaves. This can be caused by a range of factors, including overwatering, underwatering, or exposure to extreme temperatures. To prevent this, make sure to check the soil moisture regularly and adjust your watering schedule accordingly.
Another common problem that can arise is stunted growth. This might be due to inadequate light, poor soil quality, or pests such as aphids or spider mites. If you notice that your dill plants are struggling to grow, inspect them closely for signs of infestation or disease.
To address these issues, start by providing your dill plants with the right growing conditions. Ensure they receive at least six hours of direct sunlight per day and maintain a temperature between 60-70°F (15-21°C). Also, ensure the soil is rich in nutrients and well-draining.
If you’ve checked all these factors and still notice problems, consider repotting your dill plants to give them fresh soil. This can help improve their growth rate and overall health.
Reviving Weakened or Wilting Dill Plants
If you notice that your dill plants are struggling with weakened or wilting leaves, don’t worry – it’s an easy problem to fix. The first step is to identify the root cause of the issue. This could be due to overwatering, underwatering, high temperatures, or nutrient deficiencies.
When watering, make sure not to overdo it, as dill plants prefer well-draining soil and can quickly become waterlogged. Check the moisture levels by sticking your finger into the soil up to the first knuckle – if it’s dry, it’s time for a drink. However, if you suspect underwatering, give the plant a good soaking.
Another common issue is high temperatures, which can cause dill plants to wilt and lose their vibrant green color. If possible, provide your dill with some shade during the hottest part of the day or consider moving them to a cooler spot altogether. Fertilizing with a balanced fertilizer can also help to promote healthy growth and combat nutrient deficiencies.
To revive a weakened dill plant, prune it back by about one-third to encourage new growth. This will not only help the plant recover but also promote bushy growth and prevent it from flowering prematurely.
Frequently Asked Questions
Can I Grow Dill Indoors If I Don’t Have Outdoor Space?
Yes, you can grow dill indoors if you don’t have outdoor space! Choose a container with good drainage and ensure it has enough light – at least 4-6 hours of direct sunlight per day. Keep the soil consistently moist but not waterlogged, as this can lead to root rot.
How Often Should I Water My Dill Plants?
Dill plants need consistent moisture, especially when they’re producing seeds. Water them deeply once or twice a week, depending on weather conditions. Make sure the soil isn’t too wet, as this can cause fungal diseases and stunted growth.
What Are Some Common Pests Affecting Dill Plants, and How Do I Prevent Them?
Common pests affecting dill plants include aphids, spider mites, and whiteflies. To prevent infestations, use neem oil or insecticidal soap as a preventative measure. Keep your garden clean by removing weeds, debris, and infested plants to reduce the risk of pest spread.
Can I Grow Dill in Containers Without Adding Organic Matter?
While it’s possible to grow dill in containers without adding organic matter, doing so can lead to nutrient deficiencies and poor drainage. Consider incorporating compost or well-rotted manure into your potting mix to improve fertility and structure. This will help ensure healthy growth and prevent common problems like yellowing leaves.
How Do I Preserve Dill for Longer Periods, and What Are the Best Methods?
Dill can be preserved through freezing, dehydrating, or fermenting. Freezing is a simple method that involves blanching dill in boiling water before placing it in an airtight container or freezer bag. Dehydrating removes excess moisture, making it ideal for long-term storage. Fermenting creates a pickled version of dill that’s perfect for adding flavor to dishes.