Growing your own ground cherries can be a truly rewarding experience. Not only do these nutritious fruits add a burst of sweetness to your salads, desserts, and baked goods, but they’re also incredibly easy to grow from scratch. However, getting started can be intimidating, especially for beginners. That’s why we’ve put together this comprehensive guide on how to grow ground cherry seedlings. We’ll walk you through the essential steps, from preparing the perfect soil to sowing seeds and transplanting them into their forever home. Along the way, we’ll share expert tips and tricks for overcoming common issues that can prevent these delicious fruits from thriving. Whether you’re a seasoned gardener or just starting out, this article will give you the confidence to grow your own ground cherries and enjoy them in all their juicy glory.
Benefits of Growing Ground Cherries
Growing ground cherries can provide you with a bounty of sweet and nutritious fruit, while also attracting beneficial pollinators to your garden. Let’s explore some of the key benefits of growing these unique seedlings!
Introduction to Ground Cherries
Ground cherries are one of the most unique and fascinating fruits you can grow in your garden. Native to South America, these small, round fruits have a sweet and slightly tart taste, often described as a combination of pineapple and strawberry. One of the main reasons ground cherries stand out is their ability to thrive in poor soil conditions, making them an excellent choice for gardeners with challenging soil types.
Another unique characteristic of ground cherries is their papery husks, which are actually modified leaves that protect the fruit from damage. When ripe, the husk will split open, revealing a small, golden-yellow berry inside. Ground cherries are also relatively low-maintenance and disease-resistant, making them an excellent addition to any garden.
Whether you’re a seasoned gardener or just starting out, ground cherries are definitely worth growing. Not only do they provide a delicious and nutritious fruit for snacking and cooking, but they also attract beneficial pollinators like bees and butterflies to your garden. With proper care and attention, ground cherry seedlings can produce a bountiful harvest of these tasty fruits in as little as 60 days.
Nutritional Value and Health Benefits
Ground cherries are not only a delight to grow and harvest, but they’re also an incredibly nutritious fruit. One of the standout nutritional values of ground cherries is their exceptionally high antioxidant content. In fact, research has shown that ground cherries contain some of the highest levels of antioxidants among all fruits. Antioxidants play a crucial role in protecting our cells from damage caused by free radicals, which can lead to chronic diseases like cancer and heart disease.
Eating ground cherries may also have several potential health benefits, including reducing inflammation and improving heart health. The high levels of anthocyanins present in ground cherries have been shown to possess anti-inflammatory properties, which can help alleviate symptoms associated with conditions such as arthritis. Furthermore, the potassium content in ground cherries can help lower blood pressure and reduce the risk of cardiovascular disease.
To incorporate ground cherries into your diet and reap their nutritional benefits, try adding them to salads or using them as a topping for yogurt or oatmeal. You can also make jams, jellies, or preserves with ground cherries to enjoy throughout the year.
Preparing the Soil for Ground Cherry Seedlings
Before planting your ground cherry seedlings, it’s essential to prepare the soil correctly to give them a strong start and optimal growth conditions. Let’s take a closer look at how to properly prepare the soil for your new seedlings.
Understanding Ground Cherry Soil Requirements
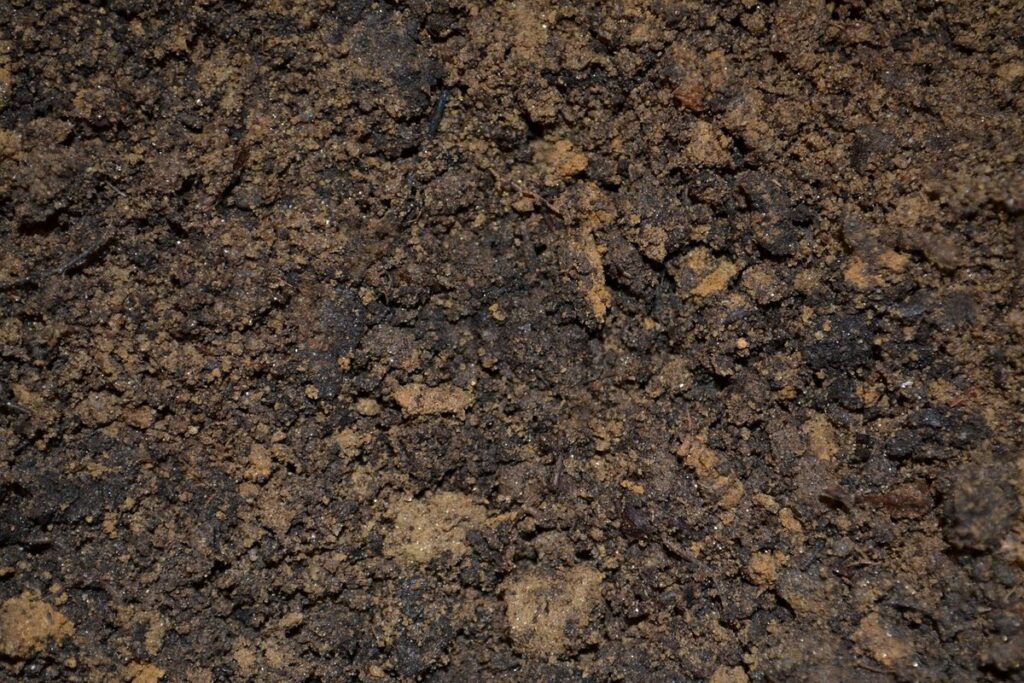
Ground cherries are adaptable to a wide range of soil types but thrive best in slightly acidic to neutral soils. The ideal pH for ground cherry seedlings is between 6.0 and 7.0, which means the soil should be neither too alkaline nor too acidic. To check your soil’s pH level, you can use a DIY testing kit or consult with a local nursery.
When it comes to nutrient needs, ground cherries prefer well-draining soils rich in organic matter. A mix of compost and perlite will provide the necessary nutrients for healthy growth. As a general rule, add 2-3 inches of compost to the soil and mix it thoroughly before planting the seedlings. This will not only improve soil fertility but also help retain moisture.
In terms of moisture preferences, ground cherries require consistent moisture levels throughout their growing season. The top 2-3 inches of soil should be kept moist but never waterlogged. A good rule of thumb is to water the seedlings when the top inch of soil feels dry to the touch.
How to Test Your Soil for Nutrient Deficiencies
To ensure that your ground cherry seedlings receive the optimal nutrients for healthy growth, it’s essential to test your soil for nutrient deficiencies. This can be done using a DIY kit or by sending a sample to a lab for analysis. The cost of these tests varies depending on the method and location, but it’s a worthwhile investment considering the long-term benefits.
When testing your soil, look out for common issues that can affect ground cherry growth. These include:
• pH imbalance: Ground cherries prefer a slightly acidic to neutral soil pH (5.5-7.0). If your soil is too alkaline or acidic, it may limit nutrient availability.
• Nitrogen deficiency: This can cause stunted growth, yellowing leaves, and reduced fruit production. Test for nitrogen levels, especially if you notice any of these symptoms.
• Phosphorus deficiency: Ground cherries need phosphorus to produce healthy flowers and fruits. A lack of this essential nutrient can result in poor pollination and smaller yields.
Send your sample to a reputable lab or use a DIY kit that tests for pH, nitrogen, phosphorus, potassium (K), calcium (Ca), magnesium (Mg), sulfur (S), and other critical nutrients.
Sowing Ground Cherry Seeds
To successfully grow ground cherry seedlings, you’ll need to learn how to properly sow their seeds indoors and outdoors, at just the right time. This crucial step sets the stage for healthy growth.
Choosing the Right Variety
When it comes to growing ground cherry seedlings, one of the most important decisions you’ll make is choosing the right variety. With so many options available, it can be overwhelming for beginners. However, by understanding the key characteristics of each type, you can select a variety that suits your needs and preferences.
Some popular varieties include ‘Hinnomaki Red’, ‘Red Santa’, and ‘White Pineapple’. ‘Hinnomaki Red’ produces small to medium-sized fruit with a sweet and slightly tangy flavor. It’s a compact growth habit makes it ideal for containers or small spaces. On the other hand, ‘Red Santa’ produces larger fruit with a more intense red color and a sweeter taste. Its bush-like growth habit requires more support and pruning.
When choosing a variety, consider factors such as climate, space constraints, and desired flavor profile. If you live in an area with limited sunlight or cooler temperatures, opt for a variety like ‘White Pineapple’ that is known to thrive in these conditions. Additionally, think about the size of your fruit – if you want larger cherries, choose a variety like ‘Red Santa’, but keep in mind it requires more maintenance.
Ultimately, selecting the right variety will depend on your specific needs and preferences. Research and read reviews from other growers to get a better understanding of each variety’s characteristics and performance in different environments.
Sowing Seeds Indoors vs. Directly in the Garden
When it comes to sowing ground cherry seeds, one of the key decisions you’ll need to make is whether to do so indoors or directly in the garden. Both methods have their pros and cons, which we’ll explore below.
Sowing seeds indoors can give them a head start on the growing season, allowing them to develop into stronger seedlings before being transplanted outside. This is especially beneficial in areas with unpredictable weather or short growing seasons. You can also control factors like temperature, light, and moisture levels, creating an ideal environment for your seedlings to thrive.
On the other hand, sowing seeds directly in the garden allows them to establish themselves in their final position, where they’ll be less prone to transplant shock. This method is often preferred by experienced gardeners who have a keen sense of the local climate and soil quality.
However, direct sowing can be vulnerable to pests like birds, slugs, and snails, which may nibble on emerging seedlings before they have a chance to grow. It’s also affected by external factors such as extreme weather conditions, which can either kill off weak seedlings or hinder their growth.
If you do decide to sow directly in the garden, choose a location with well-draining soil and sufficient sunlight. You may need to provide some protection from pests using row covers or other deterrents.
Ultimately, whether to sow seeds indoors or directly in the garden comes down to your specific climate and soil conditions. If you’re unsure about what will work best for your ground cherry seedlings, consider starting with a small batch of seeds indoors before transferring them outside when they’re strong enough.
Transplanting Ground Cherry Seedlings
When transplanting ground cherry seedlings, it’s essential to handle them gently to avoid damaging their delicate roots and leaves. Learn how to minimize shock and promote healthy growth in this crucial step.
Hardening Off Seedlings
When you’re finally ready to transplant your ground cherry seedlings outdoors, it’s essential to take the necessary steps to prevent shock. Hardening off seedlings is a critical process that will help them transition smoothly from indoor conditions to outdoor environments.
Start by moving your seedlings to a shaded area outdoors for 1-2 hours a day. Gradually increase their exposure to direct sunlight over the course of 7-10 days, making sure they don’t get scorched or dehydrated. Water them thoroughly before and after their daily stint outside to prevent stress.
Monitor your seedlings’ response to increased light and temperature, and adjust their hardening off schedule accordingly. Keep in mind that this process should begin about a week before the last frost date for your area. By following this simple yet crucial step, you’ll give your ground cherry seedlings the best chance to thrive when transplanted outdoors.
Tips for Successful Transplantation
Transplanting ground cherry seedlings requires careful consideration to ensure a smooth transition from pot to garden bed. One of the most critical factors to consider is timing. It’s essential to wait until the weather has stabilized and there’s no risk of frost, typically around late spring or early summer, when transplanting outside. This will give the young plants a chance to establish themselves without stress.
When preparing the soil for transplantation, focus on creating a well-draining mix with a pH between 6.0 and 7.0. Avoid compacted or heavy clay soils that can cause root bound issues. Water your seedlings thoroughly before transplanting to minimize shock.
Upon transplanting, water gently but thoroughly to settle the soil around the roots. Mulch around the plants to retain moisture and suppress weeds. Monitor your seedlings closely during this period, adjusting watering schedules as needed to prevent overwatering or underwatering. By considering these factors, you’ll be well on your way to successful transplantation and a thriving ground cherry crop.
Caring for Ground Cherry Plants
To keep your ground cherry seedlings healthy and thriving, learn how to properly care for them by following these essential tips on watering, pruning, and more.
Watering Requirements
When it comes to watering ground cherry seedlings, getting it right is crucial for their survival and healthy growth. Ground cherries require a consistent supply of moisture, especially when they’re young. Aim to water them every 2-3 days during the first few weeks after germination.
As the plants grow, you can gradually reduce the frequency to once a week. Water your seedlings thoroughly, making sure the soil is moist but not soggy. A good rule of thumb is to water deeply and infrequently, encouraging the roots to dig deeper into the soil in search of moisture.
Avoid getting water on the leaves or crown of the plant to prevent fungal diseases from taking hold. Instead, water at the base of the stem, allowing the plants to absorb the water through their roots. Also, make sure not to overwater, as this can lead to root rot and other problems. Check the soil moisture by inserting your finger into the soil up to the first knuckle; if it feels dry, it’s time to water again.
In hot weather or during periods of drought, you may need to water more frequently. Monitor your seedlings’ response to watering and adjust your schedule accordingly.
Fertilization Strategies
When it comes to fertilizing ground cherry plants, timing and application rates are crucial for optimal growth. Organic options like compost tea, fish emulsion, and bone meal provide a slow release of nutrients, promoting healthy root development without burning the roots.
Synthetic fertilizers, on the other hand, offer quicker results but require more caution. Use them sparingly, following package instructions to avoid overfertilization. For ground cherries, aim for a balanced fertilizer with equal nitrogen-phosphorus-potassium (NPK) ratios.
Timing is also essential; feed your seedlings lightly when they’re about two weeks old and again after transplanting into larger containers. Fertilize every 2-3 weeks during the growing season, reducing frequency as fruit begins to set. To avoid burning the leaves, dilute synthetic fertilizers according to package instructions or start with a weaker concentration.
Some gardeners prefer a liquid fertilizer like Miracle-Gro; others swear by Espoma Organic Bloom! Both options are available in various concentrations and can be applied directly to the soil or as a foliar spray.
Common Pests and Diseases
One of the most frustrating things that can happen to your ground cherry seedlings is pest infestations, which can spread disease if left unchecked. Let’s talk about common pests and diseases to watch out for.
Identifying Common Issues
As you nurture your ground cherry seedlings, it’s essential to be aware of common pests and diseases that can harm them. One of the most prevalent issues is aphids, tiny sap-sucking insects that can multiply rapidly and cause curled or distorted leaves. To prevent infestations, inspect your plants regularly and use neem oil or insecticidal soap to control aphid populations.
Powdery mildew is another common problem, characterized by a white, powdery coating on leaves and stems. This fungal disease thrives in humid environments, so ensure good air circulation around your seedlings. Remove any infected areas, and treat with a fungicide specifically designed for powdery mildew control.
Fungal infections can also occur, such as root rot caused by overwatering or poor drainage. Be cautious not to let the soil become waterlogged, and avoid getting water on the leaves to prevent fungal spores from taking hold. Regularly inspect your seedlings’ roots and remove any affected areas to prevent the spread of disease.
Keep an eye out for these issues early on, as they can be more challenging to treat if left unchecked. Monitor your plants closely and take swift action to prevent pests and diseases from compromising their growth.
Organic Control Methods
When it comes to growing ground cherry seedlings, controlling pests and diseases is crucial for their health and productivity. One of the most effective ways to do this is through organic control methods, which are gentle on the environment and the plants themselves.
To combat common pests like aphids, whiteflies, and spider mites, you can use neem oil. This natural pesticide works by disrupting the insect’s hormone system, preventing them from reproducing and eventually killing them off. Mix neem oil with water according to the label instructions and spray it on your seedlings once a week.
Another option is garlic spray, which repels pests like aphids and spider mites while also promoting healthy growth in your plants. To make a garlic spray, blend 3-4 cloves of minced garlic with 1 quart of water and let it sit for 24 hours before straining the mixture and using it as directed.
Beneficial insects like ladybugs and lacewings can also be introduced to your garden to prey on pests. These natural predators are harmless to your seedlings and will help keep pest populations under control. By incorporating these organic methods into your gardening routine, you’ll create a healthy environment for your ground cherry seedlings to thrive in.
Harvesting Ground Cherries
Now that you’ve nurtured your ground cherry seedlings, it’s time to reap what you’ve sown! Learn how to carefully harvest these delicate fruits without damaging them.
Timing for Harvest
When it comes to harvesting ground cherries, timing is everything. You’ll know that your fruit is ready when it reaches its optimal color, texture, and flavor. Generally, ground cherries are ripe about 3-4 months after flowering, but this can vary depending on factors like weather conditions and the specific variety you’re growing.
One of the most reliable ways to check for ripeness is by looking at the fruit’s color. Ground cherries typically turn from green to yellow or light brown as they mature. However, some varieties may retain a more vibrant green hue even when fully ripe. To be sure, gently squeeze the fruit – it should yield to pressure but still feel slightly firm.
The texture and flavor of ground cherries also change significantly as they ripen. Ripe fruit will have a slight softening around the stem, and its skin will become tacky to the touch. When you cut open a ripe ground cherry, you’ll find that the pulp is tender and sweet, with a unique flavor often described as a combination of pineapple and strawberry.
To avoid over-ripening or damaging your fruit, it’s essential to harvest regularly, ideally every few days during peak production.
Tips for Storing and Preserving
When you’ve harvested your ground cherries, it’s essential to store and preserve them properly to enjoy their unique flavor and nutritional benefits throughout the year. Ground cherries are a delicate fruit, so they require careful handling to maintain their quality.
To start, dry ground cherries by slicing them thin and placing them in a single layer on paper towels or clean cheesecloth. Store them in an airtight container, keeping them away from direct sunlight and moisture. Dried ground cherries can be stored for up to 6 months.
Another option is freezing the fruit. Simply remove any stems, wash the ground cherries, and pat them dry with paper towels. Place them in a single layer on a baking sheet lined with parchment paper, then transfer them to an airtight container or freezer bag once frozen solid.
You can also can ground cherries using a water bath canner. Follow safe canning procedures to ensure the fruit is properly sterilized and sealed. This method allows you to preserve the fruit for up to 12 months.
It’s crucial to note that proper storage and preservation techniques will help maintain the ground cherry’s flavor, texture, and nutritional value.
Frequently Asked Questions
Can I grow ground cherries in containers?
Ground cherries can thrive in containers, making them an excellent option for small-space gardeners or those with limited mobility. Ensure your container is at least 6-8 inches deep and has good drainage to prevent waterlogged soil. Use a well-draining potting mix and follow the same sowing and care instructions as for ground cherries grown directly in the garden.
What’s the optimal temperature for germinating ground cherry seeds?
The ideal temperature for germinating ground cherry seeds is between 70°F (21°C) to 85°F (29°C). Keep the soil consistently moist but not waterlogged, as this can lead to fungal diseases. If you’re sowing indoors, place the container in a sunny location or under grow lights.
Can I use regular fertilizers for ground cherries?
While regular fertilizers may provide some benefits, they might not be tailored to meet the specific nutritional needs of ground cherries. For optimal growth and fruit production, use a balanced fertilizer (10-10-10 NPK) or an organic alternative specifically formulated for fruits and vegetables.
How often should I water my ground cherry seedlings after transplanting?
Water your transplanted seedlings thoroughly after planting and keep the soil consistently moist during their first few weeks. Once established, reduce watering to about 1 inch (2.5 cm) per week, either from rainfall or irrigation. Avoid overwatering, which can lead to root rot and other problems.
Can I grow multiple varieties of ground cherries together?
Yes! Growing multiple ground cherry varieties together can enhance cross-pollination and potentially increase yields. Ensure the varieties have similar growing requirements and are not too competitive for resources like light, water, or nutrients.