Are you ready to bring the sweet fragrance and elegant beauty of gardenias into your garden? With their stunning white blooms and glossy leaves, it’s no wonder why gardenias are a favorite among gardeners. But, growing these lovely plants can be a bit tricky if you don’t know where to start. Choosing the right variety for your climate, preparing the perfect soil, and providing just the right amount of care are all crucial steps in getting your gardenias to thrive.
In this comprehensive guide, we’ll walk you through everything you need to know about growing gardenias, from selecting the best varieties to mastering the art of pruning. We’ll cover topics such as soil preparation, watering techniques, and more to ensure that you’re giving your gardenias the best chance to succeed. Whether you’re a seasoned gardener or just starting out, this guide will provide you with all the knowledge and confidence you need to grow beautiful, fragrant gardenias in your own backyard.
Choosing the Right Variety
When it comes to growing gardenias, selecting the right variety is crucial for success. This section will help you narrow down your options and find a type that thrives in your specific climate and conditions.
Understanding Gardenia Types
When it comes to growing gardenias, you may be surprised to learn that there are several types to choose from. Each type has its own unique characteristics, which can affect everything from bloom size and color to growth habits and hardiness. Let’s take a closer look at some of the most popular varieties.
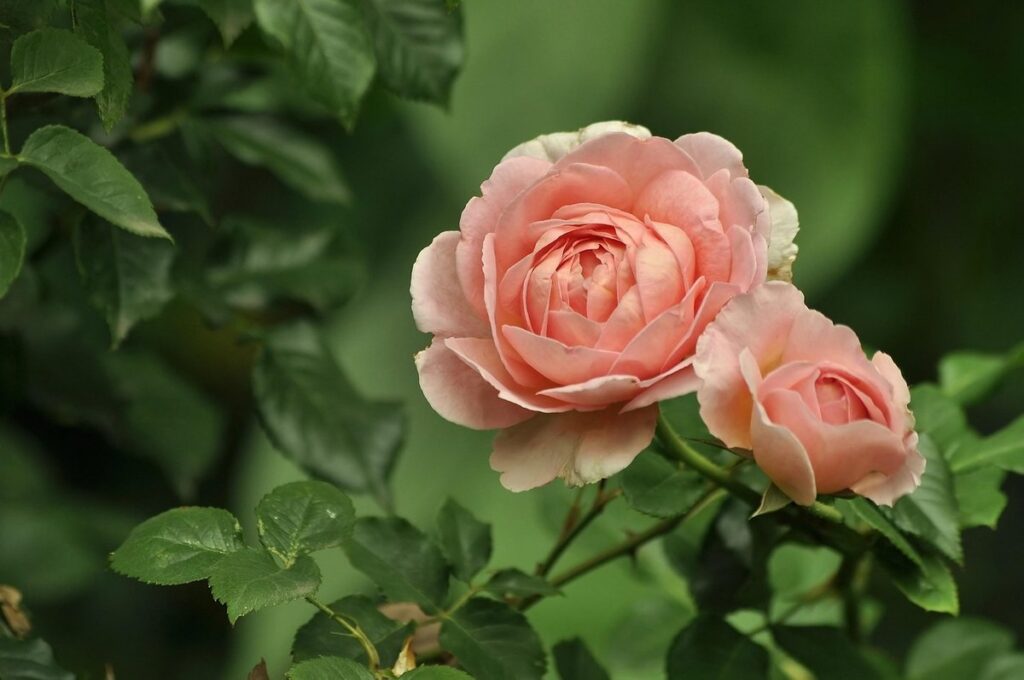
The Common Gardenia (Gardenia jasminoides) is one of the most widely cultivated species, prized for its showy white blooms and glossy dark green leaves. It’s relatively easy to care for and can thrive in a range of conditions, making it an excellent choice for beginners.
In contrast, the Cape Jasmine (Gardenia thunbergia) boasts smaller flowers with a more delicate fragrance. It prefers well-drained soil and full sun, making it ideal for warmer climates.
Finally, there’s the Oleander Gardenia (Nerium oleander ‘Gardenia’), which is technically not a true gardenia but shares its name due to its similar appearance. This hybrid is known for its dark red flowers and ability to tolerate drought.
Understanding the different types of gardenias can help you choose the best variety for your specific needs, whether that’s climate tolerance, bloom size, or ease of care.
Selecting Gardenias for Climate and Region
When selecting a gardenia variety for your region and climate, it’s essential to consider three key factors: temperature, humidity, and frost tolerance. If you live in an area with hot summers, look for varieties that are heat-tolerant or bred specifically for warm climates, such as ‘Katherine Dodd’ or ‘Radicans’. On the other hand, if you’re in a cooler region, opt for varieties like ‘Miami Supreme’ or ‘Frost Proof’, which can handle temperatures as low as 25°F (-4°C).
Humidity is also crucial to consider. Gardenias prefer high humidity, typically above 50%, but some varieties are more adaptable than others. If your area has low humidity, choose a variety that’s bred for dry conditions, such as ‘Belmore’ or ‘Mystery’. Be aware that even heat-tolerant gardenias may still suffer in extremely dry environments.
Lastly, consider frost tolerance if you live in an area where temperatures drop below 32°F (0°C). Some varieties, like ‘August Beauty’, can withstand light frosts, but be prepared to protect your plant with mulch or a frost blanket during extreme cold snaps.
Preparing the Soil
Before planting your gardenias, it’s essential to prepare the soil correctly. This includes testing its pH levels and loosening compacted areas to ensure optimal growth conditions.
Testing and Amending Your Soil
Before planting your gardenia, it’s essential to test and amend your soil to ensure it provides the right conditions for this sensitive plant. Soil testing helps you understand its pH level, nutrient content, and structure, which can impact your gardenia’s growth.
To collect a soil sample, dig a small hole about 6-8 inches deep in your planting area and scoop out a handful of soil from the side and bottom of the hole. Place the sample in a container or bag and label it with the location and date. You can then send this sample to a lab for analysis.
When interpreting the results, look for pH levels between 5.0 and 6.5, as gardenias prefer slightly acidic conditions. If your soil is too alkaline, you may need to add peat moss or sulfur to lower the pH. Conversely, if it’s too acidic, lime can help neutralize it.
In terms of nutrient content, gardenias require a balanced fertilizer with equal parts nitrogen, phosphorus, and potassium (N-P-K). You can apply a slow-release fertilizer in the spring, following the manufacturer’s instructions for application rates.
Organic vs. Synthetic Fertilizers
When it comes to fertilizing your gardenias, you’re likely wondering whether to use organic or synthetic options. Both types have their benefits and drawbacks, which we’ll break down below.
Organic fertilizers, made from natural sources like compost, manure, or bone meal, promote long-term soil health by adding beneficial microorganisms and improving soil structure. They also tend to release nutrients slowly, reducing the risk of over-fertilization. However, organic options can be more expensive and may not provide immediate results.
Synthetic fertilizers, on the other hand, are often cheaper and offer quick fixes for nutrient deficiencies. They typically contain nitrogen, phosphorus, and potassium (NPK) in specific ratios, designed to promote rapid plant growth. However, excessive use of synthetic fertilizers can lead to environmental concerns like water pollution and soil degradation.
For gardenias specifically, organic options might be a better fit due to their sensitive nature. Compost tea or fish emulsion can provide the necessary nutrients while promoting beneficial microorganisms in the soil. If you do opt for synthetic fertilizers, follow the recommended application rates carefully to avoid over-fertilizing and harming your plants.
Planting Gardenias
To successfully plant gardenias, you’ll want to choose a location with well-draining soil and partial shade, then follow these essential steps for optimal growth.
When and How to Plant a Gardenia
When it comes to planting gardenias, timing is everything. While gardenias can be planted year-round, the ideal times are spring and fall. These seasons offer mild temperatures, plenty of moisture, and reduced risk of frost or extreme heat that can shock your plant.
In regions with warm winters (USDA zones 9-11), fall is an excellent time to plant gardenia. The soil has warmed up, and the risk of frost has passed, allowing the plant to establish itself before the next growing season. If you’re in a cooler climate, spring is the better choice. Planting in early spring allows the gardenia to get a head start on the growing season.
To dig and transplant a gardenia successfully:
* Choose a location with well-draining soil and partial shade.
* Dig a hole that’s twice as wide and just as deep as the root ball of your gardenia.
* Gently remove the plant from its container, taking care not to disturb the roots.
* Place the plant in the hole, backfill with a mix of soil and organic matter, and water thoroughly.
Tips for Successful Grafting
Grafting gardenias onto rootstocks is a game-changer for these beautiful flowers. Not only does it increase their hardiness and resistance to diseases, but it also allows you to grow gardenias in areas with poor soil conditions or harsh winters.
When selecting a compatible rootstock, look for varieties that are known for their vigor and disease resistance. For example, Gardenia jasminoides ‘Radicans’ is a popular choice for its ability to tolerate cooler temperatures and drought. On the other hand, Gardenia jasminoides ‘Veitchii’ makes an excellent rootstock for its high degree of tolerance to heat and humidity.
To perform a graft, you’ll need a sharp, sterile knife or grafting tool, as well as some basic gardening equipment like potting mix and fertilizer. Start by preparing the rootstock by making a small incision in the bark about 1-2 inches from the top. Next, prepare the scion (the gardenia cutting) by making a matching incision on its stem. Place the scion onto the rootstock, securing it with grafting tape or twist ties. Water thoroughly and keep the soil consistently moist until roots develop.
By following these steps and choosing the right rootstocks, you can enjoy robust and resilient gardenias that thrive in even the most challenging environments.
Caring for Mature Gardenias
Now that you’ve established a thriving gardenia, it’s time to focus on caring for mature plants, which require slightly different attention. This includes pruning, fertilizing, and monitoring their water needs.
Watering Techniques for Healthy Growth
When it comes to watering mature gardenias, getting it just right is crucial for healthy growth. Overwatering can lead to root rot and other problems, while underwatering can cause stress that makes the plant more susceptible to pests and diseases.
As a general rule of thumb, mature gardenias need about 1-2 gallons of water per week during their active growing season. However, this can vary depending on factors like soil type, climate, and humidity levels. To determine the right watering schedule for your gardenia, check the top inch of soil daily. If it feels dry to the touch, it’s time to water.
To promote deep root growth and reduce water stress, try using a soaker hose or drip irrigation system instead of overhead sprinklers. These systems deliver water directly to the roots, reducing evaporation and runoff. You can also mulch around the base of your gardenia to retain moisture in the soil and prevent it from washing away.
By following these tips and adjusting your watering schedule as needed, you can help your mature gardenias thrive with strong, healthy growth. Remember to monitor your plant’s responses closely and make adjustments accordingly – it may take some trial and error to find the perfect balance for your specific climate and growing conditions.
Pruning and Training Tips
Pruning and training are crucial aspects of caring for mature gardenias. Regular pruning helps maintain the plant’s shape, promotes healthy growth, and encourages blooming. To prune dead or damaged branches, use sharp, clean tools to cut just above a bud eye (the small swelling from which new growth emerges). Remove any dead wood completely, as it can cause further damage to the plant.
When shaping the plant, consider its natural growth habit and desired form. Gardenias typically grow into a rounded shape, but you can also train them to become more compact or bushy. Prune back overgrown tips by about one-third to encourage branching and promote a balanced canopy.
It’s essential to prune your gardenia at the right time – late winter or early spring when it’s dormant. Avoid pruning in the summer months, as this can stress the plant and reduce blooming. To maintain shape throughout the growing season, simply remove any stray tips or damaged leaves.
Common Pests and Diseases
When growing gardenias, it’s not uncommon for pests and diseases to appear, affecting their beauty and fragrance. Here, we’ll discuss some common issues to watch out for.
Identifying Common Problems
When growing gardenias, it’s essential to be aware of common pests and diseases that can affect their health. Two of the most notorious culprits are mealybugs and spider mites. These tiny insects feed on plant sap, causing curled or distorted leaves and stunted growth. To detect them, look for a fine, cottony coating on stems and leaves, or tiny white specks moving around on the plant.
Root rot is another common problem affecting gardenias. This disease occurs when the roots are exposed to too much water, causing them to rot. Symptoms include yellowing leaves, droopy branches, and a soft, mushy stem. To prevent root rot, ensure your pot has good drainage holes and avoid overwatering. Regularly inspect the roots for signs of decay.
Leaf spot diseases, such as powdery mildew or anthracnose, can also afflict gardenias. These fungal diseases cause white or grayish patches on leaves, which can spread quickly if not treated. To prevent leaf spots, maintain good air circulation around your plants and avoid getting water on the leaves. If you notice any of these problems, act quickly to save your gardenia from damage.
Organic Solutions to Pest and Disease Issues
When dealing with pest and disease issues on your gardenia plant, it’s essential to consider eco-friendly solutions that not only promote overall plant health but also minimize harm to the environment. One of the most effective natural pesticides for gardenias is neem oil, which can be mixed with water according to the label instructions and sprayed directly onto affected areas.
Cultural practices are another crucial aspect in maintaining healthy gardenia plants. Proper watering techniques, adequate air circulation, and pruning dead or diseased leaves can significantly reduce the risk of pest and disease issues. For example, make sure your gardenias receive 1-2 inches of water per week, either through rainfall or irrigation.
In terms of fungicides, baking soda is a cost-effective and non-toxic option for treating fungal infections on gardenias. Mix one teaspoon of baking soda with one quart of water to create a solution that can be sprayed directly onto the affected area.
Propagating Gardenias
Now that you have a healthy gardenia plant, let’s talk about how to share its beauty with friends and family by propagating new plants. We’ll walk through the simple steps involved in rooting cuttings from your existing gardenia.
Stem Cuttings vs. Layering
When it comes to propagating gardenias, you have two primary methods to consider: stem cuttings and layering. While both techniques can be effective, they each have their own set of advantages and disadvantages.
Stem cuttings are a popular method for propagating gardenias because they allow you to create new plants quickly and easily. By removing 3-4 inch stem sections with at least two sets of leaves from mature gardenia stems, you can root them in a controlled environment like a propagation tray or potting mix. This method typically yields a success rate of 80-90% if the cuttings are taken from healthy parent plants and provided with the right conditions.
In contrast, layering is a more time-consuming process that involves bending a long stem down to the ground and securing it in place with soil. The bent stem will root over time, creating a new plant. This method requires patience, as it can take several months for the new roots to develop. However, if you’re looking for a low-maintenance option, layering may be worth considering.
Ultimately, both methods have their uses depending on your specific needs and preferences. If you want a faster solution with a high success rate, stem cuttings are likely the better choice. But if you prefer a more relaxed approach that requires minimal effort, layering could be the way to go.
Air-Layering Techniques
Air-layering is an excellent technique for propagating gardenias, allowing you to create new plants without disturbing the mother plant. To begin, select a healthy gardenia with a robust stem that’s around 6-8 inches long and has at least two nodes. This will give you a good starting point for air-layering.
Next, prepare your rooting medium by mixing a combination of peat moss, perlite, and vermiculite in equal parts. You can also use a commercial potting mix specifically designed for air-layering. Fill the container or bag with this mixture, leaving about an inch at the top.
Now it’s time to induce root growth. Cut a small notch in the stem above the node using a sharp, sterile knife. This will help the rooting hormone reach the area where you want new roots to develop. Gently insert a toothpick or a small stick into the notch and place a few drops of rooting hormone on top. This will stimulate the plant to produce new roots.
Make sure the air-layering container is placed in a bright, humid location with temperatures between 65-75°F (18-24°C). Water the mixture regularly, but avoid overwatering. Roots should start developing within 2-3 weeks. Once you notice root growth, gently cut the stem below the node and pot it up in fresh potting mix. With proper care, your air-layered gardenia will thrive and produce beautiful blooms.
Troubleshooting Common Issues
Don’t worry if your gardenias aren’t thriving yet – we’ve got you covered! This section tackles common problems that can affect these lovely flowers, helping you identify and fix issues.
Addressing Pests and Diseases Quickly
When it comes to growing gardenias, pests and diseases can quickly become major issues if left unchecked. In fact, prompt action is often the best defense against these problems, as they can spread rapidly and cause significant damage to your plant.
To address these issues quickly, it’s essential to identify them early on. Common pests like mealybugs, spider mites, and scale can be identified by looking for white cottony patches, fine webbing, or small brown dots on the leaves. Fungal diseases, such as root rot and leaf spot, can cause yellowing or browning of leaves, while bacterial diseases like crown gall may produce swellings on the stem.
To treat these issues, begin by isolating infected plants to prevent the problem from spreading. Next, use insecticidal soap or neem oil to control pests, and apply fungicides specifically labeled for gardenia care. For more severe infestations, prune affected areas to prevent further damage. Prevention is also key – ensure good air circulation, maintain optimal humidity levels, and provide regular fertilization to promote healthy growth.
By acting quickly and taking the right steps, you can minimize the impact of pests and diseases on your gardenias and keep them thriving.
Improving Soil Quality for Better Growth
When growing gardenias, maintaining healthy soil quality is crucial for optimal growth and blooms. Regular soil testing can help you identify nutrient deficiencies and pH levels that may be hindering your plants’ progress. Aim to test your soil at least once a year, taking note of pH levels and nutrient content.
To amend your soil, consider adding organic matter like compost or well-rotted manure. These amendments not only improve soil structure but also provide essential nutrients for plant growth. A 2-inch layer of mulch can also help retain moisture, suppress weeds, and regulate soil temperature.
Mulching around the base of your gardenia plants is an effective way to promote healthy growth. Use a thin layer (about 1-2 inches) of organic mulch like wood chips or pine straw to create a barrier between the soil and air. This will help retain moisture, suppress weeds, and regulate soil temperature.
As you amend and mulch your soil, keep in mind that gardenias prefer slightly acidic conditions with a pH range of 5.0-6.0. Be sure to adjust your amendments accordingly to avoid over-altering your soil’s pH levels.
Frequently Asked Questions
How do I know if my gardenia is receiving the right amount of sunlight?
Gardenias generally require bright, indirect light to photosynthesize effectively. If your plant is indoors, ensure it’s placed near an east- or west-facing window. Outdoor plants can tolerate some direct sun, but too much may cause scorching. Observe your plant’s response to different lighting conditions and adjust accordingly.
Can I use regular potting soil for my gardenias?
While regular potting soil can be used as a temporary solution, it may not provide the necessary nutrients for long-term growth. Gardenias prefer acidic soils with a pH between 5.0 and 6.0. Consider mixing in organic matter like peat moss or compost to create an optimal growing medium.
How often should I water my newly planted gardenia?
Newly planted gardenias need consistent moisture, especially during their first few weeks. Water your plant when the top inch of soil feels dry to the touch. Reduce watering frequency once it’s established and show signs of growth. Monitor soil moisture levels and adjust your schedule accordingly.
What are some common pests that target gardenias?
Common pests like mealybugs, spider mites, and scale can infest gardenias, especially in warm climates. Regularly inspect your plants for signs of infestation, such as sticky honeydew or white cottony patches. Treat affected areas with neem oil or insecticidal soap to prevent further damage.
Can I propagate my gardenia using stem cuttings?
Yes, you can propagate gardenias through stem cuttings during the spring and summer months when new growth is most active. Cut 3-4 inch stem sections with at least two nodes and remove lower leaves. Dip the cut end in rooting hormone and plant in well-draining soil. Keep the cutting moist until roots develop and a new plant emerges.