Are you ready to unlock the incredible potential of your own backyard? Growing elderberries at home is easier than you think, and the rewards are well worth the effort. Not only do these beautiful plants provide a stunning display of purple flowers in the summer months, but they also pack a punch when it comes to nutritional value and medicinal properties. From fighting off colds and flu to soothing skin irritations and adding flavor to your favorite recipes, the benefits of homegrown elderberries are endless. In this article, we’ll show you how to grow, harvest, and use your very own elderberry plants for a more self-sufficient lifestyle. Whether you’re a seasoned gardener or just starting out, get ready to discover the power of these incredible plants!
The Power of Homegrown Elderberries
As you’ve learned how to cultivate and harvest your homegrown elderberry plants, let’s explore the incredible benefits that come from using these berries in your daily life. We’ll dive into their medicinal properties and uses.
Introduction to Elderberry Planting
Growing your own elderberry plants at home offers numerous benefits that can enrich both your health and the environment. One of the primary advantages is their exceptional nutritional value. Elderberries are packed with vitamins A and C, potassium, and fiber, making them an excellent addition to a balanced diet. They’re also rich in antioxidants, which help protect against cell damage and inflammation.
Beyond their nutritional benefits, elderberries have been used for centuries for their medicinal properties. They contain compounds that have antimicrobial, anti-inflammatory, and antiviral effects, which can aid in relieving cold and flu symptoms, reducing pain and swelling, and even supporting immune function. When grown at home, you can harvest the berries to create homemade remedies or add them fresh to teas and juices.
In addition to their health benefits, elderberry plants also provide environmental advantages. They’re a low-maintenance crop that requires minimal water and pesticides, making them an attractive option for sustainable gardening practices. With proper care, elderberry plants can thrive in your backyard, providing a natural source of nutrition and wellness while promoting eco-friendly gardening habits.
Choosing the Right Variety for Your Climate
When it comes to growing elderberries at home, choosing the right variety for your climate is crucial. With several types of elderberry plants available, selecting one that thrives in your area can be a bit overwhelming. Let’s start with the three most common types: American elderberry (Sambucus canadensis), European elderberry (Sambucus nigra), and black elderberry (Sambucus ebulus).
American elderberry is well-suited for areas with hot summers and cold winters, making it ideal for USDA zones 3-9. It’s also the most common variety grown in North America. On the other hand, European elderberry prefers milder climates and is suitable for USDA zones 5-8. Black elderberry is more sensitive to heat and is typically grown in cooler regions, such as USDA zones 4-7.
To choose the right variety for your climate, consider the average temperature, humidity, and sunlight hours in your area. Check the plant’s specific growing requirements and select one that matches your local conditions. For example, if you live in a hot and dry region, American elderberry might be a better choice due to its drought tolerance. By selecting an elderberry variety that thrives in your climate, you’ll be more likely to enjoy a bountiful harvest of these nutritious fruits.
Growing Elderberries: Tips and Tricks
Getting started with growing elderberries from scratch can be intimidating, but don’t worry, we’ve got you covered with expert advice on choosing the right variety and soil conditions.
Preparing the Soil for Elderberry Plants
Before planting elderberry plants, it’s essential to prepare the soil for optimal growth. Elderberries prefer slightly acidic to neutral soil with a pH between 6.0 and 7.0. To check the pH level of your soil, you can purchase a DIY kit or consult a local nursery. If your soil is too alkaline, add elemental sulfur or peat moss to lower the pH.
Fertilization is another crucial step in preparing the soil for elderberry plants. Use a balanced fertilizer with a 10-10-10 N-P-K ratio and follow the manufacturer’s instructions for application rates. You can also mix in compost or well-rotted manure to provide essential nutrients. For example, adding 2-3 inches of compost around the base of each plant will improve soil structure and fertility.
Mulching is a simple yet effective way to retain moisture, suppress weeds, and regulate soil temperature. Apply a 2-3 inch layer of organic mulch like wood chips or straw around the plants, keeping it a few inches away from the stems. This will help create a healthy environment for your elderberry plants to thrive in.
Watering and Pruning Techniques for Healthy Growth
Proper watering and pruning techniques are essential for healthy growth and fruit production of elderberry plants. Elderberries require consistent moisture levels, especially during their first year after planting. Aim to provide about 1 inch of water per week, either through rainfall or irrigation. However, be cautious not to overwater, as this can lead to root rot and other problems.
Pruning is another crucial aspect of maintaining healthy elderberry plants. Prune your bushes in late winter or early spring, removing any dead or damaged branches. This will help maintain the bush’s shape and promote new growth. Remove any weak or spindly shoots, cutting them back to about one-third of their length. This will encourage bushy growth and more fruit production.
Regular pruning also helps control the plant’s size and encourages more upright growth. When pruning, make clean cuts just above a bud or leaf node, using sharp, sterile tools to prevent spreading diseases. By following these watering and pruning techniques, you’ll be well on your way to growing healthy, productive elderberry bushes that provide a bountiful harvest of delicious fruit.
Harvesting and Processing Elderberries
Now that you’ve harvested your elderberries, it’s time to process them into a usable form, whether for cooking, medicinal use, or preserving. Let’s dive into the steps involved in extracting their valuable benefits.
When to Harvest Elderberries for Optimal Flavor and Nutrition
When to Harvest Elderberries for Optimal Flavor and Nutrition
The ideal time to harvest elderberries is crucial in ensuring you get the best flavor and nutritional value from your homegrown plants. The first step is to observe the color change of the berries, which usually occurs around late summer or early fall. However, it’s essential to check for ripeness by gently tugging on a few stems; if the berries come off easily, they’re ready.
Berries that are ripe will be deep purple in color and have a sweet, slightly tart taste. If you notice any green or unripe berries, wait another day or two before harvesting. Machine harvesting can sometimes damage the delicate berries, leading to bruising and reduced flavor, so it’s often best to stick with hand-picking. Additionally, machine harvesting may not capture the full spectrum of nutrients present in the ripest berries.
When harvesting, use clean equipment to avoid contaminating your berries with bacteria or other microorganisms. For optimal nutrition, try to harvest your elderberries at dawn or early morning when they are still cool from the night’s dew. This can help preserve their antioxidants and other beneficial compounds.
Making Elderberry Syrup, Jam, and Wine at Home
Making elderberry syrup, jam, and wine at home is a fun and rewarding process that allows you to preserve the bounty of your homegrown plants. With a few simple ingredients and some basic equipment, you can create delicious and nutritious products for yourself and your loved ones.
To make elderberry syrup, start by combining 2 cups of fresh or frozen elderberries with 1 cup of granulated sugar and 1 quart of water in a saucepan. Bring the mixture to a boil, then reduce heat and simmer for 30-40 minutes, or until the berries have broken down and the liquid has thickened slightly. Strain the syrup through a cheesecloth or fine-mesh sieve into clean glass bottles.
For jam, use the same berry mixture as above, but add an additional 1/4 cup of sugar per 2 cups of berries. Cook the mixture to the gel-point (220°F) and can using a water bath sterilization method. To make wine, combine 3-4 lbs of fresh elderberries with 1 gallon of boiling water, then let steep for 24-48 hours before straining and adding sugar, yeast, and other ingredients.
Sterilizing your equipment is crucial when making these products to avoid contamination and spoilage. Wash all equipment in hot soapy water, then rinse thoroughly and dry with clean towels. Store your finished syrups, jams, and wines in a cool, dark place to preserve their flavor and nutritional value for up to 6 months.
When it comes to storing your homemade elderberry products, remember that they will continue to ferment and develop flavor over time. Check the texture and consistency of your syrup or jam periodically and rebottle as needed. For wine, use an airlock to allow the yeast to breathe while keeping contaminants out. With proper storage and handling, you can enjoy your homegrown elderberries all year round.
The Medicinal Properties of Elderberries
You’ve probably heard that elderberries are a powerhouse of health benefits, but did you know they’re also packed with antioxidants and have anti-inflammatory properties to help fight off illness?
Elderberry Antiviral and Antibacterial Effects
Elderberries have been scientifically proven to possess potent antiviral and antibacterial properties, making them an attractive natural remedy for various health issues. Studies have shown that elderberry extracts can inhibit the replication of influenza virus, reducing the severity and duration of flu symptoms. This is particularly significant during peak flu seasons when antibiotics are ineffective against viral infections.
In addition to their antiviral effects, elderberries also exhibit antibacterial properties, which can help combat bacterial infections such as strep throat, urinary tract infections (UTIs), and even certain types of pneumonia. The flavonoids present in elderberries, particularly anthocyanins and quercetin, are responsible for these antimicrobial activities.
To harness the antiviral and antibacterial effects of your homegrown elderberries, you can try making a syrup or jam using fresh berries. Take 1-2 tablespoons of this remedy daily during peak cold and flu seasons to support immune function and potentially reduce the severity of symptoms. However, please note that while elderberry extracts are generally considered safe, it’s essential to consult with a healthcare professional before using them as a treatment for any medical condition.
Using Elderberries for Cold and Flu Relief
Elderberries have been used for centuries to alleviate cold and flu symptoms, and their potential benefits are backed by scientific research. The berries contain a unique combination of anthocyanins and flavonoids that give them potent anti-inflammatory properties. These compounds help reduce the severity of cold and flu symptoms by blocking the replication of viruses.
Studies have shown that elderberry extract can significantly shorten the duration of flu-like illnesses, with one study demonstrating a reduction in recovery time from 3-4 days to just 2-3 days. The berries also exhibit antiviral properties, which help prevent the spread of viruses and alleviate congestion, fever, and sore throat.
To harness the power of elderberries for cold and flu relief, you can try making an elderberry syrup or infusion by simmering the dried berries in water with a sweetener like honey. Take 1-2 tablespoons of this remedy up to three times a day as needed. Alternatively, look for elderberry supplements or lozenges at your local health food store.
When using elderberries, be aware that they may interact with certain medications, such as diabetes drugs and blood thinners. Consult with a healthcare professional before taking any new supplement, especially if you’re already on prescription medication.
Incorporating Elderberry Benefits into Your Daily Life
Now that you’ve harvested your homegrown elderberries, let’s talk about how to incorporate their amazing benefits into your daily routine in simple and delicious ways.
Cooking with Elderberries: Recipes and Ideas
Elderberries add natural sweetness and depth to both sweet and savory dishes. To make elderberry syrup, combine 2 cups of fresh or frozen berries with 2 cups of water in a saucepan. Bring the mixture to a boil, then reduce heat and simmer for 30-40 minutes. Strain the mixture through a cheesecloth or fine-mesh sieve into a clean glass bottle. Store it in the fridge for up to two weeks.
When using elderberry syrup in baked goods, consider adding a small amount (about 1/4 teaspoon per loaf) to muffins, cakes, and breads for added flavor. You can also use it as a substitute for some of the sugar in recipes. For example, try making elderberry oatmeal cookies by mixing 1 tablespoon of syrup with rolled oats, flour, eggs, and spices.
In savory dishes, elderberries pair well with roasted meats, such as chicken or beef. Try adding a few tablespoons of chopped fresh or dried elderberries to your favorite BBQ sauce recipe for an authentic twist on traditional flavors.
Using Elderberries for Skincare and Beauty Treatments
Using elderberry extracts or products in skincare routines can be incredibly beneficial for your skin. Rich in antioxidants, elderberries have the power to combat free radicals and protect your skin from damage caused by environmental stressors and pollution. This means that regular use of elderberry-infused skincare products or homemade masks can help reduce fine lines, wrinkles, and age spots.
But that’s not all – elderberries are also known for their anti-inflammatory properties, making them a natural soother for irritated skin. Whether you’re dealing with acne, eczema, or redness, elderberry extracts can provide relief and calm the skin.
For a soothing face mask, try mixing 1 tablespoon of elderberry jam with 2 tablespoons of honey and applying it to your face for 10-15 minutes before rinsing off. For an exfoliating body scrub, blend 2 tablespoons of sugar or salt with 2 tablespoons of coconut oil and 1 teaspoon of elderberry powder. Massage onto skin in circular motions, then rinse off with warm water.
Environmental Benefits and Sustainably Growing Elderberries
As you continue on your journey of cultivating elderberry plants, let’s dive into the wonderful benefits for our planet that come from growing these remarkable shrubs sustainably. You’ll learn how to make a positive impact on the environment.
The Carbon Footprint of Buying vs. Growing Elderberries
When it comes to elderberry benefits, not only do we reap the rewards of these nutrient-dense berries, but also consider the environmental impact of sourcing them. One crucial aspect is the carbon footprint associated with buying commercial elderberry products versus growing our own at home.
Growing elderberries at home can significantly reduce transportation emissions, as you eliminate the need for long-distance shipping and distribution. A single bag of dried elderberries may travel thousands of miles from farm to store, producing substantial greenhouse gas emissions. In contrast, harvesting berries from your own garden produces zero transportation-related emissions.
Additionally, buying commercial products contributes to packaging waste – plastic containers, cellophane bags, and cardboard boxes all contribute to our waste streams. When growing at home, you can forage or harvest your berries directly into a basket or container, reducing packaging waste by up to 100%. By choosing to grow elderberries in your own garden, you not only save resources but also create an opportunity to minimize waste and lower your carbon footprint.
Sustainable Practices for Growing Elderberries at Home
When growing elderberries at home, incorporating sustainable practices is essential for not only reducing your environmental footprint but also ensuring a healthy and thriving plant. Start by implementing a rainwater collection system to conserve water and reduce your dependence on municipal supplies. This can be as simple as installing a gutter system or setting up a large barrel to collect and store rainwater for irrigation.
Composting is another crucial aspect of sustainable gardening, allowing you to recycle kitchen scraps and yard waste into nutrient-rich fertilizer for your elderberries. Consider creating a compost pile or bin in a corner of your garden, adding layers of “green” materials like food waste and grass clippings to “brown” materials like leaves and twigs.
To minimize chemical usage, opt for natural pest control methods whenever possible. For example, introducing beneficial insects like ladybugs or lacewings can help keep aphids and other pests in check without the need for pesticides. Be mindful of your local ecosystem by choosing elderberry varieties that are native to your area and selecting growing conditions that promote biodiversity. By adopting these sustainable practices, you’ll be well on your way to creating a thriving homegrown elderberry garden that benefits both you and the environment.
Conclusion: Maximizing Your Elderberry Harvest
As we wrap up our journey through elderberry benefits, let’s discuss how to get the most out of your homegrown harvest, from preparation to preservation.
Recap of Key Takeaways
As we wrap up our journey to maximizing your homegrown elderberry harvest, let’s recap the key takeaways from this article. By now, you should have a solid understanding of why growing and using elderberries at home is an excellent decision for your health and well-being.
Firstly, we discussed the numerous benefits of elderberries, including their high antioxidant content, anti-inflammatory properties, and ability to boost immunity. We also touched on how these benefits can be maximized by properly preparing and utilizing your harvested berries.
In terms of growing elderberries, it’s essential to choose a suitable location with full sun and well-draining soil. Regular pruning is crucial for maintaining the plant’s shape and promoting healthy growth. Additionally, we covered tips for monitoring and managing pests and diseases that may affect your plants.
Finally, to get the most out of your homegrown elderberries, remember to harvest them at the right time – typically in late summer or early fall when they’re ripe and have a deep purple color. By incorporating these key takeaways into your gardening routine, you’ll be well on your way to enjoying a bountiful and healthy elderberry harvest all year round.
Future Directions: Exploring New Uses and Varieties
As you continue to harvest and enjoy the bounty of your homegrown elderberries, we encourage you to think beyond traditional uses. The potential for innovation is vast, and by experimenting with different varieties and combinations, you may stumble upon new products or applications that could revolutionize the way we utilize this incredible fruit.
For instance, have you considered infusing elderberry into skin care products? Rich in antioxidants and flavonoids, elderberries hold great promise as a natural anti-inflammatory ingredient. You can try creating your own face masks, scrubs, or serums using pureed berries, oils, and other natural ingredients.
Another area ripe for exploration is the use of elderberries in fermentation processes. Their tart flavor and high pectin content make them an excellent addition to homemade wines, ciders, and even kombucha. Feel free to experiment with different varieties and blend ratios to create unique flavors.
We’d love to hear about your discoveries! Share your experiences, tips, and favorite recipes with the community to help inspire others to push the boundaries of what’s possible with elderberries. Who knows what amazing new uses you might uncover?
Frequently Asked Questions
Can I grow elderberries in containers or do they require a lot of space?
Yes, you can grow elderberries in containers if you have limited space. Choose compact varieties like ‘Adams’ or ‘York’, and make sure the container is at least 12-18 inches deep to accommodate the plant’s taproot.
How long does it take for elderberry plants to produce berries after planting?
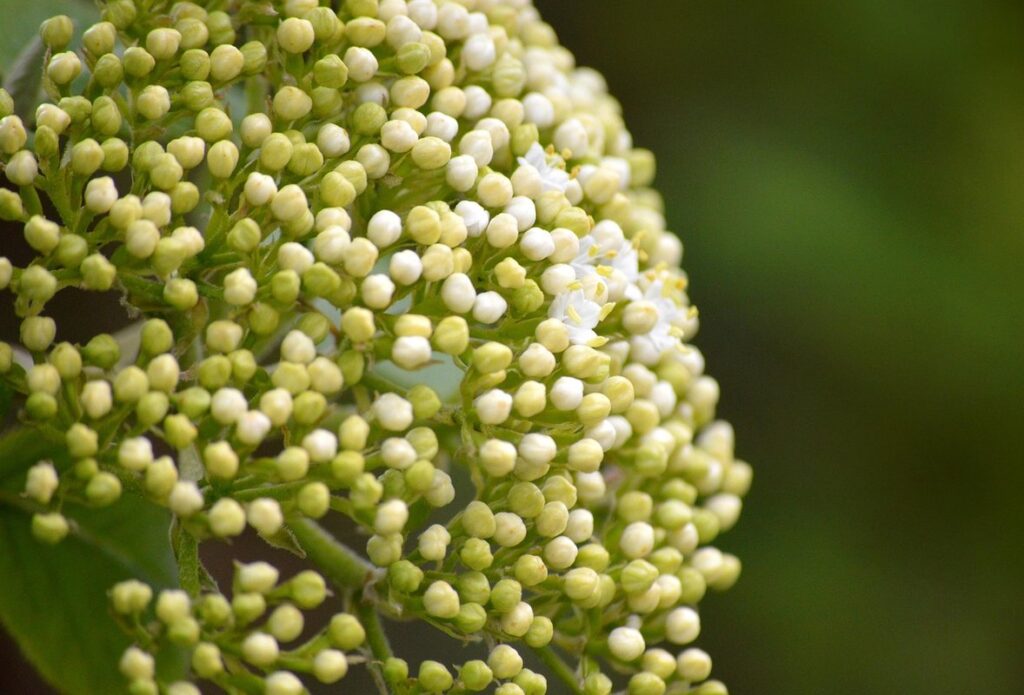
It typically takes 2-3 years for elderberry plants to mature and produce berries. However, they will start flowering in their first year, providing a beautiful display of purple flowers. With proper care, your plants should be producing an abundance of berries within 5-7 years.
Are there any specific elderberry varieties that are more resistant to pests or diseases?
Yes, some elderberry varieties are bred for resistance to specific pests and diseases. Look for cultivars like ‘Hicks’ or ‘Adams’, which have been developed for their disease-resistance traits. Additionally, growing multiple plants together can help promote a healthy ecosystem and reduce the risk of infestation.
Can I use elderberries in place of other fruits in my favorite recipes?
Yes! Elderberries can be used as a substitute for other fruits like blueberries or raspberries in many recipes. They have a similar flavor profile and texture, making them an excellent addition to jams, jellies, wines, and baked goods.
How do I preserve elderberry berries for long-term use?
To preserve elderberry berries for long-term use, you can dry them, freeze them, or make jam/jelly using sugar as a preservative. Drying is the most energy-efficient method, but freezing will help retain more of their nutritional value and flavor. When storing dried or frozen berries, keep them in airtight containers to maintain freshness and quality.