Are you ready to unlock the secret to growing delicious and fragrant dill in your garden? With its versatility in cooking, from pickling to pairing with fish, having a steady supply of fresh dill can elevate your meals to new heights. But, let’s face it – growing dill can be a challenge for even the most seasoned gardeners. That’s why we’ve put together this comprehensive guide on how to grow dill successfully.
In this article, we’ll cover everything you need to know about cultivating dill from seed to harvest, including ideal location and climate conditions, soil preparation, and tips for preventing common pests and diseases. Whether you’re a beginner or an experienced gardener looking to improve your skills, our guide will walk you through the process step-by-step, ensuring you end up with a bountiful crop of fresh dill that’s bursting with flavor.
Choosing the Right Location and Climate
When growing dill, choosing a location that receives plenty of sunlight and has well-draining soil is crucial for optimal growth. You’ll also want to consider the ideal climate conditions for your dill crop.
Understanding Dill’s Lighting Requirements
When it comes to providing dill with the right amount of light, it’s essential to understand its specific needs. Dill loves basking in full sun, so choose a location that receives direct sunlight for at least 6 hours a day. This will not only promote healthy growth but also encourage the plant to produce an abundance of fragrant foliage and delicate flowers.
While dill can tolerate partial shade, it may lead to weaker stems and reduced yield. If you’re growing dill in an area with intense heat, be mindful of potential issues such as leaf scorch or bolting (premature flowering). In regions with extreme sunlight, consider providing some afternoon shade to prevent damage.
To ensure your dill crop thrives, monitor its response to light conditions and adjust accordingly. If you notice the plant becoming leggy or developing brown tips, it may be a sign that it’s receiving too much direct sun. Conversely, if the foliage appears pale or weak, it could indicate insufficient light. By being attentive to your dill’s lighting needs, you’ll be well on your way to enjoying a bountiful harvest of this versatile herb.
Selecting a Suitable Climate for Dill
When it comes to selecting a suitable climate for dill growth, understanding its temperature requirements is crucial. Dill thrives best in temperatures between 65°F (18°C) and 75°F (24°C), making it an ideal crop for regions with mild summers. In areas with extreme heat or cold snaps, it’s essential to provide shade or protection to prevent damage.
In regions with harsh winters, dill is typically hardy in zones 2-6, where it can thrive outdoors year-round. However, even in these areas, it’s still important to protect plants from prolonged periods of cold weather. To care for your dill during hot snaps, consider providing afternoon shade or using mulch to retain moisture and regulate soil temperature.
For those living in regions with more temperate climates, dill can be grown year-round as a cool-season crop. Simply sow seeds in the spring or fall when temperatures are cooler, and enjoy a bountiful harvest of fresh, fragrant dill.
Preparing the Soil and Sowing Seeds
Before we dive into sowing those dill seeds, let’s make sure your soil is ready to give them a nutrient-rich foundation. A well-prepared bed sets the stage for a healthy and thriving crop.
Preparing the Soil for Dill
Before sowing dill seeds, it’s essential to prepare the soil for optimal growth. Dill prefers well-draining soil with a slightly acidic to neutral pH, ranging from 6.0 to 7.0. If you live in an area with heavy clay or sandy soil, amendments can help improve drainage and nutrient retention.
To test your soil pH, use a DIY kit or send a sample to a lab for analysis. Based on the results, add organic matter like compost or well-rotted manure to adjust the pH and nutrient levels. A 2-inch layer of mulch can also help retain moisture and suppress weeds.
Keep in mind that dill is sensitive to waterlogged soil, which can lead to root rot. Ensure your garden bed has good drainage by incorporating perlite, vermiculite, or sand into the soil mix. Aim for a balanced diet of nitrogen (N), phosphorus (P), and potassium (K) with a ratio of 10-10-10 NPK.
If you’re unsure about your soil’s condition, start with a small patch to observe its response before expanding to a larger area. With proper preparation, your dill crop will thrive and yield bountiful harvests.
Sowing Dill Seeds at the Right Time
When it comes to sowing dill seeds at the right time, one of the most crucial factors is the last frost date for your region. This determines when the soil has warmed up enough and the risk of frost has passed, allowing dill to germinate and grow successfully.
In areas with a short growing season or cooler climates, it’s best to start sowing dill seeds indoors 4-6 weeks before the last frost date. This will give them a head start on the growing season and allow for transplanting outside when the weather warms up. Sow seeds about 1/4 inch deep in seed starting mix and keep the soil consistently moist.
For regions with longer growing seasons, you can directly sow dill seeds outdoors after the last frost date. In areas like California or Florida, where the climate is warm year-round, you can even sow dill seeds from February to October. To ensure optimal growth, sow seeds about 1 inch apart and 1/4 inch deep in well-draining soil with full sun.
Remember to check the specific last frost date for your region before planting, as this will vary depending on your location.
Caring for Your Dill Plants
To ensure your dill plants thrive, it’s essential to provide them with proper care, including regular watering, pruning, and fertilization techniques. Let’s dive into these crucial tips next!
Watering and Irrigation Strategies
Water is essential for dill plants to grow, but overwatering can lead to root rot and other issues. To determine how often to water your dill plants, check the soil moisture by inserting a finger into the soil up to the first knuckle. If the soil feels dry, it’s time to water.
To make watering more efficient, consider implementing a drip irrigation system or mulching around the base of the plants. Drip irrigation delivers water directly to the roots, reducing evaporation and runoff. Simply attach a drip irrigation tube to your existing watering can or hose, and place the emitters near the base of each plant.
Mulching helps retain soil moisture by preventing water from seeping into the ground too quickly. Use a thin layer (about 2-3 inches) of organic mulch like straw or bark chips around the plants. Not only will this save you time and effort, but it’ll also help suppress weeds that compete with your dill for nutrients.
Keep in mind that dill plants prefer well-draining soil and can be sensitive to standing water, which can lead to root rot. Watering in the morning or early afternoon allows the plants to absorb the moisture throughout the day, reducing the risk of fungal diseases.
Fertilizing and Pruning for Maximum Growth
To maximize growth and yield from your dill plants, it’s essential to strike the right balance between fertilization and pruning. When it comes to fertilizing, choose an organic option whenever possible. Compost tea is a great choice for its high nutrient content and eco-friendly properties. Feed your dill plants with a balanced fertilizer during the initial stages of growth (first 2-3 weeks), followed by a high-potassium fertilizer to promote healthy foliage.
Pruning techniques play a crucial role in maintaining bushy growth while discouraging flowering. Remove any flower buds as soon as you notice them, and cut back your dill plant’s stem to about half its height every few weeks to encourage branching. Regular pruning will help direct the plant’s energy towards leaf production rather than seed development.
Some key takeaways from experienced gardeners include:
* Fertilizing during the cooler parts of the day (early morning or late afternoon) to prevent scorching the leaves
* Pruning your dill plants regularly, ideally once a week for optimal results
Managing Pests and Diseases
Pests and diseases can quickly ruin your dill crop, so it’s essential to know how to identify and address common issues before they take hold. We’ll walk you through effective management strategies.
Common Dill Pests and How to Control Them
Dill plants are susceptible to various pests that can damage their leaves and reduce yields. Among the most common dill pests are aphids, spider mites, and caterpillars.
Aphids are small, soft-bodied insects that feed on plant sap, causing curled or distorted leaves. To control aphid infestations, spray your dill plants with a mixture of water and mild dish soap. You can also introduce natural predators like ladybugs or lacewings to your garden to help manage the pest population.
Spider mites are tiny, spider-like insects that feed on plant sap, causing yellowing leaves and fine webbing. To control spider mite infestations, increase humidity around your dill plants by misting them regularly with water. You can also use neem oil or insecticidal soap to kill the mites.
Caterpillars are the larvae of butterflies and moths that feed on plant leaves, causing significant damage. To control caterpillar infestations, hand-pick the pests from your dill plants at night when they are most active, or use Bt (Bacillus thuringiensis) to kill them.
Regularly inspecting your dill plants for signs of pest activity and taking prompt action can help prevent infestations. By adopting these simple control methods, you can protect your dill crop from damage and ensure a bountiful harvest.
Preventing and Treating Fungal Diseases in Dill
Fungal diseases can be a significant threat to your dill crop, causing wilting, yellowing leaves, and reduced growth. Two common fungal issues affecting dill are powdery mildew and leaf spot. Powdery mildew appears as a white, powdery coating on the upper surface of leaves, while leaf spot presents with circular patches of dead tissue.
Preventing these diseases requires good gardening practices, such as providing adequate air circulation around your plants. This can be achieved by keeping them at least 12-18 inches apart and pruning nearby vegetation to allow for better airflow. Regular watering also helps prevent fungal growth, but avoid overwatering, which can lead to root rot.
To treat affected areas, you can use a fungicide specifically designed for garden use. However, it’s essential to identify the disease correctly before applying any treatment, as misuse of fungicides can cause more harm than good. In many cases, removing and disposing of infected leaves or stems is sufficient to prevent the spread of the disease.
Monitor your dill plants regularly, looking for signs of fungal growth, and take prompt action if you notice any issues.
Harvesting and Storing Your Fresh Dill
Now that you’ve enjoyed a bountiful harvest of fresh dill, it’s time to learn how to properly harvest and store your crop so it remains flavorful for as long as possible. We’ll walk you through the process step-by-step.
When to Harvest Dill for Optimal Flavor and Texture
When to harvest dill at the right time is crucial to capture its optimal flavor and texture. If you’re looking for a delicate, fresh flavor, it’s best to pick individual leaves as needed from the stems. This way, you’ll preserve the tender taste of dill without compromising its aroma.
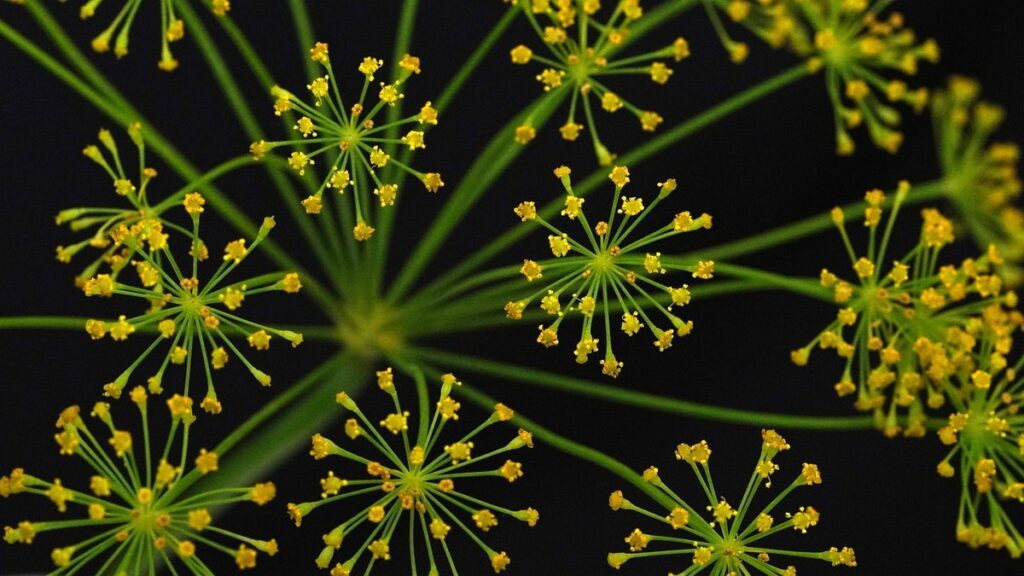
For most recipes, however, you’ll want to harvest entire stalks with their leaves intact. The optimal time to do this is when the stems are around 6-8 inches tall and the flowers have just started to form. At this stage, the leaves will be full-grown but still retain a crisp texture.
If you’re planning to freeze or preserve dill for later use, it’s best to harvest the stalks when they reach their maximum height of about 12-18 inches. This ensures that the plant has reached its peak flavor and aroma potential. Simply cut off the stems at the base with scissors or a sharp knife, leaving about an inch of stem attached to the leaves.
Tips for Preserving Fresh Dill
When you’ve harvested your fresh dill, it’s essential to preserve its flavor and aroma for later use. Fortunately, there are several methods to enjoy your bounty throughout the year. One of the most effective ways is freezing.
To freeze fresh dill, simply chop the stalks and place them in an airtight container or freezer bag. Frozen dill can be stored for up to 6 months and retains its flavor when added to soups, sauces, or salads. When you’re ready to use it, simply thaw the frozen dill by leaving it at room temperature.
Another option is dehydrating fresh dill using a food dehydrator or your oven on the lowest temperature setting. Once dried, the resulting flakes can be stored in airtight containers for up to 6 months and used as a substitute for fresh dill in recipes.
You can also make pickling spice blends by combining dried dill with other spices like mustard seeds, coriander seeds, and black peppercorns. This blend is perfect for creating homemade pickles or adding flavor to various dishes. To make the blend, simply mix the dried dill with your preferred spices in a 1:1 ratio and store it in an airtight container.
Troubleshooting Common Issues
Don’t worry if things aren’t growing as expected – we’ve got you covered with some common issues and solutions to get your dill plants back on track. Let’s troubleshoot together!
Identifying and Fixing Nutrient Deficiencies in Dill
Nutrient deficiencies are a common issue that can affect dill growth, resulting in stunted plants, yellowing leaves, and reduced yields. One of the most critical nutrients for dill is nitrogen, which is essential for leaf development and overall plant health. A nitrogen deficiency can cause pale green or yellowish leaves with purple discoloration on the stems.
To diagnose a nitrogen deficiency, look for these telltale signs: stunted growth, yellowing or browning of older leaves, and reduced flower production. If you suspect a nitrogen deficiency, test your soil pH to ensure it’s within the optimal range (6.0-7.0). You can also perform a simple nitrate test using a kit available at most gardening stores.
To correct a nitrogen deficiency, add a balanced fertilizer high in nitrogen (10-20-10 N-P-K ratio) according to package instructions. Repeat applications every 2-3 weeks until the plants show signs of recovery. It’s essential to note that excessive nitrogen can lead to weak stems and increased susceptibility to disease, so use caution when applying fertilizers.
Potassium is another critical nutrient for dill growth, responsible for overall plant health and resistance to disease. A potassium deficiency can cause yellowing or browning leaves with black tips, often accompanied by reduced yields and stunted growth.
Strategies for Reviving Failing Dill Plants
When you notice your dill plant struggling to thrive, don’t give up hope just yet. With some TLC and the right techniques, you can revive a failing dill plant and get it back on track.
Pruning is often an effective way to revive a struggling dill plant. By removing any weak or damaged stems, you allow the plant’s energy to focus on healthy growth. Start by cutting off any dead or dying leaves, making clean cuts just above a node (where a leaf meets the stem). This will encourage new growth and prevent the spread of disease.
Another strategy is repotting. If your dill plant has outgrown its container, transplant it into a larger pot with fresh, well-draining soil. Be sure to handle the roots gently when repotting, as they are delicate and can be easily damaged. Adjusting care routines can also help revive a failing dill plant. Check that you’re providing enough light (dill needs at least 4-6 hours of direct sunlight per day) and ensuring it’s getting adequate water (about 1-2 inches per week).
Frequently Asked Questions
How do I know if my dill crop is receiving too much or too little water?
Concise, valuable answer…
Make sure to check the soil moisture by inserting your finger into the soil up to the knuckle. If it feels dry, it’s time to water. However, if you notice water pooling around the base of the plant, it may be a sign that the soil is too wet and requires better drainage.
What can I do if my dill plants are developing yellow or droopy leaves despite proper care?
Concise, valuable answer…
This issue often arises due to nutrient deficiencies. Inspect your plants for signs of pests or diseases, which could also be causing the problem. If you’ve ruled out external factors, consider applying a balanced fertilizer to provide essential nutrients.
Can I grow dill in containers if my outdoor space is limited?
Concise, valuable answer…
Yes, growing dill in containers is an excellent option for small gardens or indoor spaces with sufficient light. Use a well-draining potting mix and choose a container that’s at least 6-8 inches deep to accommodate the plant’s taproot.
How often should I harvest my dill crop to encourage continuous growth?
Concise, valuable answer…
Harvest your dill regularly by pinching off individual stems or leaves as needed. This will not only prevent the plant from flowering but also stimulate new growth and prevent it from becoming leggy.
What can I do with a batch of harvested dill that’s past its prime or no longer fresh?
Concise, valuable answer…
While fresh dill has a short shelf life, you can still preserve it for later use. Chop the dill and store it in an airtight container in the freezer to keep it fresh for up to 6 months. Alternatively, dry the dill by tying it in small bunches and hanging them upside down, or make pickled dill using vinegar and spices.