Growing your own daffodils from seeds can be a truly rewarding experience. Not only do you get to enjoy the process of nurturing these beautiful blooms, but you also save money and have control over the quality of your flowers. However, growing daffodil seeds requires some expertise, and many gardeners are hesitant to try it due to concerns about germination rates and long-term sustainability.
In this comprehensive guide, we’ll walk you through every step of growing daffodils from seeds, covering everything from selecting the right variety to storage tips for long-term success. We’ll address common issues that can trip up even the most experienced gardeners, such as seed preparation and sowing techniques. By the end of this article, you’ll have a clear understanding of how to grow beautiful daffodil flowers with ease and enjoy them year after year.
Choosing the Right Variety
Now that you’ve got your daffodil seeds, it’s time to select a variety that suits your climate and desired bloom characteristics. This section will walk you through the process of making an informed decision.
Understanding Daffodil Types
Daffodils come in an astonishing array of varieties, each with its unique charm and characteristics. When selecting a daffodil type to grow from seed, it’s essential to consider the shape, size, color, and flowering period of the blooms. For instance, trumpet-shaped daffodils (Division 1) have a long, narrow trumpet that leads to a cluster of petals, often producing a sweet fragrance. These varieties are perfect for adding a pop of color to your garden in early spring.
Double-flowered daffodils (Division 2), on the other hand, feature multiple layers of petals surrounding a central core. These varieties tend to be more compact and are ideal for growing in containers or small spaces. Some popular examples of double-flowered daffodils include ‘Thalia’ and ‘Fortune’. When choosing a variety, keep in mind that some daffodils have different growth habits, such as ‘Thunbergii’, which has a more upright habit, while others, like ‘Mount Hood’, are more compact and clump-forming. By understanding the unique characteristics of each variety, you can select the perfect daffodil type to suit your garden’s needs.
Selecting Seed Sources
When it comes to growing daffodil seeds, selecting a reputable source for high-quality seeds is crucial. You can obtain daffodil seeds from various places, including online seed banks, local nurseries, and botanical gardens.
If you’re shopping online, make sure to research the seed bank’s reputation and read reviews from other customers. Look for companies that specialize in bulbous perennials like daffodils and have a clear description of their seed varieties. Some popular online seed banks include the Royal Horticultural Society’s Seed Bank and the American Beauties Seed Bank.
When visiting local nurseries or botanical gardens, ask the staff about their daffodil seed sources. Reputable nurseries often source seeds from reputable suppliers, ensuring they’re fresh and of high quality. Additionally, you can join online forums or social media groups for daffodil enthusiasts to connect with other growers who may be able to share tips on where to find reliable seed sources.
When selecting a seed source, consider factors like the seed’s origin, age, and storage conditions. Fresh seeds have a higher germination rate, so look for suppliers that offer recently harvested seeds or those stored properly in a cool, dry place.
Preparing the Seeds for Sowing
Before you can sow those beautiful daffodil seeds, it’s essential to prepare them properly to ensure they receive the right conditions for germination and growth. Let’s get started on this step-by-step process!
Scarification Methods
Breaking down seed dormancy is an essential step in preparing daffodil seeds for sowing. This process can be achieved through various scarification methods that help to weaken the outer seed coat and encourage germination. One common technique is nicking, where a small notch or slit is made on one end of the seed using a sharp tool or sandpaper. This slight wound stimulates the seed to break dormancy.
Another method involves soaking seeds in water or sulfuric acid for an extended period. Water soaking can be done by placing the seeds in a cup of room temperature water, usually between 24-48 hours. On the other hand, using sulfuric acid (a diluted solution) requires great care and caution as it is a strong chemical that can damage the seed if not handled correctly. The concentration should be no more than 5% to avoid harming the seeds.
For best results, experiment with both methods on separate sets of seeds to see which one works most effectively for your specific batch.
Seed Stratification
Before sowing your daffodil seeds, it’s essential to simulate winter conditions to trick them into thinking they’ve experienced a cold winter. This process is called seed stratification, and it’s a crucial step to ensure successful germination.
To achieve this, you can store the seeds in a paper bag or airtight container with some moist peat moss or vermiculite. Place the bag or container in the refrigerator at a consistent temperature between 32°F (0°C) and 40°F (4°C). The cold temperatures will break down any dormancy in the seeds, allowing them to germinate when conditions are right.
The duration of stratification varies depending on the daffodil variety. Some species may require as little as 30 days, while others may need up to 90 days or more. Check the specific requirements for your chosen variety or consult with a local nursery expert.
Once you’ve completed the stratification period, remove the seeds from the refrigerator and sow them in a well-draining seed starting mix at a depth of about 1-2 inches. Keep the soil consistently moist but not waterlogged, and provide adequate light for optimal germination.
Sowing and Caring for Daffodil Seeds
To successfully grow daffodils from seed, you’ll need to follow these essential steps: sowing seeds indoors or directly in the ground at the right time and providing proper care.
Optimal Sowing Conditions
When sowing daffodil seeds, it’s essential to provide them with optimal conditions for germination and growth. Daffodil seedlings prefer temperatures between 65°F to 75°F (18°C to 24°C), which is slightly cooler than other bulbs. If the temperature is too high, the seeds may sprout too quickly, leading to weak and spindly growth.
In terms of light exposure, daffodil seedlings need indirect sunlight for the first few weeks after sowing. Direct sunlight can cause the soil to dry out too quickly, especially if it’s a dense or heavy mix. A bright, sunny windowsill or under a shaded area with filtered light is ideal. As for soil requirements, choose a well-draining potting mix specifically designed for seed starting. Avoid using regular garden soil, as it may compact and prevent proper drainage.
When preparing the soil, make sure to add a balanced fertilizer according to the manufacturer’s instructions. Daffodil seedlings have delicate roots and require careful watering. Keep the soil consistently moist but not waterlogged, which can lead to root rot.
Watering and Fertilization Strategies
Watering young daffodil plants requires attention to detail. Overwatering can lead to rot and weak growth, while underwatering hampers their development. As a general rule of thumb, water seedlings when the top inch of soil feels dry to the touch. Aim for about 1-2 inches of rainfall or irrigation per week.
Fertilization is another crucial aspect of young daffodil plant care. Start with a balanced fertilizer containing equal amounts of nitrogen, phosphorus, and potassium (NPK). Dilute it according to package instructions to avoid burning the roots. Apply once a month during spring and summer when plants are actively growing.
Be cautious not to overfertilize, as this can lead to weak flowers and poor bulb development. A more balanced approach is to side-dress with a high-phosphorus fertilizer in early fall just before foliage dies back. This promotes healthy root growth for the following season.
Keep track of soil moisture by inserting your finger into the soil up to the first knuckle. Monitor your plants’ response to watering and adjust accordingly.
Troubleshooting Common Issues
Don’t worry if things don’t go as planned when growing daffodil seeds – we’ve got you covered. This section addresses common issues and offers troubleshooting solutions to get your seeds thriving again.
Dealing with Low Germination Rates
Dealing with low germination rates can be frustrating, especially when you’ve carefully prepared the soil and provided the right conditions. Before we dive into potential causes and solutions, it’s essential to understand that even high-quality daffodil seeds may not germinate at a 100% rate.
One common reason for low germination is poor seed quality. Unfortunately, not all seed suppliers are created equal, and some may sell old or damaged seeds. To minimize this risk, purchase seeds from reputable sources, such as specialty nurseries or online retailers that offer fresh stock. Inspect your seeds carefully before sowing; discard any that appear shriveled, cracked, or have visible signs of mold.
Another potential cause is insufficient scarification. Daffodil seeds often require a period of cold stratification to break dormancy. To promote germination, try soaking the seeds in water for 24-48 hours and then providing them with a cold (around 40°F/4°C) environment for several weeks. If you’re still experiencing difficulties, consider using a seed starter mix or adding a rooting hormone to your soil.
Keep in mind that even with optimal conditions, germination rates can vary depending on the specific daffodil variety and environmental factors. Be patient and persistent, as some varieties may take longer than others to germinate.
Identifying Pests and Diseases
When growing daffodil seeds, it’s essential to monitor for common pests and diseases that can affect seedlings. Aphids, for instance, are small, soft-bodied insects that feed on sap, causing curled or distorted leaves. To identify aphids, look for clusters of white eggs on the undersides of leaves or a sticky substance called honeydew on plant surfaces.
Slugs and snails are other common pests that can chew holes in daffodil seedling leaves and flowers. These nocturnal creatures leave behind silvery trails as they move around. Inspect your plants at night with a flashlight, or look for egg clusters on nearby surfaces during the day.
Powdery mildew is a fungal disease that causes a white, powdery coating to form on leaves. It thrives in humid conditions and can be controlled by improving air circulation and removing infected areas. Root rot, on the other hand, occurs when daffodil seedlings sit in waterlogged soil. To prevent this, make sure your potting mix drains well, and avoid overwatering.
Keep an eye out for these issues, as catching them early can help you save your seedlings from damage. Regularly inspect your plants, and take action promptly if you notice any signs of pests or diseases.
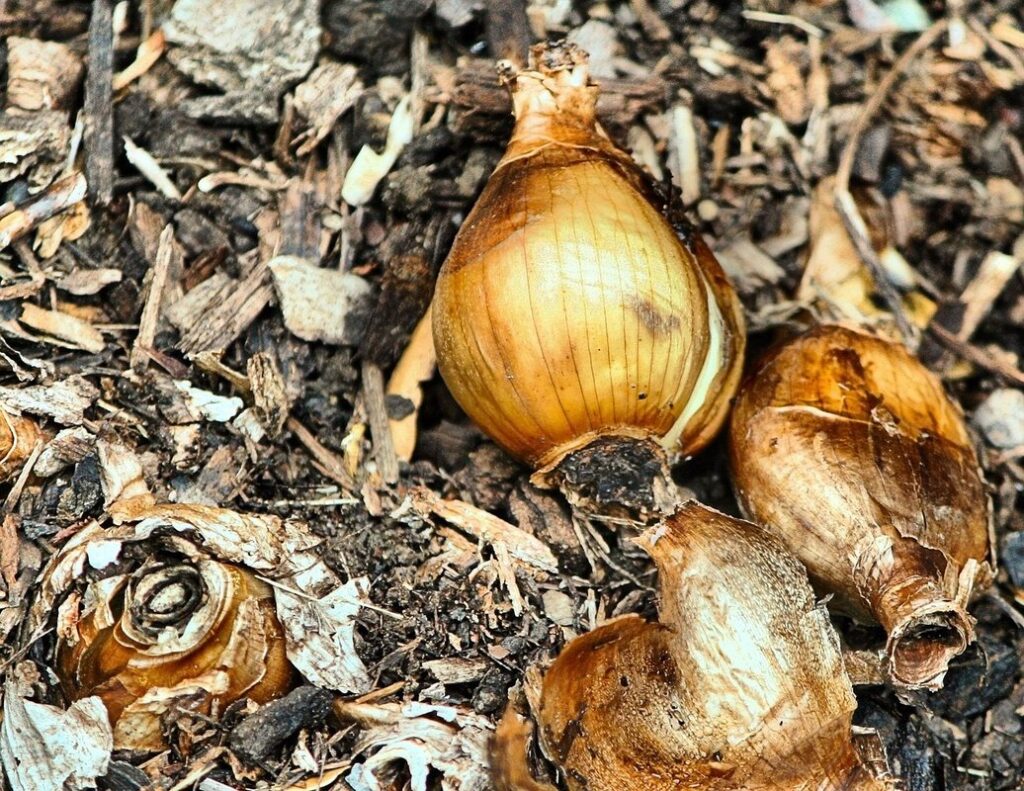
Harvesting and Storing Daffodil Bulbs
Now that your daffodils have bloomed, it’s time to harvest their bulbs, which can be replanted next season, and store them properly for a long-lasting display. Learn how to do this correctly.
Timing for Harvest
When it comes to digging up mature daffodil bulbs, timing is everything. You’ll want to wait until the foliage has begun to yellow and die back naturally, which can take anywhere from 6-8 weeks after blooming. This allows the bulb to store energy for next year’s growth.
Check the weather forecast beforehand, as you don’t want to dig up your bulbs during a period of heavy rain or extreme heat. Aim for a cooler, drier spell when the soil is workable but not waterlogged.
As a general rule, it’s best to dig up smaller bulbs (around 1-2 inches in diameter) in late summer to early fall, while larger bulbs (over 3 inches in diameter) can be left in the ground until spring. This allows them to continue growing and developing, ultimately producing more flowers.
Keep an eye on your bulb size and adjust your timing accordingly. With a little patience and planning, you’ll be able to enjoy beautiful blooms year after year from the same set of bulbs.
Storage Methods for Long-Term Sustainability
Proper storage of daffodil bulbs is crucial to maintain their health and ensure they remain viable for future plantings. After harvesting, allow the bulbs to air-dry in a warm, dry place with good ventilation. This process helps prevent rot and fungal diseases that can thrive in moist environments.
Once the bulbs are dry, it’s essential to label them accurately, including the variety name, date harvested, and any other relevant information. Store the labeled bulbs in a cool, dark place like a basement or attic. Avoid storing them near heating vents or direct sunlight, as this can cause moisture buildup and damage the bulbs.
The ideal storage temperature is between 40°F to 50°F (4°C to 10°C), which slows down metabolic processes and helps preserve the bulbs’ viability. Check on your stored bulbs periodically to ensure they remain dry and free from pests. By following these simple storage techniques, you can maintain healthy daffodil bulbs for years to come, ensuring a bountiful harvest of blooms in future seasons.
Frequently Asked Questions
What are the chances of successfully growing daffodils from seeds, especially for beginners?
Germination rates can be a concern when growing daffodil seeds. While success rates vary depending on factors like seed quality and storage, experienced gardeners often achieve 50-70% germination rates with proper care. To boost your chances, make sure to choose fresh seeds, follow optimal sowing conditions, and maintain consistent moisture levels during the germination period.
Can I use daffodil seeds that have been stored for a long time?
Yes, you can still use daffodil seeds that have been stored properly, but it’s essential to assess their viability before planting. Check the seed coat for signs of damage or mold and perform a simple water test to determine if they’re capable of germinating.
What are some common mistakes that can lead to low germination rates?
Low germination rates often result from incorrect storage, poor seed quality, or inadequate sowing techniques. Common mistakes include storing seeds in humid environments, exposing them to direct sunlight, and not providing sufficient moisture during the germination period. Be sure to research proper storage methods and follow recommended sowing procedures.
Can I grow daffodils from seeds indoors, or is it necessary to sow them outdoors?
While it’s possible to grow daffodil seeds indoors, this method can be more challenging due to limited light and temperature control. If you choose to sow indoors, use a seed starting mix and provide sufficient light (12-14 hours) at temperatures between 65°F to 75°F (18°C to 24°C). However, for optimal results, it’s recommended to sow seeds outdoors in their natural environment.
How do I know if my daffodil bulbs have successfully transitioned from seed to bulb?
After several years of proper care and nourishment, your daffodil plants should begin to form bulbs. This process typically occurs within 3-5 years after sowing. To confirm that your bulbs are developing correctly, carefully dig around the base of the plant in late summer or early fall, and inspect the underground bulb formation.