Are you ready to add a pop of color and vibrancy to your home with stunning croton plants? These beautiful, versatile plants are perfect for indoor spaces, but can be finicky to care for if you don’t know their needs. Selecting the right variety is just the beginning – did you know that some crotons thrive in bright light, while others prefer shaded areas? With so many options and potential pitfalls, it’s no wonder even seasoned plant enthusiasts get frustrated trying to grow these gorgeous plants.
In this article, we’ll break down everything you need to know to grow and care for thriving croton plants. From choosing the right variety to troubleshooting common issues like over-watering or under-fertilization, we’ve got expert tips and tricks to share with you. We’ll cover lighting, watering, fertilizing, and pruning – the secrets to keeping your crotons looking their absolute best. By the end of this article, you’ll be a croton-growing pro!
Choosing the Right Variety
When selecting a croton variety for your garden, consider factors such as color palette, leaf shape, and growth habit to ensure it suits your personal style. This helps narrow down your options.
Selecting a Healthy Plant
When selecting a croton plant, it’s essential to choose one that is healthy and vigorous from the start. A strong foundation will set your plant up for success and make it easier to care for in the long run.
Look for plants with dark green leaves that are thick and fleshy, rather than pale or thin ones. The stems should be sturdy and straight, without any signs of bending or drooping. Avoid plants with yellow or wilted leaves, as these can indicate stress or disease.
Consider the size of the plant in relation to your available space. If you have a small room or office, a compact or dwarf variety may be a better choice than a large, sprawling one. On the other hand, if you have plenty of room to spare, you can opt for a more mature or full-grown croton.
In addition to the physical characteristics, also think about the needs and preferences that will affect your plant’s care. For example, if you tend to forget to water your plants from time to time, look for varieties that are more forgiving of dry spells.
Understanding Croton Types
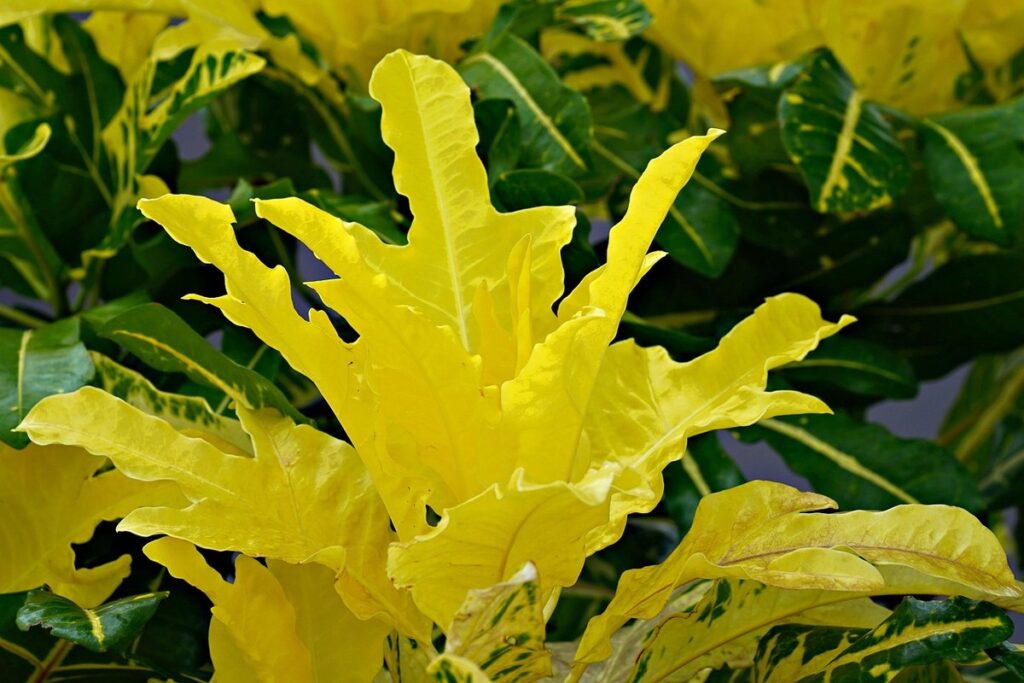
When it comes to choosing the right croton variety, understanding the different types is crucial. There are numerous varieties available, each with its unique characteristics and growth habits. For instance, the ‘Petra’ croton boasts stunning, narrow leaves that grow upright, creating a beautiful, compact shape. On the other hand, the ‘Reliance’ croton features broad, flat leaves that cascade down, making it an excellent choice for hanging baskets.
To identify these varieties, look for specific leaf shapes and growth patterns. For example, if you prefer a more compact plant with narrow leaves, ‘Petra’ is an ideal choice. If you want to add some drama to your space with cascading foliage, ‘Reliance’ could be the way to go. Some other popular varieties include ‘Flossia’, which has delicate, fern-like leaves, and ‘Dwarf’, a compact variety that’s perfect for small spaces.
When selecting a croton variety, consider the amount of light and care your plant will receive. Different varieties have varying light requirements, so be sure to choose one that fits your space and schedule.
Planting and Potting
When it comes to growing crotons, you’ll want to make sure you’re planting them correctly, including choosing a suitable pot size and soil type for optimal results. Let’s dive into the details of planting and potting your new croton friends!
Preparing the Soil
When it comes to growing croton plants, one of the most critical aspects is preparing the soil. Crotons thrive in well-draining soil that allows excess moisture to escape quickly, which helps prevent root rot and other problems associated with waterlogged soil.
To create a suitable environment for your croton plant’s healthy growth, start by selecting a potting mix specifically designed for tropical plants like crotons. Avoid using regular garden soil or mixes containing high amounts of organic matter, as these can retain too much moisture and cause issues for your plant.
Instead, look for a well-balanced potting mix that contains perlite, vermiculite, or sand to improve drainage. You can also create your own mix by combining 50% peat moss with 25% perlite and 25% regular soil. Mix the ingredients thoroughly before adding them to your container.
When preparing the potting mix, make sure it’s moist but not soggy. Crotons prefer a slightly acidic to neutral soil pH between 5.5 and 6.5. Use a soil test kit or consult with a local nursery for advice on testing the pH of your potting mix if needed.
Pot Size and Type
When it comes to growing crotons, choosing the right pot size and type is crucial for their optimal growth. A container that’s too small will lead to waterlogged soil, while one that’s too large may cause the roots to become water-stressed.
Optimal container sizes for crotons vary depending on the plant’s age and root system. For young plants (less than 1 year old), a pot size of around 6-8 inches deep is sufficient. As they mature, you can move them into larger pots with depths ranging from 10 to 14 inches.
In terms of material, crotons prefer well-draining containers made from terracotta or ceramic. Avoid using plastic or metal pots as they retain heat and moisture. If you’re repotting your plant, make sure the new container has drainage holes to prevent waterlogged soil.
When repotting your croton, gently remove it from its old pot and examine the roots. Trim any circling or damaged roots to promote healthy growth in the new pot. Place a layer of fresh potting mix at the bottom, followed by the plant’s root ball. Finally, add more mix around the base of the plant, leaving enough space for proper growth.
A good rule of thumb is to repot your croton every 2-3 years as it outgrows its container. This will ensure a healthy balance between root growth and soil quality.
Lighting and Temperature
When it comes to growing crotons, getting their lighting and temperature needs just right can be a bit tricky. Let’s explore how to create an ideal environment for your plants.
Understanding Light Requirements
When it comes to growing croton plants, understanding their light requirements is crucial for optimal growth and vibrant foliage. Bright indirect light is essential for these plants, as direct sunlight can cause the leaves to become scorched and develop brown edges. To achieve this balance, place your croton plant near an east- or west-facing window, or use sheer curtains to filter the direct sunlight.
The amount of light required also varies depending on the time of day and season. For example, in the summer months when the sun is at its strongest, it’s best to provide your croton with filtered shade during the peak hours (usually between 11 am and 3 pm). Conversely, in the winter when days are shorter, you can move the plant closer to a sunny window or use grow lights to supplement the natural light.
Keep an eye on your plant’s response to its environment, and adjust the light levels accordingly. If the leaves start to become too pale or lose their vibrant colors, it may be a sign that they need more light. On the other hand, if you notice scorching or browning of the leaves, it’s likely due to excessive direct sunlight.
Maintaining Optimal Temperatures
When it comes to growing crotons, maintaining optimal temperatures is crucial for their health and vitality. The ideal temperature range for these beautiful plants is between 65-75°F (18-24°C). If the temperature drops below 60°F (15°C), crotons may start to lose their leaves, while exposure to high temperatures above 80°F (27°C) can cause scorching and damage.
If you’re growing your croton indoors, it’s essential to provide some protection from extreme temperature fluctuations. You can use space heaters or air conditioning units to regulate the temperature in a small area, but be cautious not to create hotspots that can harm your plant. For example, if you have an air-conditioned living room with a temperature of 68°F (20°C), you can place your croton near a sunny window to take advantage of natural light while maintaining a comfortable temperature.
When growing outdoors in areas with varying climate conditions, choose a spot with filtered sunlight and protection from extreme temperatures. In areas with hot summers or cold winters, consider using shade cloth or bringing your croton indoors during the most severe months.
Watering and Humidity
To grow healthy crotons, it’s essential to understand how to provide them with the right amount of water and humidity. This section will guide you through the optimal watering and humidifying techniques for your plants.
The Importance of Proper Watering
When it comes to growing crotons, one of the most critical factors is proper watering. It’s easy to get caught up in the rhythm of watering every day or two, but this can quickly lead to disaster. Crotons are sensitive to both overwatering and underwatering, so striking a delicate balance is essential.
Signs that your croton is getting too much water include yellowing leaves, soft stems, and an overall soggy appearance. On the other hand, underwatered crotons will develop crispy leaves, droopy stems, and may even drop their leaves prematurely. So, how do you know when to water? A good rule of thumb is to check the top inch of soil for dryness. If it’s still moist, wait another day or two before watering again.
Factors like humidity and temperature can also affect your croton’s watering schedule. In high-humidity environments, you may need to reduce the frequency of watering to prevent overwatering. Conversely, in areas with low humidity, more frequent watering may be necessary. Keep an eye on your plant’s response and adjust accordingly. By paying attention to these subtleties, you can create a tailored watering schedule that meets your croton’s unique needs.
Maintaining Healthy Humidity Levels
Maintaining healthy humidity levels is crucial for croton plants, which thrive in environments with moderate to high humidity. Ideally, they prefer a relative humidity of 50-60%, which can be challenging to achieve indoors without proper care.
One simple way to increase the humidity around your crotons is through misting. You can use a spray bottle filled with water to lightly mist the leaves and surrounding air daily. This not only helps maintain the desired humidity level but also washes away dust and debris that may accumulate on the leaves, promoting healthy growth.
Another option is using a humidifier, which can be especially useful in arid environments or during dry winter months. Place the humidifier near your crotons, making sure it’s clean and well-maintained to prevent bacterial growth. You can also add plant-friendly essential oils like lavender or lemon to enhance the benefits of increased humidity.
Some plants release moisture into the air through transpiration, but this process may not be enough to maintain optimal humidity levels for crotons. By misting or using a humidifier, you’ll create an ideal environment that encourages robust growth and reduces stress on your plants.
Fertilizing and Pruning
To keep your croton looking its best, you’ll need to fertilize regularly and prune it throughout the growing season. Let’s dive into the specifics of how to do this successfully.
Nourishing Your Croton with Fertilizers
Fertilizing your croton is essential to promote healthy growth and maintain its vibrant colors. When it comes to choosing a fertilizer, you have two primary options: organic and synthetic. Organic fertilizers are derived from natural sources like fish emulsion, bone meal, or compost. These options release nutrients slowly, providing a steady supply of nourishment for your plant.
Synthetic fertilizers, on the other hand, contain fast-acting nutrients that can boost growth quickly. However, overuse can lead to burning your plant’s roots and causing more harm than good. If you opt for synthetic fertilizers, follow the instructions carefully and start with a weak solution to avoid shocking your plant.
Timing is crucial when applying fertilizers. For young crotons, use a balanced fertilizer (10-10-10) once a month during the growing season. As they mature, switch to a bloom booster (15-30-15) to promote colorful blooms. During the dormant season, skip fertilizing altogether or use a low-nitrogen, high-potassium formula to maintain root health.
Keep in mind that over-fertilization can be detrimental to your plant’s health. Monitor your croton’s response and adjust your fertilizer application schedule accordingly.
The Art of Pruning
Pruning your croton is an essential part of its care. Not only does it help maintain the plant’s shape and promote healthy growth, but it also plays a crucial role in preventing pest infestations.
When done correctly, pruning can encourage new growth, which not only enhances the plant’s appearance but also helps to remove any diseased or damaged areas. This is particularly important for crotons, as they are prone to pests like spider mites and mealybugs. Regular pruning will help to keep these pesky critters at bay by removing any weak or infested branches.
So, when should you prune your croton? The best time to prune is during the spring and summer months when the plant is actively growing. Simply remove any dead, diseased, or damaged branches using a pair of sharp, clean pruning shears. Make sure to cut just above a node (where the leaf meets the stem), as this will encourage new growth.
In terms of how much to prune, it’s essential not to overdo it. Only remove about one-third of the plant at any given time to avoid shocking the roots and causing unnecessary stress. By pruning your croton regularly, you’ll be rewarded with a lush, vibrant plant that’s less prone to pests and diseases.
Troubleshooting Common Issues
If you’re experiencing problems with your croton plants, don’t worry – we’ve got solutions to common issues that might be plaguing your leaves. Let’s troubleshoot together and get those beautiful blooms back on track!
Addressing Pests and Diseases
As you care for your croton plant, it’s essential to be aware of common pests and diseases that can affect its health. Mealybugs are one of the most prevalent pests that infest crotons, leaving behind a cottony residue on the leaves. Spider mites, on the other hand, cause fine webbing between the veins of the leaves.
Signs of mealybug infestation include white, waxy patches on the undersides of leaves and stems, while spider mite damage appears as yellowing or bronzing of leaves. To control these pests, isolate your plant to prevent further infestation, then spray it with neem oil or insecticidal soap according to the product’s instructions.
Root rot is a common disease that affects crotons, especially in overwatered conditions. Symptoms include soft, mushy stems and roots, as well as yellowing leaves. To treat root rot, reduce watering immediately and repot the plant in fresh potting mix. Leaf spot diseases like Cercospora canker cause small, circular lesions on the leaves. Regularly inspect your plant for signs of these issues and take prompt action to prevent their spread.
Handling Environmental Stressors
When growing crotons, it’s not uncommon for environmental stressors to take their toll on these beautiful plants. Temperature fluctuations, inadequate watering, and exposure to direct sunlight can all impact your croton’s health, leading to yellowing leaves, droopy stems, or even the dreaded brown tips.
One of the most common environmental stressors is temperature fluctuations. If your home is prone to drafts or has a large temperature swing between day and night, it may be causing your crotons undue stress. To mitigate this effect, try placing your plants away from windows, radiators, and air conditioning vents. Aim for a consistent temperature range between 65°F to 75°F (18°C to 24°C), as this will help your plant thrive.
Inadequate watering is another common issue that can cause stress to crotons. Over- or under-watering can lead to root rot, leaf drop, and other problems. To ensure you’re giving your plants the right amount of water, check the soil moisture by sticking your finger into the soil up to the first knuckle. Water only when the top inch of soil feels dry.
If your croton is already showing signs of stress, there are steps you can take to promote recovery. Start by adjusting its environment to a more stable temperature and humidity level. Prune any damaged leaves or stems to prevent the spread of disease and encourage healthy growth. With proper care and attention, your croton should be back on track in no time.
Conclusion
As we’ve reached the end of our croton-growing journey, let’s summarize the key takeaways and best practices you can apply to your own plant parenting adventures.
Recap of Key Takeaways
As you conclude your journey to grow thriving crotons, let’s recap the essential points covered in this guide. Remember that successful growth and maintenance of these beautiful plants rely on a few key factors.
Firstly, choose a variety suitable for your climate and provide adequate light – either direct or indirect – depending on the type. Make sure the soil is well-draining and rich in organic matter to prevent root rot. Water carefully, allowing the top 1-2 inches of soil to dry out between waterings.
Regular pruning is crucial to maintain shape, promote healthy growth, and encourage new foliage. Remove any dead or damaged leaves to prevent the spread of disease. Fertilize your croton regularly with a balanced fertilizer during the growing season, but be cautious not to over-fertilize.
Keep an eye out for common pests like mealybugs and spider mites, and treat promptly if you notice any issues. With proper care and attention, your crotons will reward you with vibrant colors, lush foliage, and year-round beauty. By following these key takeaways, you’ll be well on your way to becoming a croton expert!
Encouraging Future Growth
As you’ve successfully grown and cared for your croton plant, it’s essential to keep in mind that with proper maintenance, this vibrant beauty will continue to thrive. One of the most rewarding aspects of cultivating a thriving croton is watching it grow and adapt to its environment. With time, patience, and attention to detail, you’ll be amazed at how quickly your plant can transform from a small sapling into a stunning statement piece.
To encourage future growth, make sure to repot your croton every year or two, providing fresh soil and a larger container as it outgrows its current one. This simple act of care will give your plant the room it needs to expand its root system and continue producing new leaves. Don’t forget to fertilize regularly, using a balanced fertilizer during the growing season to promote healthy growth.
As you gaze at your thriving croton, remember that its beauty is not just skin-deep – with proper care, this versatile plant can live for up to 5 years or more in ideal conditions. So, continue to nurture and enjoy your croton, and it will reward you with countless hours of joy and relaxation.
Frequently Asked Questions
How can I ensure my newly acquired croton plant survives the initial transplant shock?
Make sure to choose a pot that is only slightly larger than the original one, as this will reduce stress on the roots. Water your croton thoroughly after repotting and maintain consistent humidity levels for the first few weeks.
What are some common signs of over-watering in croton plants?
Look out for soft or mushy leaves, yellowing or browning edges, or a general droopy appearance. If you notice any of these symptoms, adjust your watering schedule to ensure your plant isn’t receiving too much moisture.
How often should I fertilize my croton plant during the growing season?
Fertilize your croton every 4-6 weeks with a balanced fertilizer (20-20-20) during the active growth period. Dilute the fertilizer to half the recommended strength to prevent burning your plant’s roots.
Can I grow crotons in containers indoors if I don’t have a sunny windowsill?
Yes, you can still grow crotons in containers indoors, but choose varieties that are more tolerant of low light conditions. Keep in mind that even with filtered sunlight, indoor growth may be slower than outdoor growth.
How do I prevent pests like spider mites or mealybugs from infesting my croton plant?
Regularly inspect your plant for signs of pests and maintain a clean growing environment by removing any debris or dead leaves. Use neem oil or insecticidal soap as a preventative measure, especially if you live in an area prone to pest infestations.