Growing your own corn plants from popping seeds can be a fun and rewarding experience, especially when you get to enjoy the fruits of your labor. But did you know that growing corn from seed is also an excellent way to save money on store-bought seeds? Not only will you have control over the quality and type of seeds you use, but you’ll also develop a deeper appreciation for the process of cultivating your own food.
In this article, we’ll take you through the step-by-step process of growing a corn plant from popping seeds. We’ll cover everything from preparing the soil to providing optimal care conditions that will ensure a bountiful harvest. By following our comprehensive guide, you’ll be well on your way to growing healthy and thriving corn plants that are perfect for snacking, cooking, or even sharing with friends and family.
Choosing the Right Popcorn Variety
When growing popcorn from seed, you’ll want to choose a variety that’s well-suited for your climate and desired harvest size. With so many options available, selecting the right one can be overwhelming.
Understanding Popcorn Types
When it comes to growing corn from popping corn seeds, understanding the different types of popcorn is crucial. You might be wondering why this matters – after all, isn’t all corn the same? Not quite! The three main types of corn are sweet corn, dent corn, and flint corn.
Sweet corn, also known as sugar corn or soft corn, is the type you typically find in supermarkets. It’s high in moisture content and has a softer kernel that makes it perfect for boiling or grilling. However, its soft texture means it won’t pop well, so it’s not suitable for planting if you want to grow popcorn.
Dent corn, on the other hand, is a more versatile type of corn with a hard outer layer and a soft inner core. Its “dent” or depression in the center makes it ideal for animal feed, ethanol production, and even human consumption as cornmeal. While dent corn can be used for popping, its lower moisture content means it won’t yield large kernels.
Flint corn, also known as hard corn, has a hard outer layer and no dent. It’s high in starch and low in moisture, making it perfect for popping. Flint corn is the type you want to use if you’re looking to grow popcorn from seed. Its hard kernel resists moisture and heat well, allowing it to explode into the fluffy white kernels we all love.
Selecting Heirloom or Hybrid Varieties
When it comes to selecting popcorn varieties, you have two main options: heirloom and hybrid. Understanding the benefits and drawbacks of each type can help you choose the best one for your needs.
Heirloom varieties are often preferred by gardeners who want to grow a specific type of corn that has been passed down through generations. These seeds are open-pollinated, meaning they produce seeds that retain their genetic traits, allowing you to save and replant them year after year. Heirloom popcorns can offer unique flavors and textures, but they may require more maintenance and care.
Hybrid varieties, on the other hand, are bred for specific characteristics such as high yield or disease resistance. They often produce higher yields and have better germination rates than heirloom varieties, making them a popular choice among commercial farmers. However, hybrid seeds typically do not retain their genetic traits, so you won’t be able to save and replant the seeds.
Consider your growing goals and preferences when selecting between heirloom and hybrid popcorn varieties. If you want to grow a specific type of corn with unique characteristics, heirloom might be the better choice. But if you’re looking for high yields and easier maintenance, hybrid could be the way to go.
Preparing the Soil for Corn Planting
Before you start sowing your popping corn seeds, it’s crucial to prepare the soil properly to ensure a healthy and thriving corn plant. Let’s dive into the details of how to get your soil ready for planting!
Testing and Amending Your Soil
Testing and amending your soil is a crucial step before planting corn. Corn requires a balanced nutrient profile and optimal pH levels to grow well. A soil test will help you determine if your soil needs amendments to support healthy corn growth.
A standard soil test usually includes pH levels, nutrient analysis, and contamination testing. For corn, the ideal pH range is between 6.0 and 7.0. If your soil’s pH level is too high or too low, it can lead to nutrient deficiencies and poor plant growth. A common issue in many soils is phosphorus deficiency, which can hinder corn’s ability to produce tassels and ears.
To correct these issues, you’ll need to amend your soil with the necessary nutrients. For example, if your soil test shows a high pH level, adding elemental sulfur or aluminum sulfate can help bring it down. Similarly, if your soil lacks phosphorus, add a balanced fertilizer containing this nutrient. You can also add compost or manure to improve overall soil fertility and structure.
Before making any amendments, be sure to follow the recommended rates for each product to avoid over-fertilizing, which can damage your corn plants. Regularly testing your soil as you plant different crops will help you refine your understanding of its needs and optimize your fertilizer application.
Adding Organic Matter and Fertilizers
Adding organic matter and fertilizers is an essential step in preparing your soil for corn planting. This process helps improve soil structure, fertility, and overall health, which are crucial for optimal corn growth. You can start by incorporating compost into your soil. Compost is a rich source of nutrients that will provide your corn plants with the necessary energy to grow.
When using compost, mix it well with the top 6-8 inches of soil before planting your corn seeds. If you’re short on time or space to create your own compost, consider using manure tea instead. Manure tea is a liquid solution made by steeping animal manure in water, and it’s an excellent alternative to synthetic fertilizers.
Fertilizing your corn plants can be a bit tricky, but the key is to provide them with the right amount of nutrients at the right time. A balanced fertilizer that contains nitrogen (N), phosphorus (P), and potassium (K) is ideal for corn growth. However, it’s essential to avoid over-fertilizing, as this can lead to weak stalks and reduced yields.
Sowing Popping Corn Seeds
To successfully grow a corn plant from popping corn seeds, you’ll need to carefully prepare the soil and sow the seeds at the right depth. Let’s get started with sowing those seeds!
Timing and Spacing Your Planting
When it comes to sowing popping corn seeds, timing and spacing are crucial for a bountiful harvest. In temperate climates, it’s best to sow the seeds when the soil has warmed up to at least 55°F (13°C). This is usually around late spring or early summer, depending on your location.
For optimal growth, plant popping corn seeds about 1 inch deep and 6-8 inches apart in rows that are 3 feet apart. If you’re using a square foot garden bed, simply sow one seed every 6-8 inches within the 12-inch square space. This will give each plant enough room to spread its roots without overcrowding.
Keep in mind that popping corn is a cool-season crop and does best when there’s ample moisture and sunlight. Avoid planting in areas with standing water or where water tends to collect, as this can lead to rot and other issues. By following these simple guidelines, you’ll be well on your way to growing delicious popping corn from seed.
Cover Cropping and Companion Planting
When growing corn plants from popping corn seeds, it’s essential to consider the health of your soil and minimize pests. This is where cover cropping and companion planting come into play.
Cover cropping involves planting a crop between harvests or seasons to protect and enrich the soil. For example, you can plant radishes, oats, or rye in the off-season to prevent erosion and add nutrients to the soil. These crops help to break up compacted soil, suppress weeds, and even attract beneficial insects.
Companion planting involves pairing different plants together to enhance growth and deter pests. Some popular companion plants for corn include beans, squash, and marigolds. Beans provide nitrogen, while squash spreads its large leaves to shade the soil, preventing moisture loss. Marigolds repel nematodes and other pests that target corn.
To implement these techniques effectively, make sure to research which cover crops and companion plants work best in your climate and region. Plant them according to their specific requirements, usually about 8-10 weeks before sowing your popping corn seeds. This will allow the soil to benefit from the added nutrients and protection as you grow your corn plant from seed.
Germination and Seedling Care
Now that you have your seeds popping, it’s time to move on to germination and seedling care – a crucial step in successfully growing your corn plant. This section will walk you through what to do next.
Monitoring for Moisture and Temperature
Monitoring temperature and moisture levels is crucial for promoting healthy germination. Corn seeds typically require a consistent soil temperature between 70°F to 85°F (21°C to 30°C) for optimal germination. To achieve this, ensure the area where you’re growing the corn plant receives sufficient direct sunlight or use grow lights if needed.
Maintain adequate moisture levels by keeping the soil consistently moist but not waterlogged. Water gently but thoroughly after sowing the seeds and repeat the process when the top inch of soil feels dry to the touch. Avoid overwatering, as this can lead to fungal growth that might harm the seedlings.
For optimal germination, it’s also essential to monitor for temperature fluctuations. Corn seeds are sensitive to extreme temperatures, so ensure your growing area remains between 60°F and 90°F (15°C and 32°C) during the day. Overnight temperatures should not drop below 55°F (13°C).
To keep track of temperature fluctuations, consider investing in a thermometer. You can also observe changes in plant growth or seedling behavior to determine if your growing environment is conducive for germination.
Providing Support and Protecting from Pests
As you’ve successfully germinated and sown your popping corn seeds, it’s essential to provide support for young corn seedlings and protect them from common pests. At this stage, the delicate stalks are vulnerable to damage, which can hinder their growth and overall yield.
To prevent damage from raccoons, deer, or other wildlife, consider using physical barriers like 3-foot-tall chicken wire mesh around your plants. This will give them enough space to grow without being easily accessible to these pests. Make sure the mesh is buried at least 1 foot underground to prevent burrowing animals from digging underneath.
Protecting against aphids and other insects requires a different approach. Regularly inspect your seedlings for signs of infestation, such as curled or distorted leaves, sticky honeydew droplets, or actual aphid colonies. Use neem oil or insecticidal soap to control these pests, making sure to follow the product’s instructions carefully.
By taking proactive measures to support and protect your young corn seedlings, you’ll set them up for a healthy growth trajectory, ultimately yielding a bountiful harvest of homegrown corn.
Fertilization and Pruning for Optimal Growth
Now that your corn seedlings are growing, let’s talk about fertilizing and pruning to give them an extra boost of energy and help them reach their full potential. This is crucial for optimal growth and a bountiful harvest.
Feeding Your Corn with Natural Fertilizers
When it comes to fertilizing your corn plant, you want to choose natural options that promote healthy growth without harming the environment. One effective way to do this is by using fish emulsion as a liquid fertilizer. This type of fertilizer is made from the remains of small fish and is rich in nitrogen, phosphorus, and potassium – essential nutrients for corn growth.
Another great option is bone meal, which is derived from animal bones and is high in phosphorus. Phosphorus is crucial for root development and flower formation, making it an excellent choice for corn plants that need to produce ears of grain. You can also use kelp powder as a natural fertilizer, which is made from dried seaweed and is rich in micronutrients.
To use these natural fertilizers effectively, mix them according to the package instructions and apply them around the base of your corn plant every 1-2 weeks during the growing season.
Pruning Techniques for Maximum Yield
Pruning and training corn stalks is an essential step to maximize yield and promote healthy growth. Regular pruning helps control the plant’s size, allowing it to focus its energy on producing more kernels rather than sprawling outwards. By removing lower leaves and weak stalks, you improve air circulation, reducing the risk of fungal diseases.
To prune your corn plant effectively:
* Remove any damaged or diseased leaves to prevent the spread of disease.
* Thin out weak or spindly stalks, leaving only the healthiest ones.
* Cut back tall stalks to about 6-8 inches from the ground to promote bushy growth.
* Remove any suckers (shoots that grow from the base of the plant) as they can divert energy away from the main stalk.
Pruning also helps increase sunlight penetration, which is crucial for kernel development. By training your corn plant to grow in a more upright position using stakes or trellises, you can promote even growth and improve yields. Regular pruning will become second nature once you see the benefits it brings to your corn harvest!
Pest Control and Disease Prevention
To ensure a healthy and thriving corn plant, it’s essential to implement effective pest control measures and disease prevention strategies from the early stages of growth. Proper care can save your crop from common issues like earworms and blight.
Common Corn Pests and How to Manage Them
When growing corn plants from popping corn seeds, it’s essential to be aware of common pests that can damage your crop. Raccoons and deer are two primary wildlife threats that often target corn fields. These mammals are attracted to the sweet kernels and can cause significant damage if not managed properly.
Insects like corn borers, earworms, and aphids also pose a threat to corn plants. Corn borers, in particular, can be devastating as they lay eggs inside the plant’s stalk, causing it to weaken and eventually die. Earworms feed on the kernels, reducing yields and affecting grain quality.
To prevent damage from these pests, use physical barriers or repellents around your crop. For raccoons and deer, consider using fencing materials like chicken wire or electric netting. For insects, apply neem oil or insecticidal soap to control infestations. Keep your field clean by removing weeds and debris that can attract pests.
Monitor your plants regularly for signs of pest activity and take action promptly to prevent significant damage.
Organic Methods for Preventing Diseases
When growing corn plants from popping corn seeds, it’s essential to use organic methods for preventing diseases that can damage your crop. One of the most effective ways is through crop rotation. By rotating your corn crops with other vegetables or grains, you break the disease cycle and reduce the risk of powdery mildew or blight.
For example, if you’ve grown corn on a particular plot of land in the past season, consider rotating it to a different location for this season’s planting. This simple step can help prevent soil-borne diseases from affecting your new crop.
Another crucial aspect is sanitation. Remove any debris or infected plant material from your garden beds before planting new seeds. Make sure to disinfect tools and equipment regularly to prevent the spread of diseases.
To further minimize disease risk, consider companion planting with marigolds or basil, which are known to repel pests and diseases that target corn plants. By incorporating these natural methods into your growing routine, you’ll be well on your way to raising healthy, thriving corn plants from popping corn seeds.
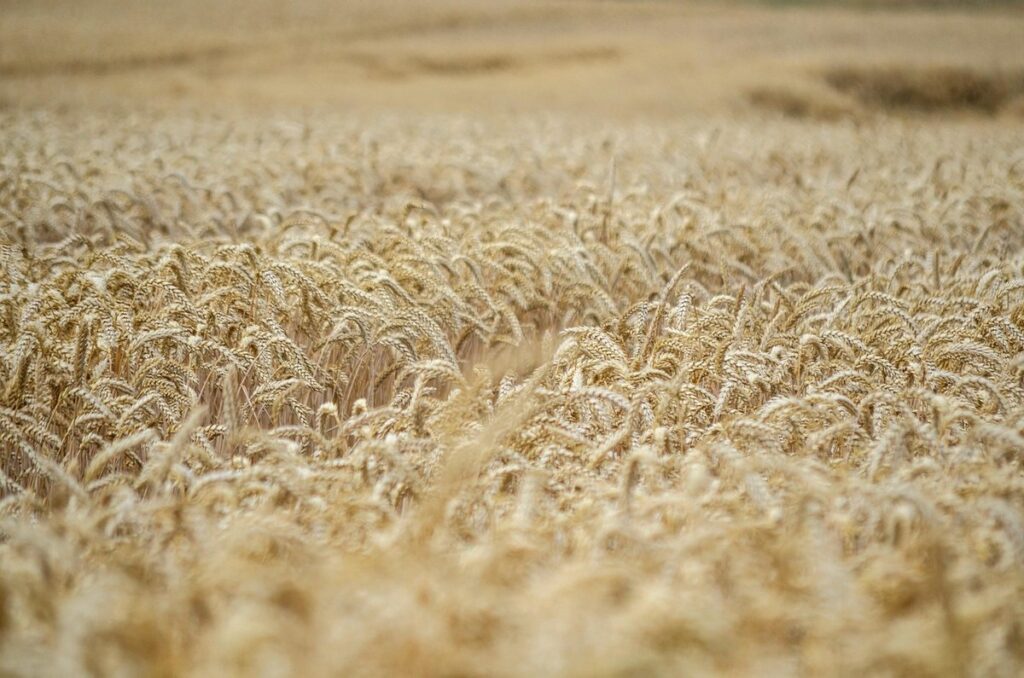
Harvesting Your Popping Corn
Now that you’ve successfully grown your corn plant, it’s time to harvest the popcorn kernels from those beautiful ears of corn. Learn how to dry and collect them in this crucial step.
Determining Maturity and Timing of Harvest
As you approach harvest time for your popping corn plant grown from popping corn seeds, it’s essential to determine when exactly to pick those mature ears of corn. A simple yet effective way to check for maturity is by observing the kernels on the ear. As the plant matures, the kernels will turn a golden yellow color, indicating that they are fully ripe and ready to be harvested.
Another sign of maturity is the silking process, where the tassels at the top of the stalk release their pollen into the air, allowing the silks (long, thin threads) to catch the pollen. Once the silks have been pollinated, you can expect the kernels on the ear to begin filling out and turning a deeper golden color. Typically, this process occurs around 3-4 weeks after silking.
Keep in mind that timing is crucial when it comes to harvesting popping corn. If you pick your ears too early, they may not pop well due to under-maturity. Conversely, waiting too long can result in over-maturity and a lower quality of popping performance.
How to Properly Dry and Store Your Harvested Crop
Drying and storing your harvested popping corn properly is crucial to preserve its quality and ensure optimal popping performance. If not done correctly, moisture can seep into the kernels, causing them to become soggy and lose their ability to pop.
To dry your popping corn, you’ll need a well-ventilated area with low humidity. Spread the ears of corn out in a single layer on a clean surface or use a drying rack specifically designed for this purpose. Allow 7-10 days for the corn to air dry completely, stirring occasionally to promote even drying.
Once dried, store your popping corn in airtight containers to prevent moisture from entering. Use glass jars with tight-fitting lids or plastic bins with secure closures. Store the containers in a cool, dark place with consistent temperatures between 50°F and 70°F (10°C and 21°C). Avoid storing popping corn near heat sources or in humid environments, as this can compromise its quality.
It’s also essential to check on your stored popping corn regularly for signs of spoilage.
Conclusion
In conclusion, growing a corn plant from popping corn seeds may seem challenging, but with the right steps and care, you can successfully cultivate your own corn. Now that you’ve learned how to sow, water, and fertilize your corn seed, it’s essential to monitor its growth closely. Be patient and observe your plant for signs of pests or diseases, taking action promptly if needed. Keep in mind that corn is a warm-season crop, so ensure your planting area receives full sun and has well-draining soil. With proper care and attention, you should be able to enjoy a bountiful harvest in about 60-90 days. By following these steps, you’ll not only save money on seeds but also develop a deeper connection with nature.
Frequently Asked Questions
What are some common mistakes to avoid when growing corn from popping seeds?
When growing corn, it’s essential to be mindful of the soil temperature. Most varieties require a minimum soil temperature of around 55°F (13°C) for germination to occur. Failing to check the soil temperature can lead to poor germination rates or even seed rot.
Can I grow multiple varieties of popping corn together?
Yes, you can grow multiple varieties together, but keep in mind that each variety will have different growth habits and space requirements. Make sure to choose varieties with similar growing conditions and mature times to avoid overcrowding.
How often should I fertilize my corn plants?
Fertilize your corn plants when the seedlings are about 6-8 inches tall. Use a balanced fertilizer (10-10-10 NPK) and follow the manufacturer’s instructions for application rates. Organic matter like compost or manure tea can also be used to provide essential nutrients.
What should I do if my corn stalks become too leggy?
If your corn stalks are becoming leggy, prune them back by about one-third to encourage bushy growth and prevent lodging (toppling over). This will help maintain a healthier plant structure and promote better yields.
Can I grow popping corn in containers or should I stick with traditional soil beds?
Yes, you can grow popping corn in containers! Choose large pots with good drainage, and use a well-draining potting mix to prevent waterlogged soil. The key is to provide adequate support for the stalks as they grow tall – consider using trellises or cages for stability.
How do I preserve my harvested popcorn for long-term storage?
To preserve your harvested popcorn, dry it thoroughly on paper bags or trays in a warm, dry area with good air circulation. Store dried kernels in airtight containers to maintain freshness and prevent spoilage.