Are you ready to elevate your gardening skills and add a burst of freshness to your dishes? Growing chives at home is easier than you think, but knowing where to start can be overwhelming. That’s why we’ve put together this comprehensive guide to help you grow healthy, flavorful chives in no time.
Whether you’re a seasoned gardener or just starting out, learning how to select the right chive variety, plant them correctly, and provide optimal care is crucial for success. But that’s not all – we’ll also cover common issues like pests, diseases, and lack of growth, so you can troubleshoot and overcome any challenges that come your way. By following our expert advice, you’ll be harvesting a bountiful crop of chives in no time, adding a delicious flavor to your meals. In this article, we’ll walk you through everything you need to know to grow the best chives possible.
Choosing the Right Variety
When it comes to growing chives, selecting the right variety can make all the difference in terms of taste, hardiness, and appearance. You’ll want to choose a type that suits your climate and desired use.
Understanding Chive Types and their Characteristics
Chives come in two main categories: perennial and annual varieties. Understanding the differences between these types is essential for choosing the right chives to grow in your garden.
Perennial chives, such as ‘Allium tuberosum’ and ‘Fragrant Fusion’, are hardy and can thrive in zones 3-9. They come back year after year, requiring minimal maintenance. These varieties tend to be more robust and produce larger onion-flavored bulbs than their annual counterparts.
Annual chives, like ‘Crispy Giant’ and ‘Semi-Globe’, typically grow for one season before needing to be replanted. While they may not have the same level of hardiness as perennials, they are often bred for specific traits like disease resistance or improved flavor.
When selecting a variety, consider your climate, available space, and desired harvest time. For example, if you live in an area with harsh winters, perennial chives might be a better choice due to their cold-hardy nature.
Selecting Chives for Your Climate and Region
When selecting chives for your climate and region, it’s essential to consider factors that will impact their growth, flavor, and harvest season. The best variety of chives will depend on whether you live in a hot and dry climate or a cool and humid one.
In warm climates (USDA zones 9-11), choose varieties like ‘Chive’ or ‘Fine Leaf’, which are more heat-tolerant and less prone to bolting. These chives will thrive in temperatures above 65°F (18°C) and can be harvested year-round.
In cooler climates (USDA zones 3-5), opt for hardy varieties like ‘Garlic Chive’ or ‘Ragged Roof’, which are more resistant to frost and can tolerate temperatures as low as 20°F (-7°C). These chives will take longer to mature, but their flavor will be more intense.
If you’re growing in an area with distinct seasons, consider choosing a variety that matures mid-season (around 60-90 days) for a consistent harvest. For example, ‘Chive’ or ‘Fine Leaf’ are great options for areas with a moderate climate.
Soil Preparation and Planting
Now that you have a suitable location for your chives, it’s time to focus on preparing the soil for planting. This involves loosening the earth to ensure healthy root growth.
Preparing the Ideal Growing Conditions
When it comes to preparing the ideal growing conditions for chives, there are three key factors to consider: well-draining soil, adequate sunlight, and a suitable temperature range.
Firstly, ensure that the soil drains water efficiently. Chives don’t like wet feet, which can lead to root rot. To achieve this, mix in some organic matter like compost or perlite into the soil. This will not only improve drainage but also provide essential nutrients for your chive plants. Aim for a slightly acidic to neutral pH, between 6.0 and 7.0.
In terms of sunlight, chives require at least four to six hours of direct sunlight per day. They can tolerate partial shade but may produce smaller or fewer leaves in low-light conditions. If you’re growing chives indoors, consider placing them near a sunny window or investing in grow lights.
Temperature-wise, chives prefer cooler temperatures between 60°F and 70°F (15°C to 21°C). Avoid exposing them to extreme heat above 85°F (29°C) or frost below 32°F (0°C), as this can cause damage or even kill the plants. By providing your chives with well-draining soil, sufficient sunlight, and a suitable temperature range, you’ll be off to a great start in creating an optimal growing environment for these versatile herbs.
Sowing Chives from Seed or Transplanting
When it comes to sowing chive seeds or transplanting seedlings, getting the basics right is crucial for a healthy and thriving plant. To sow seeds directly into the ground, start by preparing a seedbed with well-draining soil and full sun. Sow the seeds 1-2 inches apart and about 1/8 inch deep. Keep the soil consistently moist during the germination period, which typically takes around 7-10 days.
Transplanting seedlings is another option if you prefer to start your chives indoors or from a nursery. When transplanting, choose a location with similar conditions as before and space the seedlings 6-8 inches apart. Dig a hole slightly larger than the pot and gently remove the plant from its container, taking care not to disturb the roots. Place the seedling in the hole and firm the soil around it.
It’s essential to consider spacing when planting chives, as overcrowding can lead to reduced air circulation and increased risk of disease. Leave enough space between plants for easy access and to allow them to grow and spread out naturally.
Plant Care and Maintenance
To keep your chives healthy and thriving, it’s essential to learn proper plant care and maintenance techniques to prevent common issues and promote robust growth.
Watering and Fertilization Best Practices
Proper watering and fertilization are crucial for promoting healthy chive growth. Overwatering is one of the most common mistakes home gardeners make when growing chives. Chives need about 1 inch of water per week, either from rainfall or irrigation. Check the soil moisture by inserting your finger into the soil up to the first knuckle; if it feels dry, it’s time to water.
Water your chives in the morning so that the leaves have a chance to dry out before nightfall, reducing the risk of fungal diseases. Fertilize your chives lightly but regularly. A balanced fertilizer (10-10-10 NPK) is ideal for promoting leaf growth and flavor. You can also side-dress with a high-phosphorus fertilizer (10-20-10 NPK) to encourage blooming.
Be cautious not to overfertilize, as this can lead to weak or leggy growth. Feed your chives every 4-6 weeks during the growing season, and avoid fertilizing in the fall when chives are dormant. Consider using compost tea or fish emulsion for a more natural approach to fertilization.
Keep records of your watering and fertilization schedule to ensure consistency and adjust as needed based on weather conditions and plant growth.
Pruning and Harvesting Chives at Optimal Times
Pruning and harvesting chives at the right time is essential to keep them healthy, promote new growth, and prevent the plant from flowering. Chives are ready for pruning when they reach a height of 6-8 inches (15-20 cm) above the soil surface. To prune, simply snip off about one-third of the top growth using scissors or pinch off individual leaves with your fingers.
Harvesting chives is best done in the morning, after the dew has dried but before the heat of the day sets in. You can harvest individual leaves as needed, or trim back the entire plant to encourage new growth. When harvesting for cooking, it’s best to use the top two-thirds of the stem, leaving about an inch (2.5 cm) at the base intact.
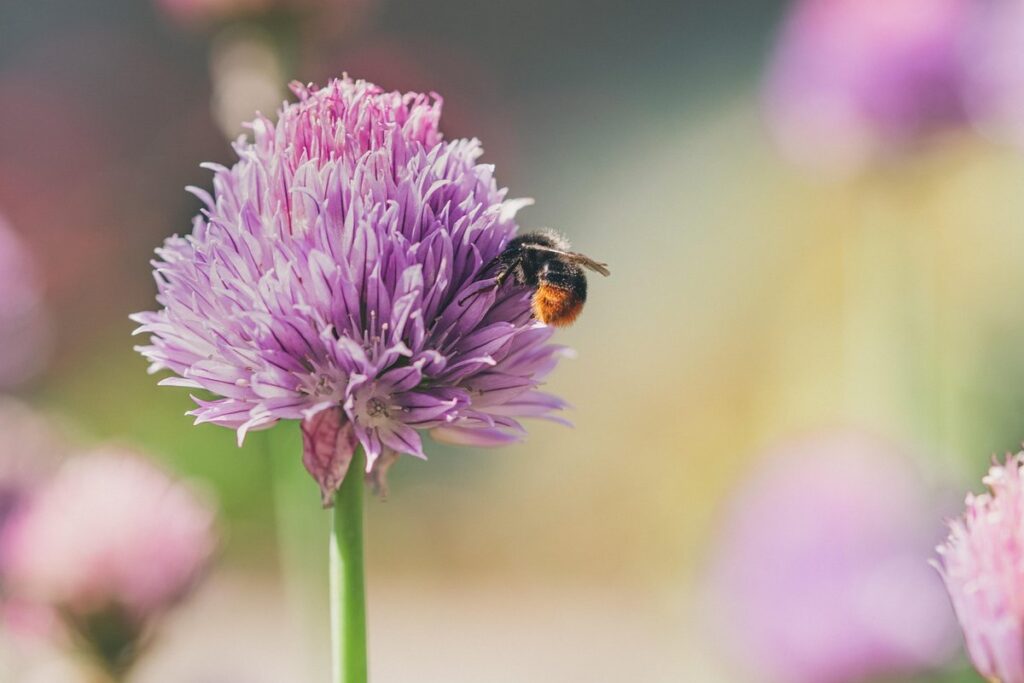
Regular pruning and harvesting will also help control the spread of chives in your garden. By removing spent flower stalks and trimming back leggy stems, you’ll promote a bushy, compact plant that’s less likely to invade neighboring plants.
Common Pests and Diseases
Growing chives can be a wonderful hobby, but unfortunately, pests and diseases can quickly ruin your progress. In this section, we’ll identify common threats to help you protect your plants.
Identifying and Managing Common Issues
Chives are generally hardy and easy to care for, but like all plants, they can fall victim to certain pests and diseases. It’s essential to recognize the common issues that might affect your chive crop so you can take action promptly.
Some common pests to watch out for include aphids, which can be identified by their small size and soft, pear-shaped bodies. These tiny insects feed on the sap of the plant, causing curled or distorted leaves. To manage aphid infestations, spray your chives with a mixture of soap and water or use neem oil to repel them.
Another pest that might target your chive plants is spider mites. You’ll notice fine webbing between the leaves and stems, as well as yellowing or bronzing of the foliage. Treat these pests by increasing humidity around the plant or using insecticidal soap.
On the disease front, powdery mildew can cause a white, powdery coating to form on the upper surface of chive leaves. To prevent this, ensure good air circulation and avoid overhead watering. Root rot is another common issue, often caused by overwatering. If you suspect your chives are suffering from root rot, repot them in well-draining soil and reduce watering.
To minimize the risk of pests and diseases affecting your chive crop, maintain healthy growing conditions by providing sufficient light, water, and nutrients. Monitor your plants regularly for signs of stress or infestation, and take prompt action if you notice any issues.
Organic Methods for Pest Control and Disease Prevention
When growing chives, it’s not uncommon to encounter pests and diseases that can threaten their health. However, there are effective organic methods for managing these issues without relying on chemical pesticides or fungicides.
One of the most natural ways to prevent pests is by introducing beneficial insects into your garden. For example, ladybugs and lacewings feed on aphids, whiteflies, and other common chive pests. You can also try attracting these beneficial bugs by planting flowers that provide nectar and pollen, such as marigolds or calendulas.
To control diseases like powdery mildew or leaf spot, practice good garden hygiene. Remove any infected leaves or stems, and disinfect your pruning tools regularly. You can also use neem oil, a natural fungicide made from the seeds of the neem tree. Mix it with water according to the label instructions and spray it on the affected areas.
Another approach is to promote healthy soil through composting. This will help create a balanced ecosystem that’s less susceptible to pest and disease issues. Simply add organic matter like kitchen scraps, leaves, or grass clippings to your soil, and let it decompose over time.
Troubleshooting Common Problems
Don’t worry if things don’t go as planned – we’ve all been there! This section will help you tackle common issues that might be affecting your chive plants.
Understanding Chive Growth Stages and Issues
Chives are relatively low-maintenance herbs, but they can still encounter growth problems if not properly cared for. Understanding their growth stages is crucial to addressing potential issues early on.
The growth cycle of chives typically begins with germination, which usually takes 1-2 weeks. During this stage, keep the soil consistently moist and ensure adequate light exposure. Once seedlings emerge, it’s essential to transplant them into individual pots or directly into a garden bed with well-draining soil.
As chives mature (around 6-8 weeks), they’ll begin producing edible leaves. However, some common problems may arise, such as yellowing leaves or reduced growth. Pests like aphids and spider mites can also infest the plants. Regularly inspect your chive crop for signs of infestation or disease.
To prevent issues, maintain a balanced fertilizer routine and ensure adequate watering. Chives require about 1 inch of water per week. Keep in mind that overwatering can be detrimental to their growth. Monitor your plants’ response to these care tips and adjust as necessary to promote healthy growth.
Tips for Reviving Struggling Plants and Resolving Pests/Diseases
When it comes to chive plants that are struggling or affected by pests and diseases, prompt action is key. Start by inspecting the plant thoroughly for signs of infestation or infection, such as yellowing leaves, holes in foliage, or white powdery patches.
To revive a weak or wilted chive plant, ensure it’s receiving enough sunlight (at least 4-6 hours daily) and water it consistently, but avoid overwatering. If you suspect root rot due to excessive moisture, repot the plant in fresh, well-draining soil. Fertilize your chives with a balanced, water-soluble fertilizer (10-10-10 NPK ratio) during the growing season.
Common pests like aphids and spider mites can be managed using neem oil or insecticidal soap sprays. For diseases such as powdery mildew or downy mildew, treat your chives with a fungicide specifically designed for indoor plants. Prune infected areas to prevent further spread and maintain good air circulation around the plant.
Monitor your chive’s condition closely after introducing any remedies, adjusting your treatment plan as needed. By taking swift action and employing these strategies, you can revive struggling chive plants and get them thriving again.
Growing Chives in Containers and Indoors
If you’re short on garden space but still want to grow chives, don’t worry – we’ve got you covered! This section will show you how to successfully cultivate chives in containers and indoors.
Container Gardening for Space-Constrained Spaces
When growing chives in spaces with limited room to stretch out, container gardening is an excellent option. Not only does it allow you to control the growing conditions, but it also gives you the flexibility to move your chive plants around as needed.
Choose a pot that’s at least 6-8 inches deep and has drainage holes to prevent waterlogged soil. A well-draining potting mix specifically designed for herbs is essential, as chives don’t like wet feet. When selecting your container, consider one with a wide mouth, making it easier to harvest those delicate chive leaves.
When it comes to lighting, chives are relatively adaptable but still require some direct sunlight. Place your container near an east- or west-facing window for 4-6 hours of indirect light per day. If you’re growing indoors, invest in grow lights to supplement the natural light. Aim for at least 12-14 inches above the plant to prevent burning.
To ensure healthy growth, fertilize your chives with a balanced fertilizer during the growing season (spring and summer). Water them regularly, but avoid overwatering, which can lead to root rot.
Indoor Chive Care: Lighting, Temperature, and Humidity Considerations
When growing chives indoors, it’s essential to provide them with optimal lighting conditions. Chives require bright light to photosynthesize and produce their characteristic flavor and aroma. A south-facing window is ideal, but east- or west-facing windows also work well if supplemented with grow lights. Aim for 12-14 hours of direct sunlight per day. If using artificial lighting, opt for LED grow lights specifically designed for indoor plants.
Maintain a temperature range between 65°F (18°C) and 75°F (24°C). Avoid placing chives near heating vents or radiators, as this can cause them to dry out. Also, keep the area away from drafts, which can stress the plant.
Humidity levels should be kept relatively high, between 50-60%. To achieve this, you can place the pot on a tray filled with water and pebbles or use a humidifier nearby. This will help prevent the soil from drying out too quickly and promote healthy growth. By providing your indoor chives with proper lighting, temperature control, and humidity levels, you’ll be well on your way to enjoying fresh, fragrant herbs year-round.
Expanding Your Chive Harvest
Now that you’ve successfully harvested your chives, it’s time to think about ways to make them last longer and multiply for future harvests. We’ll show you how to expand your chive harvest in this next step.
Companion Planting Strategies to Boost Growth
Companion planting is an age-old technique that can significantly enhance the growth and productivity of your chive crop. By strategically pairing chives with other plants, you can create a balanced ecosystem that promotes healthy growth, improves flavor, and even repels pests.
Some effective companion plants for chives include mint, which helps to improve flavor and repel aphids; oregano, which enhances the overall health of the soil; and dill, which attracts beneficial insects that prey on pests. On the other hand, you should avoid planting garlic and onions near chives, as their strong scents can inhibit growth.
To implement a successful companion planting strategy, start by assessing your garden’s conditions and selecting plants that complement each other in terms of growing requirements and space needs. You can also use this opportunity to introduce beneficial flowers like marigolds or nasturtiums, which attract pollinators and add visual appeal to your garden.
Remember to maintain a diverse and balanced mix of plants to create a thriving ecosystem that supports the growth and health of your chives.
Chives as a Cut-and-Come-Again Crop: Maximizing Yield and Reducing Waste
Chives are an excellent choice for gardeners looking to make the most of their space, as they can be harvested continuously and require minimal maintenance. To maximize yield and reduce waste, consider growing chives as a cut-and-come-again crop. This approach involves cutting off the top growth of the plant, allowing new shoots to emerge from the base, which can then be harvested again.
By adopting this strategy, you’ll not only minimize waste but also encourage healthy regrowth. Aim to harvest individual leaves or stems by cutting them off at soil level using scissors or a sharp knife. Leave about an inch (2.5 cm) of stem intact to allow new growth to emerge. This will prevent the plant from becoming leggy and promote bushy growth.
Regular harvesting will also help control weed growth and reduce the need for pruning, making this approach ideal for busy gardeners. Remember to leave some chive plants unharvested to allow them to seed and disperse, ensuring a continuous supply of new plants in the future. With proper care and maintenance, your chives should continue to produce an abundance of fresh leaves throughout the growing season.
Frequently Asked Questions
How can I propagate my chive plants for a continuous harvest?
To propagate your chives, simply snip off the flowers or cut the entire plant back to about an inch from the base after blooming has finished. This will encourage new growth and prevent seed production. You can also divide established clumps of chives in the spring or fall to create new plants.
Can I grow chives indoors year-round, regardless of my location’s climate?
Yes, you can grow chives indoors year-round with proper care. Make sure your pot has good drainage holes and use a well-draining potting mix. Provide sufficient light (at least 4-6 hours of direct sunlight or 12-14 hours of indirect sunlight) and maintain temperatures between 65°F to 75°F (18°C to 24°C).
What are the most common pests that affect chive plants, and how can I prevent them?
Common pests that affect chives include aphids, spider mites, and thrips. To prevent these pests, make sure your plants have good air circulation and water carefully to avoid overwatering. Use organic pest control methods such as neem oil or insecticidal soap if you notice any issues.
Can I grow multiple varieties of chives together in the same container?
Yes, you can grow multiple varieties of chives together in the same container, but make sure they have similar growing conditions and light requirements. This is a great way to create a diverse and fragrant herb garden with minimal space.
How often should I fertilize my chive plants for optimal growth?
Fertilize your chives regularly with a balanced fertilizer (10-10-10 NPK) during the growing season (spring-fall). You can also side-dress with a high-phosphorus fertilizer to promote blooming and seed production. Avoid overfertilizing, as this can lead to weak or leggy growth.