Growing your own chickpeas in the UK can be a rewarding experience, but it requires careful planning and attention to detail. Many gardeners are interested in cultivating this nutritious legume, but they often face challenges such as variable weather conditions, soil quality issues, and pest management problems.
In this comprehensive guide, we will walk you through the process of successfully growing chickpeas in your UK garden. We’ll cover the best varieties for British climate and soil types, provide expert advice on soil preparation, and explore effective watering techniques to ensure optimal growth. Additionally, we’ll share valuable tips on pest management strategies to protect your crop from common pests that can damage chickpea plants.
Whether you’re a seasoned gardener or just starting out, our guide will equip you with the knowledge and confidence to grow delicious and healthy chickpeas in your own garden.
Choosing the Right Variety
When growing chickpeas in the UK, selecting the right variety is crucial for success. This will help you choose from a range of options suited to the British climate and your specific needs.
Understanding Chickpea Types
When it comes to growing chickpeas in the UK, understanding the different types available is crucial for success. There are primarily two main varieties of chickpeas: Kabuli and Desi.
Kabuli chickpeas are larger and have a pale yellow or cream-colored coat. They originated from Kabul, Afghanistan, and are known for their mild flavor and high yield. This variety prefers well-drained soil and full sun, making it suitable for the UK’s temperate climate. Kabuli is an excellent choice for gardeners in the southern regions of England where the summers are warmer.
Desi chickpeas, on the other hand, are smaller with a darker coat. They have a stronger flavor profile compared to Kabuli and require less maintenance. Desi prefers slightly acidic soil and partial shade, making it more adaptable to cooler regions such as Scotland or northern England. With proper care, both varieties can thrive in UK gardens.
When selecting a variety for your garden, consider the climate and soil conditions specific to your area. This will enable you to make an informed decision on which type of chickpea best suits your needs.
Selecting Disease-Resistant Varieties
When selecting disease-resistant chickpea varieties for your UK garden, it’s essential to consider the specific diseases that affect this crop in the British climate. In the UK, chickpeas are susceptible to powdery mildew, ascochyta blight, and fusarium wilt. To combat these issues, look for varieties with built-in resistance or tolerance.
Some popular disease-resistant chickpea varieties suitable for the UK climate include ‘Cranston’, ‘Sonali’, and ‘CDC Sofia’. These varieties have been bred to resist powdery mildew and ascochyta blight, which can be devastating to chickpea crops. When evaluating a variety’s resistance, check its seed label or consult with suppliers who can provide specific disease-resistance data.
Remember that even resistant varieties may still require some protection against disease outbreaks. Factors like weather conditions, soil quality, and cultural practices also play a significant role in maintaining plant health. Consider combining disease-resistant varieties with integrated pest management (IPM) strategies to minimize the risk of disease outbreaks.
Preparing the Soil
When growing chickpeas, a well-prepared soil is essential for healthy roots and a bountiful harvest. This section will guide you through the process of creating ideal conditions for your UK-grown chickpea crop.
Testing Your Soil pH
Soil pH is a critical factor to consider when growing chickpeas in the UK. Chickpeas prefer a slightly acidic to neutral soil pH, ranging from 6.0 to 7.5. If your soil’s pH falls outside this range, it can lead to nutrient deficiencies and reduced yields.
To determine your soil’s pH levels, you’ll need to test them. You can purchase a DIY soil testing kit or send a sample to a laboratory for analysis. The most common method is the pH meter, which provides an accurate reading of the soil’s acidity level.
When collecting your soil sample, make sure it’s from 15-20 cm deep and representative of your entire garden bed. Remove any debris and mix the soil well before testing. Compare your results with a pH chart or consult a local gardening expert to understand what adjustments you need to make.
Aim for a target pH between 6.5 and 7.0, as this will provide optimal conditions for chickpea growth. If your soil is too alkaline (above 8), add organic matter like compost or manure to lower the pH. Conversely, if it’s too acidic (below 6), use lime to raise the pH. Remember, making adjustments takes time, so plan ahead and test regularly to ensure your chickpeas have a healthy environment to thrive in.
Amending Your Soil Structure
When growing chickpeas in the UK, it’s essential to amend your soil structure to create an optimal growing environment. Chickpeas prefer well-draining, fertile soils with a pH between 6.0 and 7.0. To achieve this, start by testing your soil pH using a DIY kit or sending a sample to a laboratory for analysis.
If your soil is too alkaline or acidic, you can amend it with lime or sulfur respectively. For example, if your soil has a pH of 8.0, adding 1-2 kg of dolomitic limestone per square meter can lower the pH to around 7.0. However, be cautious not to over-lime, as this can lead to nutrient deficiencies.
To improve drainage, add organic matter such as compost or well-rotted manure. This will also increase the soil’s water-holding capacity and supply essential nutrients to your chickpea plants. Aim to incorporate 2-4 inches of organic matter into the top 8-10 inches of soil. You can also try incorporating green manures, such as clover or rye, which are rich in nitrogen and improve soil structure.
Remember, amending your soil is an ongoing process, and it’s essential to monitor its pH and nutrient levels regularly to ensure they remain within the optimal range for chickpea growth.
Planting and Sowing Chickpeas
When it comes to growing chickpeas, sowing at the right time is crucial. In this section, we’ll walk you through the process of planting and sowing chickpea seeds for a bountiful harvest in your UK garden.
Timing and Weather Considerations
When it comes to planting chickpeas in the UK, timing is crucial. The ideal time to plant chickpeas in the UK is from late spring to early summer, when the soil has warmed up and the risk of frost has decreased. Typically, this falls between May and June.
In the UK’s temperate climate, chickpea plants prefer temperatures above 15°C (59°F) for optimal growth. Planting too early can lead to poor germination rates and vulnerable seedlings, while planting too late may not give them enough time to mature before the onset of autumnal frosts.
Weather conditions also play a significant role in determining when to plant chickpeas. Avoid planting during periods of prolonged rainfall or excessive heatwaves, as this can lead to fungal diseases and stress on the plants. Similarly, be cautious of extreme cold snaps that may damage or kill young seedlings.
Check the long-term weather forecast before planting to minimize the risk of adverse conditions affecting your crop. With careful planning and monitoring, you can ensure a successful chickpea harvest in the UK.
Sowing Techniques and Spacing
When sowing chickpea seeds, it’s essential to get the depth and spacing just right for healthy growth. In the UK climate, chickpeas typically prefer a slightly deeper sowing depth than other legumes.
To begin, sow the seeds 5-7cm deep, making sure the soil is well-draining and fertile. You can also consider using a raised bed or a container to help improve drainage. Make sure the seeds are spaced around 10-15cm apart in rows that are 30-40cm apart. This will give the plants enough room to grow without overcrowding.
It’s worth noting that chickpeas have a deep taproot, so it’s crucial not to sow them too close together or too shallowly. If the seeds are sown too close, they may compete for water and nutrients, while sowing them too shallow can lead to poor germination rates.
To achieve optimal results, use high-quality chickpea seeds that have been bred specifically for UK conditions. These seeds will be more resistant to disease and better adapted to the local climate.
Watering and Irrigation
When growing chickpeas in the UK, proper watering is essential for healthy yields. This section will guide you through the best practices for watering and irrigating your chickpea plants during different stages of growth.
Understanding Chickpea Water Requirements
When growing chickpeas in the UK, it’s essential to understand their water requirements throughout their growth cycle. Chickpeas need consistent moisture, especially during germination and flowering stages. A general rule of thumb is to provide around 2-3 inches of water per week, either through rainfall or irrigation.
In reality, this translates to about 1-2 liters of water per plant per day, depending on the soil type and weather conditions. To give you a better idea, let’s break it down into three stages:
* Germination: Keep the soil consistently moist during the first few weeks after sowing. Water gently but thoroughly to prevent washing away the tiny seeds.
* Vegetative growth: As the plants grow, water them deeply once or twice a week, depending on weather conditions. Aim for about 1 inch of water per week during this stage.
* Flowering and podding: Increase watering frequency to ensure consistent moisture. Water your chickpea plants when the top 2-3 inches of soil feel dry to the touch.
Keep in mind that these are general guidelines, and you may need to adjust based on specific weather conditions and soil types in your area.
Drought Tolerance and Stress Management
When growing chickpeas in the UK, managing drought stress and implementing effective irrigation techniques are crucial for ensuring healthy plant growth. Drought tolerance is a critical factor to consider when selecting chickpea varieties, with some breeds being more resistant to dry conditions than others.
To manage drought stress, it’s essential to implement a strategy that balances water supply and demand. Mulching around the plants can help retain moisture in the soil, reducing evaporation and runoff. Use organic mulch like straw or wood chips, keeping a 2-3 inch layer around the base of the plants.
Irrigation techniques also play a vital role in managing drought stress. Soaker hoses or drip irrigation systems are excellent options for delivering water directly to the roots without wasting it through evaporation or runoff. Aim to provide about 1-2 inches of water per week during peak growth periods, adjusting as needed based on weather conditions.
Monitor your plants closely and adjust your irrigation strategy accordingly. Keep an eye out for signs of drought stress such as yellowing leaves or droopy stems, taking action promptly to prevent damage to the plant.
Pest and Disease Management
Managing pests and diseases is crucial for a successful chickpea crop, so let’s explore some of the most common issues to watch out for in your UK garden.
Common Pests Affecting Chickpeas
Chickpeas are susceptible to various pests that can significantly impact their yield and quality. In the UK, some of the most common pests affecting chickpea crops include aphids, whiteflies, and spider mites.
Aphids are small, soft-bodied insects that feed on plant sap, causing curled or distorted leaves. Whiteflies, on the other hand, are flying insects that also feed on sap, spreading diseases like virus Y. Spider mites are tiny, eight-legged arachnids that suck plant juices, causing yellowing or bronzing of leaves.
To control these pests, adopt integrated pest management (IPM) strategies. Start by monitoring your crop regularly, looking for signs of infestation such as sticky honeydew droplets on plants. Use neem oil or insecticidal soap to control aphid and whitefly populations. For spider mites, apply sulfur dust or horticultural oil to the affected areas.
Crop rotation is also essential in managing pests. Break the life cycle of these pests by rotating chickpeas with other crops like potatoes or oats. Additionally, maintain good hygiene practices, disposing of infested plants and ensuring clean tools are used for each crop.
Fungal Diseases in Chickpeas
As a UK-based chickpea grower, it’s essential to be aware of the common fungal diseases that can affect your crop. Fungal diseases such as powdery mildew and fusarium wilt are particularly prevalent in the UK climate.
Powdery mildew is characterized by a white, powdery coating on the leaves and stems of the chickpea plant. It’s often most severe during periods of high humidity and moderate temperatures. To identify powdery mildew, look for yellowing or browning leaves, stunted growth, and a cottony appearance.
Fusarium wilt, on the other hand, is a more serious disease that causes the plant to wilt and die prematurely. It’s often accompanied by blackened roots and a foul odor.
To manage these diseases, ensure you’re providing optimal growing conditions for your chickpeas. This includes good air circulation, adequate moisture, and a balanced nutrient supply. Regularly inspect your plants, and remove any infected areas promptly to prevent the disease from spreading.
In addition, consider implementing crop rotation practices to break the disease cycle and reduce the risk of fungal diseases recurring year after year.
Harvesting and Storing Chickpeas
Once your chickpea plants have matured, it’s time to carefully harvest them and store them for maximum flavor and nutritional value in the months ahead. This section shares essential tips on how to do just that.
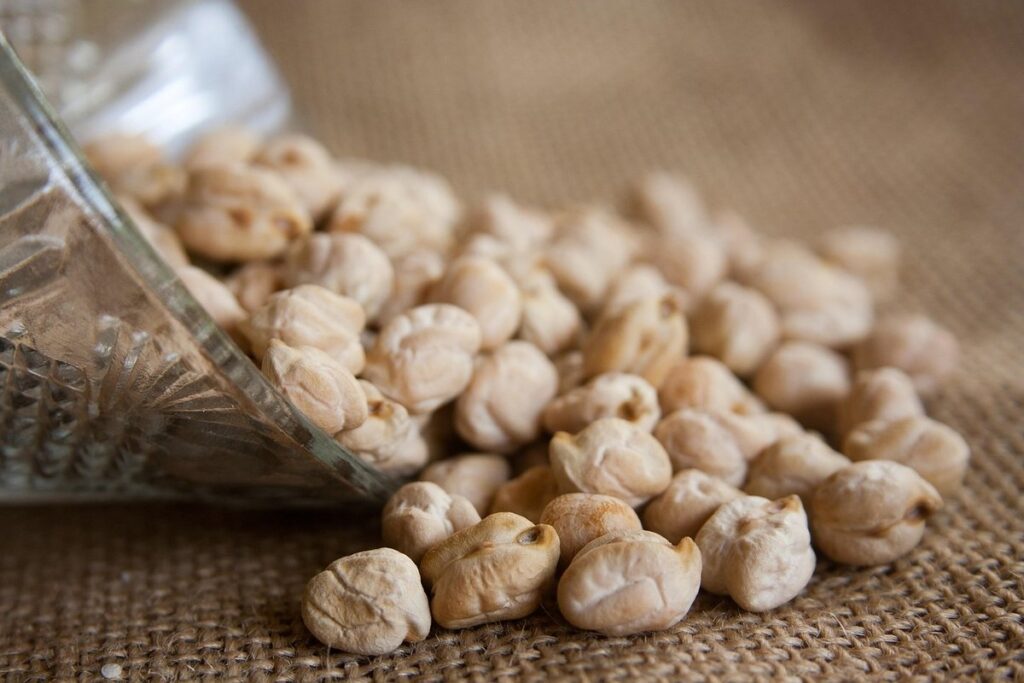
Identifying Mature Chickpeas
When harvesting chickpeas, it’s essential to identify mature pods. One of the primary indicators is a change in color, typically from green to tan or brown. This color transformation can occur gradually over time and may not be uniform across all pods. To determine if the color change is complete, gently rub your fingers along the pod; if the color doesn’t come off easily, it’s likely mature.
Another key factor is the dryness of the pod. Mature chickpeas are relatively dry to the touch, especially at the base of the stem where they attach. If you notice a high level of moisture or soft spots on any pods, it may indicate that they’re not yet ready for harvest. To verify, try gently pulling on one of the pods; if it comes off easily and leaves some of the stem intact, it’s likely mature.
As a general rule of thumb, chickpeas are typically ready to harvest 100-120 days after sowing, depending on weather conditions.
Post-Harvest Care and Storage Tips
When you’ve finally harvested your chickpea crop, it’s essential to handle and store them properly to maintain their quality. This is where post-harvest care comes into play.
To start with, gently remove the harvested chickpea pods from the plant, taking care not to damage any of the delicate pods or chickpeas within. Next, inspect each pod for any signs of pests, diseases, or physical damage. If you find any affected pods, set them aside and process them separately.
Once you’ve inspected all the pods, it’s time to clean them. Gently brush off any dirt or debris from the pods using a soft-bristled brush or a dry cloth. This will help prevent moisture from accumulating on the pods, which can lead to mold and spoilage.
For long-term storage, tie the cleaned and dried chickpea pods in small bunches and hang them upside down in a warm, dry place with good airflow. You can also store them in a sealed container or bag, making sure they’re not touching each other to prevent moisture transfer.
Remember, proper post-harvest care is crucial for maintaining the quality of your harvested chickpeas. By following these simple steps, you’ll be able to enjoy your homegrown chickpeas for months to come.
Frequently Asked Questions
What’s the ideal time to start sowing chickpeas in my UK garden, considering variable weather conditions?
When planning your chickpea crop, it’s essential to consider the UK’s unpredictable weather patterns. Generally, it’s recommended to sow chickpeas between late spring and early summer (May-June), when the soil has warmed up sufficiently. However, this can vary depending on your specific region and microclimate. Consult local gardening experts or check the long-term weather forecast for more accurate planting advice.
How do I protect my chickpea plants from frost damage during winter?
Yes, chickpeas are sensitive to frost, which can cause significant damage to the crop. To protect your plants, provide a layer of mulch around 10-15 cm deep to insulate the soil and retain heat. You can also use row covers or fleece to shield the plants from harsh winds and frost.
Can I grow chickpeas in containers, or are they best suited for in-ground cultivation?
Chickpeas can be grown in containers, but it’s crucial to provide a large enough space (at least 30-40 cm deep) with good drainage. This will help prevent waterlogged soil conditions and ensure optimal root growth.
What’s the best way to handle common pests like aphids and whiteflies on my chickpea plants?
Yes, aphids and whiteflies can be significant pests for chickpeas. To manage these issues, use neem oil or insecticidal soap to control infestations. Encourage beneficial insects like ladybugs and lacewings by providing a diverse range of flowers in your garden.
How do I store harvested chickpeas to maintain their quality and nutritional value?
When storing chickpeas, it’s essential to keep them dry and cool. Store the harvested crop in an airtight container or bag, away from direct sunlight. The ideal storage conditions are at room temperature (around 15-20°C) with low humidity. Regularly inspect your stored chickpeas for any signs of mold or spoilage.