If you’re curious about one of the world’s most versatile legumes, you’ve come to the right place. Chickpeas are a staple in many cuisines worldwide, but have you ever wondered how they grow? From tiny seeds to bountiful harvests, understanding the process can help you become a more confident gardener or farmer.
In this article, we’ll take you through every stage of chickpea growth, from the ideal climate and soil conditions to expert planting techniques and pest management strategies. We’ll cover the ins and outs of how to grow chickpeas successfully, so whether you’re looking to cultivate them on a small scale or large farm, you’ll be well-equipped with the knowledge you need. Let’s dive into the fascinating world of chickpea cultivation!
Understanding Chickpea Biology
To truly appreciate how chickpeas grow, it helps to understand their basic biology and life cycle. Let’s dive into the fascinating world of chickpea development!
The Importance of Legumes
Legumes are one of the most significant and versatile crop families in agriculture, and chickpeas are no exception. These plants have been a vital source of protein and nutrients for humans for thousands of years. As a vital legume crop, chickpeas play a crucial role in sustaining global food security and contributing to sustainable agriculture.
In fact, legumes account for nearly 30% of the world’s vegetable production, making them a cornerstone of diverse diets worldwide. What makes legumes so important is their unique ability to fix atmospheric nitrogen, converting it into a form that can be easily absorbed by plants. This process not only enriches soil fertility but also reduces the need for synthetic fertilizers.
As a key player in crop rotation and intercropping strategies, chickpeas help improve soil health and structure, promote biodiversity, and enhance ecosystem services. By incorporating legumes like chickpeas into agricultural systems, farmers can reduce their reliance on chemical pesticides and herbicides while promoting more sustainable and resilient farming practices. With proper management, chickpea cultivation can lead to increased yields, improved crop quality, and enhanced environmental benefits.
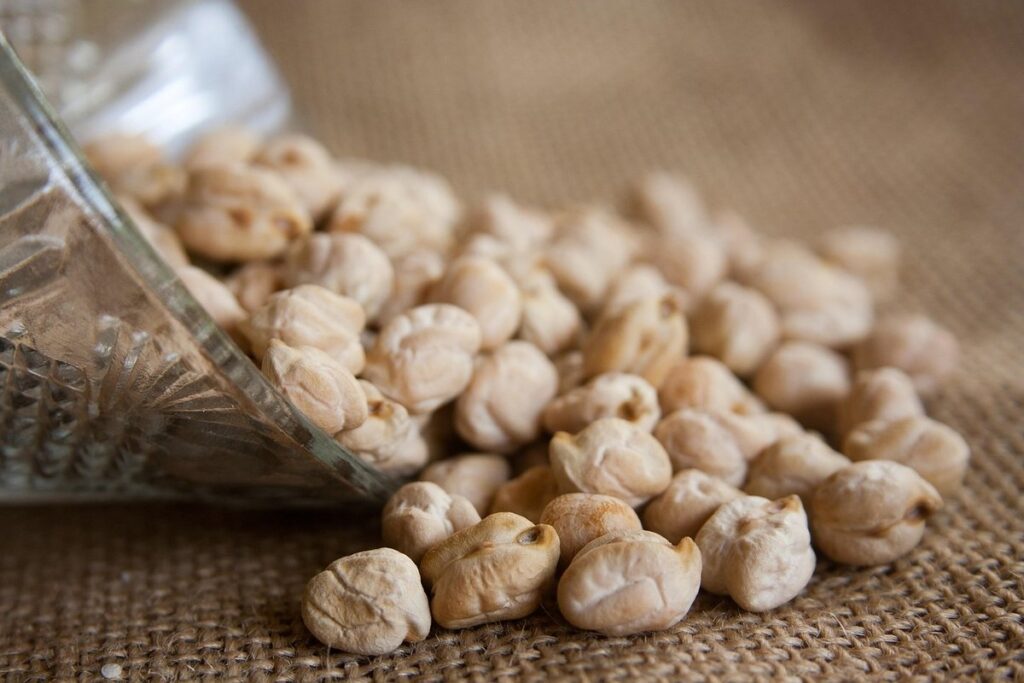
Life Cycle of Chickpeas
The life cycle of chickpeas is a fascinating process that involves several key stages. It begins with germination, where the seeds absorb water and start to sprout. This usually occurs within 7-10 days after planting, depending on factors like soil temperature and moisture. As the seedlings emerge, they develop their first set of leaves, which are typically hairy and light green in color.
During the seedling stage, which lasts around 2-3 weeks, the plants start to establish their root system and grow new leaves. It’s essential to ensure the soil is well-draining and fertile during this period to support healthy growth. As the plants mature, they produce flowers on tall stalks, with the female flowers typically developing into pods.
The maturation stage, which can take anywhere from 70-100 days, depends on factors like weather conditions and variety. When the pods turn brown or dry, it’s a sign that the chickpeas are ready to be harvested. Regular monitoring of the plants will help you determine when to collect your crop for maximum flavor and nutritional value.
Climate and Soil Requirements
To grow healthy chickpeas, you’ll want to ensure your soil has a pH between 6.0 and 7.0, which is slightly alkaline.
Chickpea growth also relies on moderate temperatures, ranging from 60°F to 80°F, with adequate moisture throughout the season.
Optimal Temperature for Growth
Chickpea plants thrive in optimal temperatures between 60°F and 85°F (15°C and 30°C), with an ideal range of 70°F to 80°F (21°C to 27°C) for maximum growth. Temperatures above 90°F (32°C) can lead to heat stress, causing leaves to wilt and reducing yield. On the other hand, temperatures below 40°F (4°C) can slow down growth and make plants more susceptible to disease.
In regions with cold winters, chickpea seeds typically germinate in late spring or early summer when soil temperature reaches around 60°F (15°C). This allows them to take advantage of optimal growing conditions. It’s essential to note that chickpeas are a cool-season crop, meaning they grow best during the cooler parts of the year.
When planning your chickpea cultivation, keep in mind that even slight variations in temperature can impact yields. For example, a 5°F (3°C) increase in temperature can result in a 10% to 15% decrease in yield. By understanding and controlling for optimal temperatures, you can ensure healthy growth and maximize your harvest.
Soil Type and pH Preferences
When it comes to growing chickpeas, the right soil type and pH level are crucial for optimal yields. Chickpeas prefer well-draining soils with a slightly acidic to neutral pH range of 6.0-7.5. Sandy loams with good organic matter content are ideal, as they provide excellent drainage and aeration.
In regions with high rainfall or irrigation, it’s essential to ensure the soil drains efficiently to prevent waterlogging, which can lead to root rot and other diseases. A sandy-loam mix with 20-30% sand content is suitable for chickpea cultivation. Avoid heavy clay soils, as they retain too much water and can cause root damage.
If you’re starting from scratch, consider adding organic matter like compost or well-rotted manure to improve soil structure and fertility. This will also help maintain a balanced pH level and provide essential nutrients for the crop. For example, applying 5-10 tons of compost per hectare can significantly improve soil health and yields.
When testing your soil, aim for a pH between 6.2-7.0 for optimal chickpea growth. Avoid extreme pH levels, as they can affect nutrient availability and overall plant performance. By choosing the right soil type and maintaining an optimal pH level, you’ll be well on your way to growing healthy and productive chickpeas.
Planting and Sowing Techniques
When it comes to growing chickpeas, proper planting and sowing techniques are essential for a bountiful harvest. Let’s dive into the specifics of how to plant and sow chickpea seeds effectively.
Preparing the Seedbed
Preparing the seedbed is a crucial step in growing chickpeas. This involves creating an optimal environment for germination and early growth. A well-prepared seedbed ensures that the seeds have enough moisture, oxygen, and nutrients to establish a strong root system.
To prepare the seedbed, start by loosening the soil to a depth of 8-10 inches using a fork or spade. Remove any debris, rocks, or weeds that may interfere with growth. If your soil is heavy clay or sandy, mix in organic matter like compost or well-rotted manure to improve its structure.
Test the pH level and adjust it if necessary. Chickpeas prefer a slightly acidic to neutral soil pH between 6.0 and 7.5. Add lime or sulfur as required to achieve the optimal pH.
Once the seedbed is prepared, rake the surface gently to create a smooth layer for sowing seeds. This will help prevent waterlogging and promote even germination. With proper seedbed preparation, you’ll be well on your way to growing healthy and productive chickpea crops.
Row Spacing and Seeding Rates
When planting chickpea seeds, it’s essential to consider the optimal row spacing and seeding rates to ensure efficient use of resources. Research suggests that a row spacing of 30-40 cm (12-16 inches) is ideal for most chickpea varieties, allowing for good air circulation and sunlight penetration.
A study conducted by the International Crops Research Institute for the Semi-Arid Tropics found that planting at a density of 50-60 seeds per square meter yielded the best results. This translates to seeding rates between 120-150 kg/ha (110-136 lbs/acre) depending on the specific variety.
To give you a better idea, here’s a rough estimate of how this looks in practice: imagine planting 4-5 seeds every 20 cm (8 inches) along a row. This spacing allows for easy weeding and harvesting, while also promoting healthy growth. Keep in mind that these are general guidelines, and it’s always best to consult with local experts or check the specific seed package recommendations for your region’s climate and conditions.
By getting this right, you’ll be setting yourself up for a bountiful harvest of delicious chickpeas!
Growth Stages and Monitoring
As you’ve learned how chickpeas sprout, it’s essential to know how to monitor their growth stages and identify potential issues early on. This is crucial for a healthy harvest.
Germination and Emergence
Germination and emergence are critical phases in the growth of chickpeas. During these stages, tiny roots and shoots begin to develop from the seed, signaling the start of new life. For germination to occur, chickpea seeds need adequate moisture, warmth, and oxygen.
Critical factors affecting germination include soil temperature, with optimal temperatures ranging between 15°C to 20°C (59°F to 68°F). Too much or too little water can also hinder the process, as seeds require consistent moisture levels. It’s essential to sow chickpea seeds about 2-3 cm deep in well-draining soil to allow for proper root development.
Emergence occurs once the seedling has broken through the soil surface. This phase is sensitive to temperature fluctuations and moisture stress. Monitor your soil regularly, keeping it consistently moist during this period. If you’re growing chickpeas indoors, ensure they receive adequate light to promote healthy growth. By understanding these key factors and maintaining optimal conditions, you can support successful germination and emergence of your chickpea plants.
Flowering and Pod Formation
As chickpea plants reach maturity, they enter the reproductive stage where flowering and pod formation take center stage. The flowering process is triggered by a combination of photoperiodism – the plant’s internal clock responding to daylight hours – and temperature. When day lengths are long enough, typically above 12 hours for most chickpea varieties, the plant begins to produce flowers.
These flowers are usually self-pollinating, but cross-pollination can also occur with the help of bees or other pollinators. After successful pollination, the flowers start to develop into pods. The temperature plays a crucial role in pod formation – temperatures above 20°C (68°F) during this period promote healthy pod development.
It’s essential for farmers and gardeners to monitor the flowering process closely, ensuring optimal conditions for pod formation. This includes maintaining adequate moisture levels and managing pests that might damage the plants or interfere with pollination. By understanding these processes, growers can take steps to optimize their chickpea crops, leading to higher yields and better overall quality.
Pest Management and Diseases
As you tend to your growing chickpeas, it’s essential to be aware of common pests and diseases that can damage your crop. We’ll cover the most prevalent issues to watch out for in this section.
Common Pests Affecting Chickpeas
Chickpea crops are susceptible to various pests that can significantly impact yields and quality. Some of the most common pests affecting chickpeas include:
Aphids: These tiny, sap-sucking insects can cause curled or distorted leaves, stunted growth, and reduced yields. To control aphid infestations, use neem oil or insecticidal soap to spray affected areas.
Whiteflies: Similar to aphids, whiteflies feed on plant sap, causing damage to leaves and stems. Use yellow traps to attract and capture these pests, and consider introducing natural predators like ladybugs or lacewings.
Spider mites: These microscopic arachnids feed on plant cells, leading to yellowing or bronzing of leaves. To manage spider mite infestations, maintain optimal humidity levels and use miticides as a last resort.
Cutworms: Large cutworms can chew through stems and leaves, causing significant damage. Use physical barriers like row covers or collars around seedlings to prevent cutworms from reaching plants.
By recognizing the signs of these pests and implementing control measures early on, you can minimize losses and ensure healthier chickpea crops.
Disease Prevention and Control
Chickpeas are susceptible to various diseases that can significantly impact yields and quality. One of the most common diseases is Ascochyta blight, a fungal disease that causes lesions on the leaves and stems. To prevent this, ensure you use resistant cultivars, maintain proper soil moisture, and practice crop rotation.
Other prevalent diseases include powdery mildew and fusarium wilt. Powdery mildew appears as a white or grayish coating on the leaves, while fusarium wilt causes yellowing of the lower leaves followed by plant death. Prevention measures include removing weeds that can harbor disease-causing pathogens, using fungicides judiciously, and ensuring good air circulation.
Monitoring your chickpea crop regularly for signs of disease is crucial. Early detection allows for timely intervention and reduces the risk of significant yield loss. Regular soil testing and adjusting the fertilizer schedule as needed also help prevent nutrient deficiencies that can contribute to disease susceptibility.
When treating a diseased crop, choose fungicides that are specifically labeled for use on chickpeas and follow the recommended application rates carefully.
Frequently Asked Questions
Can I grow chickpeas in a small backyard or do they require large agricultural spaces?
Yes, you can definitely grow chickpeas in a small backyard, but it’s essential to choose a suitable variety that is compact or dwarf-sized. These varieties are specifically bred for smaller spaces and can thrive with minimal care. Make sure to research the specific growing requirements of your chosen variety and provide optimal conditions for growth.
How do I handle common pests like aphids and whiteflies in my chickpea crop?
Common pests like aphids and whiteflies can be managed using integrated pest management (IPM) strategies. These include introducing beneficial insects, practicing good crop rotation, and maintaining a healthy crop through balanced fertilization and adequate watering. Regularly monitor your plants for signs of infestation and take action promptly to prevent the spread of pests.
Can I use leftover chickpea seeds from last season’s harvest or do I need to purchase new ones?
It’s not recommended to reuse chickpea seeds from last season’s harvest, as they may have degraded over time. Chickpeas are a legume that has a natural tendency to lose viability after one growing season. Purchase fresh seeds specifically labeled for the current growing season to ensure optimal germination rates and healthy plant growth.
How long does it take for chickpea plants to mature from sowing to harvest?
The maturation period of chickpeas can vary depending on factors like climate, soil quality, and specific variety. On average, it takes around 100-120 days for chickpea plants to mature from sowing to harvest. Keep in mind that this duration may be longer or shorter based on your local conditions.
Can I grow multiple varieties of legumes together, including chickpeas, without compromising their growth?
While it’s possible to intercrop different legume varieties, ensure compatibility and proper growing conditions for each variety. Some legumes have specific requirements that can compete with other plants for resources like light, water, or nutrients. Conduct thorough research on companion planting and choose varieties that are known to thrive together in your local climate.