Growing your own Brussels sprouts can be a rewarding experience, especially when you get to enjoy the fruits of your labor right from your backyard. Not only do homegrown Brussels sprouts taste better and retain more nutrients than store-bought ones, but they’re also a great way to ensure a steady supply throughout the seasons. However, growing these delicious veggies can seem intimidating if you don’t know where to start.
In this comprehensive guide, we’ll take you through everything you need to know about choosing the right variety, preparing your soil, sowing seeds, and caring for your Brussels sprouts plants from planting to harvesting. Whether you’re a seasoned gardener or just starting out, our step-by-step approach will walk you through the process of growing thriving and bountiful Brussels sprouts in your garden. With these tips, you’ll be well on your way to enjoying this nutritious superfood all year round.
Choosing the Right Variety
When it comes to growing Brussels sprouts, selecting the right variety is crucial for success. With so many types to choose from, let’s break down what you need to know.
Understanding Plant Types
When it comes to growing Brussels sprouts, selecting the right variety is crucial for a bountiful harvest. There are numerous types of Brussels sprouts, each with its unique characteristics, growth habits, and flavor profiles.
For example, ‘Jade Cross’ is a popular variety known for its compact growth habit, reaching about 18-20 inches in height. This makes it ideal for smaller gardens or containers. On the other hand, ‘Long Island Improved’ is a more traditional variety that grows taller, up to 24-30 inches, and produces larger, sweeter sprouts.
Other popular varieties include ‘Falstaff’, which is resistant to cold temperatures and perfect for early spring planting, and ‘Rubine’, known for its striking red color and tender flavor. When choosing a variety, consider factors such as climate, available space, and personal preference. Be sure to check the specific growing requirements for your chosen variety, including days to maturity, to ensure a successful harvest.
Some varieties also offer additional benefits like disease resistance or improved cold hardiness.
Factors to Consider for Selection
When selecting a Brussels sprouts variety, there are several key factors to consider. Climate is one of the most critical considerations. If you live in an area with mild winters and cool summers, you can grow varieties that thrive in these conditions. However, if you live in an area with harsh winters or hot summers, you’ll want to choose varieties that are more tolerant.
Soil type is another crucial factor. Brussels sprouts prefer well-draining soil rich in organic matter. If your soil is heavy clay or sandy, you may need to amend it before planting. Additionally, consider the disease resistance of the variety. Some common diseases affecting Brussels sprouts include club root and powdery mildew.
For example, ‘Long Island Improved’ is a popular variety that thrives in cooler climates with well-draining soil. On the other hand, ‘Jade Cross’ is more resistant to club root and can tolerate warmer temperatures. When selecting a variety, research its specific needs and ensure they align with your growing conditions. This will help you grow healthy, productive Brussels sprouts.
Preparing the Soil
Before planting Brussels sprouts, it’s essential to prepare your soil properly. This involves loosening and aerating the soil to provide a healthy environment for your crop to grow.
Testing and Amending Your Soil
Testing your soil pH and nutrient levels is crucial before planting Brussels sprouts. Soil pH affects nutrient availability, and most vegetables prefer a slightly acidic to neutral soil pH between 6.0 and 7.0. Brussels sprouts are no exception; they grow best in soil with a pH between 6.5 and 7.2.
You can test your soil pH using a DIY kit or sending a sample to a lab for analysis. The kit typically includes a small amount of powder that you mix with water, and the resulting color indicates the pH level. Be sure to follow the manufacturer’s instructions carefully. A lab test will provide more detailed information on nutrient levels, including nitrogen, phosphorus, potassium, and other micronutrients.
If your soil is too alkaline or acidic, you can amend it by adding organic matter like compost or peat moss. For example, if your soil pH is 7.5, you can add a small amount of peat moss to lower the pH. Aim for gradual changes; sudden shifts can be stressful for plants.
Consider getting a detailed nutrient analysis report from a lab to identify areas that need attention. Based on the results, create a plan to adjust your fertilizer application and soil amendments accordingly. This will ensure your Brussels sprouts have optimal growing conditions.
Adding Organic Matter and Compost
When it comes to growing delicious and healthy Brussels sprouts, one of the most essential steps is preparing the soil. Adding organic matter and compost can greatly improve soil structure and fertility, setting your plants up for success. Think of compost as a superfood for your soil – it’s packed with nutrients that will give your Brussels sprouts a boost.
Adding a 2-3 inch layer of compost to your soil will provide essential micronutrients like potassium, magnesium, and sulfur. These elements help promote healthy growth, encourage fruiting, and even deter pests. To incorporate compost into your soil, mix it thoroughly with existing topsoil or use it as a mulch around the base of your plants.
You can make your own compost using kitchen scraps, leaves, and grass clippings. Alternatively, purchase high-quality compost from a reputable supplier. Some gardeners swear by worm composting, which involves burying red worms in a bin filled with organic matter. The worms break down the material, producing a nutrient-rich fertilizer that’s teeming with beneficial microbes.
Remember to apply compost at least 4-6 weeks before planting Brussels sprouts. This allows the microorganisms to get established and start working their magic on your soil. By adding organic matter and compost, you’ll be creating an ideal environment for your plants to thrive – and that’s a recipe for success when it comes to growing delicious Brussels sprouts!
Sowing Seeds
To successfully grow Brussels sprouts, you need to start by sowing seeds at the right time and in a location that receives the perfect amount of sunlight. This is where planning ahead comes into play!
Timing and Spacing
When it comes to sowing Brussels sprouts seeds, timing and spacing are crucial for optimal growth. In general, it’s best to sow Brussels sprouts seeds in late spring to early summer, about 4-6 weeks before the last frost date in your area. This allows them to mature during the cooler fall season.
In warmer climates (USDA zones 8-10), you can sow Brussels sprouts in late winter or early spring for a fall harvest. However, in areas with shorter growing seasons (USDA zones 3-5), it’s best to start seeds indoors 4-6 weeks before transplanting them outside in the spring.
When spacing seeds, keep in mind that Brussels sprouts are dense plants and should be sown about 18-24 inches apart. Sowing too close together can lead to overcrowding, which can result in reduced yields and increased susceptibility to disease. Plant multiple rows about 3 feet apart for a healthy crop.
Sowing Methods: Direct Sow or Transplant?
When it comes to growing Brussels sprouts, you have two main options for sowing seeds: direct sow or transplant. While both methods can be effective, they have their pros and cons.
Direct sowing involves planting Brussels sprouts seeds directly into the garden bed where they will mature. This method has several advantages, including saving time and reducing the risk of seedlings being damaged during handling. However, it can also lead to weaker seedlings that may struggle with pests and diseases. If you’re new to growing Brussels sprouts, direct sowing might be a good option, as it allows for more flexibility in terms of spacing and layout.
Transplanting, on the other hand, involves starting seeds indoors or in a greenhouse and then moving them outside when they have 2-3 sets of leaves. This method can produce stronger seedlings that are better equipped to handle outdoor conditions. However, it requires more planning and effort upfront, including providing adequate light and care for the seedlings before transplanting.
The ideal time for direct sowing or transplanting Brussels sprouts depends on your location and climate. In general, it’s best to sow seeds 8-10 weeks before the first frost date in your area. If you’re unsure about when to plant, consider starting seeds indoors and then transplanting them outside when the weather warms up.
It’s worth noting that some Brussels sprouts varieties are specifically bred for direct sowing or transplanting, so be sure to check the seed packet or consult with a local nursery for guidance on the best method for your specific variety.
Plant Care and Maintenance
To ensure a bountiful harvest, it’s essential that you provide your Brussels sprouts plants with proper care and maintenance throughout their growing cycle. This includes regular watering, fertilization, and pruning.
Watering and Irrigation Strategies
Consistent moisture levels are crucial for healthy growth and development of Brussels sprouts. These cool-season crops thrive in temperatures between 60-70°F (15-21°C) and require adequate water to produce a bountiful harvest. Watering and irrigation strategies play a significant role in preventing overwatering or underwatering, which can be detrimental to the crop.
To ensure optimal moisture levels, aim to provide about 1 inch of water per week through rainfall or irrigation. You can achieve this by installing a drip irrigation system or soaker hose that delivers water directly to the roots of the plants. This method reduces evaporation and runoff, ensuring that more water is absorbed by the soil.
Aim to water your Brussels sprouts deeply once or twice a week, rather than shallowly every day. This encourages deep root growth and makes the plants more resilient to drought conditions. Additionally, avoid overhead watering, which can lead to fungal diseases and promote pest infestations. Monitor the moisture levels in the top 6-8 inches of soil by inserting your finger into the soil or using a moisture meter.
If you’re unsure about the water needs of your Brussels sprouts, observe the plants’ natural response. If they’re droopy, wilted, or have yellowing leaves, it’s likely due to underwatering. Conversely, if the leaves are soft and mushy, overwatering may be the culprit.
Mulching and Pest Management
When it comes to growing Brussels sprouts, mulching and pest management are crucial aspects of plant care. Mulching around your Brussels sprouts plants can help retain moisture in the soil, reducing the need for frequent watering. This is especially beneficial during hot summer days when evaporation rates are high. Additionally, a layer of organic mulch like straw or bark chips suppresses weed growth, preventing competition for nutrients and water.
To manage pests effectively, inspect your plants regularly for signs of aphids, slugs, or other common Brussels sprouts pests. For aphid infestations, use neem oil or insecticidal soap to control their population. To deter slugs, try using copper tape around the plant’s stem or laying down crushed eggshells nearby. Regularly inspect your plants at night when these pests are most active and remove any affected leaves or sprouts.
By implementing a consistent mulching routine and keeping an eye out for common pests, you’ll be able to minimize stress on your Brussels sprouts plants and promote healthy growth throughout the season.
Support and Pruning
Now that your Brussels sprouts are growing, it’s essential to provide them with the right support and pruning to promote healthy growth and prevent damage. Learn how to care for your plants here.
Providing Structure with Stakes or Cages
As your Brussels sprouts plants grow and mature, they can become quite top-heavy with their dense foliage and buds. This is especially true for varieties like ‘Jade Cross’ and ‘Long Island Improved’, which produce large, heavy harvests. If left unsupported, these plants may collapse under the weight of their own growth, leading to lost yields and damaged leaves.
To prevent this from happening, it’s essential to provide your Brussels sprouts with some form of support. You can use either stakes or cages to keep the plants upright and secure. Stakes are a good option for smaller varieties, while cages work better for larger ones. Simply drive a stake into the ground next to each plant and tie the stem gently with twine or string. For cages, you can purchase them specifically designed for Brussels sprouts or use tomato cages as a substitute.
Timing and Techniques for Pruning
Pruning is an essential technique for promoting healthy growth and maximizing yields in Brussels sprouts. The optimal timing for pruning depends on the plant’s stage of development.
When pruning, aim to remove lower leaves to allow air circulation and prevent fungal diseases from developing. For mature plants, pinch off the growing tips to encourage side shoots to form, which will produce more Brussels sprouts. This technique is called “tip-pinning” and can increase yields by up to 20%.
For young plants, prune away weak or spindly growth to direct energy towards producing a strong stem and healthy leaves. Remove any damaged or diseased leaves or stems as soon as possible to prevent the spread of disease.
When pruning Brussels sprouts, use sharp, clean tools to avoid spreading diseases. Prune during the cooler part of the day, when the plant is under less stress, for best results. Regular pruning will also help maintain the plant’s shape and encourage even growth, resulting in a more bountiful harvest.
Harvesting and Storage
Now that you’ve grown your Brussels sprouts, it’s time to reap what you’ve sown – learn how to harvest them at their peak freshness and store them for months to come. Proper handling is key!
Determining Maturity
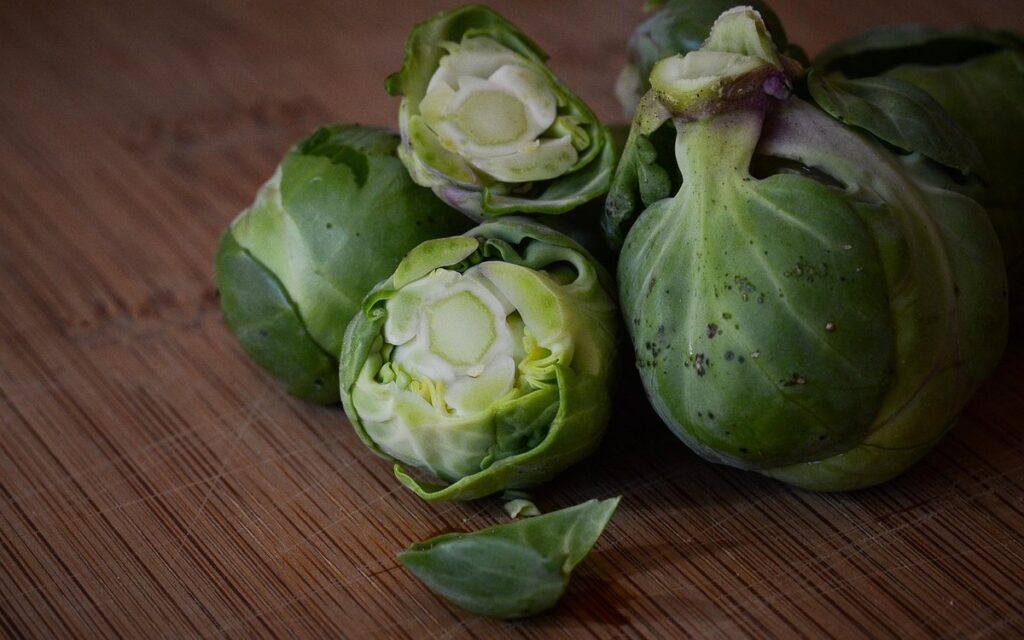
Checking for maturity is crucial when harvesting Brussels sprouts to ensure they’re at their peak flavor and texture. As you inspect your crop, look for a few key visual cues: the buds should be firm and compact, with a slight yellow or brown tint indicating ripeness. The leaves surrounding each bud should also be tightly closed, as this will help preserve moisture and prevent spoilage.
To confirm maturity, try a taste test by gently squeezing one of the largest buds. If it yields to pressure but still has some crunch, it’s ready to harvest. On the other hand, if it feels soft or mushy, wait another few days for optimal flavor and texture. Keep in mind that over-ripe Brussels sprouts will quickly become soggy and unpalatable.
It’s also essential to check for any signs of disease or pests, such as yellowing leaves, black spots, or aphids. Harvest your Brussels sprouts regularly to prevent them from becoming too large and woody, ensuring the best flavor and texture in each crop.
Storing Your Harvest: Tips and Tricks
When it’s time to harvest your Brussels sprouts, you’ll want to store them properly to keep them fresh for as long as possible. Refrigeration is the most effective method for storing harvested Brussels sprouts, but there are some key techniques and packaging suggestions to keep in mind.
First, trim any loose leaves or stems from the Brussels sprouts to prevent moisture buildup and promote even cooling. Next, place them in a breathable container or bag, such as a paper bag or mesh produce bag, to maintain airflow and prevent ethylene gas buildup. You can also store them in a shallow container with some space between each sprout for air circulation.
Keep the container in the refrigerator at a consistent temperature below 40°F (4°C). Don’t wash the Brussels sprouts before storing them; instead, rinse just before use to prevent moisture from accumulating and promoting spoilage. By following these simple steps, you can enjoy your homegrown Brussels sprouts for several weeks after harvesting.
Frequently Asked Questions
What are the ideal temperatures for Brussels sprouts growth?
The ideal temperature range for Brussels sprouts is between 60°F (15°C) and 75°F (24°C). Avoid planting them in areas where the temperature frequently drops below 40°F (4°C), as this can cause damage to the plants. Young seedlings are more susceptible to cold temperatures, so be sure to choose a spot that provides protection from wind and frost.
Can I grow Brussels sprouts in containers?
Yes, you can grow Brussels sprouts in containers, but make sure they have enough root space (at least 6-8 hours of direct sunlight) and a well-draining potting mix. Choose compact varieties like ‘Jade Cross’ or ‘Long Island Improved’, which are specifically bred for container growing.
How do I protect my Brussels sprouts from pests?
Regularly inspect your plants for signs of pests, such as aphids, slugs, or caterpillars. Use physical barriers like fine-mesh row covers to prevent insects from reaching the plants. For more severe infestations, use organic pest control methods like neem oil or diatomaceous earth.
What’s the best way to store harvested Brussels sprouts?
To keep your harvested Brussels sprouts fresh for a longer period, store them in a cool (around 40°F/4°C), dark place. You can also store them in a sealed container with a paper bag or cloth towel to maintain humidity and prevent moisture from accumulating.
Can I grow Brussels sprouts year-round in my region?
It depends on your climate zone. In warmer regions (USDA zones 9-11), you can grow Brussels sprouts throughout the year, but in colder areas (USDA zones 3-6), it’s best to plant them in early spring or late summer/early fall for a winter harvest. Check the specific growing season for your region and adjust planting times accordingly.