Growing your own delicious and nutritious bean sprouts at home is easier than you think. Not only do they add a burst of flavor and texture to salads, sandwiches, and stir-fries, but they’re also packed with vitamins and minerals that can boost your energy levels and support a healthy lifestyle. But before you start growing, it’s essential to choose the right beans for sprouting – some varieties are better suited than others for this process.
In this comprehensive guide, we’ll walk you through everything you need to know to grow delicious bean sprouts at home. From selecting the perfect beans to harvesting and storing your sprouts, we’ve got you covered. With our expert tips and tricks, you’ll be enjoying fresh, crunchy bean sprouts in no time – and saving money on store-bought varieties to boot!
Choosing the Right Beans
When selecting beans for sprouting, consider factors like moisture content and ease of germination. We’ll help you navigate the best options to achieve success.
Understanding Bean Varieties
When it comes to growing bean sprouts, understanding the different varieties of beans is crucial. Not all beans are created equal when it comes to sprouting, and choosing the right one can make a big difference.
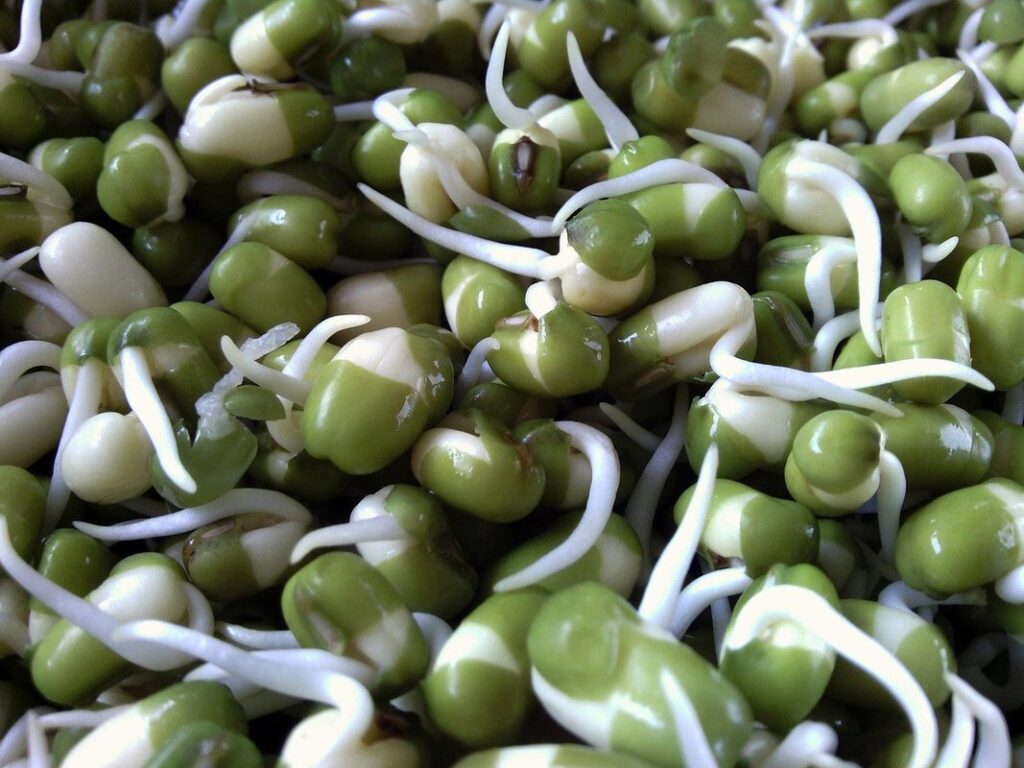
Mung beans, for instance, are one of the most popular choices for sprouting due to their ease of germination and high nutritional value. They have a relatively short germination period, typically taking 1-3 days to sprout, and can be harvested in as little as 5-7 days. However, they may require more frequent rinsing to prevent mold growth.
Adzuki beans, on the other hand, are smaller in size but pack a bigger nutritional punch. They have a slightly longer germination period than mung beans, taking around 3-4 days, and can be harvested in 7-10 days. Adzuki beans also tend to hold their shape better during sprouting, making them a great choice for salads and other dishes.
Kidney beans are another option, but they can be more challenging to sprout due to their larger size and harder seed coat. They require a longer germination period, typically taking 4-5 days, and may need additional soaking time before rinsing.
When choosing a bean variety for sprouting, consider factors such as ease of germination, nutritional value, and desired texture. Experiment with different types to find the one that works best for you.
Selecting High-Quality Seeds
When it comes to growing bean sprouts, selecting high-quality seeds is crucial for a successful harvest. Freshness is key when it comes to seed quality, and this can be determined by the packaging date or the appearance of the seeds themselves. Look for seeds that are plump, firm, and have a uniform color. Avoid seeds that appear shriveled, pale, or moldy.
Seed size also matters, as smaller seeds tend to germinate more quickly than larger ones. In terms of appearance, check for any visible signs of damage or imperfections on the seed coat.
To store your seeds properly, keep them in a cool, dark place with low humidity. A sealed glass jar or container is ideal, and you can even store them in the refrigerator to extend their shelf life. When not in use, make sure to label and date the packaging so you can easily identify the age of the seeds.
Remember that high-quality seeds will yield better results and a healthier crop. Take your time when selecting seeds, and don’t be afraid to invest in a few extra packets if needed.
Preparing for Sprouting
Before you start growing bean sprouts, it’s essential to prepare your seeds and equipment properly. This section will walk you through the necessary steps to ensure success.
Cleaning and Sorting Beans
Before you begin sprouting your beans, it’s essential to clean and sort them thoroughly. This step may seem tedious, but it’s crucial for ensuring the health and quality of your bean sprouts. Start by rinsing the beans under cold running water to remove any loose debris or dust.
Next, inspect each bean carefully, looking for signs of damage, mold, or rot. Discard any beans that are cracked, shriveled, or show visible signs of decay. This will prevent the spread of infection and promote healthy growth during sprouting.
To make sorting more efficient, separate the beans into three categories: good, borderline, and bad. Be ruthless – if a bean is damaged in any way, it’s best to err on the side of caution and discard it. Remember, a few imperfect beans can spoil an entire batch, so take your time and prioritize quality over quantity.
Rinsing and Soaking Beans
Rinsing and soaking beans are crucial steps in preparing them for sprouting. The goal of rinsing is to remove any impurities, dirt, or debris that may be present on the surface of the beans. This process also helps to wash away any residual moisture, making it easier for the beans to absorb water later.
To rinse your beans correctly, place them in a fine mesh strainer and gently swish them around under cold running water. You can also use a salad spinner or a clean colander with tiny holes to catch any stray bits. Be gentle, as rough handling can cause damage to the bean’s outer skin, which may hinder sprouting.
Soaking is another essential step that allows the beans to absorb water and rehydrate. Soak your rinsed beans in a bowl of cold water for about 8-12 hours or overnight. This will help to soften the outer layers and make it easier for the beans to sprout when they’re ready. Make sure the water level is above the surface of the beans, but not so high that they become waterlogged.
By properly rinsing and soaking your beans, you’ll be giving them a solid foundation for successful sprouting. This will also help prevent any potential issues like mold or bacterial growth during the sprouting process.
Setting Up a Sprouting Environment
Before you start growing your bean sprouts, it’s essential to set up an optimal environment that will help them thrive. This includes selecting a suitable container and preparing the right conditions for germination.
Equipment Needed for Sprouting
To grow bean sprouts successfully, you’ll need some basic equipment to get started. The most common tools for sprouting are jars, containers, or specialized sprouting devices. Let’s break down the essential items you’ll need.
For small-scale sprouting, a glass jar with a wide mouth is an ideal choice. You can find these at most home goods stores or online. Make sure to choose a jar that’s specifically designed for food use and has a lid to keep contaminants out. A mason jar or a similar alternative works well too.
If you’re planning to sprout in larger quantities, consider investing in a specialized sprouting device. These devices are designed to hold multiple trays of seeds and make it easy to rinse and drain the sprouts. Some popular options include the Sproutmaster and the Seed Starter.
Regardless of which equipment you choose, make sure it’s clean and sanitized before use. A simple solution of water and white vinegar will do the trick. Rinse the equipment thoroughly with fresh water after cleaning, and allow it to air dry before storing. By having the right equipment in place, you’ll be well on your way to growing delicious bean sprouts at home.
Preparing the Growing Medium
Preparing the growing medium is an essential step in creating an optimal environment for your bean sprouts to thrive. The choice of medium will play a significant role in determining the success of your sprouting venture.
When selecting a growing medium, consider its absorbency and drainage capabilities. Paper towels are a popular choice due to their ability to retain moisture while allowing for air circulation. However, they can become soggy and develop mold if not changed frequently. Cloth or mesh mediums offer better airflow but may require more frequent watering.
It’s essential to rinse the growing medium thoroughly before use to remove any chemical residues that could affect seed germination. Soak the medium in water, then let it drain well to prevent excess moisture from causing root rot. A 1:10 ratio of water to medium is a good starting point, but this may need to be adjusted based on your specific environment.
Some growers also swear by using reusable cloth or mesh mediums that can be washed and reused multiple times. Experiment with different materials to find the one that works best for you. Regardless of the medium you choose, make sure it’s clean, dry, and ready for its new role in supporting the growth of your delicious bean sprouts.
Maintaining a Healthy Sprout Environment
Now that your bean sprouts are growing, it’s essential to maintain a healthy environment to ensure they continue to thrive and develop strong roots. This means keeping their space clean and free of contamination.
Watering and Humidity Control
Proper watering and humidity control are crucial for healthy bean sprouting. As you place your beans on the sprouting tray or jar, ensure that it’s not too crowded, allowing air to circulate evenly around each seed.
For optimal results, maintain a consistent moisture level by watering once daily with lukewarm water. You can also cover the container with a damp cloth to create a humid microclimate. Check for proper moisture levels by gently lifting a few seeds – they should feel slightly firm but not hard when pressed between your fingers.
Monitor temperature and humidity levels in your environment, aiming for 70-80°F (21-27°C) with relative humidity above 50%. Avoid placing the sprouts near heating vents or drafty areas that could lead to water loss or drying out. If you live in a dry climate, consider using a humidifier nearby to maintain optimal conditions.
By striking the right balance between moisture and air circulation, your bean sprouts will begin to grow rapidly within 24-48 hours, eventually reaching 1-2 inches in height. Regular checks on humidity levels ensure your sprouts don’t develop mold or fungus due to overwatering.
Monitoring for Pests and Diseases
As you nurture your bean sprouts, it’s essential to keep an eye out for common pests and diseases that can harm them. Regular monitoring will help you catch issues early on, preventing damage and promoting healthy growth.
Common pests that target bean sprouts include fungus gnats, spider mites, and aphids. To prevent infestations, ensure your growing area is clean, dry, and well-ventilated. Use a gentle stream of water to rinse the jar or container every few days, and avoid overcrowding, which can contribute to pest problems.
Diseases like root rot, leaf spot, and powdery mildew can also affect bean sprouts. Root rot is often caused by overwatering, while leaf spot and powdery mildew are typically fungal infections that thrive in humid environments. To treat these issues, gently rinse the affected area with a solution of 1 part white vinegar to 10 parts water. For more severe cases, consider using a fungicide specifically designed for seed sprouts.
Some key signs to watch out for include tiny eggs or larvae on the surface, distorted leaves, and soft, mushy stems. Regularly inspect your bean sprouts, looking for these warning signals, and take prompt action if you notice any issues.
Encouraging Healthy Growth
Now that you have a successful crop of seeds germinating, it’s time to focus on encouraging healthy growth and preventing any potential problems from arising. This is where careful monitoring and maintenance come into play.
Providing Adequate Light
When growing bean sprouts, providing adequate light is crucial for their healthy growth. Bean sprouts need indirect sunlight to undergo photosynthesis and produce chlorophyll, which gives them their vibrant green color. However, direct sunlight can cause the sprouts to become leggy and weak.
If you’re growing bean sprouts indoors, ensure they receive bright, indirect light from a south-facing window or use grow lights. A standard fluorescent light is sufficient for small batches of sprouts. Place the light 6-8 inches above the seeds and maintain an 18-hour light cycle to promote healthy growth.
In a pinch, you can also use LED grow lights specifically designed for indoor gardening. These energy-efficient lights emit minimal heat and produce full-spectrum light that promotes photosynthesis. Remember to adjust the light’s intensity according to your sprouts’ needs – overexposure can cause burning or scorching of the delicate shoots.
For optimal growth, provide 12-14 hours of indirect sunlight or artificial lighting per day. This will encourage your bean sprouts to grow strong and healthy, with minimal risk of disease or pests.
Maintaining Optimal Temperature
Maintaining optimal temperature conditions is crucial for healthy bean sprout growth. When it comes to bean sprouting, temperature plays a significant role in determining the rate and quality of germination. Ideally, the temperature should be between 70°F (21°C) and 80°F (27°C), with an ideal range of 75°F (24°C) to 78°F (25°C).
This temperature range allows for consistent moisture absorption by the seed, promoting even germination. If the temperature is too low, germination may slow down or become irregular, while temperatures above 85°F (29°C) can cause seeds to sprout unevenly.
To maintain optimal temperature conditions, it’s essential to store your bean sprouts in a location with consistent and stable temperatures. Avoid placing them near heating vents, radiators, or drafty windows, as sudden changes in temperature can be detrimental to their growth. By keeping the temperature within the optimal range, you’ll promote healthy and rapid germination, setting your bean sprouts up for success.
Harvesting and Storing Bean Sprouts
Now that you’ve successfully grown your bean sprouts, it’s time to learn how to harvest them at their best flavor and texture. Here are some essential tips for harvesting and storing bean sprouts.
Identifying Ready-to-Harvest Sprouts
When it’s time to harvest your bean sprouts, you’ll want to check for the right signs of readiness. This ensures that your crop is at its optimal size and flavor for consumption.
To start, take a closer look at the color of your sprouts. They should have reached their full maturity color by now. For example, mung beans typically turn from green to light brown or yellow when they’re ready to harvest. On the other hand, adzuki beans remain green throughout their growth cycle, so you’ll need to rely on texture and size for these varieties.
Check the texture of your sprouts as well. Ready-to-harvest bean sprouts should be tender and slightly firm to the touch, similar to a fresh broccoli floret. Be gentle when handling them, as they can break easily. You can also perform a quick taste test by snipping off one of the tips – if it tastes sweet and earthy, it’s ready.
In general, bean sprouts are usually ready for harvest in 5-7 days after germination. Check on them daily during this time to catch them at their peak freshness.
Storing Bean Sprouts for Freshness
Proper storage is crucial to maintaining the freshness and quality of your bean sprouts. When stored correctly, they can last for up to 5 days. Here are some tips on storing them:
For short-term storage, store the bean sprouts in a breathable container such as a mesh bag or paper towel-lined bowl at room temperature (about 60-70°F). This allows air circulation and prevents moisture buildup.
If you won’t be using the sprouts within a day or two, place them in the refrigerator. To prevent dehydration, keep them wrapped in plastic or aluminum foil with a damp cloth to maintain humidity.
Another storage method is to use an airtight container filled with water at the bottom and store it in the refrigerator. Change the water every other day to keep the sprouts fresh. This method keeps the sprouts moist but prevents spoilage by limiting oxygen exposure.
Remember to check on your stored bean sprouts regularly for any signs of decay or mold, as these can spread quickly and compromise the entire batch.
Tips and Tricks for Successful Bean Sprouting
To ensure successful bean sprouting, it’s essential to maintain consistent moisture levels. Rinse the beans daily, and soak them in water every 12-24 hours. This helps prevent fungal growth and keeps the beans hydrated. For example, you can soak a cup of mung beans in water for about an hour, then drain and rinse them thoroughly.
When it comes to temperature, keep the sprouting area between 70-80°F (21-27°C). Avoid direct sunlight, as it can cause overheating. Use a warm location with filtered light, such as a windowsill or under a grow lamp. This will promote healthy growth and prevent the beans from becoming too leggy.
Monitor your bean sprouts daily for any signs of mold or fungal growth. If you notice anything unusual, discard the affected batch immediately to prevent contamination. Regularly inspecting your sprouts will help you catch any issues early on.
Frequently Asked Questions
Can I grow bean sprouts indoors year-round with minimal maintenance?
While it’s possible to grow bean sprouts indoors, maintaining a consistent temperature (around 70-80°F) and providing adequate light can be challenging. However, with the right equipment and setup, you can create an ideal environment for year-round growth.
How do I know if my bean sprouts are getting enough water?
Check your sprouts daily for moisture levels by gently tugging on a few leaves. If they come off easily, it’s likely that the soil is too dry. Aim to keep the growing medium consistently moist but not waterlogged, as this can lead to mold and root rot.
Can I use bean sprouts from the store to grow more?
No, using store-bought beans for sprouting may not yield the best results due to potential contamination or low germination rates. Instead, purchase high-quality seeds specifically designed for sprouting or harvest fresh beans from your own garden.
What are some common pests and diseases that can affect bean sprouts?
Watch out for aphids, whiteflies, and spider mites, which can be controlled with neem oil or insecticidal soap. Fungal diseases like powdery mildew or root rot can occur when the growing environment is too humid or waterlogged; maintain proper ventilation and drainage to prevent these issues.
How long do bean sprouts typically last after harvesting?
When stored properly in an airtight container in the refrigerator, fresh bean sprouts can last up to 5-7 days. To extend their shelf life, consider freezing or dehydrating your harvest for later use.