Growing your own basil from cuttings can be a game-changer for any herb enthusiast. Not only is it cost-effective, but it also allows you to have a constant supply of fresh basil leaves right in your backyard or even on your windowsill. However, taking care of basil can be tricky, especially when it comes to propagation methods. That’s why we’ve put together this easy-to-follow guide on how to grow basil from cuttings. In this article, we’ll walk you through the basics of propagating basil, covering topics such as optimal environmental factors and common issues that may arise along the way. By following our step-by-step instructions, you’ll be well on your way to enjoying fresh, fragrant basil all season long.
Choosing Healthy Cuttings
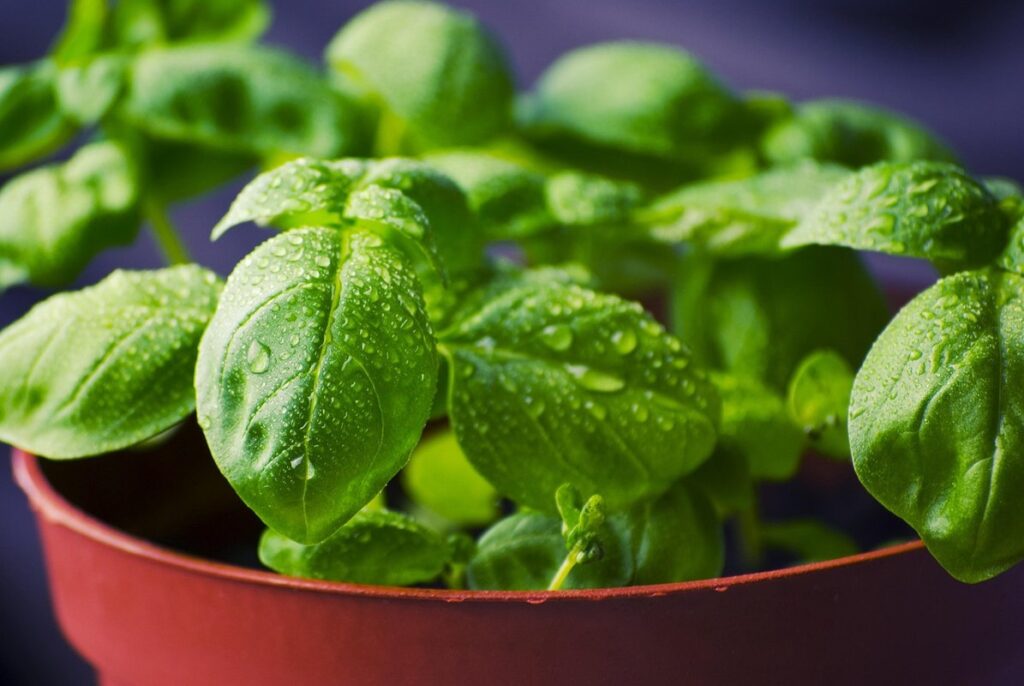
When selecting cuttings for growing basil, it’s essential to choose healthy stems with a few sets of leaves and a node that has at least two growing points. This ensures successful propagation.
Selecting the Right Time to Take Cuttings
When it comes to selecting the right time to take cuttings from your basil plant, timing is everything. In general, the best time to take cuttings is during the cooler parts of the day, usually early morning or late afternoon when the sun isn’t too intense.
Avoid taking cuttings in extreme weather conditions such as direct sunlight, high temperatures (above 75°F/24°C), and strong winds. These conditions can cause stress to the plant, making it more difficult for the cutting to root successfully.
It’s also essential to consider the maturity of your basil plant when taking cuttings. For best results, take cuttings from the top sets of leaves, where the growth is most vigorous. This ensures that you’re taking a section of the plant that will be able to produce new roots and continue growing healthily.
In terms of the time of year, spring and fall are ideal times for taking basil cuttings, as the weather is generally cooler and more favorable for rooting.
Preparing the Cutting Tools
To successfully grow basil from cuttings, it’s essential to have the right tools for harvesting and preparing them. When it comes to cutting basil stems, you’ll want to use sharp and clean pruning scissors or a dedicated herb knife. A good pair of pruning scissors should be specifically designed for cutting herbs, with curved blades that allow for precise cuts without crushing the leaves.
Using a dull or rusty tool can damage the cuttings and reduce their chances of rooting successfully. Make sure your scissors are sterile by washing them in soap and water before use, and dry thoroughly to prevent any bacterial growth.
When preparing the cuttings, gently grasp the stem with one hand and use the other to make a clean cut just above a node (where a leaf meets the stem). This will help promote root growth. Cutting at an angle also helps the cutting absorb more water and nutrients as it establishes its roots. With these simple steps, you’ll be well-prepared to start growing your basil from cuttings.
Identifying Healthy Stems
When selecting healthy stems for propagation, it’s essential to choose those with the best chance of successful growth. Look for stems that have a vibrant green color, as this indicates optimal photosynthesis and nutrient uptake. Avoid stems with yellow or brown tinted leaves, as these may be signs of stress or disease.
In terms of texture, select stems with smooth, unblemished skin. Remove any wilted or damaged leaves from the stem to prevent the spread of infection. A healthy basil stem should have some flexibility when bent gently, but not so much that it breaks easily.
Check for a node (a small swelling on the stem) about an inch below the topmost set of leaves. This is where roots will form during propagation. Choose stems with multiple nodes to increase the chances of successful rooting. By selecting healthy stems with the right characteristics, you’ll be well on your way to growing robust and fragrant basil plants from cuttings.
Propagation Methods: Water, Soil, and Air-Layering
To successfully grow basil from cuttings, you’ll need to learn various propagation methods, which we’ll explore next in more detail. We’ll cover water, soil, and air-layering techniques that will get you started.
The Water Method: Rooting Basil Cuttings in Water
Rooting basil cuttings in water is a popular and efficient method for propagation. To start, you’ll need to gather a few healthy basil stems with nodes, which are the joint points where leaves meet the stem. Remove lower leaves from each cutting, leaving only two or three sets of leaves at the top. This will help prevent the cutting from rotting and promote water uptake.
Place the cuttings in a clear glass or cup filled with room-temperature water, making sure the nodes are fully submerged. Change the water every 2-3 days to maintain its purity and oxygen levels. Root development typically occurs within 1-2 weeks, but this can vary depending on conditions like light, temperature, and humidity.
Monitor progress by checking for root growth and white nodules forming at the node points. Once roots have developed, you can transfer the cuttings into soil or a pot filled with well-draining mix. This method works best when using a clean glass container to prevent bacterial contamination.
The Soil Method: Planting Basil Cuttings Directly into Soil
Planting basil cuttings directly into soil is a simple and effective method of propagation. To get started, you’ll need to select healthy basil stems with at least two sets of leaves. Next, prepare a pot or tray filled with well-draining soil that’s specifically designed for herbs.
When it comes to soil type, choose a mix that’s rich in organic matter such as peat moss or compost. This will help retain moisture and provide essential nutrients for your basil cuttings. Water the soil gently but thoroughly before planting the cuttings. Make sure the soil is moist but not waterlogged – this can lead to root rot.
Plant the cutting about 1-2 inches deep, firming the soil around it to prevent air pockets from forming. Place the pot in a bright location with temperatures between 65-75°F (18-24°C). Water regularly, keeping the soil consistently moist but not waterlogged. With proper care, your basil cuttings should develop roots within 7-10 days and start producing new growth within two weeks.
Air-Layering: A Less Common but Effective Method
Air-layering is an unconventional yet effective method for propagating basil from cuttings. It involves stimulating root growth on a section of stem while it’s still attached to the parent plant, rather than separating the cutting entirely. To begin air-layering, select a healthy stem with at least two sets of leaves and make a small incision in the stem about 6-8 inches from the tip.
Next, gently pry the bark away from the underlying wood using a blunt instrument like a chopstick or pencil. This will create a wound that allows roots to develop more easily. Wrap the area in moist sphagnum moss, making sure to cover it completely and securing it with twine. Keep the moss consistently moist but not waterlogged.
As the new roots grow, the stem section should start to droop downward. Once you notice significant root growth, cut below the air-layered section, taking care not to damage any of the newly formed roots. Transfer the rooted cutting to a pot filled with well-draining soil and continue to care for it as you would an established basil plant.
Note: Air-layering can be more time-consuming than other propagation methods but allows you to harvest multiple cuttings from a single stem.
Environmental Factors: Light, Temperature, and Humidity
To grow basil from cuttings successfully, it’s essential to provide the right environment. This means considering factors like light, temperature, and humidity that will affect your plant’s growth and health.
Optimizing Light Conditions for Basil Growth
When it comes to growing basil from cuttings, providing optimal light conditions is crucial for healthy growth. Basil loves direct sunlight, but excessive sun exposure can cause the leaves to become scorched and discolored. To strike a balance, place your basil plant near an east- or west-facing window that receives 4-6 hours of direct sunlight per day.
If you don’t have access to natural light, consider using grow lights as a substitute. LED grow lights are energy-efficient and produce minimal heat, making them ideal for indoor growing. Aim for at least 12-14 hours of supplemental lighting to promote healthy growth and leaf production.
In some cases, it may be necessary to provide shading for your basil plant, especially during intense summer months or in warmer climates. Using a sheer curtain or placing the pot on a table under a shaded area can help filter out excessive sunlight and prevent damage.
Maintaining Ideal Temperature and Humidity Levels
Maintaining optimal temperature and humidity levels is crucial for successful basil propagation from cuttings. Basil thrives in temperatures between 65°F to 75°F (18°C to 24°C) during the day, with a slightly cooler nighttime temperature around 55°F to 65°F (13°C to 18°C). However, daytime heat stress can be detrimental, causing leaves to wilt and reducing growth rates. To mitigate this, ensure that your propagation area has good air circulation, which helps prevent fungal diseases that thrive in stagnant conditions.
Aim for a relative humidity of 40% to 60% around the cuttings, as high humidity can lead to overwatering and root rot. You can achieve this by placing the cuttings near an open window or using a fan to circulate air. Water your basil cuttings sparingly until roots develop, as excess moisture can be detrimental. To monitor temperature and humidity levels effectively, consider investing in a digital thermometer and hygrometer.
By maintaining optimal temperature and humidity conditions, you’ll create an environment that fosters healthy root development and encourages your basil cutting to grow strong and resilient.
Common Challenges and Troubleshooting
Don’t worry if things don’t go as planned, we’ll walk you through common problems and their easy fixes to ensure your basil cuttings thrive. Let’s troubleshoot together!
Overwatering: A Common Pitfall in Basil Propagation
Overwatering is one of the most common mistakes gardeners make when growing basil from cuttings. It’s easy to get caught up in the excitement of nurturing new life, but too much water can be just as detrimental as not enough. So, how do you know if you’re overwatering your basil? Look for signs such as yellowing leaves, droopy stems, and a soft, mushy texture.
If you catch it early, there’s still hope to save your basil. To correct the issue, stop watering immediately and allow the soil to dry out slightly between waterings. Check the roots by gently removing the cutting from its pot – if they’re rotting or have developed an unpleasant odor, it’s time to start over.
In future, be mindful of the moisture levels in your garden. Basil prefers well-draining soil and consistent, moderate watering. Aim for about 1-2 inches of water per week, either through rain or irrigation. Keep a close eye on your basil, and with a little patience and care, you should be able to enjoy a thriving crop in no time.
Underwatering: Ensuring Adequate Moisture Levels
Maintaining adequate moisture levels is crucial during basil propagation from cuttings. Just as our bodies need water to function properly, basil plants need consistent moisture to thrive. If the soil dries out too quickly, the cuttings may not be able to absorb enough nutrients and water, leading to weak or spindly growth.
One of the primary warning signs of underwatering is a change in leaf color. Healthy basil leaves are typically bright green and perky, but if they start to wilt or turn yellow, it’s likely due to drought stress. Check the soil moisture by sticking your finger into the soil up to the first knuckle. If the soil feels dry at this point, it’s time to water.
Water thoroughly when you do water, making sure the pot drains well to prevent root rot. Aim for about 1-2 inches of water per week, either from rainfall or irrigation. Keep in mind that basil prefers well-draining soil and can be susceptible to overwatering, so strike a balance between providing enough moisture and avoiding waterlogged soil.
Advanced Techniques: Root Pruning and Potting Up
Now that your basil cuttings are rooted, it’s time to think about their long-term care. Learn how to prune established roots for healthier plants and pot them up in this section.
Root Pruning for Healthier Plants
Root pruning is an essential technique for promoting healthy growth and development in plants grown from cuttings. When you grow basil from cuttings, it’s not just about getting the leaves to thrive – a strong root system is equally crucial for the plant’s overall health.
Pruning the roots can encourage new growth by stimulating cell division, which leads to increased root mass. This process is called “root hypertrophy.” By promoting healthy root development, you’ll also improve water and nutrient uptake, allowing your basil plants to grow stronger and more resilient.
To prune roots effectively, gently remove any dead or circling roots, making sure not to damage the rest of the root system. Trim back long roots to encourage new growth and promote a bushy shape. When repotting cuttings, loosen the roots slightly with your fingers before placing them in their new pot. This helps prevent waterlogged soil and encourages healthy establishment.
Regular root pruning can make all the difference when growing basil from cuttings – it’s a simple yet powerful technique to ensure your plants thrive.
Transplanting Basil Cuttings into Larger Pots
When transplanting basil cuttings into larger pots, it’s essential to choose a well-draining potting mix specifically designed for herbs. Avoid using regular garden soil as it can compact and prevent healthy root growth. Instead, opt for a mix that retains moisture but drains excess water quickly.
Select pots that are at least 6-8 inches deep to accommodate the basil plant’s extensive root system. A larger pot size will provide room for the roots to grow without becoming constricted. Make sure the pot has drainage holes to prevent waterlogged soil and root rot.
When transplanting, gently remove the basil cutting from its propagation medium, taking care not to disturb the delicate roots. Place the cutting in the new pot, firming the soil around it to secure it in place. Water thoroughly, making sure not to overwater, which can lead to root rot and other issues.
Keep an eye on your transplanted basil cuttings for the next few days, ensuring they’re receiving adequate water and light. This will help them establish a strong foundation for continued growth and success.
Frequently Asked Questions
How do I know if my basil cutting has rooted successfully?
A well-rooted cutting will start to develop new leaves within 1-2 weeks of being planted. Check for white or light-colored roots, and gently tug on the stem – if it resists movement, it’s likely taken root.
What can I do if my cuttings are experiencing underwatering?
Basil requires consistent moisture levels to thrive. If you notice yellowing leaves or a lack of new growth, increase watering frequency or adjust your potting mix for better water retention. Be cautious not to overwater, which can be detrimental to the plant.
Can I propagate basil in warmer weather (above 75°F/24°C)?
While it’s technically possible to propagate basil in warm temperatures, doing so can lead to reduced rooting success and increased risk of disease. If propagating in warmer conditions is unavoidable, use a shaded area or consider air-layering for better results.
How often should I fertilize my newly propagated basil plants?
Basil requires moderate fertilizer levels to promote healthy growth. Feed your cuttings with a balanced water-soluble fertilizer (diluted to half the recommended strength) every 1-2 weeks until they reach maturity, then reduce frequency as needed.
What’s the difference between air-layering and soil propagation for basil?
Air-layering involves cutting into the stem to stimulate root growth, whereas soil propagation requires planting cuttings directly in soil. Both methods work well, but air-layering can be more efficient for mass production or when working with limited space.