Are you ready to grow your own delicious and unique ground cherries? If so, this guide is for you. Ground cherries are an exciting addition to any garden, offering a sweet and tangy flavor that’s perfect for baking, snacking, or using in jams and preserves. But before you can enjoy these tasty treats, you need to learn how to plant them correctly.
In this comprehensive guide, we’ll walk you through the process of planting ground cherries, from preparing the soil to managing pests. We’ll cover seed starting techniques, fertilization methods, and tips for creating a bountiful harvest. Whether you’re a seasoned gardener or just starting out, our expert advice will help you grow healthy and productive ground cherry plants that will provide a rich source of nutrients and flavor all season long.
Understanding Ground Cherries
To grow ground cherries successfully, it’s essential to understand their unique characteristics and requirements as a fruit-bearing plant. Let’s take a closer look at what makes them special.
What are Ground Cherries?
Ground cherries are a type of fruit-bearing plant that belongs to the nightshade family. They’re native to Central and South America, but have become increasingly popular among gardeners worldwide for their unique characteristics and edible fruits. These small, round fruits have a papery husk that surrounds a juicy, sweet pulp, making them a delightful addition to salads, desserts, and even savory dishes.
One of the most distinctive features of ground cherries is their growth habit. They’re a spreading plant that can grow up to 3 feet in diameter, with trailing stems that produce an abundance of small flowers in shades of pink and white. This profuse flowering is followed by an explosion of red or yellow fruits, depending on the variety.
Ground cherries are relatively easy to care for, making them perfect for beginner gardeners. They prefer well-drained soil and full sun, but can tolerate partial shade and a range of soil types. In fact, their adaptability has made them a popular choice among permaculture enthusiasts who value their ability to thrive in diverse conditions.
As we explore the process of planting ground cherries in the following sections, it’s essential to keep these unique characteristics in mind. By understanding how they grow and respond to different environments, you’ll be better equipped to create an ideal growing space for your ground cherry plants to flourish.
Choosing the Right Variety
When it comes to planting ground cherries, one of the most important decisions you’ll make is choosing the right variety for your garden. There are several types of ground cherries to choose from, each with its own unique growth habits, yields, and disease resistance.
For example, ‘Hannah’s Purple’ is a popular variety that produces deep purple fruit with excellent flavor. It’s a compact plant that grows up to 2 feet tall and wide, making it perfect for small gardens or containers. On the other hand, ‘Aunt Ruby’s German Green’ is another favorite among ground cherry enthusiasts. This variety produces green fruit with a sweet-tart taste and can grow quite large, reaching heights of up to 3 feet.
When selecting a variety, consider your climate, soil type, and desired yield. If you live in an area with limited space or poor soil quality, choose a compact variety like ‘Hannah’s Purple’. If you’re looking for high yields, opt for a more vigorous variety like ‘Aunt Ruby’s German Green’.
Some popular varieties to consider include:
* ‘Hannah’s Purple’ – compact growth habit, deep purple fruit
* ‘Aunt Ruby’s German Green’ – vigorous growth, green fruit with sweet-tart taste
* ‘Red Santa’ – produces bright red fruit with a sweet flavor
Keep in mind that different varieties may have varying levels of disease resistance. Be sure to research the specific needs and characteristics of each variety before making your final decision.
Preparing the Soil
Preparing the soil is an often-overlooked yet crucial step in growing healthy and thriving ground cherries. As a gardener, you might be tempted to skip this process or assume that the soil in your garden is already suitable for planting. However, neglecting to test and amend the soil can lead to poor plant growth, reduced yields, and even plant disease.
To ensure optimal soil quality, it’s essential to test the pH level and nutrient content of your soil. You can purchase a DIY soil testing kit or send a sample to a lab for analysis. Based on the results, you may need to add organic matter such as compost or well-rotted manure to improve the soil‘s fertility and structure.
Aim to maintain a slightly acidic to neutral pH range (around 6.0-7.0) for ground cherries. If your soil is too alkaline, it can hinder nutrient uptake, while extremely acidic conditions may lead to micronutrient deficiencies. To amend the soil, mix in 2-3 inches of compost or well-rotted manure and till it into the top 6-8 inches of soil before planting your ground cherry seeds or seedlings.
Planting Ground Cherry Seeds or Seedlings
Now that you have your ground cherry seeds or seedlings ready, let’s dive into the process of planting them successfully for a bountiful harvest. We’ll cover all the essential steps to get you started.
Starting from Seeds
Sowing ground cherry seeds indoors 8-10 weeks before the last frost date is an excellent way to get a head start on the growing season. To begin, select high-quality seeds from a reputable supplier. Look for seeds that have been tested for viability and have a minimum of 80% germination rate.
To sow the seeds, fill a seed tray or small pots with a well-draining seed starting mix. Plant the seeds about ¼ inch deep, and 1-2 inches apart. Cover the seeds with a thin layer of the starting mix. Water gently but thoroughly.
Keep the soil consistently moist but not waterlogged, as this can lead to rot and poor germination. Provide indirect light, such as under grow lights or near an east-facing window. Maintain a temperature between 65-75°F (18-24°C) for optimal germination. It typically takes 7-14 days for the seeds to sprout.
By following these steps, you’ll be well on your way to successfully sowing ground cherry seeds indoors and giving them a strong start in life.
Planting Seedlings
When transplanting seedlings into larger pots or directly into the garden, it’s essential to choose a location with well-draining soil and sufficient sunlight. Ground cherry plants prefer slightly acidic to neutral soil pH (6.0-7.0) and can tolerate some shade but will produce more fruit in full sun.
If you’re planting seedlings in larger pots, make sure they have at least 1 gallon of container space per plant. Use a high-quality potting mix that retains moisture but drains excess water to prevent root rot. Space the seedlings 12-18 inches apart to allow for proper air circulation and growth.
When transplanting into the garden, create a trench slightly deeper than the seedling’s root ball and gently place it in position. Backfill with a mixture of soil and compost, making sure not to compact the soil around the roots. Water thoroughly after planting and keep the soil consistently moist during the first few weeks.
Ground cherry plants can grow quite tall (up to 3 feet), so provide support using stakes or trellises to prevent them from toppling over in the wind.
Caring for Ground Cherry Plants
Now that you’ve planted your ground cherry seeds, it’s time to learn how to care for these unique plants and ensure they thrive in your garden. Proper care is crucial for a bountiful harvest of those delicious little fruits!
Watering and Mulching
Ground cherry plants thrive when provided with consistent moisture levels. To achieve this, ensure that you water them deeply but infrequently, allowing the soil to dry slightly between watering sessions. This encourages deep root growth and makes them more resistant to drought.
Mulching plays a crucial role in maintaining moisture levels around your ground cherry plants. Organic mulch materials like wood chips or straw help retain moisture by reducing soil evaporation rates. They also suppress weeds that compete with your plants for water, light, and nutrients.
When choosing a mulch material, select one that is well-suited to your local climate. Pine needles are an excellent option for acidic soils, while cedar mulch is better suited to alkaline conditions. Apply a 2-3 inch layer of mulch around the base of each plant, keeping it a few inches away from the stem to prevent rot.
Regularly replenish the mulch as needed to maintain its effectiveness and ensure a consistent moisture environment for your ground cherry plants.
Fertilization and Pruning
When it comes to fertilizing ground cherry plants, you have several organic options at your disposal. One popular choice is compost tea, a liquid solution made by steeping compost in water. This method allows for easy absorption of nutrients by the plant’s roots and can be reapplied every 2-3 weeks during the growing season.
Another effective approach is to side-dress with a balanced fertilizer like fish emulsion or kelp meal. Apply these fertilizers lightly along the soil surface near the base of the plant, then gently rake them in. This method avoids burning the roots and allows for targeted nutrient delivery.
Pruning is another essential aspect of promoting bushy growth and fruit production in ground cherry plants. To encourage branching, remove any dead or diseased branches, as well as those growing inward towards the center of the plant. This will help direct energy towards producing more fruiting stems. Additionally, thin out any overbearing canes to allow for better air circulation and sunlight penetration.
This will lead to healthier, more productive plants with a higher yield of delicious ground cherries.
Pest and Disease Management
To keep your ground cherry plants healthy, it’s essential to learn how to manage common pests and diseases that can affect them. This includes identifying signs of infestation or infection.
Common Pests
When planting ground cherry, it’s essential to be aware of common pests that can damage your crop. Aphids, for instance, are small, soft-bodied insects that feed on plant sap, causing curled or distorted leaves. To control aphid infestations, spray a solution of 1 tablespoon of mild dish soap per quart of water on the affected areas. Repeat this process as needed.
Slugs and snails are another common problem when growing ground cherry. These pests prefer moist environments and can cause significant damage to fruit, leaves, and stems. To deter them, sprinkle crushed eggshells or copper tape around the plants, which they find unpalatable. You can also try setting up beer traps overnight to capture slugs and snails.
Regularly inspect your plants for signs of pests and take action promptly to prevent infestations from spreading. Keep in mind that some pests can transmit diseases, so it’s crucial to maintain a clean environment around your ground cherry plants. By being proactive about pest control, you’ll be able to enjoy a healthy and productive harvest.
Fungal Diseases
Ground cherry plants can be susceptible to various fungal diseases that can weaken their growth and productivity. One common issue is powdery mildew, which appears as a white, powdery coating on the leaves and stems. Leaf spot, another prevalent disease, manifests as circular or irregularly-shaped spots with visible veins, often accompanied by a yellow halo. Root rot, usually caused by overwatering, can lead to a soft, mushy texture at the base of the plant.
To prevent fungal diseases, ensure good air circulation around your ground cherry plants and maintain a moderate watering schedule. Avoid overhead irrigation, which can splash water onto leaves and promote disease development. Water at soil level instead, allowing it to absorb slowly. Regularly inspect your plants for signs of disease and remove any infected areas to prevent the spread.
In case you notice fungal diseases taking hold, treat affected areas with fungicides specifically designed for ground cherry plants. Prune infected stems to prevent further damage. Maintain a healthy balance between nutrients and water supply, as excessive fertilizer application can exacerbate susceptibility to disease. Monitor your soil pH, aiming for an optimal range that promotes plant resilience.
Harvesting Ground Cherries
Once you’ve successfully grown ground cherries, it’s time to harvest them – learn how to carefully pick these delicate fruits at their peak ripeness. Here are some essential tips to keep in mind.
Timing the Harvest
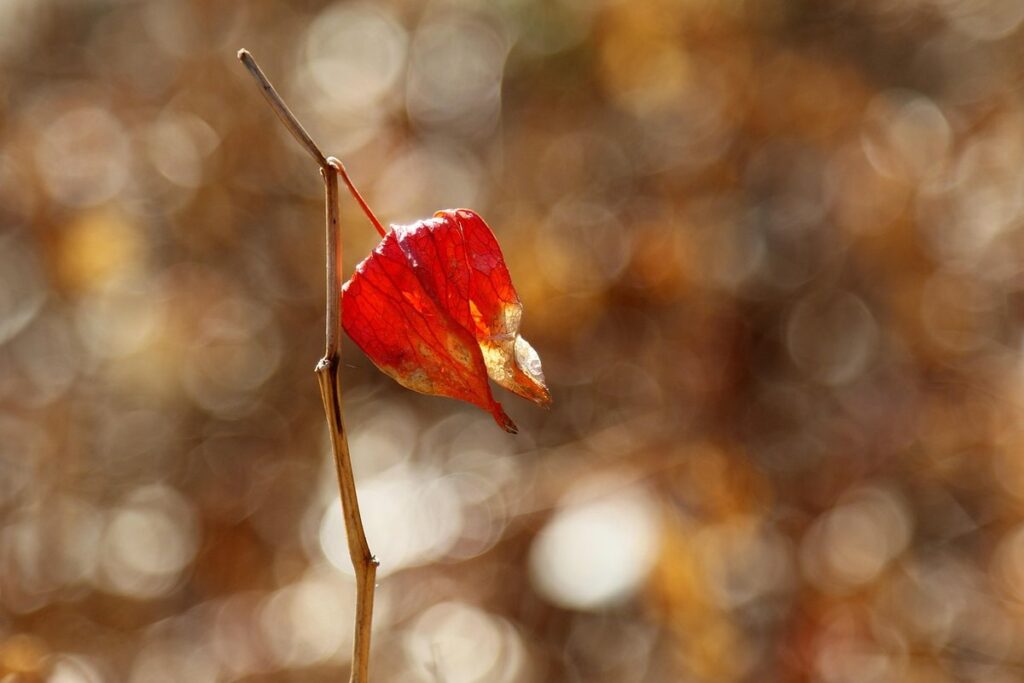
When it comes time to harvest your ground cherries, timing is everything. You’ll know they’re ripe when you notice a few key changes. Firstly, check the color of the fruit. Ripe ground cherries will be a deep red or purple color, depending on the variety. Some may also have a slight yellow or green tint, but overall, they should be quite dark.
Next, gently press on the skin of the cherry. A ripe one will yield to pressure and feel slightly soft to the touch. Be careful not to squeeze too hard, as this can damage the fruit. If it’s still firm, give it a few more days – ground cherries take their time to ripen!
One other way to determine if your ground cherries are ready is by checking for fragrance. Ripe ones will give off a sweet, slightly tart aroma that’s irresistible. Take a sniff and see if you can detect the scent of ripe ground cherries. If it’s too early, come back in a day or two – they’ll be worth the wait!
Handling and Storage
Once you’ve harvested your ground cherries, it’s essential to handle and store them properly to maintain their quality. Start by gently washing the fruit in a fine-mesh strainer under cool running water to remove dirt and debris. Avoid using soap or harsh chemicals, as they can damage the delicate skin.
Next, dry the ground cherries thoroughly with a clean towel or paper towels. This helps prevent moisture from promoting fungal growth and spoilage. If you plan to use your ground cherries immediately, store them in an airtight container at room temperature.
For longer-term storage, consider drying or preserving your ground cherries. You can dry them using a food dehydrator or by spreading them out in a single layer on paper towels in a low-temperature oven (150°F – 200°F). Alternatively, preserve them through freezing, jam-making, or canning methods.
When storing dried ground cherries, ensure they’re completely dry and brittle before packaging. This will help prevent moisture from seeping back into the fruit during storage.
Tips for Success and Troubleshooting
Now that you’ve planted your ground cherry, let’s tackle some common issues and provide tips to ensure a healthy and thriving harvest. You’ll find valuable advice here to overcome potential setbacks and achieve success.
Common Challenges
Growing ground cherries can be a rewarding experience, but like with any other crop, it’s not without its challenges. One of the most common issues faced by growers is poor yields. This can be due to various factors such as inadequate sunlight, insufficient watering, or using low-quality seeds.
Disease susceptibility is another major challenge when growing ground cherries. These plants are prone to diseases like powdery mildew and leaf spot, which can spread quickly if not addressed promptly. To mitigate this risk, make sure to choose disease-resistant varieties, maintain good air circulation around the plants, and treat any affected areas with fungicides.
Pest infestations are also a common problem when growing ground cherries. Aphids, whiteflies, and spider mites can all feed on the plant’s sap, causing damage and reducing yields. To prevent pest infestations, use row covers to keep insects away, and introduce beneficial insects like ladybugs or lacewings that prey on these pests.
To overcome these challenges, it’s essential to monitor your plants regularly for signs of disease or pests and take action promptly. Keep a close eye out for any unusual symptoms, and address them before they spread. By being proactive and taking steps to prevent these issues, you can enjoy a bountiful harvest of delicious ground cherries.
Best Practices for Long-Term Health
To ensure your ground cherry plants thrive and provide you with a bountiful harvest for years to come, it’s essential to adopt best practices for long-term health. Regular monitoring of your plants is crucial, so set aside time each week to inspect them for signs of stress, pests, or diseases.
Start by checking the soil moisture level, making sure it’s not too dry or waterlogged. Ground cherry plants prefer well-draining soil and can be susceptible to root rot if the soil is consistently wet. Also, keep an eye out for common pests like aphids, whiteflies, and spider mites, which can weaken your plants over time.
Proper pruning techniques are also vital in maintaining a healthy ground cherry plant. Remove any weak or diseased growth to prevent the spread of disease and encourage bushy growth. This will not only promote better fruit production but also help maintain the overall health of your plants. By incorporating these simple yet effective practices into your routine, you’ll be well on your way to enjoying a long and productive harvest from your ground cherry plants.
Frequently Asked Questions
What if I don’t have a greenhouse or a cold frame to start ground cherry seeds indoors?
You can still start ground cherry seeds indoors by using a seed starting mix and keeping the soil at around 70-80°F (21-27°C) for germination. Use a clear plastic bag or cloche to create a mini-greenhouse effect, and ensure good air circulation to prevent fungal diseases.
Can I grow ground cherries in containers if I have limited space?
Yes, you can grow ground cherries in containers as long as they are at least 12-18 inches deep to accommodate the plant’s taproot. Use a well-draining potting mix and a container with good drainage holes to prevent waterlogged soil.
How do I know when my ground cherry plants have reached their maximum yield potential?
Check for signs of flowering and fruiting, but also keep an eye on your plants’ overall health and vigor. Ground cherry plants typically reach their peak production after 6-8 months from planting, so be patient and provide optimal growing conditions to maximize yields.
What can I do if my ground cherry plants are susceptible to fungal diseases?
Fungal diseases like powdery mildew and root rot often thrive in humid environments with poor air circulation. Improve soil drainage, reduce watering frequency, and increase air circulation around your plants by pruning nearby foliage or using row covers to prevent disease spread.
Can I harvest ground cherries at night, since they are called “ground cherries”?
Yes, you can harvest ground cherries at any time of day, but the papery husk surrounding the fruit may be more prone to splitting if picked in the morning when the skin is still taut. Gently twist and pull the fruit from the plant, taking care not to damage the delicate stem or nearby foliage.