Are you tired of relying on store-bought herbs that often lose their flavor and aroma? Growing your own herbs indoors is easier than you think, and with the right guidance, you can enjoy fresh flavors all year round. Not only does indoor herb gardening save money and space, but it also allows for a level of control over quality and freshness. In this comprehensive guide, we’ll walk you through the basics of growing, caring for, and preserving your favorite herbs indoors.
We’ll cover everything from selecting the right variety for your indoor conditions to creating an optimal potting mix, lighting, and watering schedule. You’ll also learn how to fertilize, prune, and propagate your herbs for continuous harvests. By the end of this article, you’ll be equipped with the knowledge to grow a thriving indoor herb garden that meets all your culinary needs.
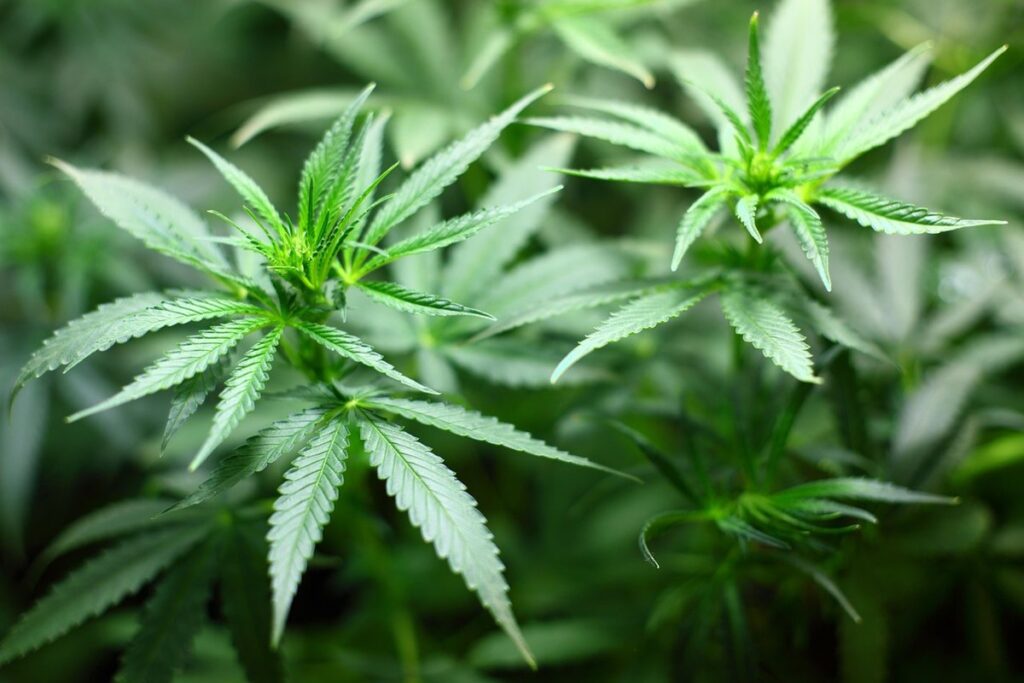
Choosing the Right Herb Varieties
When selecting herbs for indoor growing, it’s essential to choose varieties that thrive in low-light conditions and tolerate cooler temperatures. This section will help you make informed choices for your home herb garden.
Selecting Herbs Based on Climate and Season
When selecting herbs for indoor growing, it’s essential to consider the climate and season you’re living in. This will help ensure that the herbs thrive under optimal conditions. For example, if you live in a hot and humid region, you’ll want to choose herbs like mint or lemongrass that can tolerate these conditions.
On the other hand, if you live in an area with low humidity, consider growing herbs like basil or rosemary that prefer well-ventilated environments. Temperature is also crucial; many herbs prefer daytime temperatures between 65°F and 75°F (18°C to 24°C), while some can tolerate warmer or cooler conditions.
When choosing herbs for indoor growing, keep in mind the natural light exposure your space receives. Herbs like parsley, cilantro, and dill require plenty of direct sunlight, making them ideal for south-facing windowsills. Others, such as mint and chamomile, can tolerate partial shade and are perfect for north-facing windows.
Consider starting with a few hardy herbs that can adapt to indoor conditions, and then experiment with others based on your specific climate and season. This will help you find the perfect balance of temperature, humidity, and light exposure for each herb variety.
Popular Indoor Herb Varieties for Beginners
When starting out with indoor herb gardening, it’s essential to choose varieties that are easy to grow and require minimal maintenance. Here are some popular indoor herb varieties perfect for beginners:
Basil is a great choice for indoor growing, requiring only 4-6 hours of direct sunlight per day. It’s relatively low-maintenance and can produce up to 1 cup of leaves per week. For those new to indoor gardening, basil is an excellent starting point.
Mint and parsley are also easy to grow indoors, tolerating a range of light conditions. Mint requires less maintenance than other herbs but does need regular pruning to prevent it from taking over your space. Parsley is a slow-growing herb that’s ideal for containers with well-draining soil.
Chillies, cilantro, and dill are other beginner-friendly options that thrive in indoor environments. Chillies prefer warmer temperatures (around 70-80°F) and high humidity, while cilantro prefers cooler temps (60-70°F). Dill is relatively low-maintenance and can tolerate a range of light conditions.
When growing these herbs indoors, make sure to provide them with the right potting mix, water, and nutrients. Most indoor herb varieties prefer well-draining soil and should be fertilized regularly for optimal growth.
Preparing Your Indoor Growing Space
To get started, you’ll want to set up a dedicated space for your indoor herb garden, considering factors like lighting and temperature requirements. This will ensure optimal growing conditions for your herbs.
Setting Up a Potting Mix for Herbs
When it comes to growing herbs indoors, one of the most crucial elements is using a well-draining potting mix specifically designed for indoor herbs. This type of mix will help prevent waterlogged soil and root rot, which can be devastating for these delicate plants.
You don’t have to purchase a pre-mixed blend, though – you can easily create your own custom mix at home. To do this, combine 50% potting soil, 20% perlite or vermiculite, 15% peat moss, and 10% worm castings (if available). This combination will provide excellent drainage, prevent nutrient deficiencies, and promote healthy root growth.
For an added layer of protection against pests and diseases, consider adding a small amount of activated charcoal to your mix. This simple tweak can help keep your indoor herb garden thriving all season long. When selecting a potting mix or creating your own blend, be sure to read the labels carefully and choose products that are free from harsh chemicals and additives.
Remember, a well-draining potting mix is key to successful indoor herb cultivation. By investing in the right materials and taking the time to create a custom blend, you’ll be rewarded with lush, healthy herbs that will add flavor and freshness to your cooking all year round.
Providing Adequate Light for Your Herbs
When it comes to providing adequate light for your herbs indoors, you have several options at your disposal. First and foremost, natural light is always the best option if possible. Place your herb plants near a sunny window, ideally south-facing, where they can receive direct sunlight for 4-6 hours a day. This will not only save you money on artificial lighting but also provide your herbs with the most beneficial wavelengths of light.
However, during winter months or in regions with limited natural light, artificial lighting becomes necessary. LED grow lights are an excellent choice, as they emit a broad spectrum of light that promotes healthy growth and are energy-efficient. Aim for 12-14 hours of supplemental lighting per day, ensuring your herbs receive the intensity levels needed to photosynthesize.
Some popular options include T5 or T8 fluorescent lights, which provide moderate to high intensity light suitable for most herb varieties. Consider investing in a timer to regulate your lighting schedule and prevent over-exposure, which can lead to burning or scorching of leaves.
Growing Herb Plants from Seeds or Cuttings
Let’s dive into two essential methods for starting your indoor herb garden: growing herbs from seeds and propagating them using cuttings, which can be just as easy!
Starting Herbs from Seeds Indoors
Starting herbs from seeds indoors is a rewarding experience that allows you to cultivate specific varieties not readily available at local nurseries. To begin, choose high-quality herb seeds specifically bred for indoor growth and disease resistance. Some popular options include compact basil, dwarf mint, and miniature rosemary.
Next, prepare the seed starting mix by filling small cells or containers with a well-draining potting mix. Moisten the soil gently but thoroughly to create a humid microclimate ideal for germination. Sow one or two seeds per cell at a depth of 1-2 mm, depending on the variety’s specific requirements.
Gently press the soil down around the seeds using a blunt instrument like a chopstick or pencil to ensure good contact. Water lightly but thoroughly, and maintain a consistent temperature between 65-75°F (18-24°C). Keep the cells in a warm location with moderate light exposure until germination occurs, typically within 7-14 days.
By following these simple steps and selecting varieties suited for indoor growth, you’ll be well on your way to harvesting fresh herbs from your own indoor garden.
Propagating Herbs Using Cuttings and Division
Propagating herbs using cuttings and division is an excellent way to multiply your favorite plants and share them with friends. This method allows you to create new plants without relying on seeds, which can be slow to germinate and may not produce the desired characteristics.
To propagate herbs using cuttings, choose healthy stems from mature plants and remove lower leaves, leaving only a few sets of leaves at the top. Dip the cut end in rooting hormone powder or liquid to stimulate root growth. Place the cutting in a pot filled with moistened rooting mix, making sure the node (where the leaf meets the stem) is buried. Keep the soil consistently moist but not waterlogged. It can take anywhere from 1-6 weeks for roots to develop.
When it comes to division, gently separate established herb plants at planting time or during the growing season. Divide the roots and replant them in fresh potting mix. This method works best for herbs like mint, lemongrass, and ginger, which produce rhizomes that can be easily divided. With both methods, provide adequate light and maintain a stable temperature to ensure success.
By following these steps and tips, you’ll be able to multiply your indoor herb collection and enjoy fresh flavors year-round.
Caring for Your Indoor Herb Garden
To keep your indoor herb garden thriving, it’s essential to provide the right conditions and care, which we’ll cover in detail next. Let’s dive into some valuable tips for maintaining a healthy and lush indoor herb garden.
Watering and Fertilizing Herbs Indoors
Proper watering and fertilizing are crucial for the health and productivity of your indoor herb garden. One common mistake is overwatering, which can lead to root rot and other problems. To avoid this, check the soil moisture by sticking your finger into the soil up to the first knuckle. If the soil feels dry, it’s time to water.
When watering, make sure not to get water on the leaves or crown of the plant to prevent fungal diseases. Instead, water at the base of the plant, allowing the roots to absorb the moisture. As for fertilizing, a balanced, water-soluble fertilizer is ideal. Dilute the fertilizer to half the recommended strength to avoid burning your plants’ delicate roots.
It’s also essential to fertilize regularly, but not too frequently. A good rule of thumb is to fertilize once a week during the growing season and once every two weeks during the dormant season. Additionally, consider using organic fertilizers like compost tea or worm casting, which can provide beneficial microbes that enhance plant growth. By avoiding overwatering and underfertilizing your indoor herbs, you’ll be on your way to a lush and thriving herb garden.
Pruning and Harvesting Herbs for Optimal Growth
Regular pruning and harvesting are crucial for maintaining healthy and productive herb plants indoors. By removing spent flowers and trimming back overgrown branches, you’ll encourage your herbs to focus their energy on producing new growth rather than seed production.
For example, basil is a prime candidate for regular pruning. Pinch off flower buds as they form to direct the plant’s energy towards leaf growth, which will result in bushier plants with more flavor and aroma. Similarly, trim back leggy stems of rosemary or thyme to promote new growth and prevent the plants from becoming leggy.
Harvesting your herbs regularly also has a similar effect. When you remove leaves and sprigs, you’re encouraging the plant to produce more. Try to harvest your herbs just before cooking or using them in recipes, as this will help prevent moisture loss and keep the flavors fresh. By pruning and harvesting your herbs regularly, you’ll be rewarded with continuous growth and a steady supply of fragrant, flavorful leaves for your indoor kitchen.
Common Indoor Herb Growing Problems and Solutions
Growing herbs indoors can be a wonderful hobby, but it comes with its own set of challenges. Let’s tackle some common issues you might encounter.
Dealing with Pests and Diseases in Your Indoor Garden
Dealing with pests and diseases is an unfortunate reality for many indoor gardeners. Spider mites, mealybugs, root rot, and leaf spot are just a few common culprits that can quickly ruin an otherwise thriving herb garden.
Pests like spider mites and mealybugs are usually the result of overwatering or poor air circulation. To prevent these issues, ensure your herbs receive adequate light and water them only when the top inch of soil feels dry to the touch. If you do spot pests, isolate the affected plant and treat it with a mild soap solution (1 tablespoon of dish soap per quart of water). Spray the entire plant, making sure to get under leaves where mites tend to hide.
Diseases like root rot and leaf spot are often caused by overwatering or fungal spores in the air. To combat these issues, increase air circulation around your herbs, reduce watering, and treat affected areas with a fungicide specifically labeled for indoor use. Regularly inspect your plants, and take action promptly to prevent the problem from spreading.
Keep an eye out for white powdery patches (mealybugs) or fine webs on leaves (spider mites), and examine soil regularly for signs of root rot (soft, mushy texture). With vigilance and quick action, you can keep your indoor herb garden healthy and thriving.
Troubleshooting Lighting and Temperature Issues
Lighting is one of the most critical factors for herb growth, and temperature fluctuations can greatly impact their quality. To troubleshoot these issues, start by ensuring that your herbs are receiving sufficient light. Most herbs require at least 4-6 hours of direct sunlight or 12-14 hours of indirect light per day.
If you’re experiencing yellowing or pale leaves, it may be due to insufficient light. Consider using grow lights to supplement the natural light in your space. Be mindful of the type and intensity of lighting used for different herbs – for example, basil prefers bright light, while mint can tolerate partial shade.
Temperature fluctuations can also impact herb growth. Most herbs prefer daytime temperatures between 65-75°F (18-24°C) and nighttime temperatures around 55-65°F (13-18°C). Avoid placing your indoor garden near heating or cooling vents to prevent temperature extremes.
Monitor the humidity levels in your space, as herbs prefer a humid environment – ideally between 40-60% relative humidity.
Preserving Your Harvested Herbs for Year-Round Use
Now that you’ve successfully grown and harvested your indoor herbs, it’s time to think ahead: how will you preserve them for year-round use? This section shares essential tips.
Drying, Freezing, and Canning Herbs
When it comes to enjoying your homegrown herbs year-round, preservation techniques are essential. Three popular methods for drying, freezing, and canning herbs ensure that you can use them throughout the seasons.
Drying is a simple and effective way to preserve herbs. You can air-dry them by tying bunches together and hanging them upside down in a warm, dry place. Alternatively, you can use a food dehydrator or your oven on the lowest temperature setting with the door slightly ajar. This method works best for delicate herbs like basil and mint.
Freezing is another great way to preserve herbs, especially those that are high in water content like parsley and cilantro. Simply chop the herbs finely, place them in an airtight container or freezer bag, and store them in the freezer. Frozen herbs can be used directly from the freezer for cooking.
Canning is a more involved process but allows you to preserve herbs in their entirety. You’ll need a pressure canner or water bath canner, as well as jars, lids, and a new set of bands. Research specific guidelines for canning herbs like oregano and thyme to ensure safety and quality.
Using Preserved Herbs in Recipes
Preserved herbs are not just for garnishes; they can be used to elevate various recipes from teas and soups to baked goods and savory dishes. When you have a stash of preserved herbs, the possibilities become endless.
Start by incorporating dried or frozen herbs into your favorite tea blends. A combination of rosemary and lemon verbena adds a refreshing twist to a soothing chamomile tea. Alternatively, try using preserved thyme in soups like minestrone or creamy tomato soup for an authentic flavor boost. You can also use chopped dried herbs as a seasoning in baked goods such as focaccia bread or savory scones.
In the kitchen, think beyond just using preserved herbs as a finishing touch. Instead, mix them into your sauces and marinades. For instance, blend dried oregano with olive oil and lemon juice to create a flavorful vinaigrette for grilled meats or vegetables. When making homemade pasta sauce, add a teaspoon of preserved basil for added depth. Remember that when using preserved herbs in recipes, it’s essential to adjust the quantities according to the type and strength of the herb.
Frequently Asked Questions
How Do I Know if My Indoor Herb Garden is Ready for Harvesting?
Check the herb’s texture, color, and fragrance to determine when it’s ready for harvest. Typically, herbs are ready to harvest within 6-8 weeks after planting, but this can vary depending on the specific variety and growing conditions.
Can I Grow Herbs in a Low-Light Room Without Any Additional Lighting?
While some herbs like mint and lemongrass can tolerate low light, most herbs require at least 4-6 hours of direct sunlight per day or artificial lighting to photosynthesize properly. Consider supplementing with grow lights if your room doesn’t receive sufficient natural light.
How Often Should I Water My Indoor Herb Garden?
Watering frequency depends on the herb variety, potting mix, and environmental conditions. As a general rule, water herbs when the top 1-2 inches of soil feels dry to the touch. Avoid overwatering, which can lead to root rot and other issues.
Can I Use Store-Bought Potting Mix for My Indoor Herb Garden?
While store-bought potting mixes can work in a pinch, they often lack the specific nutrients and pH balance that herbs require. Consider making your own potting mix using a combination of peat moss, perlite, and compost to create an optimal growing medium.
How Do I Preserve Freshly Harvested Herbs for Long-Term Use?
To preserve fresh herbs, you can dry them through air drying or oven drying, freeze them in airtight containers, or can them using a water bath canner. Each method has its own benefits and drawbacks, so choose the one that best suits your needs and preferences.