As the seasons change, your garden is probably itching for some new life. But with so many delicious veggies to choose from, it can be hard to decide which ones are best suited for this time of year. Your climate and season play a huge role in determining which vegetables will thrive in your garden, making it essential to know what’s in season and how to grow it.
In this article, we’ll explore the world of seasonal gardening, breaking down the concept of hardiness zones and explaining how they impact your growing options. We’ll also cover some valuable tips for ensuring a bountiful harvest, including how to choose the right vegetables for your climate and when to plant them. Whether you’re a seasoned gardener or just starting out, this guide will help you make the most of your garden’s potential and enjoy fresh, homegrown veggies all year round.
Choosing the Right Vegetables for Your Climate
When it comes to growing your own vegetables, understanding which ones thrive in your local climate is key. This means selecting varieties that are best suited to your region’s temperature and weather patterns.
Understanding Your Hardiness Zone
When growing vegetables, it’s essential to consider your hardiness zone, which determines what types of plants can thrive in your area. To determine your hardiness zone, you can check the USDA Plant Hardiness Zone Map online or consult with local nurseries and gardening experts. Generally, zones range from 1 (harsh winters) to 11 (mild winters).
Commonly grown vegetables that thrive in different zones include:
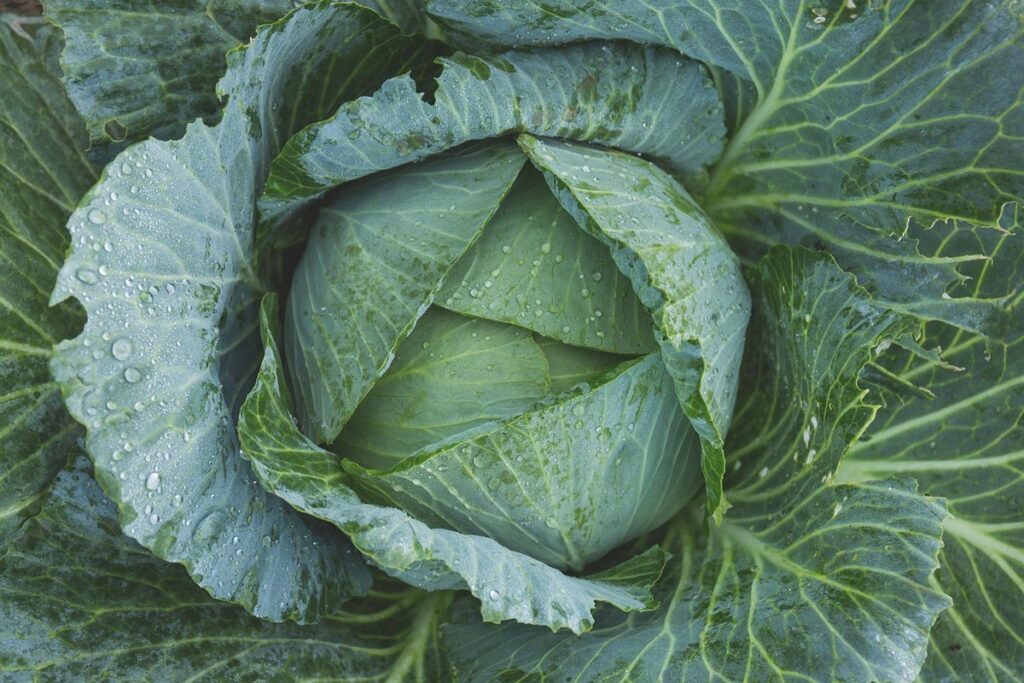
* Cool-season crops like broccoli, kale, and spinach prefer zones 3-7
* Warm-season crops like tomatoes, peppers, and eggplants do well in zones 4-10
* Root vegetables like carrots, beets, and radishes can grow in zones 2-9
Keep in mind that even within your hardiness zone, microclimates can exist. These are areas with unique temperature and moisture conditions that may support different plant growth. For example, a south-facing slope or a shaded area near a body of water might be slightly warmer or cooler than the surrounding area.
When choosing vegetables for your garden, consider what types thrive in your hardiness zone and how they’ll perform in your specific microclimate. This will help you make informed decisions about which varieties to plant and ensure a successful harvest.
Seasonal Considerations for Veggie Selection
When selecting vegetables to grow, it’s essential to consider the impact of climate, temperature, and sunlight on their growth. In temperate climates, for example, temperatures between 60°F and 70°F (15°C and 21°C) are ideal for growing leafy greens like lettuce, spinach, and kale. These crops thrive in cooler conditions and can bolt or go to seed if exposed to excessive heat.
In warmer seasons, vegetables like tomatoes, peppers, and eggplants require more sunlight and warmth. They love temperatures between 65°F and 85°F (18°C and 30°C) and full sun exposure for at least six hours a day. On the other hand, cool-season crops like broccoli, cauliflower, and Brussels sprouts prefer cooler temperatures and can tolerate some shade.
To determine which vegetables to grow during each season, consider your local climate and temperature fluctuations. Check the average high and low temperatures for your area and choose varieties that suit those conditions. For instance, in regions with hot summers, select heat-tolerant crops like okra, Southern peas, or sweet potatoes. In areas with mild winters, you can grow cool-season crops year-round. By choosing the right vegetables for each season, you’ll enjoy a bountiful harvest and minimize the risk of crop failure.
Vegetables Suitable for Spring Planting
As we welcome spring, it’s time to get planting! This section highlights some of the best vegetables to sow now that will thrive in the warmer weather.
Cool-Season Crops for Early Harvests
If you’re eager to get started with spring planting, there are several cool-season crops that can thrive as soon as the soil is workable. Typically, this is around late March or early April, depending on your location and climate.
Among these crops, broccoli, kale, and spinach are excellent choices for an early harvest. They’re relatively easy to grow and require minimal care. For example, broccoli can be direct-sown in late winter or early spring, about 4-6 weeks before the last frost date. Sow seeds about 1 inch deep and 18-24 inches apart. Keep the soil consistently moist during the first few weeks after sowing.
Kale is another cool-season crop that’s perfect for early planting. It can tolerate light frosts and can be harvested in as little as 50 days. Plant seeds about 2-3 inches apart, and thin them to 12-18 inches apart as they grow. Spinach prefers well-drained soil and partial shade. Sow seeds about 1/8 inch deep and 2-4 inches apart.
Remember to check the specific frost dates for your area before planting these crops. With proper care and timing, you’ll be enjoying fresh broccoli, kale, and spinach in no time!
Root Vegetables for Spring
As we transition into spring, it’s the perfect time to plant those delicious root vegetables that thrive in cooler temperatures and moist soil. Carrots are a great choice for this season – they’re relatively easy to grow and can be harvested in as little as 60 days. To get started, sow carrot seeds directly into well-draining, loose soil with a pH between 6.0-6.8. Keep the soil consistently moist during the first few weeks after planting.
Beets are another excellent option for spring planting – they’re hardy and can tolerate light frosts. Sow beet seeds about 2 inches apart in rows that are 12-18 inches apart, making sure to keep the soil consistently moist. Radishes, on the other hand, prefer even more moisture than beets and should be sown as thinly as possible (about 1/8 inch deep). All three of these root vegetables require minimal care beyond keeping the soil consistently moist – a task made easy by spring showers.
Avoid over-watering, which can lead to fungal diseases and poor growth. To ensure optimal flavor and texture, harvest your carrots and beets when they’re at their peak – about 60-70 days after planting. Radishes are typically ready in as little as 20-25 days, making them a great addition to any spring salad or side dish.
Summer Favorites: Warm-Season Crops
As we dive into summer, it’s time to focus on warm-season crops that thrive in the warmer temperatures and longer days of the season. Let’s explore some delicious options for your garden.
Tomatoes, Peppers, and Eggplants for the Warmest Months
When it comes to warm-season crops, tomatoes, peppers, and eggplants are some of the most popular choices for summer gardens. These heat-loving plants thrive in temperatures above 65°F (18°C), making them ideal for sowing in late spring or early summer.
To get started with these crops, select varieties that suit your climate and growing conditions. For example, ‘Patio’ tomatoes are a great choice for small spaces, while ‘California Wonder’ bell peppers are more resistant to heat stress. When it comes to eggplants, look for varieties like ‘Fairy Eggplant’ or ‘Hansel’, which are compact and disease-resistant.
Once your plants are established, keep them well-watered, but avoid overwatering, which can lead to fungal diseases. To promote healthy growth and prevent pests, prune your tomatoes regularly, removing suckers and weak branches. For peppers and eggplants, provide support with cages or trellises to encourage vertical growth and prevent sprawling.
By following these tips, you’ll be able to enjoy a bountiful harvest of juicy tomatoes, crunchy peppers, and delicious eggplants right in your own garden!
Corn, Squash, and Okra for Maximum Yield
Growing corn, squash, and okra during the summer months can be incredibly rewarding, but each of these warm-season crops has its unique needs and requirements. Let’s dive into what it takes to maximize their yields.
When growing corn, make sure to provide a deep, well-draining soil with a pH between 6.0 and 7.0. Plant seeds 1 inch deep and 8-12 inches apart in late spring or early summer, when the soil has warmed up to at least 55°F (13°C). To ensure optimal growth, corn requires full sun, so choose a spot that receives direct sunlight for most of the day.
Squash, including popular varieties like zucchini and acorn squash, loves warm weather and well-draining soil with a pH between 6.0 and 7.0. Plant seeds 1 inch deep and 3-5 feet apart in late spring or early summer. To encourage bushy growth and prevent sprawling, provide support using a trellis or cage.
Okra is another heat-loving crop that requires full sun and well-draining soil with a pH between 6.0 and 7.0. Plant seeds 1 inch deep and 12-18 inches apart in late spring or early summer. Regular watering is essential to prevent root rot, but avoid overwatering, which can lead to fungal diseases.
When growing these crops together, be mindful of their spacing requirements to prevent overcrowding and competition for resources. With proper care and attention, you’ll be harvesting delicious corn, squash, and okra in no time!
Vegetables That Thrive in Shaded Areas
If you’re short on sunlight, don’t worry – many delicious veggies can still thrive in shaded areas of your garden. Let’s explore some options that’ll do well with partial shade.
Leafy Greens and Other Shade-Tolerant Crops
When it comes to growing vegetables in shaded areas, leafy greens are an excellent choice. These crops prefer the cooler temperatures and reduced sunlight that shaded conditions provide, making them perfect for avoiding scorching heat. Lettuce, spinach, and chard are all great options that can be grown in partial shade.
In addition to these popular choices, other vegetables like beans and cucumbers also thrive in shaded areas. Bush beans, for example, prefer the dappled light of a shaded spot and will produce a bountiful harvest with minimal care. When growing beans in a shaded area, make sure to provide them with a trellis or other support to help them grow upwards.
Cucumbers are another great option for shaded gardens. They require minimal sunlight and can be trained to climb up a trellis or left to spread on the ground. To ensure success when growing cucumbers in a shaded area, choose a variety that is specifically bred for shade tolerance and provide them with consistent moisture.
Remember, even if your garden receives some direct sunlight, leafy greens and other shade-tolerant crops will still prefer partial shade to avoid heat stress.
Using Shade Houses or Trellises for Optimal Growth
When growing vegetables that thrive in shaded areas, creating a suitable environment is crucial for optimal growth. One effective way to do this is by using shade houses or trellises. These structures provide the necessary support and protection from excessive sunlight, which can be detrimental to some vegetable varieties.
Trellising is particularly beneficial for vining plants like peas, beans, and cucumbers. By providing a trellis, you can train these plants to climb upwards, maximizing space and promoting even growth. For example, using a tomato cage or a teepee-shaped trellis can help support indeterminate tomato varieties, keeping them upright and allowing for better air circulation.
You can also use shade houses or pergolas to create a shaded area in your garden. These structures can be made from natural materials like wood or bamboo, or artificial ones like metal or plastic. When selecting a structure, consider the mature size of your plants and ensure that the trellis or shade house provides sufficient support.
When using trellises or shade houses, make sure to provide adequate air circulation to prevent fungal diseases. Also, keep in mind that some vegetables, such as lettuce and spinach, prefer partial shade but not complete shading. Monitor their growth and adjust the shading accordingly.
Vegetables That Can Be Grown in Containers
You’re eager to start growing your own veggies, but don’t have a garden? No problem! This next section will guide you through growing delicious vegetables right in containers.
Compact Varieties and Container Tips
When growing vegetables in containers, compact varieties are often the best choice. These plants have been bred to thrive in smaller spaces and typically require less support and maintenance than their full-sized counterparts. Consider looking for terms like ‘compact’, ‘dwarf’, or ‘patio’ when selecting varieties.
For most vegetables, a container size of at least 5-gallons is recommended to ensure sufficient root growth. However, some plants such as lettuce, herbs, and strawberries can do well in even smaller containers. For example, cherry tomatoes will happily grow in a 1-gallon pot but may need more frequent watering.
Container care differs from in-ground gardening primarily in terms of water management. Make sure your container has adequate drainage holes to prevent waterlogged soil. It’s also crucial to check the moisture levels daily as dry spells can be more pronounced in containers than in the ground. Adjust your fertilization and pruning schedule according to the plant’s specific needs, taking into account its smaller root system.
In terms of choosing the right potting mix, look for products specifically designed for container gardening. These mixes typically have improved water retention and aeration properties that can help mitigate some of the challenges associated with growing in containers.
Growing Microgreens Indoors or Outdoors
Growing microgreens indoors or outdoors is an excellent way to have fresh greens year-round, regardless of the season. These tiny seedlings are packed with nutrients and can be harvested within 1-3 weeks of sowing. To get started, choose a container that’s at least 2-3 inches deep and has good drainage holes.
Some popular microgreens for beginners include pea shoots, radish greens, and arugula. For pea shoots, sow the seeds directly in the container and keep the soil consistently moist. You can harvest them in as little as 7 days, when they’re about 2-3 inches tall. Radish greens are a bit more hardy and can be harvested in around 10-14 days.
To care for microgreens, ensure they receive indirect sunlight (4-6 hours a day) and maintain a temperature between 60-70°F (15-21°C). Water them gently but thoroughly, making sure not to overwater. Regularly pruning or harvesting will also encourage bushy growth and prevent the seedlings from flowering.
Microgreens can be grown indoors on a windowsill or outdoors in a container garden. If growing outdoors, ensure your container has some shade during peak sun hours to prevent scorching. With proper care, you’ll have a continuous supply of delicious microgreens for salads, sandwiches, and snacking!
Harvesting and Storing Your Homegrown Vegetables
Now that your veggies are ready, let’s dive into how to harvest them at the peak of freshness and store them for long-term enjoyment. We’ll cover the best methods for each type of vegetable.
Timing the Perfect Harvest for Each Crop
When it comes to harvesting your homegrown veggies, timing is everything. You want to pick them at their peak flavor and nutritional value, but not before they’re fully ripe. So, how do you know when to harvest each crop?
For leafy greens like lettuce and spinach, the key is to check on them daily. They’re ready to be picked when the leaves are a vibrant green color and have reached the desired size. For example, romaine lettuce is typically ready in 40-50 days after sowing, while loose-leaf lettuce can be harvested in as little as 20-30 days.
Root vegetables like carrots and beets take longer to mature. They’re usually ready when they’ve reached their full color and the tops have begun to yellow. For example, Nantes-type carrots are ready in about 60 days after sowing, while Detroit Dark Red beets can take up to 70 days.
Fruiting crops like tomatoes and peppers need a bit more patience. They’re typically ready when they’ve reached their full color and the skin has started to wrinkle slightly. For example, cherry tomatoes are usually ready in about 50-60 days after sowing, while bell peppers can take up to 70-80 days.
To determine if your veggies are ready for harvest, simply check on them daily and look for these key signs of readiness: a vibrant color, the right size, and no more than 1-2 inches of growth remaining. Remember, it’s always better to err on the side of caution and wait a day or two longer rather than pulling up your veggies too soon!
Preserving and Storing Freshly Harvested Produce
Now that you’ve harvested your homegrown veggies, it’s essential to store and preserve them properly to enjoy their flavor and nutrients throughout the year. Here are some methods to consider:
Freezing is an excellent way to preserve vegetables like leafy greens, broccoli, and carrots. Simply blanch them in boiling water for 2-3 minutes, then chill them immediately in an ice bath before transferring them to airtight containers or freezer bags. This method helps retain their texture and flavor.
Dehydrating, on the other hand, is perfect for herbs like basil and rosemary, as well as vegetables like tomatoes and bell peppers. You can use a food dehydrator or your oven on its lowest temperature setting (135°F – 150°F) to remove excess moisture. Store the dried produce in airtight containers.
Canning is another method for preserving high-acid vegetables like cucumbers, green beans, and beets. Follow safe canning practices to ensure that the jars are properly sterilized and sealed. For low-acid vegetables like carrots and Brussels sprouts, add acidity with lemon juice or vinegar before canning.
Lastly, pickling is a great way to preserve cucumbers, onions, and other vegetables in brine solution. This method helps retain their crunchiness while adding a tangy flavor. Experiment with different spices and seasonings to create unique flavors.
Frequently Asked Questions
Can I Grow Vegetables Year-Round with This Method?
Yes, the seasonal gardening approach outlined in this article can help you enjoy a bountiful harvest throughout the year. By understanding your hardiness zone and choosing vegetables suitable for each season, you’ll be able to plant and harvest fresh produce even during periods of extreme temperatures.
How Do I Determine My Hardiness Zone if I Don’t Have Access to Online Maps?
If you don’t have access to online maps or can’t consult with local nurseries, try contacting your local cooperative extension office or gardening clubs in your area. They may be able to provide information on your hardiness zone or direct you to a reliable source.
What Happens If I Choose the Wrong Vegetables for My Climate?
If you select vegetables that aren’t suited to your climate, they may not thrive or even die off quickly. This can result in wasted time and resources. To avoid this, carefully research which varieties are best for your region’s temperature and weather patterns.
Can I Grow Microgreens Indoors Year-Round with Proper Lighting?
Yes, microgreens can be grown indoors year-round with sufficient lighting. Most microgreens require a lot of light to grow well, so make sure you have adequate lighting in your indoor growing space, such as fluorescent or LED grow lights.
How Do I Store My Harvested Vegetables for Maximum Freshness?
To store harvested vegetables and keep them fresh for longer, follow these general guidelines: cool dry place (40-50°F), humidity-controlled environment (around 90%), avoid direct sunlight. For specific storage instructions, check the main article’s section on “Preserving and Storing Freshly Harvested Produce”.