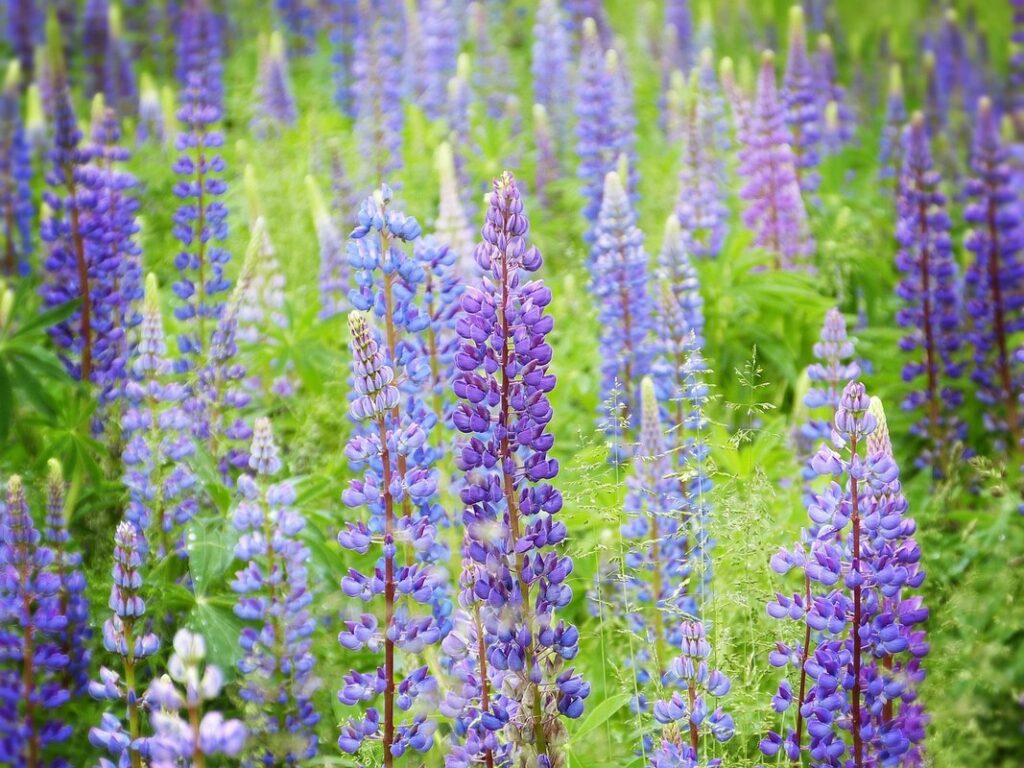
Are you ready to create a stunning and thriving lupin garden? With their vibrant colors, delicate blooms, and nitrogen-fixing abilities, lupins are an excellent choice for any gardener looking to add some drama and beauty to their outdoor space. But growing a successful lupin garden requires more than just sowing the seeds – it demands careful planning, precise pruning techniques, and attention to soil preparation.
In this expert guide, we’ll walk you through every step of creating a thriving lupin garden. From selecting the right variety for your climate and needs to tips on soil preparation and pruning techniques, we’ve got you covered. Whether you’re a seasoned gardener or just starting out, our comprehensive guide will provide you with all the knowledge you need to grow a stunning lupin garden that blooms year after year.
Planning and Preparation
Before diving into planting lupins, it’s essential to prepare your soil and garden bed properly for a thriving and healthy crop. Let’s explore the key steps you need to take in this section.
Choosing the Right Variety of Lupins
When it comes to choosing the right variety of lupins for your garden, there are several factors to consider. With over 200 species to choose from, you’ll want to select a type that suits your climate, soil, and desired level of maintenance.
If you’re looking for a low-maintenance option, dwarf lupins (Lupinus nanus) might be the way to go. These compact plants grow to around 12-18 inches tall and require minimal care. They thrive in well-drained soil and full sun, making them perfect for small gardens or containers.
On the other hand, perennial lupins (Lupinus perennis) are a great choice if you want to establish a long-term presence in your garden. These plants can live for up to 10 years and require regular watering and fertilization. They prefer moist soil and partial shade, making them ideal for shadier areas of your garden.
Annual lupins (Lupinus annuus) are another option, but they tend to be more high-maintenance than their perennial counterparts. They require frequent watering and may need staking to prevent toppling in the wind. However, they offer a vibrant display of color and can be grown in a variety of conditions.
When selecting a lupin variety, remember to consider your local climate. Some types are better suited for warmer or cooler temperatures than others. Additionally, think about the amount of sunlight and water your garden receives, as these will impact the health and success of your lupins.
Preparing the Soil for Lupin Growth
Before planting lupins, it’s essential to prepare the soil to give these legumes the best chance of thriving. One crucial step is conducting a soil test to determine its pH level and nutrient content. Lupins prefer slightly acidic to neutral soils with a pH between 6.0 and 7.5. If your soil is too alkaline or acidic, you may need to add lime or sulfur to adjust the pH.
In addition to pH testing, consider amending your soil with organic matter such as compost or manure to improve its fertility and structure. This will also help retain moisture and suppress weeds. To promote healthy root growth, ensure good drainage in your garden bed by incorporating perlite or vermiculite into the soil.
Another vital aspect is aeration, which can be achieved through mulching with organic materials like straw or wood chips. These not only reduce soil temperature but also prevent waterlogging and soil compaction. Regularly till the soil to maintain its porosity and oxygen levels, allowing your lupins to grow strong and healthy.
Planting and Caring for Lupins
To successfully grow lupins, you’ll need to know how to plant them properly, including choosing a suitable location and spacing, as well as providing adequate care.
Sowing Lupin Seeds and Seedlings
Sowing lupin seeds directly into the ground is an excellent way to get started with these beautiful flowers. To do this, choose a spot that receives full sun and has well-draining soil. Prepare the soil by loosening it to a depth of about 12 inches and adding some compost or fertilizer for optimal growth.
For sowing, scatter the seeds evenly over the prepared area, making sure they’re not too dense. You can sow them directly in the spring as soon as the ground can be worked, or start them indoors 6-8 weeks before the last frost date. Sow lupin seeds about 1 inch deep and 3-4 inches apart.
If you prefer to start your lupins as seedlings, fill small pots with a good quality potting mix and sow the seeds about 1/2 inch deep. Keep them in a warm location until they’re strong enough to be transplanted outside. When transplanting, handle the roots gently and water thoroughly to minimize shock.
When spacing lupin seedlings or plants, leave at least 12 inches between each one for optimal growth. This will give their taproots room to develop without becoming entangled with neighboring plants.
Watering and Fertilization Needs of Lupins
When it comes to watering and fertilizing lupins, it’s essential to get it right. Lupins are drought-tolerant plants but require adequate moisture during their early stages of growth. Water them deeply once or twice a week during the spring and summer months when they’re actively growing. As for how much water they need, aim for about 1-2 inches per week, either from rain or irrigation.
As lupins mature, they’ll become more drought-resistant, but don’t let them dry out completely between watering sessions. During hot spells, you may need to water every three to four days. It’s also crucial to avoid overwatering, which can lead to root rot and other issues.
When it comes to fertilization, a balanced fertilizer is a great starting point. You can apply it once or twice during the growing season, following the manufacturer’s instructions. Another option is using compost tea as a natural fertilizer. This liquid solution is made by steeping compost in water and can provide beneficial microbes and nutrients for your lupins.
To create your own compost tea, fill a bucket with 1-2 pounds of compost and add enough water to cover it. Let the mixture steep for 24 hours before straining and applying it to your lupin plants. This will give them an extra boost of nutrients without overloading their soil.
Encouraging Healthy Growth and Blooming
To encourage healthy growth and blooming in your lupin garden, it’s essential to provide optimal conditions for these delicate legumes. This includes a spot with full sun and well-draining soil.
Pruning Techniques for Lupins
When it comes to encouraging healthy growth and blooming in lupins, pruning plays a crucial role. By pruning your lupin plants regularly, you can promote strong stems, prevent disease, and even encourage more blooms.
For tall lupin varieties, such as Lupinus x hybridus or Lupinus regalis, prune them back by about one-third to half after they have finished flowering in late summer. This will help control their height and encourage new growth from the base of the plant. For shorter varieties like Lupinus angustifolius or Lupinus pilosus, you can simply trim off any weak or damaged stems.
It’s essential to prune lupins in the dormant season, typically between autumn and early spring. This allows the plant to focus its energy on producing new growth rather than trying to recover from pruning wounds. Cut back any dead or dying stems to about 2-3 inches from the base of the plant, making clean cuts just above a leaf node using sharp, sterile pruning tools.
Pruning lupins regularly also helps prevent disease and pest issues, such as powdery mildew or aphid infestations. By removing any weak or damaged growth, you’re reducing the risk of these problems taking hold.
Managing Common Pests and Diseases Affecting Lupins
Lupins are susceptible to various pests and diseases that can affect their growth and productivity. One of the most common issues is aphid infestation, which can lead to curled or distorted leaves and reduced flower formation. To manage aphids, use neem oil or insecticidal soap spray on affected plants at the first sign of infestation.
Another pest that affects lupins is whitefly, which can transmit diseases like powdery mildew. To prevent powdery mildew, ensure good air circulation around your lupin plants and avoid overhead watering, which can encourage fungal growth. Remove any infected leaves or stems to prevent the spread of disease.
Common root rot issues in lupins are caused by overwatering or waterlogged soil conditions. To prevent this, plant lupins in well-draining soil and ensure regular soil moisture checks. Regularly inspect your plants for signs of stress or infection, such as yellowing leaves or soft stems.
When treating pest or disease issues, consider integrated pest management strategies that combine physical removal, cultural controls, and chemical treatments only when necessary. This approach helps minimize harm to beneficial insects and reduces the development of pesticide-resistant pests and diseases.
Maximizing Blooms and Harvests in Your Lupin Garden
To get the most out of your lupin garden, it’s essential to understand how to maximize blooms and harvests for a bountiful and beautiful display. Let’s dive into some expert tips on doing just that!
Understanding the Life Cycle of Lupins
As you tend to your lupin garden, it’s essential to understand the life cycle of these beautiful flowers. Lupins typically bloom for about 6-8 weeks during their peak season, usually from mid-spring to early summer. However, this can vary depending on the specific variety and weather conditions.
One crucial aspect to keep in mind is that lupins are biennials, meaning they take two years to complete their life cycle. In the first year, they focus on developing a strong root system and foliage. During the second year, they produce buds and flowers, followed by seed production.
To extend the blooming period, try deadheading your lupin flowers as soon as they fade. This will encourage the plant to produce new blooms, rather than focusing energy on seed development. You can also cut back tall stems after flowering to promote bushy growth and more blooms. By following these techniques, you can enjoy a longer display of vibrant colors in your garden. With proper care, lupins can provide weeks of stunning blooms and a bountiful harvest of seeds for replanting or sharing with friends.
Preserving Lupin Seeds for Future Plantings
Harvesting lupin seeds requires patience and care to ensure they remain viable for future plantings. Once the pods have dried and split open, gently remove the seed from each pod, taking care not to damage them. It’s essential to separate the seeds immediately, as moisture can cause them to rot or become infested with pests.
To dry lupin seeds effectively, you can air-dry them by spreading them out in a single layer on paper towels or cloth. You can also use a desiccant or a food dehydrator set at a low temperature (95°F – 105°F). Once the seeds are completely dry, store them in an airtight container, such as a glass jar with a tight-fitting lid.
When storing lupin seeds for future plantings, it’s crucial to keep them in a cool, dark place, like a basement or cupboard. This will help preserve their viability and ensure they remain healthy when planted. A good rule of thumb is to store the seeds at temperatures between 32°F and 50°F (0°C – 10°C).
Tips for Integrating Lupins into Your Garden Design
Now that you’ve fallen in love with lupins, let’s explore how to seamlessly integrate these stunning flowers into your garden design and make them a focal point.
Companion Planting with Lupins
Companion planting with lupins is an effective way to enhance their growth and add diversity to your garden. Lupins are natural nitrogen fixers, which means they have the ability to convert atmospheric nitrogen into a form that’s accessible to other plants. This makes them a valuable companion for crops like peas, beans, and strawberries.
Some plants benefit from lupin’s growth habits by using the shade provided by their tall spikes as a respite from intense sunlight. For example, lettuce, spinach, and herbs like mint and rosemary can thrive in the dappled light created by lupins. On the other hand, some plants like tomatoes and cucumbers are known to be sensitive to lupin’s alkaline-rich soil conditions.
When incorporating lupins into ornamental garden designs, consider their vibrant spikes of color against a backdrop of other flowers or foliage. They pair particularly well with cottage-style gardens featuring roses, foxgloves, and hydrangeas. Simply plant lupins at the back of your border to create a stunning focal point, and interspersed them with smaller perennials like thyme or creeping phlox to add depth and texture.
When planting companion species, remember that the ratio is key. Plant a mix of 3-5 companions for every one lupin to avoid overwhelming the space. Also, keep in mind that some plants might compete for resources, so ensure you choose ones with similar growing requirements.
Using Lupin Flowers in Floral Arrangements
When it comes to using lupin flowers in floral arrangements, they can add a unique and striking touch. One of the key things to keep in mind when cutting lupins for use in bouquets is to cut them at the correct time. Lupins are typically ready to be harvested when their blooms have opened and have been exposed to some heat from the sun.
To prepare lupin stems for arranging, trim the stems at an angle using a sharp knife or pruning shears. This helps increase water uptake by allowing more surface area for absorption. Remove any lower leaves that will be below the waterline in your vase to prevent bacterial growth and keep the water clean.
In terms of arrangement style, lupins work particularly well paired with more delicate blooms like roses or peonies. Their tall spikes can also add a dramatic element when placed among other stems in a bouquet. Consider pairing them with foliage elements like eucalyptus or ferns to add depth and texture to your arrangements.
Conclusion: Enjoying Your Bountiful Lupin Garden
As you gaze upon your thriving lupin garden, it’s essential to remember that this is just the beginning. With proper care and maintenance, your lupins will continue to bloom year after year, providing a stunning display of color and vibrancy in your outdoor space. To ensure their longevity, be sure to divide and replant them every 3-4 years, as they can become congested over time. This simple task will not only keep your garden looking its best but also promote healthy growth and prevent disease.
By following these tips and enjoying the beauty of your lupin garden, you’ll create a haven that’s both visually stunning and wildlife-friendly. Don’t forget to appreciate the little things – like the sweet fragrance of blooming lupins or the hum of bees as they flit from flower to flower. With every passing season, your lupin garden will become an increasingly treasured part of your outdoor space.
Frequently Asked Questions
Can I grow lupins in containers or do they require a large garden bed?
You can definitely grow lupins in containers, but make sure the pot is at least 6-8 inches deep to accommodate their taproot. Use a well-draining mix and ensure the container has good drainage holes to prevent waterlogged soil.
How often should I prune my lupin plants for optimal blooming and growth?
Prune your lupins in late winter or early spring, removing any dead or damaged stems. Also, cut back the foliage by about one-third after they finish blooming to encourage new growth.
Can I grow multiple varieties of lupins together in the same garden bed without worrying about cross-pollination?
Yes, most lupin varieties are self-incompatible and will not cross-pollinate with each other. However, if you want to ensure no cross-pollination occurs, choose varieties that have been specifically bred for your region.
Are there any specific companion plants that complement the growth of lupins and improve their blooming?
Yes, many flowers like roses, lavender, and daisies benefit from the nitrogen-fixing abilities of lupins. Plant them together to create a vibrant and thriving garden bed.
Can I harvest lupin seeds for replanting next year or do they need to be purchased again?
Yes, you can harvest your own lupin seeds for replanting next year. Allow the seed pods to dry completely on the plant, then remove the seeds and store them in an airtight container for up to two years.