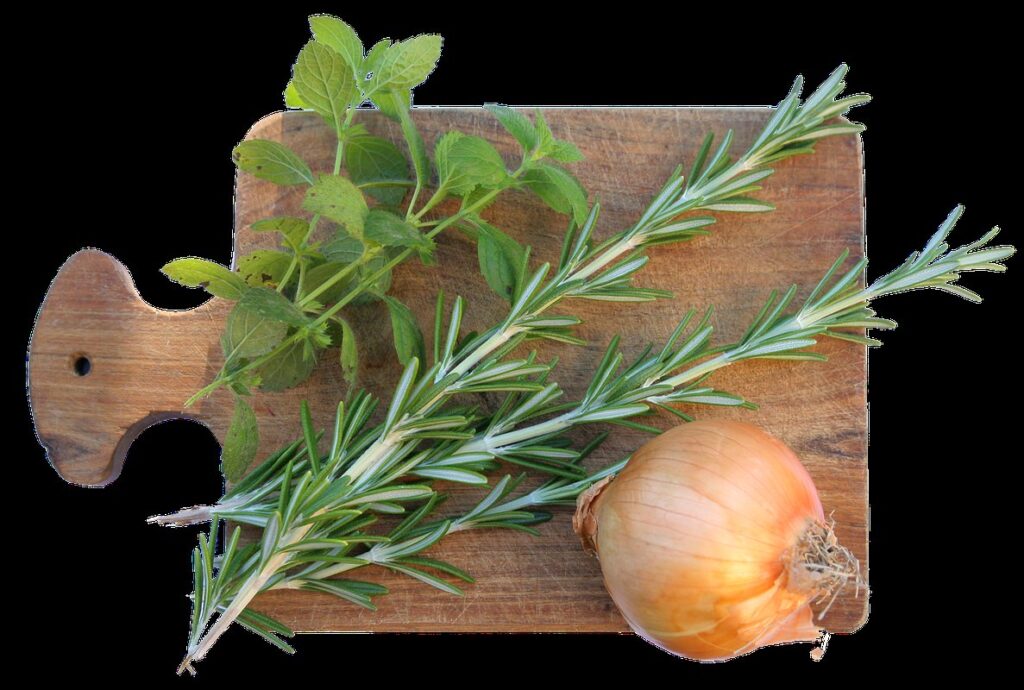
If you’re looking to expand your herb garden or simply want to share some of your favorite rosemary with friends and family, propagating rosemary from cuttings is a great way to go. Not only does it allow you to multiply this fragrant and versatile herb, but it’s also a fantastic opportunity to learn about the process of plant propagation. With a little patience and the right know-how, you can successfully grow new rosemary plants from clippings taken from your existing ones. In this comprehensive guide, we’ll walk you through the benefits of propagating rosemary from cuttings, prepare you for the process with step-by-step instructions, and share expert tips on aftercare to ensure your new plants thrive. By the end of this article, you’ll be well-equipped to start growing your own rosemary from clippings.
Understanding Rosemary Propagation
Now that you’ve successfully propagated rosemary cuttings, it’s time to understand how they grow and mature into healthy new plants. Let’s dive into the process of propagation.
What is Rosemary Propagation?
Rosemary propagation is the process of creating new rosemary plants from existing ones. It’s a crucial aspect of gardening, as it allows you to multiply and share your favorite rosemary varieties with others. By propagating rosemary through cuttings, you can create new plants that are genetically identical to the parent plant, ensuring they retain its unique characteristics.
One of the most popular methods for propagating rosemary is through stem cuttings. This method is favored by gardeners because it’s relatively easy and doesn’t require specialized equipment. To take a cutting, simply choose a healthy stem with plenty of leaves, remove lower leaves to prevent moisture loss, and then plant it in a well-draining potting mix. With proper care, your rosemary cutting should develop roots within 1-2 weeks and produce new growth in as little as 4-6 weeks.
By propagating rosemary through cuttings, you can share your favorite varieties with friends and family or even sell them at local nurseries and plant sales. It’s also a great way to preserve heirloom rosemary varieties that may be difficult to find elsewhere.
Benefits of Growing Rosemary from Cuttings
Growing rosemary from cuttings offers numerous benefits that make it an attractive option for gardeners and cooks alike. One of the most significant advantages is its cost-effectiveness. When you grow rosemary from seeds, each seedling requires a few weeks to mature before being ready for harvest. By contrast, growing from cuttings reduces this timeframe significantly, allowing you to enjoy fresh herbs sooner.
Another benefit of growing rosemary from cuttings is disease resistance. Cuttings tend to retain the genetic makeup of the parent plant, which means they inherit its natural defenses against diseases and pests. This makes them less susceptible to common issues like root rot or leaf spot that can decimate a young rosemary plant grown from seed.
In addition to these advantages, growing rosemary from cuttings allows you to capture the unique characteristics of your favorite variety, ensuring that your homegrown crop shares its flavor profile, fragrance, and vigor. This is especially appealing for those who have spent time perfecting their rosemary cultivation techniques or who have access to particularly robust or fragrant plants.
Choosing Healthy Mother Plants
When selecting healthy mother plants for propagation, it’s essential to look for those with desirable traits. A robust and vigorous plant is more likely to produce strong cuttings that will thrive once planted. This means choosing a rosemary plant with plenty of new growth, dark green leaves, and a well-balanced root system.
To identify a healthy mother plant, inspect it carefully for signs of stress or disease. Avoid plants with yellowing or wilted leaves, as these can be indicators of root problems or pests. Similarly, steer clear of plants with black spots or powdery mildew on their leaves, as these can spread quickly and compromise the entire plant.
Some key characteristics to look for in a healthy mother plant include:
• Fresh, fragrant foliage
• A balanced canopy with an even distribution of new growth
• A robust root system that’s free from disease or pests
• A well-established stem with no signs of damage or weakness
By selecting a healthy mother plant, you’ll be giving your propagated rosemary the best chance to succeed.
Preparing Rosemary Cuttings for Propagation
To successfully grow new rosemary plants, you need to prepare your cuttings carefully, making sure they have the right conditions and moisture levels. This is where preparation truly begins!
Taking Softwood Cuttings in Spring
When taking softwood cuttings from rosemary plants in spring, it’s essential to identify suitable stems and branches. Look for young, flexible shoots with a soft texture, typically found near the tips of the plant. These are ideal for propagation as they contain high levels of auxins, which promote rooting.
To take a cutting, choose a stem about 5-7 cm (2-3 inches) long, making sure it has at least two nodes (the joint where the leaf meets the stem). Cut just below a node using a sharp, clean knife or pruning tool. Make your cut at a 45-degree angle to help prevent water from collecting on the cutting.
Cut ends should be treated with care; dip them in a rooting hormone powder or liquid to increase the chances of successful root development. If you don’t have any rooting hormone, you can skip this step and still achieve good results. Place the cuttings in a glass of water or a propagation tray filled with a well-draining mix, making sure they’re not overcrowded. This will give them the best chance to develop roots before being transplanted into pots or directly into the garden.
Taking Semi-Hardwood Cuttings in Summer
When taking semi-hardwood cuttings from rosemary plants in summer, you’ll notice a difference in stem hardness compared to softwood cuttings. Semi-hardwood stems are slightly firmer and have started to develop woody tissue, making them more suitable for propagation. This is an ideal time to take cuttings as the plant’s energy is focused on producing new growth.
To identify semi-hardwood stems, look for sections on the current season’s growth that are about 2-4 inches (5-10 cm) long and slightly thicker than softwood cuttings. Cut a section of stem from the tip, making sure it includes at least two nodes. Remove lower leaves to prevent them from getting in the way of rooting.
The semi-hardwood cutting will develop roots more quickly than a softwood cutting, typically within 2-3 weeks when conditions are favorable. Keep in mind that even though semi-hardwood cuttings have a higher success rate, they may not root as vigorously as hardwood cuttings taken in late summer or fall. Be patient and provide the necessary care to ensure successful propagation.
Rooting Hormone and Potting Mix Considerations
When it comes to successfully propagating rosemary cuttings, using rooting hormone and a suitable potting mix is crucial. Rooting hormone, usually available as a powder or liquid, contains plant growth regulators that stimulate root development.
To apply rooting hormone, gently dip the base of each cutting into the powder or liquid, making sure not to overdo it – too much can be counterproductive. This step typically occurs just before planting the cuttings in their new potting mix. A well-draining mix specifically designed for seed starting or propagation is ideal, as rosemary roots prefer moist but not waterlogged conditions.
Some examples of suitable potting mixes include those containing perlite, vermiculite, or a mix of these materials. Avoid using regular potting soil, as it can retain too much moisture and may lead to root rot. Instead, opt for a sterile mix that provides the necessary aeration and drainage for healthy root development.
Propagation Methods: Water, Soil, or Greenhouse
Let’s dive into the different ways you can propagate rosemary from cuttings, including water, soil, and using a greenhouse setup for optimal growth. This section will walk you through each method.
Water Propagation Method
To propagate rosemary cuttings using the water method, you’ll need to create a rooting environment that’s conducive to root development. Fill a clean glass or container with lukewarm water, making sure it’s deep enough to cover the length of the cutting. Add a rooting hormone powder or liquid to the water, following the product’s instructions for the correct dosage.
Place the rosemary cutting into the water, making sure the node (where the leaf meets the stem) is submerged. Secure the cutting in place with a small rock or weight, if necessary. Keep the container out of direct sunlight and maintain a consistent temperature between 65-75°F (18-24°C).
Monitor the cutting’s progress by checking for root development every few days. White roots will start to emerge from the node, indicating that the cutting has begun to root. Continue to change the water every week or two to prevent bacterial growth and maintain oxygen levels. With proper care, you should see new roots developing within 2-4 weeks, at which point you can transplant the rosemary into soil.
Soil Propagation Method
The soil propagation method is an effective way to grow rosemary from cuttings, as it provides a controlled environment for root establishment. To prepare a potting mix specifically designed for this process, combine one part peat moss or coconut coir with one part perlite or vermiculite in a container. This blend retains moisture while allowing air to reach the roots.
Next, fill small pots (about 2-3 inches deep) with the prepared potting mix. Moisten the mix with water before making holes for the rosemary cuttings. Gently plant each cutting up to the node (where the leaf meets the stem), and firm the soil around it. Water thoroughly but avoid overwatering, which can lead to root rot.
Monitor the moisture level by sticking your finger into the soil, ensuring it’s damp but not waterlogged. Maintain a consistent temperature between 65-75°F (18-24°C) for optimal growth. Keep the pot in bright, indirect light until roots develop and new growth appears.
Greenhouse Propagation Method
The greenhouse propagation method is an ideal way to grow rosemary from cuttings, especially for those who want to optimize root growth. By creating a controlled environment with precise temperature and humidity conditions, you can significantly increase the chances of successful rooting.
In a greenhouse setting, you can maintain temperatures between 65°F to 75°F (18°C to 24°C), which is ideal for rosemary cuttings. This range promotes healthy root development without causing stress to the plant. Moreover, maintaining high humidity levels in the greenhouse helps to prevent drying out of the cutting’s tissues.
For optimal results, ensure that your greenhouse has adequate ventilation and shading. Direct sunlight can cause temperature fluctuations and may scorch the leaves of your rosemary cuttings. By controlling these factors, you can provide a stable environment for root growth, leading to stronger and healthier plants.
Remember to monitor the greenhouse conditions closely, as extreme temperatures or humidity levels can hinder the rooting process. With careful management, you’ll be able to grow robust and fragrant rosemary plants from your carefully propagated cuttings.
Aftercare and Transplanting
Once you’ve successfully rooted your rosemary cuttings, it’s time to move on to the crucial steps of aftercare and transplanting for healthy growth. With proper care, your new rosemary plants will thrive.
Monitoring Cuttings for Root Development
Monitoring your rosemary cuttings for signs of root development is crucial to ensure they establish a strong foundation. Keep an eye out for changes in leaf color and stem firmness, which are indicators that roots are forming.
Start by gently grasping the cutting between your thumb and index finger, just above the node from where you took the cutting. This will help you assess its firmness. A healthy cutting with developing roots should feel slightly firmer than when it was first taken.
Observe the leaves for any changes in color or texture. As roots begin to develop, you may notice a slight change in leaf color, becoming greener and more vibrant. Some growers also observe that new growth appears as a slight swelling at the base of the cutting.
Check your cuttings every few days, ideally in bright, indirect light. If you notice any signs of root development, make sure to provide adequate moisture but avoid overwatering, which can lead to rot. This will help your rosemary cuttings establish a healthy root system and give them the best chance at successful growth.
Transplanting Established Cuttings
When you have successfully rooted your rosemary cuttings and they’ve developed a robust root system, it’s time to transplant them into individual pots or directly into garden beds. This stage is crucial for the continued growth and health of your newly established plants.
Before transplanting, make sure the soil in your containers or garden bed is well-draining and rich in organic matter. A mix specifically designed for herbs like rosemary will provide the necessary nutrients for healthy growth. If you’re transplanting directly into a garden bed, choose an area with full sun to partial shade and ensure good air circulation to prevent fungal diseases.
To minimize shock during transplanting, gently remove the cutting from its pot or tray, taking care not to disturb the roots. Trim back any leggy growth to encourage bushy development. Plant the rosemary at the same depth as it was in the original container, water thoroughly, and mulch around the base to retain moisture and suppress weeds. Keep the soil consistently moist during this period, but avoid overwatering which can lead to root rot.
Keep an eye out for signs of transplant stress such as yellowing leaves or a sudden drop in growth rate. Adjust your care routine accordingly by adjusting watering schedules or providing support with stakes if necessary. With proper attention and care, your transplanted rosemary cuttings will thrive and continue to grow into robust, fragrant plants.
Troubleshooting Common Issues
When growing rosemary from cuttings, you may encounter common issues that can hinder successful propagation. One of the most prevalent problems is fungal infections. These can arise due to overwatering or poor air circulation around the cutting.
To prevent fungal infections, ensure that the soil isn’t too moist and provide adequate ventilation in your propagation area. Remove any dead leaves from the cutting and treat it with a fungicide if necessary.
Another issue you may encounter is inadequate root development. This can be caused by insufficient light or an unsuitable potting mix. Make sure to use a well-draining potting mix and provide bright, indirect light for your rosemary cuttings.
Monitor the roots’ progress by gently removing the cutting from its container every week or two. If you notice weak or sparse root growth, adjust your lighting conditions or repot the cutting in fresh soil with added nutrients specifically designed to promote root development. Regular pruning of mature rosemary plants can also stimulate new growth and improve propagation outcomes.
Tips for Successful Rosemary Propagation
Now that you’ve successfully rooted your rosemary cuttings, it’s time to learn some valuable tips for encouraging them to thrive and grow into healthy plants. These expert-approved techniques will give your new rosemary a head start.
Record Keeping and Tracking Progress
As you begin propagating rosemary from cuttings, it’s easy to get caught up in the excitement of watching your plants grow. However, keeping track of your progress and results can make all the difference in fine-tuning your technique and achieving success.
Take note of the variables that affect your propagation process, such as temperature, humidity, light exposure, and watering schedules. This will help you identify what works best for your specific environment and rosemary variety. For instance, you might find that a particular temperature range yields higher germination rates or that a certain type of potting mix enhances root development.
Regularly documenting your progress can also help you pinpoint areas where adjustments need to be made. Are you experiencing high failure rates due to overwatering? Or are some cuttings not rooting at all? By recording your observations, you’ll be able to analyze and refine your methods for future attempts. This might mean tweaking your watering schedule or switching to a more suitable potting mix.
Experimenting with Different Varieties
Experimenting with different rosemary varieties is an exciting way to discover new flavors, fragrances, and growth habits. Not all rosemary varieties are created equal when it comes to propagation. Some are more forgiving than others, while some may require specific conditions to thrive.
When selecting a variety for propagation, look for ones that are known to be vigorous growers with a strong root system. These characteristics will increase the chances of successful rooting from cuttings. For example, ‘Tuscan Blue’ and ‘Miss Jessop’s Upright’ are popular varieties that have proven to be resilient and adaptable in various environments.
On the other hand, some varieties may not propagate as well due to their weak or delicate nature. In such cases, it’s best to start with a more robust variety before experimenting with less forgiving ones. You can also try using propagation techniques specifically tailored for sensitive varieties, such as rooting them in a glass of water instead of soil.
Consider consulting with local nurseries or rosemary enthusiasts to learn about the most suitable varieties for your climate and region. By exploring different rosemary varieties, you’ll not only enhance your knowledge but also expand your rosemary cultivation possibilities.
Conclusion
In conclusion, growing rosemary from cuttings is a rewarding and relatively easy process that requires careful planning, proper techniques, and attention to detail. By following the steps outlined in this article, you’ll be well on your way to successfully propagating new rosemary plants.
To recap, we’ve covered the importance of choosing healthy mother plants, preparing clean and sterile equipment, taking 4-6 inch cuttings, and maintaining optimal temperatures and humidity levels for rooting. We’ve also discussed how to encourage root development through gentle misting and reducing light exposure during the initial stages.
Remember that successful rosemary propagation is not a one-size-fits-all process. Be prepared to adapt your techniques based on your specific climate, soil conditions, and plant variety. With patience, persistence, and attention to detail, you can enjoy a continuous supply of fresh rosemary from your very own homegrown plants. By incorporating these tips into your gardening routine, you’ll be well-equipped to take on the challenge of growing rosemary from cuttings with confidence.
Frequently Asked Questions
Can I propagate rosemary from clippings year-round, or is there a specific time frame for successful propagation?
Propagation of rosemary from cuttings can be done throughout the growing season, but it’s most effective during the spring and summer months when new growth is abundant. During these periods, the chances of successful rooting are higher due to the optimal temperature and humidity conditions.
How do I know if my rooted rosemary cutting has successfully taken hold in the soil?
Check for signs of healthy root development by gently removing the plant from its pot and inspecting the roots. A well-rooted rosemary cutting should have a robust, white root system that’s at least 1-2 inches long. If you’re still unsure, wait a few more weeks before checking again.
Can I propagate rosemary using leaves or only stems?
While stem cuttings are the most common method for propagating rosemary, you can also use leaf cuttings. However, this method is less reliable and may result in lower success rates due to the reduced rooting potential of individual leaves.
What’s the ideal temperature range for successful propagation of rosemary from cuttings?
Rosemary propagation thrives in temperatures between 65°F (18°C) and 75°F (24°C). Avoid exposing your cutting to extreme temperatures, as this can lead to root rot or other problems. Keep the environment warm but not hot, ensuring optimal conditions for healthy growth.
How long does it take for a rosemary plant propagated from cuttings to mature?
Rosemary plants propagated from cuttings typically take around 6-12 months to reach maturity, depending on factors like climate, soil quality, and aftercare. Be patient and provide your newly propagated plants with the right conditions for optimal growth and development.